Table of Contents
Advertisement
Quick Links
Package contents
Track
Front bumper
Back bumper
© UPLIFT Desk • 1-800-349-3839 • info@upliftdesk.com • www.upliftdesk.com
5/8''
Wood screws
(qty 8)
Machine screws
(qty 4)
Mechanism
Acorn nuts
(qty 4)
Step 1
Take the Track and place underneath your desktop, in order to figure out
where to place it. If there are pre-drilled holes in your desktop, line the track
up with the holes, or you can pre-drill your own 1/8" pilot holes.
Be sure to leave about 1/2" from the front edge of the desk.
Use eight (8) Wood screws to attach the track to the desktop, and one more
screw to attach the rear bumper as shown.
Step 2
With the desk right side up, line up the mechanism with the grooves on
the track and slide it in.
Please note: the mechanism will not adjust up or down until the tray
has been attached and the shipping pin is removed (see steps 3 and 4).
Step 3
Attach the tray to the mechanism by lining up the integrated screws on
the bottom of the tray with the holes on the mechanism, and secure by
screwing the 4 acorn nuts in to the underside of the tray.
Step 4
Lift up on the front of the tray and lower the back to relieve pressure on
the shipping pin and remove it.
Step 5
Finally, lower the tray, slide it back on the track and install the front
bumper.
®
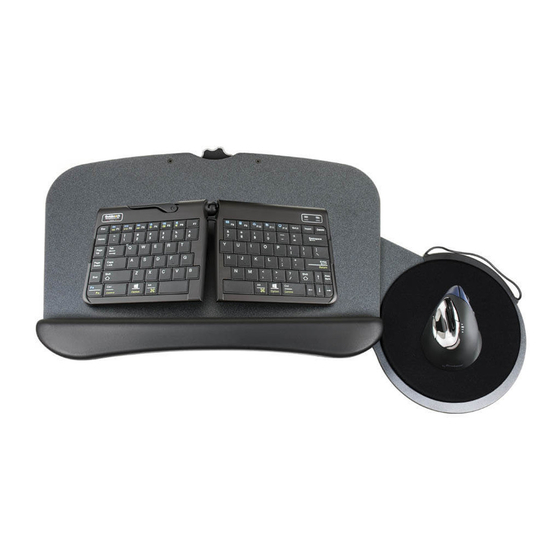
Switch Keyboard Tray
UPL140
Keyboard Tray
Palm support
Mousepad
Cord catcher
Adhesive pads
(optional. qty 4)
UPL140/R02
Advertisement
Table of Contents

Related Manuals for Uplift Desk UPL140


Summary of Contents for Uplift Desk UPL140
- Page 1 Lift up on the front of the tray and lower the back to relieve pressure on the shipping pin and remove it. Step 5 Finally, lower the tray, slide it back on the track and install the front bumper. © UPLIFT Desk • 1-800-349-3839 • info@upliftdesk.com • www.upliftdesk.com UPL140/R02...
- Page 2 Copyright Notice: These instructions are a component of the UPLIFT Switch Keyboard Tray. These instructions are part of the scope of delivery, even if the item is resold. These instructions are also available on the UPLIFT Desk website: upliftdesk.com. Excerpts or copies may not be forwarded to third parties or used in any other ©...
Need help?
Do you have a question about the UPL140 and is the answer not in the manual?
Questions and answers