
Related Manuals for Insignia NS-BC115SS9


Summary of Contents for Insignia NS-BC115SS9
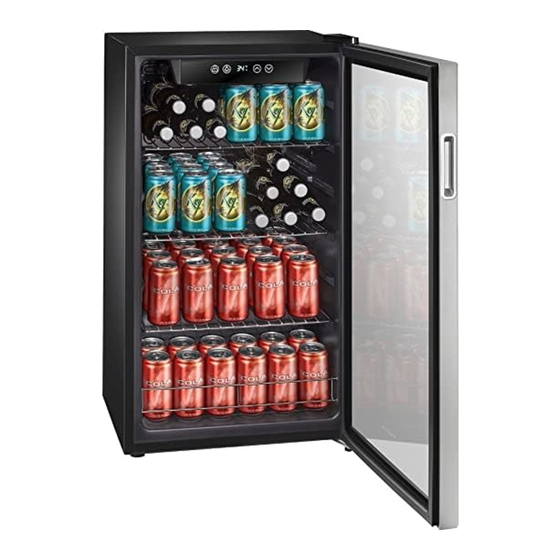
- Page 1 USER GUIDE 115-Can Beverage Cooler NS-BC115SS9/NS-BC115SS9-C Before using your new product, please read these instructions to prevent any damage.
-
Page 2: Table Of Contents
Contents IMPORTANT SAFETY INSTRUCTIONS ........3 Features . -
Page 3: Important Safety Instructions
115-Can Beverage Cooler IMPORTANT SAFETY INSTRUCTIONS CAUTION RISK OF ELECTRIC SHOCK DO NOT OPEN This symbol indicates that dangerous voltage constituting a risk of electric shock is present within your cooler. This symbol indicates that there are important operating and maintenance instructions in the literature accompanying your cooler. - Page 4 Do not turn the appliance on or off by plugging or unplugging the power cord. Turn off the appliance before unplugging it. Refer all servicing to qualified service personnel. Servicing is required when the appliance has been damaged in any way, such as when the power-supply cord or plug is damaged, when liquid has been spilled or objects have fallen into the appliance, or when the appliance has been exposed to rain or moisture, does not operate normally, or has been dropped.
-
Page 5: Features
115-Can Beverage Cooler Follow local regulations regarding disposal of the cooler due to flammable refrigerant and gas. All refrigeration products contain refrigerants, which under the guidelines of federal law must be removed before disposal. It is the consumer's responsibility to comply with federal and local regulations when disposing of this product. -
Page 6: Components
Components Control panel/ Display Glass door Shelf Steel bar Leveling feet www.insigniaproducts.com... -
Page 7: Control And Display Panel
115-Can Beverage Cooler Control and display panel Light LED Display Temperature +/- Standby BUTTON FUNCTION • Press to turn the power on or off. • Hold for three seconds to set your cooler to “Standby” mode. Press to turn the interior light on or off. Press to increase the temperature by one degree. -
Page 8: Leveling Your Cooler
• Avoid placing your cooler in moist areas. • Your cooler is not designed to be installed in an RV or used with an inverter. • Do not stack your cooler. • For your cooler to operate normally, avoid placing it in areas with high magnetic fields or high humidity. - Page 9 115-Can Beverage Cooler Remove the upper hinge. Rivets Hinge cover Axle sleeve Hinge bolts Upper hinge Axle sleeve Remove the door from your cooler. Use a Phillips screwdriver to remove the door stopper screws, then remove the door stopper. Door stopper Axle sleeve Door stopper screws www.insigniaproducts.com...
- Page 10 Use a Phillips screwdriver to remove the hinge bolts, then remove the lower hinge and the leveling foot. Leveling foot Lower hinge Hinge bolts Attach the lower hinge and leveling feet to the opposite sides of your cooler. Leveling foot Lower hinge Hinge bolts Replace the glass door, then reinstall the upper hinge.
-
Page 11: Grounding Requirement
115-Can Beverage Cooler Grounding requirement Your cooler must be grounded. Your cooler is equipped with a cord having a grounding wire with a grounding plug. The plug must be inserted into an outlet that is correctly installed and grounded. Consult a qualified electrician or service person if the grounding instructions are not completely understood, or if doubt exists as to whether your cooler is correctly grounded. -
Page 12: Setting The Temperature
Setting the temperature • Press the temperature up or down buttons to increase or decrease the temperature by one degree. The temperature range is 34°–50° F (1°–10° C). • Press and hold the temperature up and down buttons at the same time for three seconds to switch between Fahrenheit and Celsius. -
Page 13: Filling Your Beer And Beverage Cooler
115-Can Beverage Cooler Filling your beer and beverage cooler The following illustrations are provided to show the best way to fill your cooler for maximum storage: Inner row Middle row Outer row Top shelf - 8 cans Top shelf - 6 cans Top shelf - 12 cans Second shelf - 16 cans Second shelf - 5 cans... -
Page 14: Maintaining Your Beverage Cooler
Maintaining your beverage cooler Your cooler is designed for year-round use with only minimal cleaning and maintenance. When you first receive it, wipe the cabinet with a mild detergent and warm water, then wipe dry with a dry cloth. Do this periodically to keep your cooler looking new. -
Page 15: Moving Your Beverage Cooler
115-Can Beverage Cooler Moving your beverage cooler Note: Make sure that your cooler stays in the upright position during transportation. Turn off your cooler and unplug it from the wall outlet. Remove all beverages. Securely tape down all loose items inside your cooler. Tape the door shut. -
Page 16: Specifications
PROBLEM SOLUTION Moisture is building up in • Make sure that the door is closed correctly. the interior of my cooler. • Move your cooler to a dryer location. My cooler turns on and off • Make sure that your cooler is in a room that is 50°– frequently. -
Page 17: One-Year Limited Warranty
Product is determined to be defective by an authorized Insignia repair center or store personnel, Insignia will (at its sole option): (1) repair the Product with new or rebuilt parts; or (2) replace the Product at no charge with new or rebuilt comparable products or parts. - Page 18 • Connection to an incorrect voltage or power supply • Attempted repair by any person not authorized by Insignia to service the Product • Products sold “as is” or “with all faults” • Consumables, including but not limited to batteries (i.e. AA, AAA, C, etc.) •...
- Page 19 1-877-467-4289 (U.S. and Canada) or 01-800-926-3000 (Mexico) INSIGNIA is a trademark of Best Buy and its affiliated companies. Distributed by Best Buy Purchasing, LLC 7601 Penn Ave South, Richfield, MN 55423 U.S.A. V5 ENGLISH ©2020 Best Buy. All rights reserved.
Need help?
Do you have a question about the NS-BC115SS9 and is the answer not in the manual?
Questions and answers
what does stand by do
The standby function on the Insignia NS-BC115SS9 beverage cooler is activated by holding the power button for three seconds. This sets the cooler to "Standby" mode, effectively turning it off while keeping it ready for quick reactivation.
This answer is automatically generated
There are water in the glass door. And it's blurry? How to clear them out
I have ice on back wall of fridge. Is that normal
Yes, it is normal. Moisture from warm air or products settles on the back wall, which is the coldest part. Since the back wall can reach freezing temperatures, the moisture may freeze into ice. When the fridge is idle, the ice thaws and drains away.
This answer is automatically generated
What does an error code E9 mean