Graco 3540 Instructions-Parts List Manual
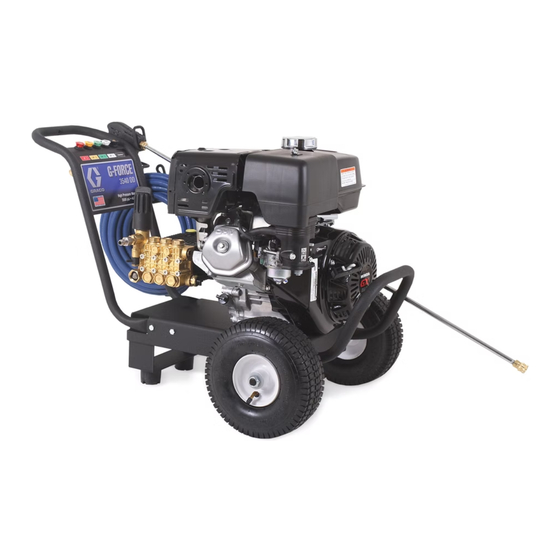
Belt-drive pressure washer
Hide thumbs
Also See for 3540:
- Instructions manual (34 pages) ,
- Instructions-parts list manual (26 pages) ,
- Instructions manual (32 pages)
Table of Contents
Advertisement
Quick Links
INSTRUCTIONS–PARTS LIST
Parts
This manual contains important
warnings and information.
READ AND KEEP FOR REFERENCE.
INSTRUCTIONS
3540 Belt-Drive Pressure Washer
Model 800636, Series C
3500 psi (24 MPa, 241 bar) Operating Pressure
3900 psi (27 MPa, 269 bar) Maximum Working Pressure
GRACO INC. P.O. BOX 1441 MINNEAPOLIS, MN 55440–1441
ECOPYRIGHT 1991, GRACO INC.
Graco Inc. is registered to I.S. EN ISO 9001
308525
First choice when
quality counts.t
Rev. H
Advertisement
Table of Contents

Related Manuals for Graco 3540


Summary of Contents for Graco 3540
- Page 1 Model 800636, Series C 3500 psi (24 MPa, 241 bar) Operating Pressure 3900 psi (27 MPa, 269 bar) Maximum Working Pressure GRACO INC. P.O. BOX 1441 MINNEAPOLIS, MN 55440–1441 ECOPYRIGHT 1991, GRACO INC. Graco Inc. is registered to I.S. EN ISO 9001...
-
Page 2: Table Of Contents
Warning Symbol Table of Contents WARNING Warnings ........Setup . - Page 3 WARNING WARNING MOVING PARTS HAZARD Moving parts, such as the drive belt, can pinch or amputate fingers. D Keep clear of moving parts when you start or operate this equipment. D Do not operate the pressure washer without all guards and interlocks installed and functioning. HAZARDOUS FLUIDS Improper handling of hazardous fluids can cause serious injury or death from splashing in the eyes, ingestion, or bodily contamination.
-
Page 4: Setup
Setup hose high-pressure hose connection water supply connection TI1265A Check for Shipping Damage Connect to Water Supply Check the unit for any damage that may have occurred in shipping. Notify the carrier immediately if there is any CAUTION damage. Unit Preparation Before attaching to the water supply, check your local plumbing code regarding cross connection to the water Charge the battery. -
Page 5: Operation
Operation Pressure Relief Procedure Startup Always use this startup procedure to ensure that the pressure washer is started safely and properly. WARNING 1. Check oil levels. INJECTION HAZARD Engine: Add SAE 30 or 10W–30 weight detergent oil System pressure must be manually as necessary. - Page 6 Operation Water Sandblasting CAUTION Water Sandblasting Kit 244766 is available for Do not allow pressure washer to idle more than 10 abrasive cleaning of stubborn dirt and paint. The kit minutes. Doing so may cause recirculating water to requires sandblasting tip 805317, which is sold overheat and seriously damage pump.
- Page 7 Operation Installing and Changing Spray Tips Shutdown, Flushing, and Storage 1. If pressure washer will be exposed to freezing WARNING temperatures, drain all water out of pump. If it must be stored in freezing temperatures, flush unit To reduce risk of serious bodily injury, including with a 50% anti–freeze solution.
- Page 8 Operation Maintenance WARNING Observing regular maintenance intervals helps ensure To reduce risk of serious bodily injury, including that you get maximum performance and life from the fluid injection, splashing in eyes or on skin or injury pressure washer. from moving parts, always follow Pressure Relief Procedure on page 5 before proceeding.
-
Page 9: Troubleshooting
Troubleshooting WARNING To reduce risk of serious injury, including fluid injection and splashing in eyes, or on skin, always follow Pres- sure Relief Procedure on page 5 before proceeding. Problem Cause Solution Engine will not start No gasoline in fuel tank or carburetor. Fill tank with gasoline, open fuel shut off valve. - Page 10 Troubleshooting Problem Cause Solution Frequent or prema- Scored, damaged or worn plungers. Install new plungers. See PUMP SERVICE, page 11. ture failure of pack- ings Abrasive material in fluid being pumped. Install proper filtration on pump inlet plumbing. Inlet water temperature too high. Check water temperature;...
-
Page 11: Pump Service
Pump Service 2. Carefully separate manifold from crankcase. WARNING NOTE: It may be necessary to tap manifold lightly with To reduce risk of serious bodily injury, including a soft mallet to loosen. fluid injection, splashing in eyes or on skin or injury from moving parts, always follow Pressure Relief CAUTION Procedure on page 5 before proceeding. - Page 12 Pump Service 6. Lightly grease retaining screw and outer end of 2. Carefully pull packing retainer from manifold. plunger. Place washer, o–ring and backup ring Examine o–ring and replace it if it is cut or dam- around screw and install screw through plunger. aged.
-
Page 13: Technical Data
Technical Data Model 800636 Engine (4 cycle, air–cooled) 13 HP Honda OHV Battery 12 Volt, 30 AMP 250 CCA Gasoline Tank Capacity 2 Gallon (7.6 Liter) Water Pump Maximum Working Pressure 3500 psi (241 bar) Water Pump Maximum Flow 4 gpm (15 lpm) Inlet Hose Connection 3/4”... - Page 14 Notes 14 308525...
-
Page 15: Pressure Washer
Pressure Washer – Parts 3540 Pressure Washer Model 800636, Series C 5 28 59 2 308525... -
Page 16: Parts
Pressure Washer - Parts 3540 Pressure Washer Model 800636, Series C Part No. Description Part No. Description 100214 WASHER, Lock 5/16 244450 GUN & WAND ASSEMBLY 803945 BELT, Drive 803526 SPACER 803800 SHEAVE, Engine 801217 BUMPER, Rubber 100023 WASHER, Flat 5/16... -
Page 17: Pump
Pump – Parts Pump Assembly 803508, 3500 psi (24 MPa, 241 bar) 308525... - Page 18 Pump – Parts Pump Assembly 803508, 3500 psi (24 MPa, 241 bar) Part No. Description No. Part No. Description Kit 6 or 107 WASHER 801467 MANIFOLD, 3000 psi Kit 6 or 107 SCREW, Piston 803504 MANIFOLD, 3500, 4000 psi 1 803295 COVER, Crankcs., 3000 psi 1 801468...
- Page 19 Pump – Parts 801487 O–RING Repair Kit Packing & Retainer, RETAINER, Part No. Description Qty. 3000 psi PACKING 801472 O–RING PACKING Valve SEAT, Valve RING, Head PLATE, Valve RETAINER, SPRING PACKING GUIDE, Valve RING, Long Life VALVE ASSEMBLY 106 803509 O–RING 801473 SEAL, Oil...
-
Page 20: Warranty
Graco distributor to the original purchaser for use. With the exception of any special extended or limited warranty published by Graco, Graco will, for a period of twelve months from the date of sale, repair or replace any part of the equipment determined by Graco to be defective.
Need help?
Do you have a question about the 3540 and is the answer not in the manual?
Questions and answers