Table of Contents
Advertisement
Advertisement
Table of Contents

Related Manuals for JVC RC-D327B


Summary of Contents for JVC RC-D327B
- Page 1 Instruction Manual Boombox with DAB and Cassette RC-D327B...
-
Page 3: Table Of Contents
Contents Safety Warnings ..........................5 Unpacking ............................7 Product Overview ..........................8 Front View .................................. 8 Rear View ................................... 8 Top View ..................................9 Power Source ..........................10 Battery Power .................................10 Mains Power ................................11 Connections ..........................12 Using the AUX Connection..........................12 Using Headphones ...............................12 Playing MP3s from a USB Device........................13 General Operation ........................13 Powering ON/OFF ..............................13 Selecting Modes ..............................13... - Page 4 Fast Forward and Fast Reverse .........................20 Selecting an Album (MP3) ..........................20 Repeat Playback ..............................21 Programme Setting ..............................21 Programme Cancel ...............................21 Cassette Playback ........................22 Fast Forwarding/Rewinding..........................22 Bluetooth® Operation .........................23 AUX Operation ..........................23 Maintenance ..........................24 Cleaning the Unit / Cassette Compartment ....................24 Handling Discs ...............................24 Cleaning Discs ................................24 Storing Discs ................................24...
-
Page 5: Safety Warnings
Safety Warnings Ventilation • Read all the instructions carefully before using the unit and keep them for future • To prevent the risk of electric shock or reference. fire hazard due to overheating, ensure • Retain the manual. If you pass the unit that curtains and other materials do not onto a third party make sure to include this obstruct the ventilation vents. - Page 6 Supervision • This equipment is a Class II or double insulated electrical appliance. It has • Children should be supervised to ensure been designed in such a way that it that they do not play with the unit. does not require a safety connection •...
-
Page 7: Unpacking
Thank you for purchasing your new product. We recommend that you spend some time reading this instruction manual in order that you fully understand all the operational features it offers. You will also find some hints and tips to help you resolve any issues. Read all the safety instructions carefully before use and keep this instruction manual for future reference. -
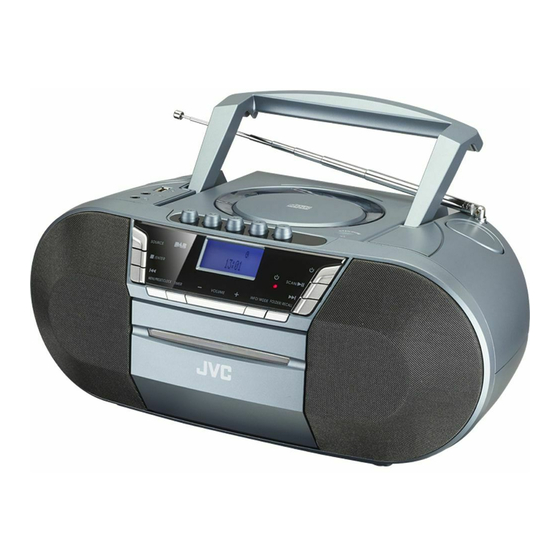
Page 8: Product Overview
Product Overview Front View Rear View 9. MENU/PRESET/CLOCK Button Button /ENTER Button 10. TIMER Button 3. SOURCE Button 11. Volume +/– Button 12. FOLDER/RECALL Button 4. Display 13. INFO/MODE Button Indicator Button 14. Cassette Door 7. SCAN/ Button 15. Aerial Button 16. -
Page 9: Top View
Top View AUX-IN 9 10 11 Cassette Buttons 1. Handle 2. USB Socket Button 3. AUX IN Jack / Button 4. HEADPHONES Jack Button 5. CD Tray Button 6. OPEN/CLOSE Button Button • Visible and invisible laser radiation. If the cover is open, do not look at the beam. •... -
Page 10: Power Source
Power Source Whenever convenient, use the mains cable if you want to conserve battery life. Make sure you remove the plug from the unit and mains socket before inserting batteries. Battery Power 1. Open the battery door and insert 8 batteries, type UM-2 or C-cells (not included) with the correct polarity as indicated by the “+”... -
Page 11: Mains Power
Mains Power Always check you have completely switched off the unit, before you change or disconnect the power supply. 1. Check that the power voltage shown on the rating label located on the bottom of the unit, corresponds to your local power supply. If it does not, consult your dealer or service centre. -
Page 12: Connections
Connections Using the AUX Connection Use a 3.5mm to RCA stereo audio cable to connect the audio device’s audio output sockets to the unit’s AUX IN socket. Top View of Unit Auxiliary device 3.5mm to RCA stereo audio cable (not included) AUX-IN AUX IN Audio devices... -
Page 13: Playing Mp3S From A Usb Device
Playing MP3s from a USB Device When a USB device is connected to the unit, press SOURCE button repeatedly on the unit to select USB mode. Top View of Unit AUX-IN To safely remove the USB switch to another mode or turn off the power, then remove the USB. -
Page 14: Manual Setting Of The Clock
Manual Setting of the Clock 1. During Standby mode, press and hold MENU/PRESET/CLOCK button on the unit. ‘24HR’ will flash on the display. to select ‘24Hour’ or ‘12Hour’ , then press MENU/PRESET/CLOCK button. 2. Press 3. Press to set the hours, then press MENU/PRESET/CLOCK button. to set the minutes, then press MENU/PRESET/CLOCK button. -
Page 15: Dab Operation
DAB Operation Press SOURCE repeatedly to select DAB mode. If the unit is connected to the mains power and then switched on to DAB mode for the first time, the unit will automatically start scanning. The display will show ‘ Scanning… ’ . All the stations that have been found will be stored automatically. -
Page 16: Presetting Stations
Presetting Stations You can store up to 10 of your favourite DAB stations to the memory. This will enable you to access your favourite stations quickly and easily. 1. To store a preset, you must first be listening to the station that you would like to save, press and hold MENU/PRESET/CLOCK . -
Page 17: Dab Display Modes
DAB Display Modes Press INFO/MODE to switch through the following display modes. The information of each display mode is displayed on the lower segment of the display. Signal Strength This shows a slide bar to indicate the signal strength, the Signal Strength stronger the signal, the longer the bar will be from left to right. -
Page 18: Fm Operation
FM Operation Press SOURCE repeatedly to select FM mode. Auto Scan Press and hold the SCAN/ button until the tuner starts searching for a station. Once a station has been found, the scanning will stop automatically. The search may not stop at a station with a very weak signal. Manual Scan Press repeatedly until your desired frequency is reached. -
Page 19: Fm Display Modes
FM Display Modes Press INFO/MODE to switch through the following display modes. The information of each display mode is displayed on the lower segment of the display. Radio Text Radio Text This displays a station description. Programme Type This describes the “style” or “genre” of the programme that is being broadcast. -
Page 20: Cd/Mp3 Operation
CD/MP3 Operation • CD-ROM, CD-I, CDV, VCD, DVD or computer CDs are not possible for playback. • CDs encoded with copyright protection technologies by some record companies may be unplayable by this unit. Press the SOURCE button repeatedly to select CD mode. Playback 1. -
Page 21: Repeat Playback
Repeat Playback For CD Mode 1. Press INFO/MODE once, ‘Rep1’ will show on the display. The CD will play the current track repeatedly. 2. Press INFO/MODE twice, ‘RepA’ will show on the display. The CD will play all tracks repeatedly. 3. -
Page 22: Cassette Playback
Cassette Playback 1. Press SOURCE button repeatedly to select TAPE mode. / button to open the cassette door. Insert a cassette and close the cassette 2. Press the door. 3. Press the button to start playback. 4. To pause playback, press the button. -
Page 23: Bluetooth® Operation
2. The unit will enter pairing mode, and then “Pairing” will flashing on the display and prompt a beep tone. 3. Activate your Bluetooth® device and select the search mode. 4. Select RC-D327B” and enter “0000” for the password if necessary. “Connected” will show on display. 5. To disconnect the Bluetooth® function, •... -
Page 24: Maintenance
Maintenance Cleaning the Unit / Cassette Compartment Ensure the unit is fully unplugged from the mains socket before cleaning. • To clean the unit, wipe the case with a slightly moist, lint-free cloth. • Do not use any cleaning fluids containing alcohol, ammonia or abrasives. •... -
Page 25: Hints And Tips
Hints and Tips Problem Description Cassette Poor cassette sound • Dust or dirt on the heads, etc. Clean cassette compartment quality parts, see Maintenance. • Use of incompatible cassette types (METAL or CHROME). Only use NORMAL (IECI) for recording. The disc does not •... -
Page 26: Product Fiche And Specifications
Product Fiche and Specifications Brand Model RC-D327B Power Requirement AC 230-240 V 50Hz Power Consumption 16 W Bluetooth® Bluetooth® Version Maximum 4 dBm transmitted power Frequency 2402 - 2480 MHz band Output Speaker Power 2 W RMS × 2 Audio Input Sensitivity... -
Page 27: Useful Information And Licences
Useful Information and Licences For general information about appliances, and handy hints and tips check out Kit Guides at teamknowhow.com or call UK: 0344 561 1234 Ireland: 1890 818 575 Visit Partmaster.co.uk today for the easiest way to buy electrical spares and accessories. - Page 28 3rd Floor Office Suite Omni Park SC, Santry, Dublin 9, Republic of Ireland The product is distributed and warranted exclusive by DSG Retail Ltd. “JVC” is the trademark of JVC KENWOOD Corporation, used by DSG Retail Ltd. under license. IB-RC-D327B-190408V4...