Advertisement
Quick Links
Advertisement

Related Manuals for Robinsons Rowton


Summary of Contents for Robinsons Rowton
- Page 1 NOMINAL SIZE A (mm) B (mm) 4 x 2 4 x 4 1392 4 x 6 2012 1366 4 x 8 2632 4 x 10 3252 4 x 12 3872...
-
Page 2: Key Description
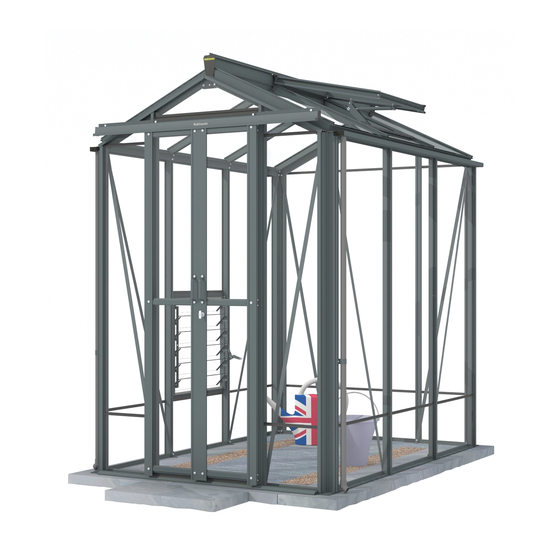
Thank you for purchasing your new Robinsons greenhouse. We recommend you familiarise yourself with the instructions and read all safety information before you commence assembly. This instruction manual is also available online at www.robinsonsgreenhouses.co.uk in our technical help section should you need to reprint it. Should you require any additional advice you can always call us on 01782 385409. - Page 3 They attach to the building during the glazing process (8) like a piece of glass with a black separa- tor above and below them. LOUVRE Robinsons integral cantilever shelving attaches to the inside of the greenhouse frame using either square head bolts (for each shelf insert two into each side glazing bar ’D066’ during construction of OPTIONAL the sides (1)) or use rectangular ‘crop head’...
- Page 4 Section Part Section Size Section Part Section Size (mm) (mm) D1046 654 2 D1047 657 1 D071 1274 D072 1277 D043 1894 D044 1897 D021 2514 D001 2517 D022 3134 D002 3137 D023 3754 D003 3757 D1045 657 2 D070 1277 D042 1897...
- Page 5 Section Part Section Size Section Part Section Size (mm) (mm) D812 1660 0 2 D762 + D815 1830 D347 lock 1714 D764 D1060 D1135 D763 + D813 1675 D156 1714 strike = D766 1773 D765 D834 1660 D1134 D1136 PLASTIC 724 4 6 10 12 14 D760...
- Page 6 THE DIMENSIONS BELOW ARE THE EXACT EXTERNAL BASE DIMENSIONS FOR THE ROBINSONS RANGE. We cannot emphasis how important it is to have a proper base for your Robinsons Greenhouse to be erected upon. It is essential that the BASE IS FLAT, LEVEL AND SQUARE AS WELL AS BEING SUBSTANTIAL enough to take the weight of the greenhouse including its 4mm glass.
- Page 7 Feed glazing rubber into each glazing bar and PARTITION trim to length. Notice that some channels are ONLY REFER TO only used on a partition. Applying a lubricant to SEPARATE MANUAL the aluminium channels will speed up insertion. PARTITION ONLY REFER TO SEPARATE MANUAL...
- Page 8 4’ X 2 2’ X 2 On the 2’ long model the sides have no vertical side bar ‘D066’. Because of Part No Quantity Part No Quantity this the sides have little substance and D070 1277 D1045 you will find it easier to skip this sec- D070 D071 1274...
- Page 9 You may wish pre-load the side glazing bars ‘D066’ with square head 10mm bolts for any shelves purchased rather than crop heads retro- D103 spectively. 10mm D066 TRANSIT BOLT ON 15mm DIAGONALS D066 D103 15mm...
- Page 10 Part No Quantity Part No Quantity D111 D048 1676 D057 1830 D174 D1130 1366 D227 15.5m D1131 D1132 M6X10 D1141 1703 M6X15 M6NUT 10mm D1132 10mm D1131 10mm 10mm D1141 D1141 D057 D057 D048 D048 D1130 15mm 10mm 15mm 15mm 10mm 15mm 15mm...
- Page 11 D1131 D1131 D1132 D111 D057 D750 D048 D1141 D048 D1141 D057 D174 D1130 D1130...
- Page 12 Part No Quantity Part No Quantity D111 D048 1676 D057 1830 D174 D1130 1366 D227 15.5m D1131 D1132 M6X10 D1141 1703 M6X15 M6NUT 10mm D1132 10mm D1131 10mm 10mm D1141 D1141 D057 D057 D048 D048 D1130 You may wish pre-load 15mm the rear 10mm...
- Page 13 D1131 D1131 D1132 D057 D111 D1131 D048 D1141 D048 D1141 D057 D174 D1130 D1130...
- Page 14 EQUAL...
- Page 15 2’ 6’ 8’ Part Quan. 10’ D1047 Part Quan. 12’ Part Quan. D044 1897 Part Quan. D001 2517 4’ D1133 Part Quan. D002 3137 D1133 RUBBER 1000 D003 3757 Part Quan. D1133 RUBBER 1000 D072 1277 D1133 RUBBER 1000 D1133 RUBBER 1000 RUBBER...
- Page 16 Part No mm Q Part No mm Q D762 + D347 lock = D233 D764 1714 1 D909 D763 + D156 strike = D909 247 x 812 D765 1714 1 247 x 812 P053 pane pane D760 1714 1 (cut 2 D225 x 305) D761...
- Page 17 D909 247 x 812 pane D909 D233 247 x 812 pane D909 247 x 812 pane D060 D225 D062 D225 D840B P053...
- Page 18 Part No mm Quantity Part No mm Quantity D220 D866 PLUS FS6060 SCREW D205 D863L D863R BOLM6X11 SYNUTM6 D862 D1208 8 X 12 S/T 1 of - FS6017 610 x 610 8 x 19 S/T pane FS6018 D863R D863R D866 D863L D866 D1208...
- Page 19 D862 D863L D862 FLIP VIEW D119...
- Page 20 Part No mm Quantity Part No mm Quantity D079 PLUS BOLM6X11 FLUFF D114 BOLM6X15 SYBOLM6 X11CROP SYNUTM6 D114 D079 D114 FLIP VIEW...
- Page 21 GLAZING (plans pto): Glass and aluminium can potentially cause injury. Please ensure you wear protective goggles, gloves, headgear and suitable foot- wear when assembling and glazing the build- ing. D812 Please remember that glass is fragile and should be handled with extreme care. Always clear up and dispose of any breakages imme- diately.
- Page 22 D1059 D1059 PART Section Size (mm) D1060 D1060 D812 1660 D661 1906 D1060 D1135 D812 D813 1675 D766 1773 D826 D767 D767 D826 D834 1660 D813 D766 D766 D813 D1134 D1136 PLASTIC D825 D825 1660 D826 1677 125° D827 1832 D767 1773 ALUM...
- Page 23 PART Size (mm) 2’ 4’ 6’ 8’ 10’ 12’ D1206 610 X 1374 D1140 610 X 732 D1208 610 X 610 D1254 610 X 305 D1139 610 X 132 D905 305 X 305 D904 305 X 1374 D909 247 X 812 D902 ANGLE D1137...
- Page 24 D220 D220 Note: On the 2’ and 4’ long (one end only) model there is not enough room for the D220 stops to be fitted in the ridge. Instead the plastic ridge D203 end cap acts as the stop (see section 14).
- Page 25 D862 D079...
- Page 26 Part No Part No D163 D864 D150 D845 D082 1270 D800 PLASTIC BOLM6X15 D081 1270 SYNUTM6 D845 D845 D057 D767 D766 D163 D057 D845...
- Page 27 N/A 4 D150 D082 D081 D864 Note: D800 is a plastic infill to aid glazing, it can be removed after the pane above the doors has been installed if you wish. Its colour may not match your building. D800 D864 N/A 4 X-ray D800...
- Page 28 Part No Quantity D860 D087 D087 D860 D860 D087...
- Page 29 Part No Quantity D312 D222/B D204L/B D204R/B D1137 D1060 D1060 D1059 D1059 D222/B X-ray D800/B D222/B D204R D1132 D312...
- Page 30 O7mm...
-
Page 31: Internal View
Part No Quantity D168L D168R (handle) D165 D166 FS6013 D166 D166 D168L D168R D165 D165 INTERNAL VIEW D729TG - 100 x 525 panes x 6 PINCH ALL GLASS RETAINERS BEFORE GLAZING D165... - Page 32 3 slat Example: 2 x 4’ shelves ‘ST0304’ = 8’ run 10mm crop D2013 D048 15mm 10mm 10mm D066 D048 IMPORTANT: Please make sure when deciding on your shelving heights that the louvre handle or optional auto D2014 louvre mechanism does not inter- fere with the staging slats.
- Page 33 3 slat Example: 3 x 2’ shelves in rear gable 10mm crop D2013 15mm 10mm 10mm D2001 =620mm D2014 10mm crop 1 x 2’ 3 SLAT QUANTITIES Part No Length Quantity (mm) D2001 D2013 D2014 IMPORTANT: D2021 Please make sure when deciding on your shelving heights that the louvre handle or optional auto SYBOLM6...
- Page 34 D214 D203 D201 D119 D119 D208 D211 D048 D202 D841 D119 D211 D048 D207 D048 D206...
- Page 35 End finials need to be pinched onto ridge using ‘DV282’ grub screws. Depending on your ridge length a half cresting may need to be cut or/ and some spacer bar ‘DV281’ cut into two equal sections. Each finial and cresting piece needs to be siliconed ‘D119’ into place. D119 DV281 DV282...
- Page 36 I will make the necessary amendments. Whilst the information contained in this booklet is accurate at the time of publication, changes in the course of Robinsons policy of improvement through development and design might not be indicated. We point out this fact to avoid any infringements of the Trade Descriptions Act and also to advise that Robinsons Greenhouses reserve the right to change specifications and materials without prior notice.
Need help?
Do you have a question about the Rowton and is the answer not in the manual?
Questions and answers
how to fit thermofor automatic roof vent opener