Table of Contents
Advertisement
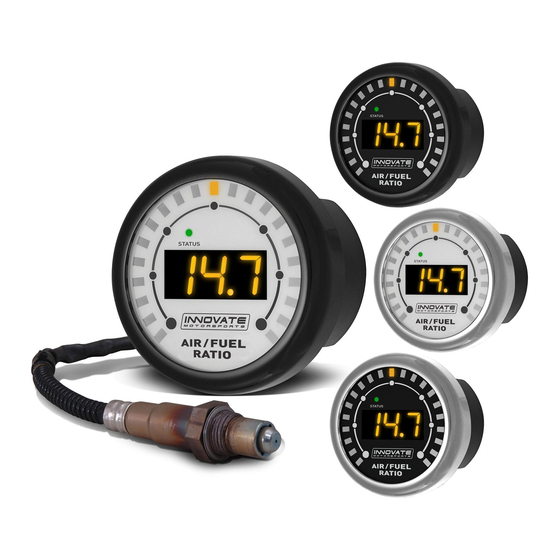
MTX-L
Digital Air/Fuel Ratio Gauge
User Manual
Warning!
The Oxygen Sensor used in this device gets very hot in operation.
Do not touch a hot sensor. Do not let a hot sensor touch a combustible surface.
Do not use the sensor with or near flammable liquids or gases. Failure to heed
these warnings may result in severe burns, explosions, fires, or other dangerous
events.
When installed in the exhaust, the oxygen sensor MUST be connected and
operating with the MTX-L whenever the car is running. An un-powered oxygen
sensor can be quickly damaged when exposed to hot exhaust gases.
Advertisement
Table of Contents

Related Manuals for Innovate Motorsports MTX-L


Summary of Contents for Innovate Motorsports MTX-L
- Page 1 When installed in the exhaust, the oxygen sensor MUST be connected and operating with the MTX-L whenever the car is running. An un-powered oxygen sensor can be quickly damaged when exposed to hot exhaust gases.
-
Page 2: Table Of Contents
General measurement requirements ..................... 14 Vehicles with ‘smog-pumps’......................14 Single Cylinder Engines ......................... 14 Diesel Engines ..........................14 Connecting the MTX-L to simulate a narrow band oxygen sensor..........15 Appendix A: Specifications.......................... 17 Appendix B: Limited Warranty ........................18 Appendix C: Connectors ..........................19 Appendix E: Error Codes and Troubleshooting Tips .................. -
Page 3: Mtx-L
1 MTX-L The MTX-L is an integrated gauge and controller for wideband AFR (lambda) measurements. Although it can be operated stand alone, it has digital I/O for integration with other MTS compatible products and two configurable analog outputs for integration with ECU’s and 3... -
Page 4: Installation
.1V = 15 AFR. This is a simulated narrowband signal. 2.2 Mounting and Routing The MTX-L gauge fits in any standard 2 1/16” (52mm) gauge pod. Mounting of the gauge should be done in such a manner that the cables are not being forcefully pulled from the gauge itself. -
Page 5: Sensor Placement
2.3 Sensor Placement Your MTX-L gauge kit includes a 1” bung. This bung is supplied to best prolong the life of your sensor since it will allow the sensor to sit flush with the exhaust pipe. Using a bung is the preferred method for mounting the O sensor for both catalytic and non- catalytic cars. -
Page 6: Sensor Calibration
Wide band oxygen sensors, like the one shipped with the MTX-L, are designed to work with unleaded gasoline. Use with leaded gasoline will significantly reduce the lifespan of the sensor. The reduction is directly proportional to the metal content of the fuel and the tune of the engine. -
Page 7: Calibration Schedule
- Calibrate every 2-3 days, depending on usage 2.5 Changing the MTX-L’s gauge face and/or bezel 1. Lay the MTX-L face down and remove the three #2 phillips screws from the outside rim of the back plate. 2. Carefully lift out the bezel from the gauge cup. -
Page 8: Software (Logworks 3 And Lm Programmer)
5. Reinstall the 3 #2 phillips screws. 3 Software (LogWorks 3 and LM Programmer) 3.1 Installing software 1. Install the CD that came with your MTX-L on your Windows based personal computer. 2. The installer will automatically start, follow the prompts to install the software. -
Page 9: Analog Outputs
Innovate Motorsports (P/N 3733) or use any USB to serial adaptor that includes drivers. Make sure that nothing is connected to the IN port of the MTX-L. 2. Power up the MTX-L. 3. Launch LM Programmer. The LM Programmer application can be launched from Start->Programs->LogWorks3->LM Programmer from the Windows task bar. -
Page 10: Advanced Output Programming
MTX-L. So there might be some small ‘rounding errors’ when you open LM Programmer and review your settings in the future. Click the ‘Program’ button to download the new data into the MTX-L. Once the unit is programmed the ‘Program’ button will grey out. -
Page 11: Customizing Your Fuel Type
Info tab in LM Programmer. Customizing your display range 3.2.4 The MTX-L gauge can be setup to display different ranges from both the Needle Bar and the Numeric Display. There is also an option to display lambda or AFR. -
Page 12: Updating The Firmware
The analog outputs on the MTX-L are ‘single ended’. That is, each output uses just one wire. It is assumed that the MTX-L and the device it is being connected to are already sharing the same ‘ground’. In a vehicle, this is generally true, but there can be small offsets in voltage when devices are grounded to, say, the chassis at different points. -
Page 13: Tips, Tricks, & Troubleshooting
The Stoichiometric AFR value is the AFR multiplier. So for (standard, unblended) gasoline its 14.7. If you set it to 14.7 the MTX-L display will show 14.7 AFR for Lambda 1.0. If you set it to 6.4 (methanol) the MTX-L will show 6.4 AFR for Lambda 1.0. -
Page 14: General Measurement Requirements
Diesel Engines and gas turbines run at wide open throttle at all times. They do not have a throttle but regulate power by the amount of injected fuel. The MTX-L can still be used, but measurements at idle will read as lean. -
Page 15: Connecting The Mtx-L To Simulate A Narrow Band Oxygen Sensor
Be careful where you mount the stock sensor, as heated sensors will get hot. To connect the MTX-L to the EFI-computer, first determine what kind of narrow band sensor is used, then follow the instructions below (you will need a digital multimeter to determine correct OEM sensor wires): a. - Page 16 Wire analog output 1 directly to this wire. The Ground connection has low resistance to chassis ground (less than 1 Ohm). Measure while the engine is off. d. Vehicle has a 4-wire sensor Typically the 4 wires are: heater power, heater ground, sensor ground, and sensor element connection.
-
Page 17: Appendix A: Specifications
Appendix A: Specifications Power Power requirements 8-18 Volt / 2 A (max, 1 A nominal) Serial Communication Serial Port Speed 19.2 kbit/sec Packet/Logging Speed 81.92 msec/sample packet Sample Resolution 10 bits (0..5V at 0.1% resolution) Mechanical Hole Size 2 1/16” (52mm) Software Supported OSs Windows 98, ME, 2000, XP, and Vista... -
Page 18: Appendix B: Limited Warranty
Appendix B: Limited Warranty LIMITED WARRANTY Innovate stands behind the quality of its products. Innovate makes the following warranty to purchasers of its products: All new Innovate products carry a one year warranty from the date of purchase. If proof of purchase cannot be provided, warranty will be determined by date of manufacture. -
Page 19: Appendix C: Connectors
Appendix C: Connectors 1. Sensor IPUMP+ SENSE/PUMP- SHTR VBAT SENSE+ SHIELD GND SHTR VBAT 2. Power and Analog Cable 3. Serial Out 4. Serial In *MTS Sense MTX-L_Manual.doc... -
Page 20: Appendix E: Error Codes And Troubleshooting Tips
2. Inspect sensor cable for rips or tears. 3. Damaged Sensor 3. Replace sensor Error 7 General System Software error Reboot MTX-L by cycling power. error (typically a Reload firmware if necessary. software error). Error 8 Sensor Timing 1. Sensor overheating. - Page 21 Revision History 1.0 11/18/10 Initial Release 1.1 12/17/10 Added analog output configuration, Bezel/gauge face installation, and new screenshot for customizing the range display. MTX-L_Manual.doc...
Need help?
Do you have a question about the MTX-L and is the answer not in the manual?
Questions and answers