
Related Manuals for THORENS TD402 DD


Summary of Contents for THORENS TD402 DD
- Page 1 TD402 DD BEDIENUNGSANLEITUNG USER GUIDE MANUEL D’UTILISATION РУКОВОДСТВО ПОЛЬЗОВАТЕЛЯ 使用手册 16 USER GUIDE...
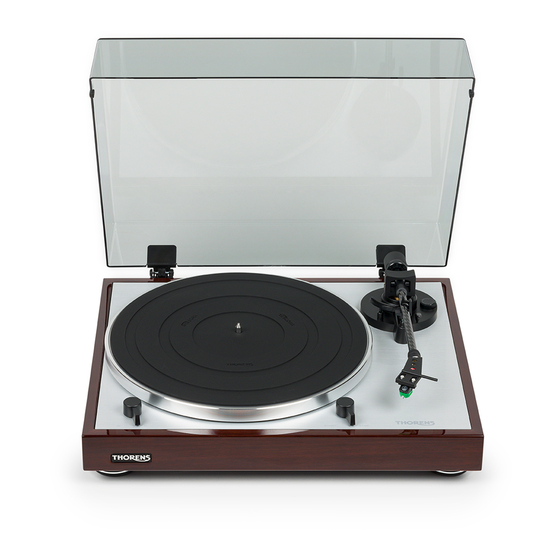
- Page 2 FEATURES / TOP PANEL...
- Page 3 01. Counterweight The counterweight is used for precise adjustment of the stylus pressure on the vinyl, to properly balance the tonearm. 02. Anti-Skating Control To set the anti-skating force of the tonearm. 03. Tone arm Lever Use this lever to lower and raise the tonearm. 04.
-
Page 4: Rear Panel
10. Grounding terminal A direct electrical connection to the earth 11. RCA JACKS selector Plug in the RCA cable, and connect the cable to the audio amplifier 12. PHONO EQ ON: Connect the RCA cable to an LINE-IN terminal of the amplifier. OFF: Connect the RCA cable to a PHONO-IN (MM) terminal of the amplifier. - Page 5 13. AUTO PLAY ON: to start the AUTO-PLAY function. Motor starts turning once the tonearm is moved out of its rest towards the platter. After record is finished motor stops OFF: to stop AUTO-PLAY function. 14. Power Jack Connecting power cable 15.
-
Page 6: Dust Cover Installation
DUST COVER INSTALLATION 01. Unwrap the two hinges and the dustcover. 02. Note that the hinges have a clamp side and a tab side. 03. Note that the dustcover has two spots on its rear edge shaped to accept the clamps. 04. -
Page 7: Mains Connection
used, adjust the stylus pressure and the antiskating indicated to the corresponding specifications. MAINS CONNECTION An external switching power adaptor is supplied with this turntable. There are the RCA jack on the rear panel of the turntable. You can use it to connect to your amplifier. You also could switch the selector to “ON”... -
Page 8: To Replace The Stylus
TO REPLACE THE STYLUS • Put the rest clip on the pick-up arm. • Remove Headshell (5) from the tonearm. • Remove the protective cap from the stylus. • Pull the stylus to the lower front and remove it. • Put in the new stylus following the reverse procedure. •... -
Page 9: Important Recommendations
IMPORTANT RECOMMENDATIONS We advise you to clean your records using a rag impregnate with an antistatic product for maximum enjoyment of your records and also to make them last. We would also point out that for the same reason your stylus should be replaced periodically (approximately every 250 hours). - Page 10 Turntable section Drive System Direct Drive Motor DD Motor Speed 33 1/3 RPM, 45 RPM Rotation Speed Variation +/–0.33% Wow and Flutter 0.15% 67dB or higher (A-weighted, 20kHz LPF) Signal-to-Noise Ratio 60dB or higher (unweighted, 20kHz LPF) Platter Aluminum Die-cast Diameter of Platter 12“, 300mm SPECIFICATION...
-
Page 11: Tonearm Section
Tonearm section Carbon tube Type Static Balance, Straight Effective Arm Length 8.8“, 223.6mm Stylus Pressure Range 0 to 4g Supported Cartridge Weight 3.5 to 6.2g Overhang 18.6mm Anti-skating Adjustment Supported SPECIFICATION... -
Page 12: Cartridge Section
Cartridge section Type MM type (Audio-Technica VM95E) Stylus Construction Bonded elliptical Diamond Frequency Response 20Hz to 22kHz Channel Separation >20dB Channel Balance 2.0dB Vertical Tracking Angle 23 degrees Supported Load Impedance 47k ohms Output Voltage 4mV (1kHz, 5cm/sec.) Stylus Pressure 2.0g +/–0.2g Cartridge Weight 6.1g... -
Page 13: Analog Output
Analog Output Connector RCA Pin jack (Gold-plated) Power AC 100 to 240V, 50/60Hz Power Consumption 2.5W Overall Dimensions (W x D x H) 420 x 355x 139mm Weight Approx. 6.1 kg SPECIFICATION... - Page 14 Thorens GmbH Lustheide 85 · 51427 Bergisch Gladbach · Deutschland www.thorens.com · info@thorens.com www.thorens.com...
Need help?
Do you have a question about the TD402 DD and is the answer not in the manual?
Questions and answers