Advertisement
Advertisement
Table of Contents

Related Manuals for ProGear 750

Summary of Contents for ProGear 750
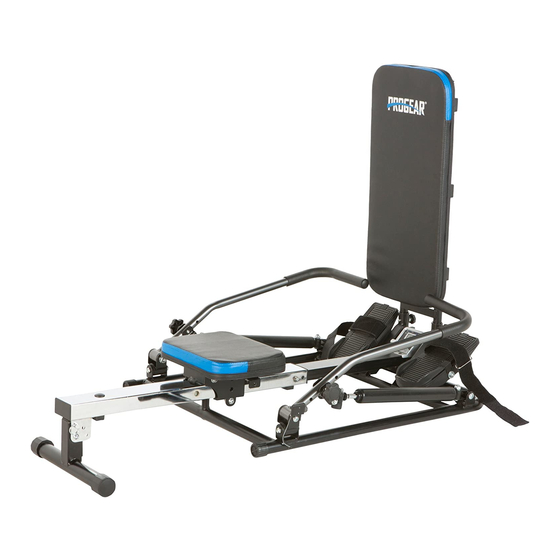
- Page 1 750 Rower with Additional Multi Exercise Workout Capability IMPORTANT: Read all instructions carefully before using this product. Retain this owner’s manual for future reference. The specifications of this product may vary from this photo, subject to change without notice. 3600.1 -011518...
- Page 2 PLEASE DO NOT RETURN THIS PRODUCT TO THE STORE. STOP. Contact customer service if you have any questions regarding assembly or proper operation of the machine. Email us at: Service@paradigmhw.com Or call us at: 1-844-641-7920 Hours: 8:00 am to 5:00 pm (PST) Daily...
-
Page 3: Table Of Contents
TABLE OF CONTENT SERVICE ------------------------------------------------------------------------ LABEL PLACEMENT---------------------------------------------------------- IMPORTANT SAFETY GUIDELINES ------------------------------------ OVERVIEW DRAWING ------------------------------------------------------ PARTS LIST --------------------------------------------------------------------- ADJUSTMENT-------------------------------------------------------------------- CONSOLE ----------------------------------------------------------------------- TROUBLESHOOTING & MAINTENANCE------------------------------ WARRANTY -------------------------------------------------------------------- PARTS REQUEST FORM---------------------------------------------------... -
Page 4: Service
SERVICE IMPORTANT: FOR NORTH AMERICA ONLY For damaged or defective product, questions, replacement parts or any other service support, please contact our customer service department by the below methods: For The Best Service, please Email: service@paradigmhw.com Response Time: 1-2 Business Days Emailing us with the information above will be the best method to receive a response during peak business hours Website:... -
Page 5: Label Placement
LABEL PLACEMENT... -
Page 6: Important Safety Guidelines
IMPORTANT SAFETY GUIDELINES Read all instructions before using the Rower. Basic precautions should always be followed. WARNING - To reduce the risk of injury to persons, read the following: Be sure all screws, nuts, and bolts are tightened prior to use. Before using this equipment, we recommend doing warm ups. -
Page 7: Overview Drawing
OVERVIEW DRAWING... -
Page 8: Parts List
PARTS LIST Description Description Base Frame 20 Bushing Support Tube 21 Foot Pad Slide Tube 22 EVA Pad Backrest Frame 23 Wire Plug Rear Stabilizer 24 Flat Washer D8 6L Left Handlebar 25 Anti-Loosen Nut M8 Self-Tapping Philips Screw 6R Right Handlebar ST4.2*13 7L Left Bracket 27 Foam Grip... - Page 9 PARTS LIST Description Description 41 Sensor 63 Hex Bolt M8*60*15 42 Phillips Screw M3*5 64 Small Foot Pad 43 Rubber Magnet 65 Curved Washer D8 44 Wire 66 Sleeve 45 Support Tube End Cap 67 Tube Sleeve 46 Round End Cap 68 Hex Bolt M8*50*15 47 Hex Bolt M10*25 69 Hex Bolt M8*25...
-
Page 10: Adjustment
ADJUSTMENT Loosen the Knobs (80), and adjust the Backrest (15) to the suitable position A, B or C. Lock the Knobs (80). 1A. Pull the H-Shaped Tube Pin (62) from the Backrest Frame (4). See Fig. A. 1B. Swing the H-Shaped Support Tube (10) so it contacts the ground. See Fig. B. 1C. - Page 11 With this adjustment you can do these workouts: Pec Fly Make sure the Left and Right Handlebar (6L & 6R) are laying to the sides of the Rower. Lay on the Backrest (15) and the Seat (16) with your head towards the Console (13). Grab the Left and Right Handlebar (6L &...
- Page 12 ADJUSTMENT Loosen both Knobs (80) from the Seat Slider Bracket (11) and remove the Backrest Frame (4) and set aside. Fig. F Fig D. Fig. E 2A. Adjust the Slide Tube (3) to a comfortable position for your height at MIN or MAX. See Fig. D. 2B.
- Page 13 ADJUSTMENT With this adjustment you can do these work outs: Rows Make sure the Left and Right Handlebar (6L & 6R) are laying to the Front of the Rower. Sit on the Seat (16), insert your feet into the Strap (17) on the Foot Pedal (14) and tighten it to a comfortable position.
- Page 14 ADJUSTMENT 3A. Adjust the angle of Rear Stabilizer (5). There are three holes for different angle options. 3B. Pull the Pin (60) out from the Slide Tube (3), and adjust the Rear Stabilizer (5) to the desired position and insert the Pin (60) into the hole.
- Page 15 ADJUSTMENT 4A. Move the Seat Slider Bracket (11) to the pedal position, align the hole and insert the Pin (61) to secure it. 4B. Insert the Backrest (15) onto the Base Frame (1) and tighten with two Knobs (80).
- Page 16 ADJUSTMENT With this adjustment you can do: Chest Presses Make sure the Left and Right Handlebar (6L & 6R) are laying to the Front of the Rower. Sit down on the Seat (16), grab the Left and Right Handlebar (6L & 6R), bring them to your chest, push forward.
- Page 17 ADJUSTMENT 5A. Lay the Rower down on the Backrest (15) and adjust the Seat (16) onto the upper position then insert the Pin (61) to secure it.
- Page 18 ADJUSTMENT With this Adjustment you can do these workouts: Bent over Rows Place one foot on the Backrest (15), lean forward, grab the Left and Right Handlebar (6L & 6R) and bring them down towards your feet. Pull the Left and Right Handlebar (6L & 6R) up towards your chest, then bring your hands back down to your starting position and Repeat.
- Page 19 Shoulder Presses Make sure the Left and Right Handlebar (6L & 6R) are to the sides of the Rower and sit on the Backrest (15), grab the Left and Right Handlebar (6L & 6R) and bring them to your chest. Press the Left and Right Handlebar (6L &...
- Page 20 ADJUSTMENT Fig. F Fig. G Fig. I Fig. H You may adjust the RESISTANCE to a suitable position. A. is the highest resistance setting. B. is middle resistance setting. C. is the lowest resistance setting. NOTE: when adjusting the resistance be sure to push Left or Right Handlebar (6L & 6R) all the way forward to help position the Left or Right Bracket (7L/7R).
-
Page 21: Console
CONSOLE Display : TIME-------------------------0:00~99:59MIN TOTAL---------------------- 0~9999 COUNT--------------------- 0~9999 CAL--------------------------0~9999KCAL MODE USING YOUR CONSOLE RESET The console can be activated by pressing the MODE button or by rowing. If you leave the console idle for 3.5 minutes, the power will shut off automatically. BUTTON FUNCTIONS: MODE: Press the MODE button to select each function of the console. -
Page 22: Troubleshooting & Maintenance
TROUBLESHOOTING & MAINTENANCE TROUBLE SHOOTING PROBLEM: The Rower wobbles when in use. SOLUTION: Turn the Stabilizer Round End Cap (58) on the Rear Stabilizer (5) as needed to level the Rower. PROBLEM: The Rower makes a squeaking noise when in use. SOLUTION: The bolts and other hardware may be loose on the Rower. -
Page 23: Warranty
WARRANTY MANUFACTURER’S LIMITED WARRANTY Paradigm Health & Wellness warrants to the original purchaser that this product is free from defects in material and workmanship when used for the purpose intended, under the conditions that it has been installed and operated in accordance with Paradigm’s Owner’s Manual. -
Page 24: Parts Request Form
PARTS REQUEST FORM Paradigm Health & Wellness, Inc. EMAIL THIS FORM WITH YOUR RECEIPT OF PURCHASE TO Service@paradigmhw.com NAME:______________________________________________________________________ ADDRESS:__________________________________________________________________ CITY:________________________ STATE:_____________ ZIP:________________________ TELEPHONE: (Day)_________________________________________________________ (Night)________________________________________________________ SERIAL#:____________________________________________________________________ MODEL#:____________________________________________________________________ PURCHASE DATE:____________________________________________________________ PLACE OF PURCHASE:________________________________________________________ PART # DESCRIPTION “YOUR ORDER WILL BE PROCESSED WITHIN 3 BUSINESS DAYS” *This form can also be faxed to #: 626-810-2166...
Need help?
Do you have a question about the 750 and is the answer not in the manual?
Questions and answers