Table of Contents
Troubleshooting

Related Manuals for ZyXEL Communications LTE4506-M606


Summary of Contents for ZyXEL Communications LTE4506-M606
- Page 1 User’s Guide LTE4506-M606 4G LTE-A HomeSpot Default Login Details Version 1.0 Edition 3, 06/2020 LAN IP Address http://192.168.1.1 User Name admin Password 1234 Copyright © 2020 Zyxel Communications Corporation...
- Page 2 IMPORTANT! READ CAREFULLY BEFORE USE. KEEP THIS GUIDE FOR FUTURE REFERENCE. Screenshots and graphics in this book may differ slightly from what you see due to differences in your product firmware or your computer operating system. Every effort has been made to ensure that the information in this manual is accurate.
-
Page 3: Document Conventions
Document Conventions Warnings and Notes These are how warnings and notes are shown in this guide. Warnings tell you about things that could harm you or your LTE4506. Note: Notes tell you other important information (for example, other things you may need to configure or helpful tips) or recommendations. -
Page 4: Table Of Contents
Contents Overview Contents Overview User’s Guide ............................9 Introduction ............................10 Web Configurator ..........................15 Technical Reference ........................22 Home ..............................23 Internet ..............................28 Wi-Fi ................................ 36 Router ..............................55 Applications ............................72 System ..............................78 Troubleshooting ............................ 89 LTE4506 User’s Guide... -
Page 5: Table Of Contents
Table of Contents Table of Contents Document Conventions ........................3 Contents Overview ..........................4 Table of Contents ..........................5 Part I: User’s Guide.................... 9 Chapter 1 Introduction ............................10 1.1 Overview ............................10 1.2 Managing the LTE4506 ........................10 1.3 Good Habits for Managing the LTE4506 ..................10 1.4 Hardware Connections ......................... - Page 6 Table of Contents 3.3.2 WiFi ............................25 Chapter 4 Internet..............................28 4.1 Overview ............................28 4.1.1 What You Can Do in this Chapter ..................28 4.2 Internet Status Screen ........................29 4.3 PIN Settings Screen ......................... 30 4.4 APN Configuration Screen ......................31 4.5 Network Selection Screen ......................
- Page 7 Table of Contents 6.13 ICMP Screen ..........................66 6.14 ARP Screen ............................ 66 6.14.1 How ARP Works ........................67 6.15 DMZ Screen ........................... 68 6.16 DDNS Settings Screen ........................68 6.17 Remote Management Screen ....................69 6.18 Telnet Screen ..........................70 Chapter 7 Applications ............................72 7.1 Overview ............................
- Page 8 Table of Contents Appendix A Customer Support ....................... 93 Appendix B Common Services ......................99 Appendix C Legal Information ...................... 102 Index ..............................111 LTE4506 User’s Guide...
-
Page 9: User's Guide
User’s Guide... -
Page 10: Introduction
H A P T E R Introduction 1.1 Overview This chapter introduces the main features and applications of the LTE4506. The LTE4506 is a 4G+ home-spot wireless router, which can connect to a mobile network and the Internet through a wireless WAN connection and provide easy network access to mobile users without additional wiring. -
Page 11: Hardware Connections
Chapter 1 Introduction • Change the password often. Use a password that is not easy to guess and that consists of different types of characters, such as numbers and letters. • Write down the password and put it in a safe place. •... -
Page 12: One-Touch Wifi Sharing
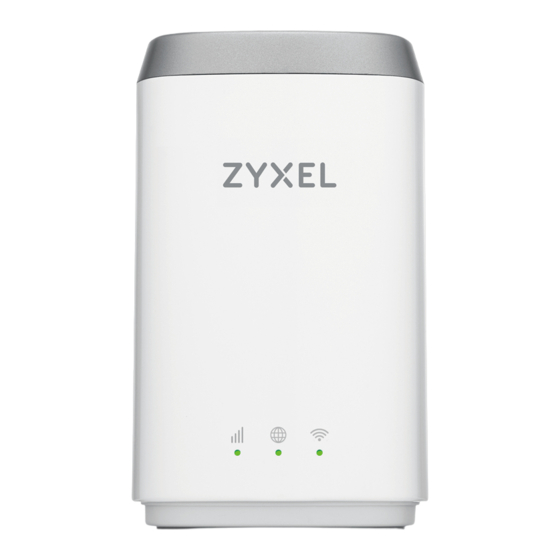
Chapter 1 Introduction Figure 2 LTE4506 LEDs The following table describes the LED lights. Table 1 LTE4506 LEDs ICONS DESCRIPTION The power signal and quality of the mobile network to which the LTE4506 is connecting. Flashing red: the power is on, but there is no LTE/3G signal received. Solid red: weak signal quality. -
Page 13: Resetting The Lte4506
Chapter 1 Introduction Figure 3 WiFi Sharing Button 1.8 Resetting the LTE4506 If you forget your password or IP address, or you cannot access the Web Configurator, you will need to use the Reset button to reload the factory-default configuration file. This means that you will lose all configurations that you had previously saved, the password will be reset to 1234 and the IP address will be reset to 192.168.1.1. - Page 14 Chapter 1 Introduction Figure 4 Reset Button LTE4506 User’s Guide...
-
Page 15: Web Configurator
H A P T E R Web Configurator 2.1 Overview The Web Configurator is an HTML-based management interface that allows easy system setup and management via Internet browser. Use a browser that supports HTML5, such Internet Explorer 11, Mozilla Firefox, or Google Chrome. The recommended screen resolution is 1024 by 768 pixels. In order to use the Web Configurator, you need to allow: •... - Page 16 Chapter 2 Web Configurator Note: The default allowable times that you can enter the Password is 3. If you entered the wrong password for the fourth time, by default the Web Configurator will lock itself for 5 minutes before you can try entering the correct Password again. The following screen displays when you log into the Web Configurator for the first time.
-
Page 17: Navigating The Web Configurator
Chapter 2 Web Configurator 2.2 Navigating the Web Configurator The following summarizes how to navigate the Web Configurator from the Home screen. Figure 5 The Web Configurator’s Main Screen The Web Configurator’s main screen is divided into these parts: • A - Title Bar •... -
Page 18: Navigation Panel
Chapter 2 Web Configurator Table 2 Title Bar: Web Configurator Icons (continued) LABEL DESCRIPTION Roaming This shows whether the LTE4506 is connected to another service provider’s mobile network using roaming. The icon is grayed out if roaming is disabled on the LTE4506. Internet This shows whether the LTE4506 has an Internet connection. - Page 19 Chapter 2 Web Configurator Wi-Fi Menu Table 5 Wi-Fi Menu Screens Summary LABEL DESCRIPTION WiFi Wi-Fi Status This screen displays information about the 2.4 GHz / 5 GHz wireless LAN. Wi-Fi Settings Use this screen to enable wireless LAN and configure the basic wireless settings. MAC Filter Use this screen to allow or deny wireless clients based on their MAC addresses from connecting to the LTE4506.
- Page 20 Chapter 2 Web Configurator Router Menu Table 6 Router Menu Screens Summary LABEL DESCRIPTION LAN IP Use this screen to configure the management IP address for the LTE4506 LAN interface. DHCP Server Use this screen to enable the DHCP server on the LTE4506 and configure static DHCP entries. DNS Settings Use this screen to automatically configure DNS server from mobile network or manually configure the first and second DNS server IP.
- Page 21 Chapter 2 Web Configurator System Menu Table 8 System Menu Screens Summary LABEL DESCRIPTION System System This screen displays the LTE4506’s basic information and allows you to restart the LTE4506. Information User Account This screen allows you to change administrative settings and the password of your LTE4506. Settings Profile This screen allows you to backup and restore device configurations, or reset your device settings back to the factory default.
-
Page 22: Technical Reference
Technical Reference... -
Page 23: Home
H A P T E R Home 3.1 Overview Use the Home screen to check status information about the LTE4506. Use the Wizard screens to configure the LTE4506’s basic Internet access and wireless settings. 3.2 Home This screen is the first thing you see when you log into the LTE4506. It also appears every time you click the Home icon in the navigation panel. -
Page 24: Setup Wizard
Chapter 3 Home Table 9 Home (continued) LABEL DESCRIPTION Setup Wizard Click this button to set up the Internet and WiFi. Wi-Fi 2.4G SSID This displays a descriptive name used to identify the LTE4506 in the 2.4 GHz wireless LAN. Encryption This displays the level of wireless security the LTE4506 is using. -
Page 25: Wifi
Chapter 3 Home Figure 10 Setup Wizard > Set Up Internet: Connection Mode Specify limiting the amount of the package data and reminding the percentage of the package data usage. Click Next to configure the WiFi settings. Figure 11 Setup Wizard > Set Up Internet: Package Data Limit 3.3.2 WiFi If you have not enabled the Wi-Fi 1 network, this screen shows the WiFi 1 and WiFi 2 network status. - Page 26 Chapter 3 Home Figure 12 Wizard > Set Up WiFi (if WiFi 1 is not enabled) If you have enabled the WiFi 1 network, this screen shows the default WiFi key and SSID for the LTE4506’s wireless network. If you set up a new key and SSID, the wireless clients will lose their wireless connection and need to use new wireless settings.
- Page 27 Chapter 3 Home Table 10 Apply Settings LTE4506 User’s Guide...
-
Page 28: Internet
H A P T E R Internet 4.1 Overview This chapter discusses the LTE4506’s Internet screens. Use these screens to configure your LTE4506 for Internet access. A WAN (Wide Area Network) connection is an outside connection to another network or the Internet. It connects your private networks, such as a LAN (Local Area Network) and other networks, so that a computer in one location can communicate with computers in other locations. -
Page 29: Internet Status Screen
Chapter 4 Internet 4.2 Internet Status Screen Use this screen to change your LTE4506’s Internet access settings. Click Internet > Internet Status. The screen appears as shown next. Figure 15 Internet > Internet Status The following table describes the labels in this screen. Table 11 Internet >... -
Page 30: Pin Settings Screen
Chapter 4 Internet Table 11 Internet > Internet Status (continued) LABEL DESCRIPTION Allow Data Select this check box to enable data roaming on the LTE4506. Roaming 4G roaming is to use your mobile device in an area which is not covered by your service provider. -
Page 31: Apn Configuration Screen
Chapter 4 Internet The following table describes the labels in this screen. Table 12 Internet > PIN Settings LABEL DESCRIPTION PIN Protection Enable PIN Click On to turn on PIN code authentication. Otherwise, click Off to turn off PIN code Protection authentication. -
Page 32: Network Selection Screen
Chapter 4 Internet The following table describes the labels in this screen. Table 13 Internet > APN Configuration LABEL DESCRIPTION Select APN Select Auto to reload the default profile. Otherwise, select Manual to configure a connection Profile profile. This field displays the Access Point Name (APN) in the profile. Enter the Access Point Name (APN) provided by your service provider. -
Page 33: Data Usage/Statistic Screen
Chapter 4 Internet The following table describes the labels in this screen. Table 14 Internet > Network Selection LABEL DESCRIPTION Select PLMN Select Auto to have the LTE4506 automatically connect to the first available mobile network Mode using roaming when it is outside the coverage area of the original service provider’s network. Select Manual to display the network list and manually select a preferred network. - Page 34 Chapter 4 Internet Figure 19 Internet > Data Usage/Statistic The following table describes the labels in this screen. Table 15 Internet > Data Usage/Statistic LABEL DESCRIPTION Package Data Limit Setting Enable Data Select the check box to enable data limits. Limit My Internet Specify the limiting the amount of the package data in this field.
- Page 35 Chapter 4 Internet Table 15 Internet > Data Usage/Statistic (continued) LABEL DESCRIPTION Reset Click Reset to reload the previous configuration for this screen. Reset Network Statistics Reset all Click Reset to remove all traffic statistics. statistics and histories Current Connection Statistics Data Flow This indicates the current traffic flow transmitting from/to the LTE4506.
-
Page 36: Wi-Fi
H A P T E R Wi-Fi 5.1 Overview This chapter describes the LTE4506’s Wi-Fi screens. Use these screens to set up your LTE4506’s wireless LAN connection. 5.1.1 What You Can Do in this Chapter • Use the Wi-Fi Status screen to view information about the 2.4 GHz/5 GHz wireless LAN (Section 5.2 on page 37). -
Page 37: What You Need To Know
Chapter 5 Wi-Fi 5.1.2 What You Need to Know Wireless Basics “Wireless” is essentially radio communication. In the same way that walkie-talkie radios send and receive information over the airwaves, wireless networking devices exchange information with one another. A wireless networking device is just like a radio that lets your computer exchange information with radios attached to other computers. -
Page 38: Wi-Fi Settings Screen
Chapter 5 Wi-Fi Figure 21 Wi-Fi > Wi-Fi Status The following table describes the labels in this screen. Table 16 Wi-Fi > Wi-Fi Status LABEL DESCRIPTION Wi-Fi Status SSID 1 / SSID2 The SSID (Service Set IDentity) identifies the service set with which a wireless device is associated. - Page 39 Chapter 5 Wi-Fi Figure 22 Wi-Fi > Wi-Fi Settings The following table describes the labels in this screen. Table 17 Wi-Fi > Wi-Fi Settings LABEL DESCRIPTION SSID 1 / SSID 2 Select SSID 1 (or SSID 2) to configure the basic wireless settings. Enable SSID 1 (or Select the check box to enable the wireless LAN of the LTE4506.
-
Page 40: Mac Filter Screen
Chapter 5 Wi-Fi Table 17 Wi-Fi > Wi-Fi Settings LABEL DESCRIPTION Encryption Select WPA, WPA2, or WPA/WPA2 to add security on this wireless network. The wireless clients Mode which want to associate to this network must have same wireless security settings as the LTE4506. When you select to use a security, additional options appears in this screen. - Page 41 Chapter 5 Wi-Fi Use this screen to view your LTE4506’s MAC filter settings and add new MAC filter rules. Click Wi-Fi > MAC Filter. The screen appears as shown. Figure 23 Wi-Fi > MAC Filter The following table describes the labels in this screen. Table 18 Wi-Fi >...
-
Page 42: Wps Screen
Chapter 5 Wi-Fi Table 18 Wi-Fi > MAC Filter (continued) LABEL DESCRIPTION Apply Click Apply to save your changes back to the LTE4506. Reset Click Reset to reload the previous configuration for this screen. 5.5 WPS Screen Use this screen to configure Wi-Fi Protected Setup (WPS) on your LTE4506. WPS allows you to quickly set up a wireless network with strong security, without having to configure security settings manually. -
Page 43: Technical Reference
Chapter 5 Wi-Fi Table 19 Wi-Fi > WPS (continued) LABEL DESCRIPTION Select WPS • Select PBC to set up a WPS wireless network using Push Button Configuration (PBC). Method If you select PBC, click Activate to add another WPS-enabled wireless device (within wireless range of the LTE4506) to your wireless network. - Page 44 Chapter 5 Wi-Fi Figure 25 Example of a Wireless Network The wireless network is the part in the blue circle. In this wireless network, devices A and B use the access point (AP) to interact with the other devices (such as the printer) or with the Internet. Your LTE4506 is the Every wireless network must follow these basic guidelines.
-
Page 45: Additional Wireless Terms
Chapter 5 Wi-Fi 5.6.2 Additional Wireless Terms The following table describes some wireless network terms and acronyms used in the LTE4506’s Web Configurator. Table 20 Additional Wireless Terms TERM DESCRIPTION RTS/CTS Threshold In a wireless network which covers a large area, wireless devices are sometimes not aware of each other’s presence. - Page 46 Chapter 5 Wi-Fi Vanishing Point (which you know was made in 1971) you could use “70dodchal71vanpoi” as your security key. The following sections introduce different types of wireless security you can set up in the wireless network. 5.6.3.1 SSID Normally, the LTE4506 acts like a beacon and regularly broadcasts the SSID in the area. You can hide the SSID instead, in which case the LTE4506 does not broadcast the SSID.
-
Page 47: Signal Problems
Chapter 5 Wi-Fi 5.6.3.4 Encryption Wireless networks can use encryption to protect the information that is sent in the wireless network. Encryption is like a secret code. If you do not know the secret code, you cannot understand the message. The types of encryption you can choose depend on the type of authentication. -
Page 48: Wifi Protected Setup (Wps)
Chapter 5 Wi-Fi 5.6.5 WiFi Protected Setup (WPS) Your LTE4506 supports WiFi Protected Setup (WPS), which is an easy way to set up a secure wireless network. WPS is an industry standard specification, defined by the WiFi Alliance. WPS allows you to quickly set up a wireless network with strong security, without having to configure security settings manually. - Page 49 Chapter 5 Wi-Fi security information to the other, allowing it to join the network. Take the following steps to set up a WPS connection between an access point or wireless router (referred to here as the AP) and a client device using the PIN method. Ensure WPS is enabled on both devices.
- Page 50 Chapter 5 Wi-Fi Figure 26 Example WPS Process: PIN Method ENROLLEE REGISTRAR This device’s WPS PIN: 123456 Enter WPS PIN from other device: START START WITHIN 2 MINUTES SECURE EAP TUNNEL SSID WPA(2)-PSK COMMUNICATION 5.6.5.3 How WPS Works When two WPS-enabled devices connect, each device must assume a specific role. One device acts as the registrar (the device that supplies network and security settings) and the other device acts as the enrollee (the device that receives network and security settings.
- Page 51 Chapter 5 Wi-Fi Figure 27 How WPS Works ACTIVATE ACTIVATE WITHIN 2 MINUTES WPS HANDSHAKE ENROLLEE REGISTRAR SECURE TUNNEL SECURITY INFO COMMUNICATION The roles of registrar and enrollee last only as long as the WPS setup process is active (two minutes). The next time you use WPS, a different device can be the registrar if necessary.
- Page 52 Chapter 5 Wi-Fi Figure 28 WPS: Example Network Step 1 ENROLLEE REGISTRAR SECURITY INFO CLIENT 1 In step 2, you add another wireless client to the network. You know that Client 1 supports registrar mode, but it is better to use AP1 for the WPS handshake with the new client since you must connect to the access point anyway in order to use the network.
- Page 53 Chapter 5 Wi-Fi Figure 30 WPS: Example Network Step 3 EXISTING CONNECTION CLIENT 1 REGISTRAR CLIENT 2 ENROLLEE 5.6.5.5 Limitations of WPS WPS has some limitations of which you should be aware. • WPS works in Infrastructure networks only (where an AP and a wireless client communicate). It does not work in Ad-Hoc networks (where there is no AP).
- Page 54 Chapter 5 Wi-Fi your wireless clients (usually printed on a label on the bottom of the device). If there is an unknown MAC address you can remove it or reset the AP. LTE4506 User’s Guide...
-
Page 55: Router
H A P T E R Router 6.1 Overview This chapter describes how you can configure the management IP address, DHCP settings of your LTE4506, the IP filtering and content filtering settings. The Internet Protocol (IP) address identifies a device on a network. Every networking device (including computers, servers, routers, printers, and so on.) needs an IP address to communicate across the network. -
Page 56: Lan Ip Screen
Chapter 6 Router 6.2 LAN IP Screen Use this screen to view or configure the management IP address for your LTE4506. To access this screen, click Router > LAN IP. Note: If you change the LTE4506’s IP address, you need to use the new IP address to access the LTE4506’s Web Configurator. - Page 57 Chapter 6 Router Figure 32 Router > DHCP Server The following table describes the labels in this screen. Table 23 Router > DHCP Server LABEL DESCRIPTION DHCP Settings Enable DHCP Server Select the check box to enable the DHCP server on the LTE4506. Start IP The LTE4506 is pre-configured with a pool of 240 IP addresses starting from 192.168.0.10 to 192.168.0.250.
-
Page 58: Dns Settings Screen
Chapter 6 Router 6.4 DNS Settings Screen Click Router > DNS Settings to configure the LTE4506’s DNS settings. The following screen displays. Figure 33 Router > DNS Settings The following table describes the labels in this screen. Table 24 Router > DNS Settings LABEL DESCRIPTION DNS Mode... -
Page 59: Ipv4/Port Filter Screen
Chapter 6 Router Table 25 Router > Connected Devices LABEL DESCRIPTION Host Name (If This field displays the device host name. any) IP Address This field displays the IP address that the LTE4506 assigns to the device. 6.6 IPv4/Port Filter Screen The LTE4506 firewall is a packet filtering firewall and restricts access based on the source/destination computer network address of a packet and the type of application. -
Page 60: Ipv6/Port Filter Screen
Chapter 6 Router Table 26 Router > Firewall > IPv4/Port Filter LABEL DESCRIPTION Port This field displays a single port number of the destination or a port range. Enter the port number/range of the destination that define the traffic type, for example TCP port 80 defines web traffic. -
Page 61: Url Filter Screen
Chapter 6 Router Table 27 Router > Firewall > IPv6/Port Filter LABEL DESCRIPTION Port This field displays a single port number of the source or a port range. Enter the port number/range of the source that define the traffic type, for example TCP port 80 defines web traffic. -
Page 62: Ip/Port Forwarding Screen
Chapter 6 Router Table 28 Router > Firewall > URL Filter LABEL DESCRIPTION URL Filtering Select Whitelist to allow users to access the websites that match the filtering rules defined on this Policy screen. Select Blacklist to block users to access the websites that match the filtering rules defined on this screen. -
Page 63: Dos Attack Screen
Chapter 6 Router Table 29 Router > Firewall > IP/Port Forwarding (continued) LABEL DESCRIPTION Private IP This field displays the inside IP address of the server. Enter the inside IP address of the virtual server here. Private Port A private port is a port that causes (or triggers) the LTE4506 to record the IP address of the LAN computer that sent the traffic to a server on the WAN. -
Page 64: Alg Screen
Chapter 6 Router Table 30 Router > Firewall > DoS Attack (continued) LABEL DESCRIPTION SYN Flood SYN (synchronize) flood is an attack that attackers flood SYN packets to a server in TCP handshakes, and not respond with ACK packets on purpose. This keeps the server waiting for attackers’... -
Page 65: Upnp Screen
Chapter 6 Router The following table describes the labels in this screen. Table 31 Router > Firewall > ALG LABEL DESCRIPTION Application Layer Gateway (ALG) Settings FTP ALG Select Enable for File Transfer Protocol (FTP) ALG to detect FTP traffic and help build FTP sessions through the LTE4506, otherwise select Disable. -
Page 66: Icmp Screen
Chapter 6 Router 6.13 ICMP Screen If an outside user attempts to probe an unsupported port on your LTE4506, an Internet Control Message Protocol (ICMP) response packet is automatically returned. This allows the outside user to know the LTE4506 exists. Your LTE4506 supports anti-probing, which prevents the ICMP response packet from being sent. -
Page 67: How Arp Works
Chapter 6 Router 6.14.1 How ARP Works When an incoming packet destined for a host device on a local area network arrives at the device, the device's ARP program looks in the ARP table and, if it finds the address, sends it to the device. If no entry is found for the IP address, ARP broadcasts the request to all the devices on the LAN. -
Page 68: Dmz Screen
Chapter 6 Router Table 34 Router > Firewall > ARP (continued) LABEL DESCRIPTION Apply Click this button to save your changes back to the LTE4506. Reset Click Reset to reload the previous configuration for this screen. 6.15 DMZ Screen DMZ allows other devices over the Internet to access a DMZ host device within your local network. DMZ, which stands for "DeMilitarized Zone", is a network between the WAN and the LAN that is open to the WAN but still has firewall protection. -
Page 69: Remote Management Screen
Chapter 6 Router even if they do not know your IP address. First of all, you need to register a dynamic DNS account with www.dyndns.org. This is for people with a dynamic IP from their ISP or DHCP server that would still like to have a domain name. The Dynamic DNS service provider will give you a password or key. -
Page 70: Telnet Screen
Chapter 6 Router Figure 46 Remote Management From the WAN Use the following screen to enable remote management from the WAN on the LTE4506. To access this screen, click Router > Remote management. Figure 47 Router > Remote management The following table describes the labels in this screen. Table 37 Router >... - Page 71 Chapter 6 Router Figure 48 Router > Telnet The following table describes the labels in this screen. Table 38 Router > Telnet LABEL DESCRIPTION Telnet Access Select the check box to enable access to the LTE4506 via Telnet on the LAN. WAN Port Select the check box to enable access to the LTE4506 via Telnet on the WAN and enter the port number.
-
Page 72: Applications
H A P T E R Applications 7.1 Overview This chapter shows you how to set up a contact list, send and view the text messages. SMS (Short Message Service) allows you to send and view the text messages that the LTE4506 received from mobile devices or the service provider. -
Page 73: Sim Contacts Screen
Chapter 7 Applications Figure 49 Application > Contacts > Contact List The following table describes the labels in this screen. Table 39 Application > Contacts > Contact List LABEL DESCRIPTION Delete Select the check box which next to the contact name and click Delete to remove the entry. Click New to create a new entry. -
Page 74: New Sms Screen
Chapter 7 Applications Figure 51 Application > Contacts > Contacts Settings The following table describes the labels in this screen. Table 41 Application > Contacts > Contacts Settings LABEL DESCRIPTION Import Contacts Import from File Click Choose File/Browse to find the .csv file you want to upload. Remember that you must decompress compressed (.zip) files before you can upload them. -
Page 75: Inbox Screen
Chapter 7 Applications Figure 52 Application > Short Message > New SMS 7.6 Inbox Screen Use this screen to view messages received on the LTE4506. To access this screen, click Application > Short Message > Inbox. Figure 53 Application > Short Message > Inbox The following table describes the labels in this screen. -
Page 76: Draft Screen
Chapter 7 Applications Figure 54 Application > Short Message > Outbox The following table describes the labels in this screen. Table 43 Application > Short Message > Outbox LABEL DESCRIPTION Delete All Click Delete All to remove all messages. This field displays the index number of the message. This field displays the name the message is sent to. -
Page 77: Sim Sms Screen
Chapter 7 Applications Table 44 Application > Short Message > Draft (continued) LABEL DESCRIPTION Content This field displays the content of the message. Action Click Delete to remove the message record. Click Send to deliver the message. 7.9 SIM SMS Screen Use this screen to view messages received on the SIM card. -
Page 78: System
H A P T E R System 8.1 Overview Use the system screens to configure general LTE4506 settings. 8.1.1 What You Can Do in this Chapter • Use the System Information screen to view basic information about the LTE4506 and restart the LTE4506 (Section 8.2 on page 78). - Page 79 Chapter 8 System Figure 57 System > System Information The following table describes the labels in this screen. Table 46 System > System Information LABEL DESCRIPTION About the 4G Hotspot Firmware This displays the current firmware version of the LTE4506. Version IMEI This displays the International Mobile Equipment Number (IMEI) which is the serial number of the...
-
Page 80: User Account Screen
Chapter 8 System Table 46 System > System Information (continued) LABEL DESCRIPTION Bridge Mode Enable Bridge Select this if you want the LTE4506 to work in bridge mode. Mode Apply Click this button to save your changes back to the LTE4506. Reset Click Reset to reload the previous configuration for this screen. -
Page 81: Settings Profile Screen
Chapter 8 System The following table describes the labels in this screen. Table 47 System > User Account LABEL DESCRIPTION Login Web URL Setting Web Domain Name Enter the domain name you want to give to the LTE4506. Apply Click Apply to save your Login Web URL Setting changes back to the LTE4506. User Settings Username Enter your user name of the system account. -
Page 82: Reset Settings
Chapter 8 System Figure 59 System > Settings Profile 8.4.1 Reset Settings Click the Restore button to clear all user-entered configuration information and return the LTE4506 to its factory defaults. The LTE4506 automatically restarts. You can also press the Reset button on the rear panel to reset the factory defaults of your LTE4506. Refer Section 1.8 on page 13 for more information on the Reset button. -
Page 83: Import & Export Settings Profile
Chapter 8 System Table 48 System > Settings Profile LABEL DESCRIPTION Saved Date This field displays the saved time and date of the profile. Action Click Apply to use the configuration to the LTE4506. Click Delete to go to the screen where you can remove the profile. 8.4.3 Import &... -
Page 84: Time Settings Screen
Chapter 8 System Figure 60 System > Firmware Upgrade 8.6 Time Settings Screen For effective scheduling and logging, the LTE4506 system time must be accurate. The LTE4506 has a software mechanism to get the current time and date from an external server. To change your LTE4506’s time zone, click System >... - Page 85 Chapter 8 System Figure 61 System > Time Settings LTE4506 User’s Guide...
- Page 86 Chapter 8 System The following table describes the labels in this screen. Table 49 System > Time Settings LABEL DESCRIPTION Date & Time Device time This field displays the present time and date of your LTE4506. Set Automatically Select Prefer Cellular Service Time to have the LTE4506 get the time and date from the cellular service server.
-
Page 87: System Log Screen
Chapter 8 System 8.7 System Log Screen Use this screen to specify which logs to display and to where the LTE4506 is to send logs. Click System > System Log. The screen displays as shown. Figure 62 System > System Log he following table describes the labels in this screen. - Page 88 Chapter 8 System Table 50 System > System Log LABEL DESCRIPTION Apply Click Apply to save your changes back to the LTE4506. Reset Click Reset to reload the previous configuration for this screen. System Log Display The log wraps around and deletes the old entries after it fills. Select what logs you want to see from the Log Level drop list.
-
Page 89: Troubleshooting
H A P T E R Troubleshooting 9.1 Overview This chapter offers some suggestions to solve problems you might encounter. The potential problems are divided into the following categories. • Power and Hardware Installation • LTE4506 Access and Login • Internet Access •... -
Page 90: Internet Access
Chapter 9 Troubleshooting Make sure you are using the correct IP address. • The default IP address is 192.168.1.1. • If you changed the IP address, use the new IP address. • If you changed the IP address and have forgotten it, see the troubleshooting suggestions for LTE4506 Access and Login Make sure the LTE4506 is correctly installed and turned on. -
Page 91: Wireless Connections
Chapter 9 Troubleshooting Make sure you insert a 4G SIM card into the card slot before turning on the LTE4506. Make sure your mobile access information (such as APN) is entered correctly in the WAN screen. These fields are case-sensitive, so make sure [Caps Lock] is not on. Check with your service provider for the correct APN if you do not have it. -
Page 92: Getting More Troubleshooting Help
Chapter 9 Troubleshooting Make sure the wireless adapter (installed on your computer) is IEEE 802.11 compatible and supports the same wireless standard as the LTE4506’s active radio. Make sure your computer (with a wireless adapter installed) is within the transmission range of the LTE4506. -
Page 93: Appendix A Customer Support
• Brief description of the problem and the steps you took to solve it. Corporate Headquarters (Worldwide) Taiwan • Zyxel Communications Corporation • http://www.zyxel.com Asia China • Zyxel Communications (Shanghai) Corp. Zyxel Communications (Beijing) Corp. Zyxel Communications (Tianjin) Corp. • https://www.zyxel.com/cn/zh/ India • Zyxel Technology India Pvt Ltd. • https://www.zyxel.com/in/en/ Kazakhstan •... - Page 94 • Zyxel Singapore Pte Ltd. • http://www.zyxel.com.sg Taiwan • Zyxel Communications Corporation • https://www.zyxel.com/tw/zh/ Thailand • Zyxel Thailand Co., Ltd. • https://www.zyxel.com/th/th/ Vietnam • Zyxel Communications Corporation-Vietnam Office • https://www.zyxel.com/vn/vi Europe Belarus • Zyxel BY • https://www.zyxel.by Belgium • Zyxel Communications B.V. • https://www.zyxel.com/be/nl/...
- Page 95 Appendix A Customer Support • https://www.zyxel.com/be/fr/ Bulgaria • Zyxel България • https://www.zyxel.com/bg/bg/ Czech Republic • Zyxel Communications Czech s.r.o • https://www.zyxel.com/cz/cs/ Denmark • Zyxel Communications A/S • https://www.zyxel.com/dk/da/ Estonia • Zyxel Estonia • https://www.zyxel.com/ee/et/ Finland • Zyxel Communications • https://www.zyxel.com/fi/fi/ France •...
- Page 96 • Zyxel Communications Poland • https://www.zyxel.com/pl/pl/ Romania • Zyxel Romania • https://www.zyxel.com/ro/ro Russia • Zyxel Russia • https://www.zyxel.com/ru/ru/ Slovakia • Zyxel Communications Czech s.r.o. organizacna zlozka • https://www.zyxel.com/sk/sk/ Spain • Zyxel Communications ES Ltd. • https://www.zyxel.com/es/es/ Sweden • Zyxel Communications • https://www.zyxel.com/se/sv/ Switzerland •...
- Page 97 Appendix A Customer Support Turkey • Zyxel Turkey A.S. • https://www.zyxel.com/tr/tr/ • Zyxel Communications UK Ltd. • https://www.zyxel.com/uk/en/ Ukraine • Zyxel Ukraine • http://www.ua.zyxel.com South America Argentina • Zyxel Communications Corporation • https://www.zyxel.com/co/es/ Brazil • Zyxel Communications Brasil Ltda. • https://www.zyxel.com/br/pt/ Colombia •...
- Page 98 Appendix A Customer Support Middle East • Zyxel Communications Corporation • https://www.zyxel.com/me/en/ North America • Zyxel Communications, Inc. – North America Headquarters • https://www.zyxel.com/us/en/ Oceania Australia • Zyxel Communications Corporation • https://www.zyxel.com/au/en/ Africa South Africa • Nology (Pty) Ltd. • https://www.zyxel.com/za/en/...
-
Page 99: Appendix B Common Services
P P E N D I X Common Services The following table lists some commonly-used services and their associated protocols and port numbers. For a comprehensive list of port numbers, ICMP type or code numbers and services, visit the IANA (Internet Assigned Number Authority) web site. - Page 100 Appendix B Common Services Table 51 Commonly Used Services (continued) NAME PROTOCOL PORT(S) DESCRIPTION ICMP User-Defined Internet Control Message Protocol is often used for diagnostic or routing purposes. 4000 This is a popular Internet chat program. IGMP (MULTICAST) User-Defined Internet Group Management Protocol is used when sending packets to a specific group of hosts.
- Page 101 Appendix B Common Services Table 51 Commonly Used Services (continued) NAME PROTOCOL PORT(S) DESCRIPTION TCP/UDP Secure Shell Remote Login Program. STRM WORKS 1558 Stream Works Protocol. SYSLOG Syslog allows you to send system logs to a UNIX server. TACACS Login Host Protocol used for (Terminal Access Controller Access Control System).
-
Page 102: Appendix C Legal Information
The contents of this publication may not be reproduced in any part or as a whole, transcribed, stored in a retrieval system, translated into any language, or transmitted in any form or by any means, electronic, mechanical, magnetic, optical, chemical, photocopying, manual, or otherwise, without the prior written permission of Zyxel Communications Corporation. Published by Zyxel Communications Corporation. All rights reserved. - Page 103 Appendix C Legal Information • This radio transmitter has been approved by Innovation, Science and Economic Development Canada to operate with the antenna types listed below with the maximum permissible gain and required antenna impedance for each antenna type indicated. Antenna types not included in this list, having a gain greater than the maximum gain indicated for that type, are strictly prohibited for use with this device.
- Page 104 Appendix C Legal Information Български С настоящото Zyxel декларира, че това оборудване е в съответствие със съществените изисквания и другите (Bulgarian) приложими разпоредбите на Директива 2014/53/ЕC. National Restrictions • The Belgian Institute for Postal Services and Telecommunications (BIPT) must be notified of any outdoor wireless link having a range exceeding 300 meters.
- Page 105 Appendix C Legal Information Română Prin prezenta, Zyxel declară că acest echipament este în conformitate cu cerinţele esenţiale şi alte prevederi relevante ale (Romanian) Directivei 2014/53/UE. Slovenčina Zyxel týmto vyhlasuje, že zariadenia spĺňa základné požiadavky a všetky príslušné ustanovenia Smernice 2014/53/EÚ. (Slovak) Slovenščina Zyxel izjavlja, da je ta oprema v skladu z bistvenimi zahtevami in ostalimi relevantnimi določili direktive 2014/53/EU.
- Page 106 Appendix C Legal Information List of national codes COUNTRY ISO 3166 2 LETTER CODE COUNTRY ISO 3166 2 LETTER CODE Austria Liechtenstein Belgium Lithuania Bulgaria Luxembourg Croatia Malta Cyprus Netherlands Czech Republic Norway Denmark Poland Estonia Portugal Finland Romania France Serbia Germany Slovakia...
- Page 107 Appendix C Legal Information Le symbole ci-dessous signifie que selon les réglementations locales votre produit et/ou sa batterie doivent être éliminés séparément des ordures ménagères. Lorsque ce produit atteint sa fin de vie, amenez-le à un centre de recyclage. Au moment de la mise au rebut, la collecte séparée de votre produit et/ou de sa batterie aidera à...
- Page 108 Appendix C Legal Information Environmental Product Declaration LTE4506 User’s Guide...
- Page 109 Appendix C Legal Information 台灣 以下訊息僅適用於產品具有無線功能且銷售至台灣地區 • 第十二條 經型式認證合格之低功率射頻電機,非經許可,公司,商號或使用者均不得擅自變更頻率、加大功率或變更原設計之特性及功能。 • 第十四條 低功率射頻電機之使用不得影響飛航安全及干擾合法通信;經發現有干擾現象時,應立即停用,並改善至無干擾時方得繼續使用。 前項合法通信,指依電信法規定作業之無線電通信。 低功率射頻電機須忍受合法通信或工業、科學及醫療用電波輻射性電機設備之干擾。 • 無線資訊傳輸設備忍受合法通信之干擾且不得干擾合法通信;如造成干擾,應立即停用, 俟無干擾之虞,始得繼續使用。 • 無線資訊傳設備的製造廠商應確保頻率穩定性,如依製造廠商使用手冊上所述正常操作, 發射的信號應維持於操作頻帶中 • 使用無線產品時,應避免影響附近雷達系統之操作。 • 高增益指向性天線只得應用於固定式點對點系統。 以下訊息僅適用於產品屬於專業安裝並銷售至台灣地區 • 本器材須經專業工程⼈員安裝及設定,始得設置使用,且不得直接販售給⼀般消費者。 安全警告 - 為了您的安全,請先閱讀以下警告及指示 : • 請勿將此產品接近水、火焰或放置在高溫的環境。 • 避免設備接觸 : - 任何液體 - 切勿讓設備接觸水、雨水、高濕度、污水腐蝕性的液體或其他水份。 - 灰塵及污物...
- Page 110 Appendix C Legal Information Explanation of the Symbols SYMBOL EXPLANATION Alternating current (AC): AC is an electric current in which the flow of electric charge periodically reverses direction. Direct current (DC): DC if the unidirectional flow or movement of electric charge carriers. Earth;...
-
Page 111: Index
Index Index Numbers enable Broadband button 2G/3G/4G connection One-Touch status power 3G module Reset serial number 4G+ home-spot wireless router certifications viewing access Challenge Handshake Authentication Protocol access point (AP) 38, 39 (CHAP) Access Point Name (APN) channel Address Resolution Protocol (ARP) wireless LAN ad-hoc network channel number... - Page 112 Index Environmental Product Declaration ESSID Extended Service Set IDentification data usage data flow from/to the LTE4506 data fragment threshold data limit FCC EMC Statement FCC Radiation Exposure Statement Data Usage/Statistic screen File Transfer Protocol (FTP) ALG date filters Daylight Saving Time (DST) MAC address 40, 46 DDNS Settings screen...
- Page 113 Index ICMP settings ICMP (Internet Control Message Protocol) flood Java permissions ICMP screen JavaScripts icon Internet connection language log out roaming LAN IP screen service provider signal strength language icon SIM card WiFi network Internet connection status IEEE 802.11 compatible mobile network quality power signal IEEE 802.11b/g/n...
- Page 114 Index MAC (Media Access Control) address One-Touch button MAC address Open Source License filter 40, 46 Outbox screen LTE4506 overview wireless network LTE4506 MAC authentication MAC Filter screen maintenance management managing the device packets good habits received menu transmitted Applications password Home default...
- Page 115 Index Session Initiation Protocol (SIP) ALG Push Button Configuration (PBC) settings 43, 48 save current Push Button Configuration, see PBC Settings Profile screen Setup Wizard signal strength icon status Radio Equipment Directive, RED SIM card RADIUS server contact list saved Real Time Streaming (media control) Protocol phone number (RTSP)
- Page 116 Index time Time Settings screen time zone Wide Area Network, see WAN title bar WAN (Wide Area Network) TKIP warranty note traffic flow data warranty period LTE4506 traffic statistics LTE4506 web browser pop-up window Trivial File Transfer Protocol (TFTP) ALG Web Configurator 10, 15 access...
- Page 117 Index limitations MAC address filter 40, 46 overview preamble RADIUS server RTS/CTS threshold security SSID WPA-PSK 48, 50 WPS example WPS limitations wireless network MAC address wireless security level 40, 42, 47 WPA/WPA2 WPA2 WPA-PSK 45, 47 48, 50 example 50, 51 limitations PIN example...
Need help?
Do you have a question about the LTE4506-M606 and is the answer not in the manual?
Questions and answers