
Related Manuals for ALDI Workzone WAC 3050/1


Summary of Contents for ALDI Workzone WAC 3050/1
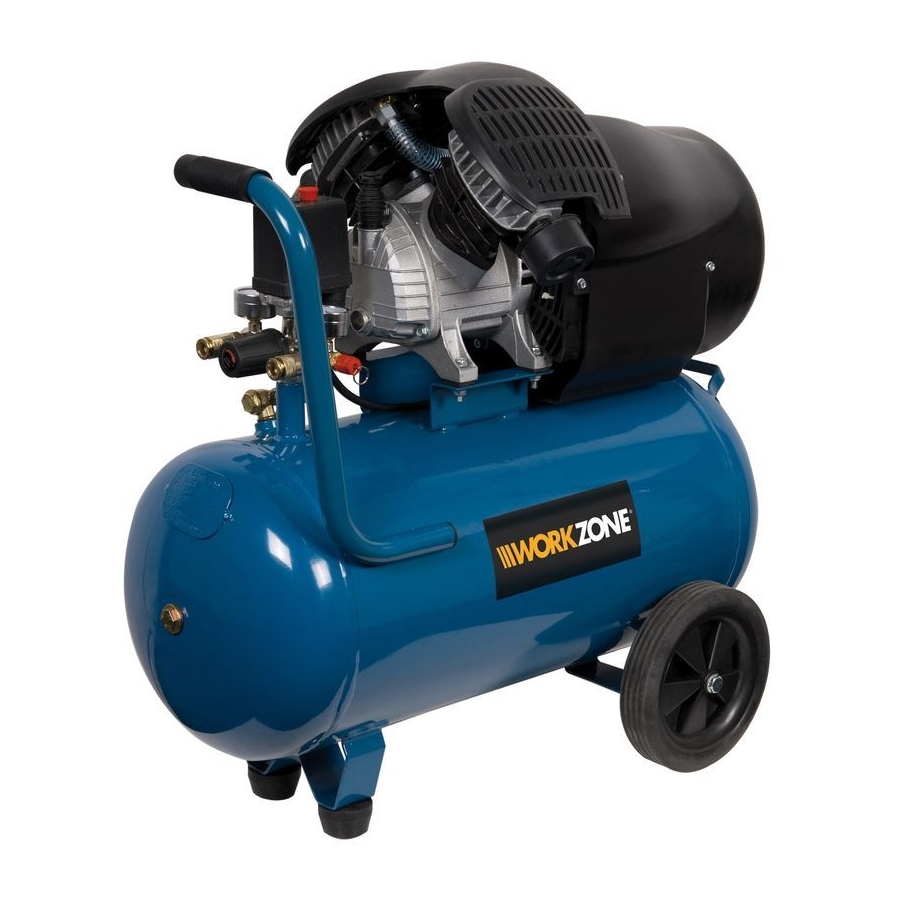
- Page 1 User Manual Spend a little Live a lot 3HP 50 L AIR COMPRESSOR WAC 3050/1 Original instructions ID: #05007...
- Page 2 Try it out now Just scan the QR code with your smartphone and find out more about the Aldi product you have purchased.* Your Aldi Service Portal All details mentioned above can also be found in the Aldi Service Portal at www.aldi.co.uk.
-
Page 3: Table Of Contents
Contents Overview ................4 Use ..................5 Product contents/device parts ...........6 General information ............7 Reading and storing the user manual ........7 Explanation of symbols ............7 Safety ...................8 Proper use ................. 8 Residual risks ................9 Safety notes ................10 Safety notes when spray painting ........12 Safety notes for the compressor........... -
Page 5: Use
Max 10° max. min. -
Page 6: Product Contents/Device Parts
Product contents/device parts Overload switch Support foot bracket Air filter, 2× Oil fill opening Handle Wheel, 2× Drain cock for condensed water (drain valve) Screw, 2× Support foot, 2× Washer, 8× Nut, 4× Axle screw, 2× Spring washer, 2 × Oil drain plug Safety valve Quick coupling 2×... -
Page 7: General Information
General information General information Reading and storing the user manual This user manual accompanies this 50 Litre Air Compressor. It contains important information on start-up and handling. For improved readabili- ty, the 50 Litre Air Compressor will be referred to only as the “compressor” below. -
Page 8: Safety
Safety The certified safety seal confirms that the compressor is safe if used as foreseeable. The test seal confirms conformity with the German Product Safety Act. Wear ear protection. The guaranteed sound power level L is 96 dB. Warning: The compressor may start without warning. Warning of hot parts. -
Page 9: Residual Risks
Safety The manufacturer or vendor accepts no liability for damage caused by improper or incorrect use. Only accessories that are suitable for the compressor may be used. Persons who operate the compressor and perform maintenance must be familiarised with it and be advised of possible risks. Furthermore, every aspect of applicable acci- dent prevention guidelines must be exactly adhered to. -
Page 10: Safety Notes
Safety Safety notes Attention! When using this compressor, the following general safety meas- ures must be taken in order to provide protection against electric shocks, risks of injury and fire. Read and take note of these instructions before you use the device. 1. - Page 11 Safety 10. Take good care of your compressor. • Keep your compressor clean to ensure that you can work safely and effectively. • Follow the maintenance guidelines. • Check the connector cable and the plug of the compressor regularly and have it replaced by a qualified professional in case of damage.
-
Page 12: Safety Notes When Spray Painting
Safety 17. Have your power tool repaired by an electrical technician. • This power tool complies with applicable safety regulations. Repairs may only be performed by an electrician who uses original replacement parts; otherwise, there is a risk of accident for the operator. 18. -
Page 13: Safety Notes For The Compressor
Safety Safety notes for the compressor ATTENTION! For your own safety, only operate the compressor after you have read the safety notes. WARNING! Danger of explosion! Operating the compressor in an unsuitable location without adequate venti- lation, at an unsuitable ambient temperature or in a room where dust, acids, vapours or flammable gases are present poses a risk of explosion. - Page 14 Safety − Never create holes or welded seams on the compressed air tank and nev- er change its shape. − Never operate the compressor if it is damaged or deformed. − Make sure that the compressed air tank is always vented before separat- ing the connections, connecting or removing pneumatic tools.
- Page 15 Safety WARNING! Burn hazard! Parts of the compressor such as the assembly comprising the head, cylinder and air line may become hot during operation. You could burn yourself on them. − Do not touch the assembly comprising the head, cylinder and air line dur- ing operation to avoid burns.
-
Page 16: First Use
First use First use Checking the compressor and product contents WARNING! Risk of swallowing and choking! Children must not play with plastic bags, wrappers and small parts. There is a risk of being swallowed and suffocation. − Keep children away from the compressor, small parts and the packaging material. - Page 17 First use 8. Use 2 open-ended spanners to tighten the axle screw. Use one open-ended span- ner to hold the nut in place and with the second open-ended spanner, tighten the axle screw. 9. Repeat steps 2 to 8 with the second wheel. The wheels have now been mounted.
-
Page 18: Start-Up
Start-up Mounting the air filters Before operating the compressor for the first time, you must mount the two air filters to the right and left of the motor unit. To do so, proceed as follows (see fig. D): 1. With a screwdriver, remove the two transport caps for the air filters to the right and left of the motor unit. -
Page 19: Using The Compressor
Start-up Tip: A pressure monitor controls the compressor. The compressor switch- es off once the pressure in the compressed air tank reaches the set maximum level and it switches back on when the pressure in the compressed air tank drops to the set minimum level. By factory de- fault, a maximum value of 8 bar and a minimum value of 6 bar are set. -
Page 20: Starting The Compressor After An Overload
Cleaning and maintenance 9. To increase the operating pressure, turn the pressure regulator clockwise. To reduce the pressure, turn the pressure regulator counterclockwise (see fig. A and H). You can read the set pressure on the operating pressure gauge You can read the pressure of the air contained in the compressed air tank on the tank pressure gauge . - Page 21 Cleaning and maintenance WARNING! Risk of electric shock! Water that has penetrated the housing may cause a short circuit. There is a risk of electric shock. − Never immerse the compressor in water. − Never use a high-pressure cleaner to clean the compressor. −...
-
Page 22: Cleaning The Compressor
Cleaning and maintenance Cleaning the compressor to the “0” position by pulling it out slightly (see fig. G). 1. Set the On/Off switch 2. Disconnect the mains plug before cleaning. 3. Let the compressor cool off completely. 4. Vent the compressor via the connected pneumatic tool or the drain cock for con- densed water (see fig. -
Page 23: Draining Condensed Water
Cleaning and maintenance Draining condensed water NOTICE! Risk of damage! Tipping the compressor over too far or turning it upside down could cause oil to leak and the compressor could be damaged as a result. − Never tip the compressor by more than 10°. −... -
Page 24: Adding And Changing Oil
Cleaning and maintenance 7. Let the condensed water drain completely. 8. Close the drain cock for condensed water. Repeat the process regularly depending on how much and how intensely you use the device (e.g. weekly). Adding and changing oil NOTICE! Risk of damage! Unsuitable oil or an insufficient or excessive amount of oil in the compressor could damage it. -
Page 25: Replacing The Mains Connection Line
Cleaning and maintenance Changing the oil The compressor is shipped with the synthetic oil SAE 10W40. Completely replace the oil of the pump system after the first 100 hours of operation. You will need an open-end- ed spanner or a ring spanner with a width of AF 24. 1. -
Page 26: Transport
Transport Transport WARNING! Risk of electric shock! Transporting the compressor while it is operating poses a risk of electric shock. − Switch the compressor off each time before you transport it and pull the mains plug. NOTICE! Risk of damage! If you do not transport the compressor properly, tip it or turn it upside down, it may be damaged or fluids may leak. -
Page 27: Storage
Storage Storage NOTICE! Risk of damage! The compressor can be damaged as the result of incorrect or improper storage. − Pull the mains plug each time before you store the device. − Only store the compressor and all connected pneumatic tools in a vented state. -
Page 28: Troubleshooting
Troubleshooting Troubleshooting Problem Cause Solution The compressor doesn’t No mains voltage is − Check the cable, mains start. present. plug, safety valve and socket. The mains voltage is too − Make sure that the low. mains voltage corre- sponds to the specifi- cation on the name- plate. - Page 29 Troubleshooting Troubleshooting Problem Cause Solution The compressor is run- The gaskets are defective. − Check the gaskets. ning, but no pressure is − Have defective gas- created. kets replaced by a specialist workshop or customer service. The drain cock for con- −...
-
Page 30: Ordering Spare Parts
Ordering spare parts Ordering spare parts Contact the manufacturer at the service address specified on the warranty card if you need spare parts. The following data should be provided when ordering spare parts: • Device type • EH product number of the device (see data plate) •... -
Page 31: Technical Data
Technical data Technical data Model: WAC 3050/1 Nominal voltage: 230 V ~ Nominal frequency: 50 Hz Input power: 2.2 kW Idle speed n 2850 rpm IP code compressor: IP20 IP code motor: IP23 Tank contents: 50 litres Theoretical suction capacity: 412 l/min Max. -
Page 32: Disposal
Disposal Disposal Disposal Disposing of the packaging Dispose of the packaging separated into single type materials. Dispose of cardboard and carton as waste paper and foils via the recyclable ma- terial collection service. Disposing of the compressor Dispose of the compressor in accordance with the applicable disposal regulations for your country. -
Page 33: Declaration Of Conformity
Declaration of conformity Declaration of conformity Einhell Germany AG · Wiesenweg 22 · D-94405 Landau/Isar Konformitätserklärung erklärt folgende Konformität gemäß EU-Richtlinie und deklaruje zgodność wymienionego poniżej artykułu z Normen für Artikel następującymi normami na podstawie dyrektywy WE. GB explains the following conformity according to EU directi- BG декларира... - Page 34 AFTER SALES SUPPORT 0044 151 649 1500 www.isc-gmbh.info 0044 1890 946 244...
-
Page 35: Warranty Card
WARRANTY CARD 3 HP 50 L AIR COMPRESSOR WAC 3050/1 Your details: Name Address E-mail Date of purchase* * We recommend you keep the receipt with this warranty card. Location of purchase Description of malfunction: If after contacting the manufacturer you AFTER SALES SUPPORT are requested to return the faulty product 0044 151 649 1500... -
Page 36: Warranty Conditions
Warranty conditions Dear Customer, The ALDI warranty offers you extensive benefits: Warranty period: 3 years from date of purchase. Costs: Free repair/exchange. No transport costs. ADVICE: Please contact our service hotline by phone, e-mail or fax before sending in the device. This allows us to provide support in the event of possible operator errors. - Page 40 PRODUCED IN CHINA FOR: ALDI STORES LTD. PO BOX 26, ATHERSTONE WARWICKSHIRE, CV9 2SH ALDI STORES (IRELAND) LTD.
Need help?
Do you have a question about the Workzone WAC 3050/1 and is the answer not in the manual?
Questions and answers