Table of Contents
Advertisement
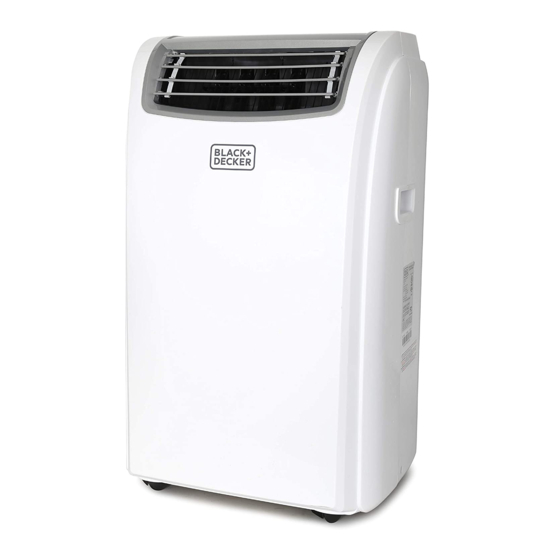
12,000 & 14,000 BTU
PORTABLE AIR CONDITIONER
INSTRUCTION MANUAL
CATALOG NUMBER
BPACT12**
BPACT14**
Thank you for choosing BLACK+DECKER!
PLEASE READ BEFORE RETURNING THIS PRODUCT FOR
ANY REASON.
If you have a question or experience a problem with your BLACK+DECKER
purchase, go to www.blackanddecker.com/instantanswers
If you can't find the answer or do not have access to the Internet, call
844-299-0879 from 10:30 a.m. to 6:30 p.m. EST Mon. - Fri. to speak with an
agent. Please have the catalog number available when you call.
SAVE THIS MANUAL FOR FUTURE REFERENCE.
Advertisement
Table of Contents
Troubleshooting

Related Manuals for Black+Decker BPACT12 Series


Summary of Contents for Black+Decker BPACT12 Series
- Page 1 PLEASE READ BEFORE RETURNING THIS PRODUCT FOR ANY REASON. If you have a question or experience a problem with your BLACK+DECKER purchase, go to www.blackanddecker.com/instantanswers If you can’t find the answer or do not have access to the Internet, call 844-299-0879 from 10:30 a.m.
-
Page 2: Table Of Contents
Before You Call For Service ..........................20 Customer Service ..............................20 Troubleshooting ..............................21 Limited Warranty ...................................22 PRODUCT REGISTRATION Thank you for purchasing our BLACK+DECKER product. This Model number easy-to-use manual will guide you in getting the best use of your air conditioner. Serial number Remember to record the model and serial numbers. -
Page 3: Safety Information
SAFETY INFORMATION DANGER WARNING CAUTION DANGER - Immediate hazards WARNING - Hazards or unsafe CAUTION - Hazards or unsafe which WILL result in severe practices which COULD result in practices which COULD result in personal injury or death severe personal injury or death minor personal injury IMPORTANT SAFETY INSTRUCTIONS WARNING... - Page 4 SAFETY INFORMATION HANDLING ALKALINE BATTERIES WARNING When handling alkaline batteries, basic safety precautions should be followed, including the following Should fluid from the battery accidentally get into your eyes, there is a threat of loss of eyesight, do not rub them. Immediately rinse your eyes with clean tap water and then consult a physician immediately.
-
Page 5: Grounding Instructions
NOTE: Neither BLACK+DECKER nor the dealer can accept any liability for damage to the product or personal injury resulting from failure to observe the electrical connection procedures. -
Page 6: Safety Guidelines
SAFETY INFORMATION SAFETY GUIDELINES To prevent injury to the user or other people and property damage, the following instructions must be followed. Incorrect operation due to ignoring of instructions may cause harm or damage. ALWAYS DO THIS NEVER DO THIS ENERGY SAVE •... -
Page 7: Power Cord Operation
SAFETY INFORMATION POWER CORD OPERATION The power supply cord contains a current device that senses damage to the power cord. To test your supply cord follow these steps: 1. Plug in the Air Conditioner. 2. The power supply cord head has two buttons, a TEST button and a RESET button. -
Page 8: Set Up & Use
SET UP & USE PARTS & FEATURES Control Panel and Remote Control Sensor Air Outlet Grill Filter Handles Air Exhaust Hose Housing Intake Grill Condensation Drain Castors (4) Plug Air Exhaust Hose Hose Outlet Hose Inlet Castor Locks Metal Locking Screw Metal Locking Screw Drip Pan... -
Page 9: Specifications
SET UP & USE SPECIFICATIONS BPACT12 / BPACT14 • Unit Dimensions (W x D x H): 17.1” x 13.8” x 28.1” • Unit Weight: Approx. 59.5 lbs. / 68.3 lbs. • Electric Requirements: 115V ~ 60Hz INSTALLATION GUIDE LOCATION • The air conditioner should be placed on a firm floor to minimize noise and vibration. -
Page 10: Window Slider Kit Installation
SET UP & USE WINDOW SLIDER KIT INSTALLATION Your window slider kit has been designed to fit most standard “Vertical” and “Horizontal” window applications; however, it may be necessary for you to improvise/modify some aspect of the installation procedures for certain types of window. -
Page 11: Exhaust Hose Installation
SET UP & USE EXHAUST HOSE INSTALLATION The air exhaust hose and hose inlet must be installed or removed from the portable air conditioner in accordance with the way it is being used: COOL, AUTO, DEHUMIDIFY: Air exhaust hose and hose inlet should be connected to the portable air conditioner. -
Page 12: Control Panel
SET UP & USE CONTROL PANEL Display Area Fan Speed Selected Mode Indicator Light Indicator Light Mode Selection Fan Speed Button Selection Button ON/OFF Decrease Temp/Time Increase Temp/Time Button Button Pictures are for illustration purpose only. Your model may or may not have all the features. OPERATING FROM THE CONTROL PANEL The Control Panel enables you to manage all the main functions of the appliance, but to fully exploit its potential, you must use the remote... - Page 13 SET UP & USE COOL MODE FAN MODE Ideal for hot muggy weather Adjust fan speed by pressing when you need to cool and the Fan Speed button as dehumidify the room. To set described for the cool mode. Fig. 9 Fig.
-
Page 14: Control Panel On Remote Control
SET UP & USE CONTROL PANEL ON REMOTE CONTROL Sleep Indicator Indicator Mode Indicator Indicator Timer On/Off Power Indicator Button Mode Button Increase Decrease Timer Button Sleep Fan Speed Button Button Air Swing ˚C / ˚F Button Selector Button CORRECT USE Point the remote control at the receiver on the appliance. -
Page 15: Operating From The Remote Control
SET UP & USE OPERATING FROM THE REMOTE CONTROL The first part of the controls on the remote control are the same as those on the control panel of the appliance. You should therefore refer to the instructions in the chapter Operating from the Control Panel to turn the appliance on and select the operating mode (Cool, Dry, Fan, Heat) and the fan speed. - Page 16 SET UP & USE MAX FUNCTION - Ideal for the summer to cool rooms rapidly. - Activate by simply pressing the MAX button ( ). - The appliance operates in cool mode at fan speed auto. While this function is selected, it is not possible to set the temperature or change fan speed.
- Page 17 SET UP & USE PROGRAMMED SHUTDOWN - With the appliance on, press the TIMER button, the TIMER is displayed under - Set the time when you want the appliance to switch off using the buttons (from 30 minutes to 24 hours). - During the first ten hours you can select half intervals.
-
Page 18: Water Drainage
SET UP & USE WATER DRAINAGE METHOD This air conditioner is equipped with the very latest MIST technology which means the water tank nearly never fills, hence water drainage will generally only be required at the end of the season (see START-END OF SEASON OPERATIONS in page 19. -
Page 19: Cleaning & Care
SET UP & USE CLEANING Before cleaning or maintenance, turn the appliance off by pressing the button on the control panel or button on the remote control. Wait for a few minutes then unplug from the electrical outlet. CLEANING THE CABINET You should clean the appliance with a slightly damp cloth then dry with a dry cloth. -
Page 20: Troubleshooting & Warranty
TROUBLESHOOTING & WARRANTY BEFORE YOU CALL FOR SERVICE IF THE AIR CONDITIONER FAILS TO OPERATE: A) Check to make sure that the air conditioner is plugged in securely. If it is not, remove the plug from the outlet, wait 10 seconds and plug it in again securely. -
Page 21: Troubleshooting
TROUBLESHOOTING & WARRANTY Troubleshoot your problem by using the chart below. If the air conditioner still does not work properly, contact W Appliance Co. customer service center or the nearest authorized service center. Customers must never troubleshoot internal components. TROUBLE POSSIBLE CAUSE POSSIBLE REMEDY Unit does not start when... -
Page 22: Limited Warranty
TROUBLESHOOTING & WARRANTY LIMITED WARRANTY Any repair, replacement, or warranty service, associated with the replacement of the unit. and all questions about this product should be 13. Food loss for loss due to product directed to W Appliance Co. at 844-299-0879 failure or delay in service, repair or from the USA or Puerto Rico. - Page 23 Page 23...
- Page 24 BLACK & DECKER, BLACK+DECKER, the BLACK & DECKER and BLACK+DECKER logos and product names and the orange and black color scheme are trademarks of The Black & Decker Corporation, used under license. All rights reserved. Product in this box may differ slightly from that pictured. Does not affect function.
Need help?
Do you have a question about the BPACT12 Series and is the answer not in the manual?
Questions and answers
BPACT12WT Has not turns on randomly all by its self. Can this be fixed easily.
The Black+Decker BPACT12 Series has a self-diagnosis system that displays error messages for malfunctions. If the unit randomly does not turn on, checking the control panel for error messages can help identify the issue. Additionally, ensuring the power cord is properly connected and the electrical requirements (115V, 60Hz, 15A) are met is recommended. If the problem persists, contacting customer support may be necessary.
This answer is automatically generated