Table of Contents
Advertisement
Advertisement
Table of Contents

Related Manuals for Hitron E31N2V1


Summary of Contents for Hitron E31N2V1
- Page 1 E31N2V1 DOCSIS 3.1 EMTA User’s Guide Version 1.0 - 11/2017...
-
Page 2: About This User's Guide
About This User’s Guide Intended Audience This manual is intended for people who want to configure the E31N2V1’s features via its Graphical User Interface (GUI). How to Use this User’s Guide This manual contains information on each the E31N2V1’s GUI screens, and describes how to use its various features. - Page 3 Settings in the GUI, then Advanced settings. A key stroke is denoted by square brackets and uppercase text. For example: Press [ENTER] to continue. Customer Support For technical assistance or other customer support issues, please consult your Hitron representative. Version 1.0, 11/2017. Copyright 2012 Hitron Technologies Version 1.0, 11/2017.
-
Page 4: Table 1: Default Credentials
Hitron E31N2V1 User’s Guide Default Login Details The E31N2V1’s default IP address and login credentials are as follows. For more information, see Logging in to the E31N2V1 on page 17. Table 1: Default Credentials IP Address 192.168.100.1 Username technician Password... -
Page 5: Table Of Contents
1.3 Battery Operations ................13 1.4 LEDs ....................14 1.5 IP Address Setup ................15 1.5.1 Manual IP Address Setup ............16 1.6 Logging in to the E31N2V1 ............... 17 1.7 GUI Overview ..................17 1.8 Resetting the E31N2V1 ..............18 Status ................... 19 1.1 Status Overview ................ - Page 6 Hitron E31N2V1 User’s Guide 1.1.7 Cable Frequencies ..............24 1.1.8 Modulation ................24 1.1.9 TDMA, FDMA and SCDMA ............25 1.1.10 OFDM ..................25 1.1.11 FFT ..................25 1.1.12 OFDMA ................... 26 1.2 The Status: System Information Screen ........... 26 1.3 The Status: DOCSIS Provisioning Screen ........
-
Page 7: List Of Figures
Hitron E31N2V1 User’s Guide List of Figures Figure 1: Application Overview ................9 Figure 2: Hardware Connections ................11 Figure 3: Power Adaptor ..................13 Figure 4: LEDs ....................14 Figure 5: Login ....................17 Figure 6: GUI Overview ..................18 Figure 1: The Status: System Information Screen ..........26 Figure 2: The Status: DOCSIS Provisioning Screen ...........27... -
Page 8: List Of Tables
Hitron E31N2V1 User’s Guide List of Tables Table 1: Default Credentials ................4 Table 2: Hardware Connections ................11 Table 3: LEDs ....................14 Table 4: GUI Overview ..................18 Table 1: Private IP Address Ranges ..............21 Table 2: IP Address: Decimal and Binary ............21 Table 3: Subnet Mask: Decimal and Binary ............22... -
Page 9: Introduction
Hitron E31N2V1 User’s Guide Introduction This chapter introduces the E31N2V1 and its GUI (Graphical User Interface). E31N2V1 Overview Your E31N2V1 is a DOCSIS cable modem, router and embedded Multimedia Terminal Adapter (eMTA) that allows you to connect your cabled Ethernet and analog telephones to one another and to the Internet via your building’s cable connection. -
Page 10: Hardware Connections
TR-069 and HNAP for easy setup and remote management. Enhanced management and stability for low total cost of ownership. Hardware Connections This section describes the E31N2V1’s physical ports and buttons. Version 1.0, 11/2017. Copyright 2012 Hitron Technologies Version 1.0, 11/2017. Copyright 2017 Hitron Technologies... -
Page 11: Figure 2: Hardware Connections
Hardware Connections Table 2: Hardware Connections RESET Use this button to reboot or reset your E31N2V1 to its factory default settings. To reboot the E31N2V1, press the button and hold it for four seconds, then release. The E31N2V1 restarts, using your existing settings. - Page 12 Hitron E31N2V1 User’s Guide Table 2: Hardware Connections ETHERNET Use this port to connect your computer and/orother network devices, using a Category 5 or 6 Ethernet cable with RJ45 connectors. The LED on the left displays the speed of the connection...
-
Page 13: Battery Operations
13). Battery Operations The E31N2V1 has an optional battery backup unit (BBU) enabling you to connect a lithium-ion battery that provides emergency power to the device in the event of a power outage. If you ordered this option, connect the battery by following the Quick Installation Guide that accompanied it. -
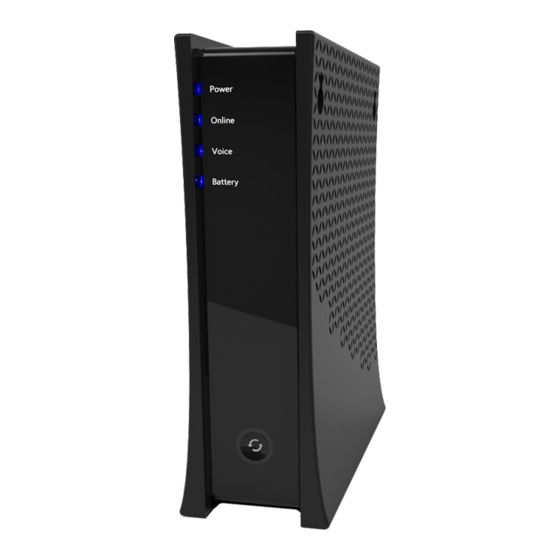
Page 14: Leds
The E31N2V1 is not receiving power. The E31N2V1 is receiving power, has completed powering-up, and is ready to use. Blinking The E31N2V1 is receiving power and is powering- Online Blinking The E31N2V1’s cable modem is registering with the service provider’s CMTS. -
Page 15: Ip Address Setup
(with 10% or less of its charge remaining). IP Address Setup Before you log into the E31N2V1’s GUI, your computer’s IP address must be in the same subnet as the E31N2V1. This allows your computer to communicate with the E31N2V1. -
Page 16: Manual Ip Address Setup
192.168.100.1 (default). NOTE: If your E31N2V1 is not using the default IP address, enter an IP address and subnet mask that places your computer in the same subnet as the E31N2V1. Click OK. The Internet Protocol (TCP/IP) window closes. In the Local Area Connection Properties window, click Close. -
Page 17: Logging In To The E31N2V1
Hitron E31N2V1 User’s Guide Logging in to the E31N2V1 Take the following steps to log into the E31N2V1’s GUI. Open a browser window. Enter the E31N2V1’s IP address (default 192.168.100.1) in the URL bar. The Login screen displays. Figure 5: Login Enter the Username and Password. -
Page 18: Resetting The E31N2V1
When you reset the E31N2V1 to its factory defaults, all user-configured settings are lost, and the E31N2V1 is returned to its initial configuration state. To reset the E31N2V1, press and hold the RESET button for ten seconds. The E31N2V1 turns off and on again, using its factory default settings. -
Page 19: Status
The Data Over Cable Service Interface Specification (DOCSIS) is a telecommunications standard that defines the provision of data services) Internet access) over a traditional cable TV (CATV) network. Your E31N2V1 supports DOCSIS version 3.0. Version 1.0, 11/2017. Copyright 2012 Hitron Technologies Version 1.0, 11/2017. -
Page 20: Ip Addresses And Subnets
In the case of the E31N2V1: The public network (Wide Area Network or WAN) is the link between the cable connector and your Internet Service Provider. Your E31N2V1’s IP address on this network is assigned by your service provider. Version 1.0, 11/2017. Copyright 2012 Hitron Technologies Version 1.0, 11/2017. -
Page 21: Subnets
Network (WLAN), if featured and enabled. You are free to assign IP addresses to computers on the LAN and WLAN manually, or to allow the E31N2V1 to assign them automatically via DHCP (Dynamic Host Configuration Protocol). IANA has reserved the following blocks of IP addresses to be used for private... -
Page 22: Dhcp
By default, the E31N2V1 is a DHCP client on the WAN (the CATV connection). It broadcasts an IP address over the cable network, and receives one from the service provider. By default, the E31N2V1 is a DHCP server on the LAN; it provides IP addresses to computers on the LAN which request them. -
Page 23: Dhcp Lease
(to connect to your network via a wired interface) and also has a wireless card (to connect to your network over the wireless interface) the MAC addresses of the two cards will be different. In the case of the E31N2V1, each internal module (cable modem module, Ethernet module, etc.) possesses its own MAC address. -
Page 24: Downstream And Upstream Transmissions
The terms “downstream” and “upstream” refer to data traffic flows, and indicate the direction in which the traffic is traveling. “Downstream” refers to traffic from the service provider to the E31N2V1, and “upstream” refers to traffic from the E31N2V1 to the service provider. -
Page 25: Tdma, Fdma And Scdma
Orthogonal Frequency-Division Multiplexing (OFDM) is a physical-layer data encoding method for transmitting and receiving data on Radio Frequency (RF) media, such as the E31N2V1’s cable connection. OFDM takes a single wide-band signal and separates it into multiple simultaneous subcarriers across the available RF spectrum, separated by the minimum frequency necessary to ensure non-interference among sub-carriers. -
Page 26: Ofdma
25) that permits simultaneous use by multiple users by assigning a specific group of OFDM subcarriers to each individual user. The Status: System Information Screen Use this screen to view information about the E31N2V1’s system and statistics. Click Status > System Information. The following screen displays. Figure 1: The Status: System Information Screen The following table describes the labels in this screen. -
Page 27: The Status: Docsis Provisioning Screen
This screen displays the steps successfully taken to connect to the Internet over the Cable connection. Use this screen for troubleshooting purposes to ensure that the E31N2V1 has successfully connected to the Internet; if an error has occurred you can identify the stage at which the failure occurred.Click Status >... -
Page 28: The Status: Docsis Wan Screen
Hitron E31N2V1 User’s Guide Process displays when the E31N2V1 is attempting to complete a connection step. Success displays when the E31N2V1 has completed a connection step. Disable displays when the relevant feature has been turned off. The Status: DOCSIS WAN Screen... -
Page 29: Figure 3: The Status: Docsis Wan Screen
Hitron E31N2V1 User’s Guide Figure 3: The Status: DOCSIS WAN Screen Version 1.0, 11/2017. Copyright 2012 Hitron Technologies Version 1.0, 11/2017. Copyright 2017 Hitron Technologies... -
Page 30: Table 5: The Status: Docsis Wan Screen
IP address lease expires, and a new IP address is assigned to it by the DHCP server. Downstream Overview NOTE: The downstream signal is the signal transmitted to the E31N2V1. Port ID This displays the ID number of the downstream connection’s port. - Page 31 This displays whether or not the relevant OFDM connection’s physical link channel (PLC) data is locked. The PLC tells the E31N2V1 how to decode the OFDM signal, and what power level to use. Once the E31N2V1 receives a PLC without uncorrectable errors, the PLC is locked and subsequent communication can continue.
- Page 32 Hitron E31N2V1 User’s Guide Table 5: The Status: DOCSIS WAN Screen (continued) Upstream Overview NOTE: The upstream signal is the signal transmitted from the E31N2V1. Port ID This displays the ID number of the upstream connection’s port. Frequency (Hz) This displays the actual frequency in Hertz (Hz) of each upstream data channel to which the E31N2V1 is connected.
-
Page 33: The Status: Docsis Event Screen
Hitron E31N2V1 User’s Guide Table 5: The Status: DOCSIS WAN Screen (continued) BW (sc’s*fft) This displays the bandwidth of the relevant channel, expressed as the number of subchannels multiplied by the channel’s Fast Fourier Transform size, in megahertz (MHz). Report Power... -
Page 34: Figure 4: The Status: Docsis Event Screen
Hitron E31N2V1 User’s Guide Figure 4: The Status: DOCSIS Event Screen The following table describes the labels in this screen. Table 6: The Status: DOCSIS Event Screen This displays the arbitrary, incremental index number assigned to the event. Time This displays the date and time at which the event occurred. -
Page 35: The Status: Lan Port Status Screen
Click this to remove all DOCSIS event logs from the system. The Status: LAN Port Status Screen Use this screen to see information about the data rate and flow of the E31N2V1’s LAN port. Click Status > LAN Port Status. The following screen displays. -
Page 36: The Status: Spectrum Screen
Hitron E31N2V1 User’s Guide The Status: Spectrum Screen Use this screen to examine the radio frequency (RF) spectrum on the cable connection between the E31N2V1 and the Internet. Click Status > Spectrum. The following screen displays. Figure 6: The Status: Spectrum Screen The following table describes the labels in this screen. -
Page 37: The Spectrum Realtime Monitor Screen
Hitron E31N2V1 User’s Guide Figure 7: The Spectrum Scan Screen The following table describes the labels in this screen. Table 9: The Spectrum Scan Screen Center Enter the center frequency for the scan, in megahertz (MHz). Scan Enter the bandwidth of the scan, in megaherts. For... -
Page 38: The Spectrum Constellation Screen
Click this to end monitoring. (Index) The graph displays a differently-colored line for each of the frequencies on which the E31N2V1 is communicating on the RF network. The index lets you know which color line represents which frequency. Power (dBmV) This displays the power of each channel, in decibels relative to one millivolt. -
Page 39: The Status: Mta Line Status Screen
This diagram displays the measured spectrum constellation. In-Phase The Status: MTA Line Status Screen Use this screen to see general information about the E31N2V1’s embedded Multimedia Terminal Adapter module. Version 1.0, 11/2017. Copyright 2012 Hitron Technologies Version 1.0, 11/2017. Copyright... -
Page 40: The Status: Mta Dhcp Screen
Hitron E31N2V1 User’s Guide Click Status > MTA Line Status. The following screen displays. Figure 10: The Status: MTA Line Status Screen The following table describes the labels in this screen. Table 12: The Status: MTA Line Status Screen Startup Procedure... -
Page 41: Figure 11: The Status: Mta Dhcp Screen
Hitron E31N2V1 User’s Guide service provider. Click Status > MTA DHCP. The following screen displays. Figure 11: The Status: MTA DHCP Screen The following table describes the labels in this screen. Table 13: The Status: MTA DHCP Screen Network Address Information... - Page 42 Hitron E31N2V1 User’s Guide Table 13: The Status: MTA DHCP Screen (continued) FQDN This displays the Fully-Qualified Domain Name of the DHCP server from which the MTA module derives its IP address and subnet mask. IP Address / Submask This displays the MTA module’s IP address and subnet mask, derived by DHCP.
-
Page 43: Troubleshooting
Hitron E31N2V1 User’s Guide Troubleshooting Use this section to solve common problems with the E31N2V1 and your network. It contains the following sections: None of the LEDs Turn On on page One of the LEDs does not Display as Expected on page ... - Page 44 (see LEDs on page 14). Make sure that your computer is on the same subnet as the E31N2V1; see Address Setup on page 15. If the above steps do not work, you need to reset the E31N2V1. See...
-
Page 45: Index
Hitron E31N2V1 User’s Guide Index downstream transmission accounts, login address, IP address, IP, local encoding Ethernet port bar, navigation buttons factory reset Fast Fourier Transform FDMA Fourier analysis cable connection frequencies, cable cable connection status cable modem CATV connection status, cable... - Page 46 Hitron E31N2V1 User’s Guide host ID navigation navigation bar network number IANA interface, user IP address IP address lease IP address renewal OFDM IP address setup Orthogonal Frequency-Division IP address, default Multiplexing IP address, format overview, GUI IP address, local...
- Page 47 Hitron E31N2V1 User’s Guide routing mode SCDMA status status, cable connection subnet subnet, IP support, customer system information TCP/IP TDMA upstream transmission user interface username username and password window, main Windows 7 Version 1.0, 11/2017. Copyright 2017 Hitron Technologies...
Need help?
Do you have a question about the E31N2V1 and is the answer not in the manual?
Questions and answers