Table of Contents
Advertisement
Quick Links
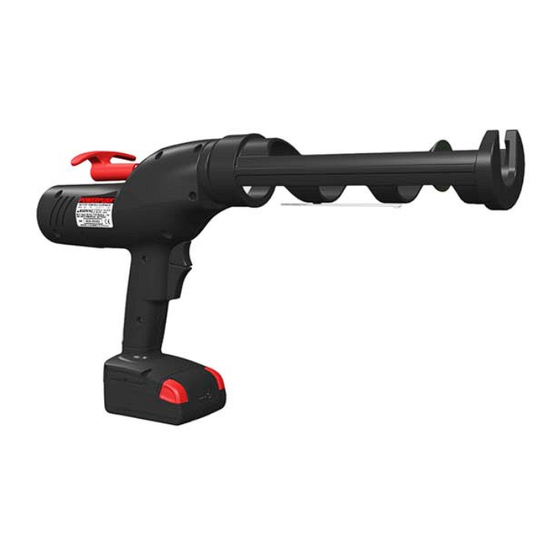
POWERPUSH
5000
®
INSTRUCTION MANUAL
POWER UNIT MODEL 5026-1
ALP Oz Part Number: 5026CG600
BEFORE USING THE POWERPUSH® 5000,
READ, UNDERSTAND AND SAVE ALL SAFETY INFORMATION
AND INSTRUCTIONS INCLUDING:
● BATTERY AND CHARGER MANUAL
● POWERPUSH® 5000 INSTRUCTION MANUAL
● INSTRUCTIONS PROVIDED IN MSDS OR MANUFACTURER OF MATERIAL
BEING DISPENSED FROM CARTRIDGE OR SAUSAGE
Distributed in Australia by
FORM NO. 1060‐145_revF Meritool LLC
Advertisement
Table of Contents

Related Manuals for Meritool POWERPUSH 5000

Summary of Contents for Meritool POWERPUSH 5000
- Page 1 POWERPUSH 5000 ® INSTRUCTION MANUAL POWER UNIT MODEL 5026-1 ALP Oz Part Number: 5026CG600 BEFORE USING THE POWERPUSH® 5000, READ, UNDERSTAND AND SAVE ALL SAFETY INFORMATION AND INSTRUCTIONS INCLUDING: ● BATTERY AND CHARGER MANUAL ● POWERPUSH® 5000 INSTRUCTION MANUAL ● INSTRUCTIONS PROVIDED IN MSDS OR MANUFACTURER OF MATERIAL BEING DISPENSED FROM CARTRIDGE OR SAUSAGE Distributed in Australia by FORM NO. 1060‐145_revF Meritool LLC ...
-
Page 2: General Safety Rules
3.2 A battery operated tool with integral batteries or a separate Battery pack must be recharged only with the specified Charger for the Battery. A Charger that may be suitable for one type of Battery may create a risk of fire when used with another Battery. 3.3 Use Battery operated tool only with specifically designated Battery. Use of any other Batteries may create a risk of fire. FORM NO. 1060‐145_revF Meritool LLC ... -
Page 3: Personal Safety
Shorting the Battery terminals together may cause sparks, burns, or a fire. 5.7 Maintain tools with care. Keep cutting tools sharp and clean. Properly maintained tools with sharp cutting edge are less likely to bind and are easier to control. 5.8 Check for misalignment or binding of moving parts, breakage of parts, and any other condition that may affect the tool’s operation. If damaged, have the tool serviced before using. Many accidents are caused by poorly maintained tools. 5.9 Use only accessories that are recommended by the manufacturer for your model. Accessories that may be suitable for one tool may create a risk of injury when used for another tool. FORM NO. 1060‐145_revF Meritool LLC ... -
Page 4: Specific Safety Rules And Symbols
Do not immerse dispenser, battery, or charger in any liquid, as this may cause damage and unsafe conditions. 9.4 Always unplug Charger before cleaning and when it is not in use. Failure to do so may result in shock or fire. 10. OPERATION 10.1 When operating the POWERPUSH® 5000, use both hands. Use of both hands will help prevent dropping the tool which could cause damage to the tool or operator. 10.2 Do not place hand, finger, or other foreign objects in front of Pistons while Battery is attached. This could result in injury to operator. 10.3 Do not use any attachments. Use of attachments could cause personal injury or damage to tool. 10.4 Do not operate without Pistons attached. This will damage the cartridge and may be dangerous. 10.5 Use only with Batteries of rated voltage and same type. Higher voltages may create an electrical hazard. Other Battery types may fall from tool, creating a risk of personal injury. FORM NO. 1060‐145_revF Meritool LLC ... -
Page 5: Functional Description
Children shall not play with the appliance. Cleaning and user maintenance shall not be made by children without supervision. FUNCTIONAL DESCRIPTION Figure 1 1. Cartridge Piston 7. Variable Speed Power Trigger 2. Sausage Piston 8. Clutch Trigger 3. Rack 9. Quick Thread End Cap ‐ Aluminum 4. Quick Thread End Cap ‐ Aluminum 10. Cartridge Holder 5. Rack Handle 11. Sausage Barrel 6. Speed Control (1 is slowest, 6 is fastest) FORM NO. 1060‐145_revF Meritool LLC ... -
Page 6: Operation
1. Remove and Install Battery Pack (See Figure 2): To remove Battery, squeeze both release buttons and slide the Battery forward. To insert Battery, slide Battery fully onto the base of the handle. Figure 2 2. Install Rack: Remove Battery, depress Clutch Trigger; insert Rack from rear of tool by wiggling and easing it into position. Do not power the Rack into the tool, as damage may occur. Depress Clutch Trigger Push Rack forward until Piston (See Install Piston Instruction Below) engages the cartridge or sausage. Figure 3 3. Install Cartridge Holder or Sausage Barrel: Line up the Cartridge Holder or Sausage Barrel over Rack. Hold Quick Thread End Cap securely and screw Cartridge Holder or Sausage Barrel into Quick Thread End Cap fully. 4. Install Piston: Push Rack forward and slide Piston over it. Insert and tighten #2 Phillips screw into Piston. 5. Dispense Material: Install Cartridge or Sausage Material into the tool, install Battery, and begin dispensing. FORM NO. 1060‐145_revF Meritool LLC ... -
Page 7: Maintenance
Battery and tool are both clean. If they require maintenance, use caution and clean with an eraser. If your tool is still not operating properly, return all parts including tool, Battery and Charger to a service center shown in the Service Center section of this manual for repair. Service or maintenance performed by unqualified personnel could result in injury or damage. FORM NO. 1060‐145_revF Meritool LLC ... - Page 8 PISTON: Patented PowerPiston™ (Part number 1040‐137) for use with Clear Barrel ‐ 400 & 600ml CARTRIDGE KIT: 10oz. kit includes Cartridge Holder, Piston, Quick Thread End Cap, Rack, Rack Handle, and Screws (Part number 5510‐10) CLEAR BARREL KITS: 400ml kit includes Clear Barrel, (2) PowerPiston™, Rack, Rack Handle, Quick Thread End Cap, and Screws (Part number 5510‐400) 600ml kit includes Clear Barrel, (2) PowerPiston™, Rack, Rack Handle, Quick Thread End Cap, and Screws (Part number 5510‐600) FORM NO. 1060‐145_revF Meritool LLC ...
-
Page 9: Warranty
Bendigo VIC 3550 Australia Australia Phone 03 9703 1522 Phone 03 5443 1755 WARRANTY THE WARRANTY IS NULL AND VOID IF THE TOOL HAS BEEN OPENED OR TAMPERED WITH BY ANYONE OTHER THAN THE DESIGNATED FACTORY SERVICE CENTER. The warranty covers the cost of parts for repairing defects in workmanship and materials. All repairs will be completed at the Factory Service Center. Purchaser is responsible for shipping costs to the Factory Service Center. The warranty is valid for up to one year from the date of purchase. FORM NO. 1060‐145_revF Meritool LLC ...
Need help?
Do you have a question about the POWERPUSH 5000 and is the answer not in the manual?
Questions and answers