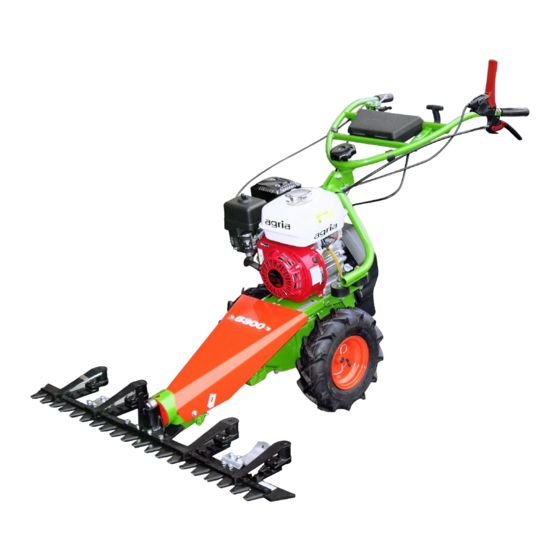
Agria 5300 Operating Instructions Manual
Meadow mower
Hide thumbs
Also See for 5300:
- Operating instructions manual (52 pages) ,
- Translation of the original operating instructions (68 pages)
Table of Contents
Advertisement
Advertisement
Table of Contents

Related Manuals for Agria 5300


Summary of Contents for Agria 5300
- Page 1 Translation of the original Operating In- structions Meadow mower agria 5300 Petrol engine: Honda 5300 535 Before commissioning please read the operating instructions and note the safety and warning information! Operating Instructions No. 998 478GB 02.20...
-
Page 2: Nameplate
Petrol engine: Engine no. see page 51, Fig. B/6 Please provide this information for each spare parts order, to prevent errors in delivery. Only use genuine Agria spare parts! The technical data, illustrations and dimensions provided in these operating instructions are non-binding. No claims may be derived from them. -
Page 3: Symbols
Engine oil level After each cleaning (in particularly with a high- pressure cleaner) Clutch Annually Mower drive See separate engine op- erating instructions Wheel drive - agria-Service - = contact your agria service centre forward reverse Fast Slow Meadow mower agria 5300... -
Page 4: Designation Of Parts
Designation of parts agria 5300... - Page 5 Air filter Exhaust with contact guard Carburettor Sparking plug, sparking-plug connector Fuel tank cap Oil dipstick Fuel tank Engine oil drain plug Choke lever Fuel cock Engine type no. Engine stop switch Starter handle Fan grille Meadow mower agria 5300...
-
Page 6: Table Of Contents
Danger zone....................30 Starting the petrol engine ................31 Stopping the petrol engine................32 Mowing ....................... 33 Mowing on slopes..................35 Safety instructions for handling ..............37 5 Maintenance and Repair ............. 38 Petrol engine ....................39 Meadow mower agria 5300... - Page 7 Machine...................... 56 7 Decommissioning / Disposal ............58 Inspection and Maintenance Overview........... 60 Electric diagram of petrol engine ............ 62 Lubrication plan ................63 Paints, Wear parts................64 Declaration of Conformity ..............65 Designation of parts..................66 Meadow mower agria 5300...
-
Page 8: Unpacking And Assembly Instructions
Pull the machine rearwards out of the cardboard box Attach the cutter bar (5). See page 25 Carry out the steps for initial startup. See page 27. Meadow mower agria 5300... -
Page 9: Safety Instructions
The machine meets the current state of A trailer for operation with the two-wheel the art and complies with the applicable tractor is not included in the Agria sales safety regulations at the time of market- program. An expertise to obtain an indi- ing within the context of the approved vidual homologation (to German §21... - Page 10 Operator clothing must fit tightly. Wear For operation in enclosed areas, ensure sturdy footwear. that a safety distance is kept from edges to prevent damage to tools. The affixed warning and information signs provide important information for Meadow mower agria 5300...
- Page 11 There may be ment. tension in the drive train as a result of Secure machine and implements against the blockage, which is why you should rolling away (parking brake - if installed, resolve the blockage carefully. wheel chocks). Meadow mower agria 5300...
- Page 12 Wear protective goggles and protective installed and properly adjusted! gloves when you grind the knives. Only use genuine Agria spare parts. Ballast Carry out a functional and safety test after completing the work. Always attach ballast properly at the attachment points provided.
- Page 13 Persons with cardiac pacemakers are plenty of water. Avoid inhaling vapours. not allowed to touch the energized parts Read and observe enclosed instructions! of the ignition system as long as the engine is running. Meadow mower agria 5300...
- Page 14 Keep a safe distance to the mower knives when the engine is running! When working with the machine wear individual hearing pro- tection. Wear protective gloves. Wear safety shoes. Meadow mower agria 5300...
-
Page 15: Technical Data
Clutch: V-belt clutches with tension rollers between engine and gearbox, friction clutch for reverse gear Use only genuine Agria V-belts! (see wearing parts page 64) Gearbox: ............. Worm gear with switchable wheel drive Gearbox oil: .............. Oil filling volume approx. 0.6 l Gearbox oil SAE 90 –... - Page 16 2 Technical Data Dimensions (mm): 860-1080 1550 910 or 1050 (corresponding to cutter bar ver- sion) Twin tyres 762 Twin tyres 857 Meadow mower agria 5300...
-
Page 17: Petrol Engine
Mixture adjustment screw:......Basic setting approx. 2 1/8 turn open Engine oil: ...............Filling volume approx. 0.6 l Multigrade oil SAE 10W-30, quality class API-SJ or higher Slope capability: ................... < 30° (58 %) (with engine oil level "max." = upper level mark) Meadow mower agria 5300... -
Page 18: Devices And Operating Elements
3 Devices and Operating Elements 3 Devices and Operating Elements The meadow mower agria 5300 is suit- road traffic regulations of the relevant able to be used for the maintenance of country must be complied with (marking, green areas and parks as well as in lighting, etc.). -
Page 19: Speed Regulating Lever
Never tamper with the safety circuit. Never tie up the safety lever. The safety lever is used as an emergency off switch: Release the lever in a dangerous situation. It swings automatically to "STOP" position! Meadow mower agria 5300... -
Page 20: Engine Stop Switch
(C/5) Pull the manually operated clutch lever fully Traction drive in neutral: • Manually operated clutch lever (C/5) pulled approx. half. Forward movement: Press down the manually operated clutch lever (C/5) Press the safety lever (C/4). Meadow mower agria 5300... -
Page 21: Clutch
Move the wheel switching hand lever (C/11) down. • Slowly release the manually operated clutch lever (C/5) while you are accelerating. If you cannot shift the wheel drive, engage and disengage the clutch briefly and repeat the shift- ing process. Meadow mower agria 5300... -
Page 22: Mower Drive
Steering bar side adjustment • Release the grip screw (1) until the notches are released. • Swing the steering bar to the required side, and let it engage in the proper meshing. • Tighten the grip screw. Meadow mower agria 5300... -
Page 23: Driving Wheels
(Fig. K or L) and let it engage into an annular groove on the wheel shaft. • Coat both sides of the wheel shaft ends (small shaft diameter) with organic lubricat- ing grease. To remove the driving wheels, proceed in re- verse order. Meadow mower agria 5300... - Page 24 (Fig. M). They mostly prevent the grass from being wrapped around the wheel shaft. To remove wrapped up grass, simply remove the driving wheels and the wrap protec- tion tubes without tools. Meadow mower agria 5300...
-
Page 25: Cutterbar
With twin and grid driving wheels, the switching positions rigid drive / neutral gear / differential-type drive effect are also possible. Cutter bar The mower heads approved in the Agria • Set the knife driver (8) on the cutter sales list are available. -
Page 26: Attachment Points
Fixed skids are installed at the bottom of the cutter bar. If you want a higher cut, you can attach 2 height-adjustable gliding soles to the cutter bar. (Special equipment Agria no. 713 22 = 1 pair) With cutter bar version S, the existing skid... -
Page 27: Commissioning And Operation
Use only branded petrol. Caution is needed when handling fuel. Petrol is highly flammable and explosive under certain conditions! Do not refuel in closed rooms. Refuel only with the engine switched off and cooled down. Meadow mower agria 5300... - Page 28 If you spilled fuel, push the machine away from the spilled liquid before you start the engine. Bowden cable for the safety function Check the Bowden cable of the safety function for damage. Replace a defective Bowden cable immediately! Meadow mower agria 5300...
-
Page 29: Before Starting The Engine
Keep a sufficient distance from hot surfaces and keep children away from the running engine. When the petrol engine is running, do not touch or remove the ignition cable or spark plug connector. Meadow mower agria 5300... -
Page 30: Danger Zone
The user is responsible for third parties in the working area (entire area to be worked on). Hazard area meadow mower Meadow mower agria 5300... -
Page 31: Starting The Petrol Engine
Once the engine is running, set the engine speed to min and allow the engine to warm up for a short time. Slowly move the choke actuator back to operating position (if actuat- ed). Meadow mower agria 5300... -
Page 32: Stopping The Petrol Engine
If you want to shut down the machine for a longer time, do not stop the engine at the engine stop switch. Close the fuel cock(s) and let the engine run until it stops. This empties the carbu- rettor and prevents resinification. Meadow mower agria 5300... -
Page 33: Mowing
See page 31 Switch on the wheel drive Switch on the mower drive Traction drive at forward movement - clutch lever (C/5) released, press safety lever (C/4) slowly down, and accelerate at the same time. Meadow mower agria 5300... - Page 34 If you have to clean the machine during work, switch off the engine and remove sparking-plug connector(s) and ignition key for safety reasons. Meadow mower agria 5300...
-
Page 35: Mowing On Slopes
Mowing on slopes Slope capability ± = 20° (37%), see page 17 max. Depending on the type of ground sur- face (vegetation, humidity ...), wear suitable shoes so that you do not slip or fall. Meadow mower agria 5300... - Page 36 Always position the machine such route across he slope. that it is across the slope, and/or leave wheel switching ON. Starting the engine on a slope When you start the engine, leave the wheel drive switched on -> braking effect. Meadow mower agria 5300...
-
Page 37: Safety Instructions For Handling
Ensure that your feet are at a safe distance from the tools. • Never approach your hands or feet to rotating parts. • Never lift or carry the machine while the engine is running. Meadow mower agria 5300... -
Page 38: Maintenance And Repair
Bio-lubricants bio-anti-corrosive Only use genuine Agria spare parts. agents are environmentally friendly, as Carry out a functional and safety test they are quickly biodegradable. after completing the work. -
Page 39: Petrol Engine
Remove the oil dipstick and check the oil level. • If the oil level is below the lower "min" mark, fill in engine oil (see "Technical data") up to the rim of the oil filler neck "max". Meadow mower agria 5300... - Page 40 Never spray water on the engine. Use a brush or compressed air. • Continually check the fan grille (B/8), and remove aspirated dirt and plant debris. Meadow mower agria 5300...
- Page 41 Always ensure that the engine idle speed is adjusted correctly. With speed regulat- ing lever at idling, the engine should continue running smoothly. - agria-Service - All further maintenance and care of the engine Engine operating instructions Meadow mower agria 5300...
-
Page 42: Machine
(1). • Fill in fresh gearbox oil until the oil is level with the filling hole. (Fig. V). • Oil filing volume and quality see "Technical data". • Screw in and tighten the screw plug. Meadow mower agria 5300... - Page 43 Remove the driving wheels if necessary. • Prior to mounting the driving wheels, yearly and after each cleaning with a high-pressure cleaner, coat the wheel shaft ends (small shaft diameter) with organic lubricating grease. Meadow mower agria 5300...
- Page 44 (in particular on the knife driv- er). 1 Cutter bar linkage 2 Beam supporting pin When replacing the knife driver fixing screws use only genuine Agria screws. Failure to do so can result in knifebreakage. Cleaning Immediately after each mowing opera- tion, clean the cutter bar thoroughly with water.
- Page 45 (h) in the direction of the arrow (f) • Check whether the knife guide while you are tightening the clamp- needs to be adjusted. Adjust if nec- ing screws (c) very tightly (70 Nm) essary. with a long ring spanner. Meadow mower agria 5300...
- Page 46 When fitting new clamping sleeves (10), make sure that the slots always point to the outside! 1 Beam knife 2 Pin carrier 3 Driver sleeve 4 Driver pin 5 Back of the beam 7 Fixing screw 8 Adjusting screw Meadow mower agria 5300...
- Page 47 25 mm and a front (P). length of approx. 35 mm, or a special • Do not grind the cutting edges in a sharpening device. curve (P). • Remove burrs with a hand stone. Meadow mower agria 5300...
- Page 48 2/3. The function of safety circuit and clutch may require an adjustment of the V-belt tension on the drive rollers. See page 50. Meadow mower agria 5300...
- Page 49 Screw the adjusting pin in / out until there is a distance "X" or idling at position 0. Reinsert the cable pull end with the adjusting pin in the retainer and install the shaped spring (2). Meadow mower agria 5300...
- Page 50 Install the belt guard (D/8). This requires the clutch lever to be set to "Forward movement". Do not use commercially available V-belts. Use only genuine Agria spe- cial V-belts! Put the machine only into operation when all protective devices are in protec-...
-
Page 51: Labels
Replace worn-out and missing signs for operating and safety instructions. 614 76 wheel switching 757 55 speed 104 226 reverse 587 50 hearing protection 757 01 mowing drive gearshift 104 230 start/stop 757 05 beam mower 104 229 clutch note 104 227 drives off mower Meadow mower agria 5300... -
Page 52: General
Engine Only clean the engine with a cloth. Do not spray with water, as water could enter the ignition and fuel system and cause malfunctions. Meadow mower agria 5300... -
Page 53: Storage
Never smoke in the working area. Stay away from naked flames and sparks. Alternatively fill the fuel tank completely and add a fuel stabilizer (Agria no. 799 09) to the fuel - Observe the operation instructions! Let the engine run for approximately 10 minutes. -
Page 54: Troubleshooting And Remedies
Observe the safety instructions! Faults on the machine or on the engine that make a major intervention necessary must always be repaired by a specialist agria workshop that have the necessary tools. Incorrect intervention will only lead to damage. Petrol engine... - Page 55 - agria-Service - Petrol engine Ignition distance too large; Adjust or replace sparking plug frequently stalls sparking plug defective when idling Carburettor incorrectly ad- Adjust carburettor justed - agria-Service - Air filter contaminated Clean air filter Meadow mower agria 5300...
-
Page 56: Machine
Adjust knife guides material gets justed stuck between the knives Knife not straight Have knives aligned or replaced Knives are not aligned Have knives aligned Knives are not on top of each Have cutter bar aligned other Meadow mower agria 5300... - Page 57 The tips of the The upper knife protrudes too Adjust knife guides lower knife work themselves into the blades of the upper knife * = Contact your agria specialist workshop! BM = See separate operating instructions for engine Meadow mower agria 5300...
-
Page 58: Decommissioning / Disposal
The machine consists of valuable tipping over and rolling away. raw materials, which can be recycled and reused. Wear protective gloves. Take the machine including the remain- ing technical fluids to a recycling facility for disposal. Meadow mower agria 5300... - Page 59 7 Decommissioning / Disposal Meadow mower agria 5300...
-
Page 60: Inspection And Maintenance Overview
Cutter bar: Check the play of the knife guides - also after each knife change Lubricate the beam supporting pin - also after each knife change Checking the gearbox oil level Cleaning Check bolts and nuts Clean air filter insert Meadow mower agria 5300... - Page 61 = before each start-up = after each cleaning, especially with a high-pressure cleaner = See separate operating instructions for engine = maintenance tasks should be performed by your agria service centre = at least annually = inspection and maintenance tasks can be performed by the operator...
-
Page 62: Electric Diagram Of Petrol Engine
Electric diagram of petrol engine Engine flywheel Ignition coil unit Sparking plug Engine stop switch sw = black Meadow mower agria 5300... -
Page 63: Lubrication Plan
Lubrication plan Engine oil (page 40) Gearbox oil (page 42) Mower knives (page 44) Mower drive (page 44) Lever bearing (page 52) Meadow mower agria 5300... -
Page 64: Paints, Wear Parts
305 65 Housing cover seal (worm gear) 481 75 V-belt for clutch 481 74 V-belt for reverse drive Attention: Use only genuine Agria V-belts! Engine Honda 761 99 Air filter element, set 759 99 Sparking plug, Bosch WR7DC Spare parts lists:... -
Page 65: Declaration Of Conformity
Declaration of Conformity Meadow mower agria 5300... -
Page 66: Designation Of Parts
Threaded pin for belt guard hood Locating holes for belt guard holder Drive V-belt pulley (on crankshaft) Belt guiding plate Belt guard hood Spring washer Locknut Reverse gear rubber roller Drive V-belt for reverse gear Drive V-belt pulley (on gearbox shaft) Meadow mower agria 5300... - Page 67 5300...
- Page 68 Agria-Werke GmbH Bittelbronner Straße 42 D-74219 Möckmühl Tel.: +49 6298 39-0 Fax: +49 6298 39-111 E-Mail: info@agria.de Internet: www.agria.de Your local agria specialist dealer:...
Need help?
Do you have a question about the 5300 and is the answer not in the manual?
Questions and answers