Advertisement
Table of Contents
- 1 Fumes and Gases
- 2 Welding Sparks
- 3 Installation
- 4 Technical Specifications
- 5 Foot Pedal
- 6 Stick Welding (Mma)
- 7 Output Connections
- 8 Operation Control and Connectors
- 9 Controls and Operational Features
- 10 Mma Operation
- 11 Tig Welding Process
- 12 Parameters Setting
- 13 Stainless Steel
- 14 Ac Tig Operation
- 15 Spot Operation
- 16 Maintenance and Troubleshooting
- Download this manual
IM7906-5
Apirl. 2015
Rev. 01
®
arcweld
TIG 201 AC/DC
For use with machine Part Number K69021-7, Code 76262
Safety Depends on You
®
arcweld
machine is designed and
built with safety in mind. However,
your overall safety can be increased
by proper installation and thoughtful
operation on your part. DO NOT
INSTALL, OPERATE OR REPAIR
THIS EQUIPMENT WITHOUT
READING THIS MANUAL AND
THE SAFETY PRECAUTIONS
CONTAINED THROUGHOUT. And,
most importantly, think before you
act and be careful.
Copyright © 2015 The Shanghai Lincoln Electric Company
THE SHANGHAI LINCOLN ELECTRIC COMPANY
No. 195, Lane 5008, Hu Tai Rd. Baoshan, Shanghai, PRC 201907
www.lincolnelectric.com.cn
Advertisement
Table of Contents

Related Manuals for arcweld TIG 201 AC/DC


Summary of Contents for arcweld TIG 201 AC/DC
- Page 1 IM7906-5 Apirl. 2015 Rev. 01 ® arcweld TIG 201 AC/DC For use with machine Part Number K69021-7, Code 76262 Safety Depends on You ® arcweld machine is designed and built with safety in mind. However, your overall safety can be increased by proper installation and thoughtful operation on your part.
- Page 2 ® Thank you for selecting QUALITY arcweld products. Please examine the packaging and equipment for damage. Claims for material damaged in shipment must be notified immediately to the authorized dealer from whom you purchased the machine. For future reference, please record your equipment identification information in the table below.
- Page 3 SAFETY WARNING ARC WELDING CAN BE HAZADOUS. PROTECT YOURSELF AND OTHERS FROM POSSIBLE SERIOUS INJURY OR DEATH. KEEP CHILDREN AWAY. PACEMAKER WEARERS SHOULD CONSULT WITH THEIR DOCTOR BEFORE OPERATING. BE SURE THAT ALL INSTALLATION, OPERATION, MAINTENANCE AND REPAIR PROCEDURES ARE PERFORMED ONLY BY QUALIFIED INDIVIDUALS. ELECTRIC AND ELECTRIC SHOCK can MAGNETIC FIELDS...
-
Page 4: Fumes And Gases
SAFETY FUMES AND GASES WELDING SPARKS can be dangerous. can cause fire or explosion. 6.a Remove fire hazards from the welding area. If this Welding may produce fumes and gases is not possible, cover them to prevent the welding hazardous to health. Avoid breathing these sparks from starting a fire. - Page 5 SAFETY...
- Page 6 SAFETY...
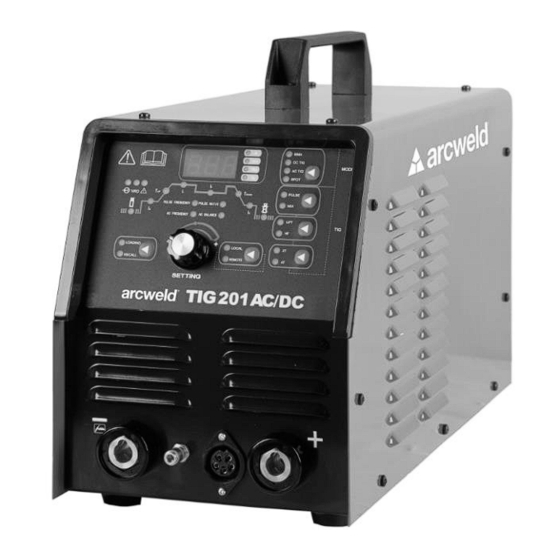
- Page 7 SUMMARY A -1 GENERAL INTRODUCTION VOLT-AMPERE ® arcweld TIG 201 AC/DC is a new generation of CHARACTERISTIC multi functional high quality welding machine. The power ® arcweld machine has excellent volt- source adopts a microcomputer system control, dual ampere characteristic, refer to the current loop PWM control, full-bridge high frequency following graph.
-
Page 8: Installation
13V (VRD) GTAW 10A ~ 200A 10.4 V ~ 18V OTHER PARAMETERS Power Factor Efficiency Protection Class Insulation Class ® arcweld IP23S TIG 201 AC/DC PHYSICAL DIMENSIONS Length Width Height Weight ® arcweld 545mm 215mm 325mm 18.0 Kg TIG 201 AC/DC... -
Page 9: Foot Pedal
INSTALLATION FOOT PEDAL The foot pedal is used for remote control. The wire connection as below table for your reference. DESCRIPTION WIRE Switch Black Switch White Resistor(up) Green Resistor(middle) Yellow Resistor(down) * For the safety and reliability of the electrical connection, the terminal connection must be reliable, otherwise it will cause the connection terminal damage or affect the welding performance. - Page 10 INSTALLATION PARAMETERS PRESETTING RANGES SYMBOLS DC TIG AC TIG AC TIG DC TIG AC TIG SPOT ON UI /PULSE /PULSE /MIX Preflow Time 0~10 ( S ) Initial Current 10~200 ( A ) Slope Up Time 0~10 0~10 0~10 0~10 0~10 ( S ) Welding...
- Page 11 INPUT VOLTAGE Keep flammable material away. Do not weld on closed containers. ® arcweld machine is provided with a 220V±10% input voltage, 50/60Hz. PLEASE SEE ADDITIONAL WARNING INFORMATION An output guide is provided in the technical AT THE FRONT OF THIS OPERATOR’S MANUAL.
-
Page 12: Stick Welding (Mma)
Insulate yourself from work and ground. Connect the welding cable to the (+) terminal ® Turn the input line Switch on the arcweld and the work clamp to the (-) terminal. Insert machines “Off” before connecting or disconnecting the connector with the key lining up with the output cables or other equipment. - Page 13 INSTALLATION TIG WELDING (GTAW) STRIKING ARC OF TIG OPERATION ® arcweld machine has a built in Gas Solenoid When the tungsten electrode touches the so a TIG Torch with gas hose inside is required. A workpiece, the short-circuit current is only 10A.
-
Page 14: Operation Control And Connectors
OPERATION CONTROL AND CONNECTORS CONTROLS AND OPERATIONAL FEATURES The front panel includes 6 button switches ( welding ENCODER SWITCH (SETTING) model switch, welding function switch, arc start switch, The switch can be turned and pushed. Turning 2T/4T switch, data loading, recall switch and remote for choosing program and adjust data. -
Page 15: Mma Operation
OPERATION CONTROL AND CONNECTORS 1. MMA OPERATION PARAMETERS SETTING: Choose the MMA mode, adjust the initial current I for hot start current (10-200A), adjust slope up time T for arc force current (10~200A), and adjust the peak current I for welding current. Welding current setting table - Flat welding DIAMETER(mm) TYPE... -
Page 16: Tig Welding Process
OPERATION CONTROL AND CONNECTORS DC TIG WELDING TABLE WORKPIECE Φ ELECTRODE Φ ROD (FILLER) CURRENT FLOW RATE MATERIAL THICKNESS (mm) (mm) (A) (ARGON L/mIn) (mm) STAINLESS 1.0,1.6 ~1.6 20~40 STEEL 1.0,1.6 ~1.6 30~60 (DC+) 1.6,2.4 ~1.6 60~90 1.6,2.4 1.6~2.4 80~120 2.4,3.2 2.4~3.2 110~150... -
Page 17: Parameters Setting
OPERATION CONTROL AND CONNECTORS TIG WELDING TECHNIQUES: The suggested electrode and welding rod angles for welding a bead on plate. The same angles are used when marking a butt weld. The torch is held 60-75 from the metal surface. This is the same as holding the torch 15-30 from the vertical. -
Page 18: Stainless Steel
OPERATION CONTROL AND CONNECTORS DC TIG / PULSE WELDING TABLE 1 Welding conditions: Argon (10L/min); Thoriated tungsten electrode (3.2mm); Rod: φ1.2mm; Arc length:2mm. PULSE CONDITION WELDING SPEED PEAK BASE PULSE PULSE MATERIAL JOINT SHAPE (mm) (cm/min) CURRENT CURRENT FRE. RATIO ‘C’... -
Page 19: Ac Tig Operation
OPERATION CONTROL AND CONNECTORS 4. AC TIG OPERATION PARAMETERS SETTING: Choose the AC TIG mode which default setting will be without pulse and mix functions, LIFT/HF , 2T/4T, adjust the preflow time, initial current, slope up time, peak current, slope down time, crater current, postflow time, AC frequency and AC balance. -
Page 20: Spot Operation
OPERATION CONTROL AND CONNECTORS AC TIG / PULSE WELDING TABLE PULSE CONDITION THICKNESS PEAK BASE PULS PULE MATERIAL JOINT SHAPE DIA. CURRENT CURRENT FRE. RATIO (mm) (mm) (HZ) ALUMINIUM FIRST LAYER SECOND LAYER 6. AC TIG / MIX OPERATION PARAMETERS SETTING: Choose the AC TIG mode, MIX welding function, LIFT/HF , 2T/4T, adjust the preflow time, initial current, slope up time, peak current,, slope down time, crater current, postflow time, AC frequency, AC balance. -
Page 21: Maintenance And Troubleshooting
MAINTENANCE AND TROUBLESHOOTING MAINTENANCE n order to guarantee the arc welding machine works efficiently and safely, it must be maintained regularly. Refer to the maintenance items in the following table. ● Warning: For safety while maintaining the machine, please shut off the supply power and wait for 5 minutes, until capacitor voltage drops to safe voltage. - Page 22 MAINTENANCE AND TROUBLESHOOTING ARC WELDING DEFECT AND PREVENTION METHOD Problem Possible Cause What to do Welding bead The groove angle is not correct Choosing the proper groove angle & assembly doesn’t meet The root face and assembly gap is not gap, improve the assembly quality.
- Page 23 MAINTENANCE AND TROUBLESHOOTING HOW TO USE TROUBLESHOOTING GUIDE WARNING Before arc welding machines are dispatched from the factory, they have already been tested. Therefore no unauthorised modifications are allowed. Unauthorised repairs performed on this equipment may result in danger to the technician and machine operator and will invalidate your factory warranty.
- Page 24 MAINTENANCE AND TROUBLESHOOTING TROUBLESHOOTING RECOMMENDED COURSE OF Item PROBLEMS(SYMPTOMS) POSSIBLE CAUSE ACTION Check whether there is input No input voltage. voltage. Turn on the power source, and the power light is not on, and fan doesn’t work The line switch is damaged. Check and replace line switch.
- Page 25 MAINTENANCE AND TROUBLESHOOTING The welding current potentiometer on Repair or change the potentiometer the front panel damaged The welding parameters can not be adjusted anyway. Press any buttons on front panel for The software died. 5 seconds for resetting software. The penetration of molten pool is The welding current adjusted too low.
- Page 26 DIAGRAM...
- Page 27 NOTE THE SHANGHAI LINCOLN ELECTRIC COMPANY No. 195, Lane 5008, Hu Tai Rd. Baoshan, Shanghai, PRC 201907 www.lincolnelectric.com.cn...
Need help?
Do you have a question about the TIG 201 AC/DC and is the answer not in the manual?
Questions and answers