Table of Contents
Advertisement
Advertisement
Table of Contents

Related Manuals for GE RAK180W1


Summary of Contents for GE RAK180W1
- Page 1 OWNER’S MANUAL & INSTALLATION INSTRUCTIONS RAK180W1 49-5000416 Rev. 0 06-19 GEA...
- Page 2 THANK YOU FOR MAKING GE APPLIANCES A PART OF YOUR HOME. Whether you grew up with GE Appliances, or this is your first, we’re happy to have you in the family. We take pride in the craftsmanship, innovation and design that goes into every GE Appliances product, and we think you will too.
-
Page 3: Table Of Contents
Table of Contents Safety Information ..................4 Before You Begin ...................5 Thermostat Installation ................7 Installing the Wireless Control card ..............7 Wireless Installation..................10 Wired Installation ....................10 Thermostat Configuration ..............11 Setting the clock ....................12 Entering the room number ................13 Configuring the Equipment Settings - Compressor Type ......14 Configuring the Equipment Settings - Electric Heat ........15 Configuring the Equipment Settings - Reversing Valve .........16 Configuring the Energy Saving Settings ............17... -
Page 4: Safety Information
IMPORTANT SAFETY INFORMATION READ ALL INSTRUCTIONS BEFORE USING WARNING FIRE AND SHOCK HAZARD • Always turn off power at the main power supply before installing, cleaning or removing the thermostat. Failure to do so could result in electrical shock hazard. •... -
Page 5: Before You Begin
Before You Begin • Determine the appropriate installation location for the thermostat The thermostat should face the bed area of the room. The thermostat must not be installed near or on metal structures or surfaces including metal air ducting that may be in the wall. reduce the range of the wireless signal. - Page 6 NETWORK INSTALLATION ONLY NOTE: This section is not required unless the thermostats are networked Pairing the Thermostat and the Control Card: In case of Network Installation with online management, the thermostat and the Control Card must be paired with a Network Programmer specific to the property before the installation.
-
Page 7: Thermostat Installation
Thermostat Installation Installing the Wireless Control Card • Power off the Zoneline • Insert the Control Card wiring harness into the thermostat connection port on the front of the Zoneline control box cover. • For Makeup Air Models (*DBM and *EBM), insert the small connector into the mating CDC Connection port next to the thermostat port. - Page 8 Thermostat Installation Installing the Wireless Control Card (cont.) • Using the supplied double sided tape, attach the control card to the Zoneline control box cover. (See Drawing 2) Mount the control card inside of the hvac unit. The wireless control card antenna must not be touching any metal components of the hvac unit.
- Page 9 Thermostat Installation Wiring Table – 24V AC Wire Color Terminal Letter Terminal Connection Black Common Yellow Compressor White Heat Orange O or B Reversing Valve Green Fan High Purple Fan Low Brown Occupancy NOTE: If the PTAC unit has only one (1) fan speed, connect both fan control wires –...
-
Page 10: Wireless Installation
Thermostat Installation Wireless Installation GH OB W Mounting the thermostat to the wall • Remove the thermostat cover; • Use the supplied wall anchors and mounting screws to secure the thermostat to the wall; • Insert two (2) AA-cell batteries (not supplied) into the thermostat battery compartment;... -
Page 11: Thermostat Configuration
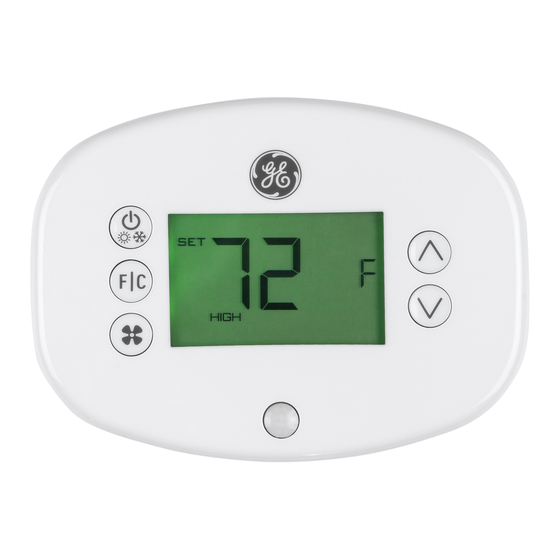
Thermostat Configuration Once the thermostat is powered, thermostat configuration settings will appear on the thermostat screen. In order to properly operate the HVAC unit: • Set the thermostat clock • Enter the room number • Configure the equipment settings • Select Energy Savings Preset (Zoneline custom settings are the default). -
Page 12: Setting The Clock
Thermostat Configuration Setting the thermostat clock Minutes Hours Set the thermostat clock to current time in 24h (Military Time) format. • Use the “Up” and “Down” buttons to set the hours • Press the “Fan” button to advance to the minutes setting •... -
Page 13: Entering The Room Number
Thermostat Configuration Entering the room number Enter the room number by changing the digits on the screen. Leading zeros “0” preceding other digits will be ignored, i.e. Room number “123” should be entered as “00123”. • Use the “Up” and “Down” buttons to change the digit; •... -
Page 14: Configuring The Equipment Settings - Compressor Type
Thermostat Configuration Configuring the Equipment Settings - Compressor Type Compressor Type Use the “Up” and “Down” buttons to change the compressor type by changing the first digit 0 - No Compressor 1* - Heat pump 2 - Air Conditioner • Press the “Fan” button to advance to the next setting; * Indicates default setting NOTE: If the Zoneline is an AZ45 model, change the compressor type to a 2. -
Page 15: Configuring The Equipment Settings - Electric Heat
Thermostat Configuration Configuring the Equipment Settings - Electric Heat Electric Heat Use the “Up” and “Down” buttons to change the Electric Heat setting by changing the second digit; 0 - No Electric Heat- All Zonelines have Electric heat - Do not select this option. 1* - Electric Heat •... -
Page 16: Configuring The Equipment Settings - Reversing Valve
Thermostat Configuration Configuring the Equipment Settings - Reversing Valve Reversing Heat Use the “Up” and “Down” buttons to change the reversing valve type by changing the first digit 0 - OB contact is energized to cool 1* - OB contact is energized to heat (default operation for Zoneline heat pump models) Refer to the HVAC unit documentation to determine the correct OB VALVE setting. -
Page 17: Configuring The Energy Saving Settings
Thermostat Configuration Configuring the Energy Saving Settings Use the “Up” and “Down” buttons to select the Energy Saving preset: E-C*: Custom Energy Savings • Refer to the APPENDIX 1 on page 48 for Energy Saving Preset details. • For details on changing the custom settings, refer to the “Custom Energy Savings Settings”... - Page 18 Thermostat Configuration Testing the thermostat Following the thermostat configuration, test if the thermostat is controlling the Zoneline unit. • Press the “Power” button to turn the thermostat ON; • Press the “Down” button to change the temperature set point below the current room temperature to confirm that the thermostat initiates air conditioning.
-
Page 19: Custom Energy Savings Settings
Custom Energy Savings Settings This thermostat comes preprogrammed to use a custom energy setting. To change any of these presets, follow the instructions below. Accessing the Thermostat Settings With the thermostat turned on, press and hold the “Configuration” button until the first thermostat settings screen appears. -
Page 20: Using The Thermostat Settings Screens
Custom Energy Savings Settings Using the Thermostat Settings Screens Setting Value Screen Number • Use the “Up” and “Down” buttons to change the setting. • Press the “F/C” button to advance to the next setting. • Press the “Fan” button to return to the previous setting. •... -
Page 21: Fan Control Mode
Custom Energy Savings Settings 01 – FAN CONTROL MODE Select Fan Control Mode: 00 - MANUAL - guest can select automatic or continuous fan mode. 01* - AUTOMATIC - fan runs only when there is a demand for heating or air conditioning. * Indicates default setting. -
Page 22: 1St Stage Differential - Heat
Custom Energy Savings Settings 02 – 1ST STAGE DIFFERENTIAL - HEAT (0.2°F - 3.0°F; 1.0°F* default setting) Select the number of degrees** the thermostat has to sense between the automatic changeover temperature for heat and the room temperature before a call for the 1st stage heating is initiated. -
Page 23: 2Nd Stage Differential - Heat
Custom Energy Savings Settings 03 – 2ND STAGE DIFFERENTIAL - HEAT (1.0°F - 2.0°F; 1.0°F* default setting) Select the difference between 1st stage heating and 2nd stage heating initiation. 49-5000416 Rev. 0... -
Page 24: 1St Stage Differential - Cool
Custom Energy Savings Settings 04 – 1ST STAGE DIFFERENTIAL - COOL (0.2°F - 3.0°F; 1.0°F* default setting) Select the number of degrees** the thermostat has to sense between the automatic for cool and the room temperature before a call for the 1st stage cooling is initiated. **below the dead band offset (refer to page 40) 49-5000416 Rev. -
Page 25: Incidental Occupancy Threshold
Custom Energy Savings Settings 05 – INCIDENTAL OCCUPANCY THRESHOLD (00 - 60; 05* default setting) Select the minimum period of time (in minutes) for which occupancy needs to be detected to enter the guest occupancy mode. When occupancy is detected, thermostat will switch to occupied mode for a duration of “Incidental Occupancy Threshold”... -
Page 26: Night Occupancy Threshold
Custom Energy Savings Settings 06 – NIGHT OCCUPANCY THRESHOLD (00 - 60; 01* default setting) Select the minimum period of time (in minutes) for which occupancy needs to be detected in order to consider the room occupied during the “Night Occupancy”period. When occupancy is detected during the “Night Occupancy Period”... -
Page 27: Forced 2Nd Stage Heating
Custom Energy Savings Settings 07 – FORCED 2ND STAGE HEATING (00 - 60; 15* default setting) Select a number of minutes 1st stage heating will run before 2nd stage heating is automatically initiated if the guest set point is not reached and the 2nd stage heating is not initiated through differential settings. -
Page 28: Night Occupancy Start
Custom Energy Savings Settings 08 – NIGHT OCCUPANCY START (00 - 23; 21* default setting) Select the start time (in hours - 24-hour clock) for “Night Occupancy” If occupancy is detected for a period of time longer than the “Night Occupancy Threshold” during “Night Occupancy”... -
Page 29: Night Occupancy End
Custom Energy Savings Settings 09 – NIGHT OCCUPANCY END (00 - 23; 09* default setting) Select the time (in hours - 24-hour clock) for “Night Occupancy” to end. This is the time of day the “Night Occupancy” ends and the thermostat switches back to the room sensing settings chosen in the other occupancy modes. -
Page 30: Temperature Recovery Time
Custom Energy Savings Settings 10 – TEMPERATURE RECOVERY TIME (00 - 60; 15* default setting) Select the maximum time allowed for a HVAC unit to attain temperature as defined by Heat and Cool “Recovery Temperature”. “Temperature Recovery Time” selected here and the actual temperature recovery ability of the HVAC unit are used to calculate setback temperatures. -
Page 31: Recovery Temperature - Heat
Custom Energy Savings Settings 11 – RECOVERY TEMPERATURE - HEAT (62°F - 82°F; 69°F* default setting) Select the room temperature in °F that a HVAC unit will have to attain within the selected “Temperature Recovery Time” when there is a need for heating. 49-5000416 Rev. -
Page 32: Temperature Setback Delay - Heat
Custom Energy Savings Settings 12 – TEMPERATURE SETBACK DELAY - HEAT (00 - 120; 30* default setting) Select the time delay (in minutes) for which the room that is in the guest occupancy mode needs to be unoccupied before the temperature setback is initiated. -
Page 33: Minimum Setback Temperature
Custom Energy Savings Settings 13 – MINIMUM SETBACK TEMPERATURE - HEAT (52°F - 72°F; 65°F* default setting) Select the “Minimum Setback Temperature” in °F. Setback temperature is calculated by measuring HVAC unit’s ability to attain “Recovery Temperature - Heat” within “Temperature Recovery Time”. If recovery is disabled (“Temperature Recovery Time”... -
Page 34: Temperature Setback Delay - Cool
Custom Energy Savings Settings 14 – TEMPERATURE SETBACK DELAY - COOL (00 - 120; 30* default setting) Select the time delay (in minutes) for which the room that is in the guest occupancy mode needs to be unoccupied before the temperature setback is initiated. -
Page 35: Maximum Setback Temperature
Custom Energy Savings Settings 15 – MAXIMUM SETBACK TEMPERATURE - COOL (72°F - 92°F; 76°F* default setting) Select the “Maximum Setback Temperature” in °F. Setback temperature is calculated by measuring HVAC unit’s ability to attain “Recovery Temperature - Cool” within “Temperature Recovery Time”. If recovery is disabled (“Temperature Recovery Time”... -
Page 36: Recovery Temperature - Cool
Custom Energy Savings Settings 16 – RECOVERY TEMPERATURE - COOL (62°F - 82°F; 72°F* default setting) Select the room temperature in °F that a HVAC unit will have to attain within the selected “Temperature Recovery Time” when there is a need for air conditioning. 49-5000416 Rev. -
Page 37: Minimum Set Point
Custom Energy Savings Settings 17 – MINIMUM SET POINT (64°F - 84°F; 66°F* default setting) Select the minimum set point in °F that a guest can select. 49-5000416 Rev. 0... -
Page 38: Maximum Set Point
Custom Energy Savings Settings 18 – MAXIMUM SET POINT (60°F - 82°F; 78°F* default setting) Select the maximum set point in °F that a guest can select. 49-5000416 Rev. 0... -
Page 39: Temperature Control Mode
Custom Energy Savings Settings 19 – TEMPERATURE CONTROL MODE Select Temperature Control Mode: 00 - MANUAL - Allows users to select HEAT only or COOL only temperature control mode to maintain the room temperature. 01* - AUTOMATIC - Thermostat automatically turns on heating or air conditioning to maintain the room temperature at the selected temperature set point. -
Page 40: Auto Changeover Set Point Offset (Dead Band)
Custom Energy Savings Settings 20 – AUTO CHANGEOVER SET POINT OFFSET (DEAD BAND) (00°F - 04°F; 01°F* default setting) Select the difference between the guest-selected set point and the heat and the cool set point when the thermostat is in the automatic temperature control mode. -
Page 41: Setback Set Points / Auto-Restore
Custom Energy Savings Settings 21 – SETBACK SET POINTS / AUTO-RESTORE Select Temperature Control Mode: 00 - When room is unoccupied and the thermostat is in the setback mode or turned off, it will NOT maintain the temperature between heat and cool setback set points. When guest enters the room, the thermostat will be turned off - it will not automatically restore the most recent guest settings. -
Page 42: Automatic Humidity Control
Custom Energy Savings Settings 22 – AUTOMATIC HUMIDITY CONTROL 00 - Disable automatic humidity control 01* - Enable automatic humidity control When “Automatic Humidity Control” is enabled, thermostat will turn on air conditioning in an unoccupied room when humidity raises above 60% and room temperature is above 72°F until either room humidity is below 55% or room temperature is below 72°F. -
Page 43: Temperature Calibration
Custom Energy Savings Settings 23 – TEMPERATURE CALIBRATION (-5.0°F - 5.0°F; 0.0°F* default setting) Calibrate the temperature display: +/- 5.0°F 49-5000416 Rev. 0... -
Page 44: Thermostat Maintenance
Thermostat Maintenance Replacing Thermostat Batteries The low battery indicator will be displayed on the thermostat screen when it is necessary to replace batteries in the thermostat. Under normal operating conditions, new brand-name alkaline batteries will last for a period of approximately one (1) year. -
Page 45: Troubleshooting
ERR4 - No link with the Wireless Control Card ERR5 - Thermostat Memory Defect NOTES: For ERR1, ERR2, ERR3, and ERR5, call GE Appliances service. (Phone number located in Limited Warranty section on page 50. For ERR4, reset the configurations starting on page 5. - Page 46 Troubleshooting The thermostat is not controlling the HVAC unit. Check if the HVAC unit is set to “External Thermostat” (Class 2) mode. Refer to Zoneline Owner’s Manual, Aux settings. Verify the status of the red light on the Wireless Control Card.
- Page 47 “12:00”,indicating all settings will be reset to default and the thermostat needs to be re-configured. Please see “configuring thermostat” in the manual on page 9. Contact GE Appliances technical support at 1-844-GE4-PTAC (or 844-434-7822) if the issues are not resolved. 49-5000416 Rev. 0...
-
Page 48: Appendix 1 - Energy Saving Presets
Appendix 1 - Energy Saving Presets Screen # Energy Level Default Setting Fan Control Mode Auto Auto Auto Auto Auto Auto Auto Heat Guest Occupancy Threshold Night Occupancy Threshold Force 2nd Stage Heating After Night Occupancy Start Night Occupancy End Recovery Time Recovery Temperature Heat... -
Page 49: Technical Specifications
(2) this device must accept any interference received, including interference that may cause undesired operation. Pursuant to part 15.21 of the FCC rules, any changes or GE Appliances may void the user’s authority to operate the equipment. 49-5000416 Rev. 0... -
Page 50: Limited Warranty
For help with thermostat troubleshooting, call 1-844-GE4-PTAC (or 844-434-7822) What GE Appliances Will Not Cover: Service trips to your location. Improper installation. If you have an installation problem, contact your installer. You are responsible for providing adequate electrical connections to the product.