Advertisement
Quick Links
Welcome note
Thank you!
We don't believe in new and different technologies if they don't provide a meaningful user benefit. This is how we make decisions involving
product.
We're incredibly proud of what we've accomplished with the IO PRO 3D, allowing us to offer some of the finest smartphone innovations right
here and now.
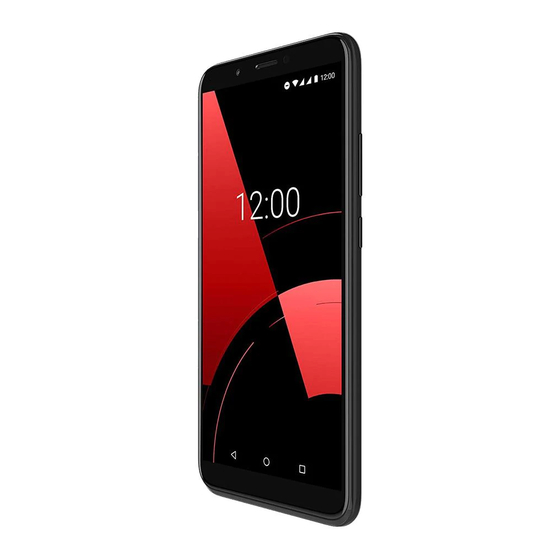
The IO PRO 3D combines high-end hardware, a near boundless 18:9 display, and incredibly smooth software. Android 9 OS is having a whole
slew of exciting features, and finally, we enhanced performance through a combination of the best hardware available and carefully optimized
software.
1
Advertisement

Related Manuals for Rokit IO Pro 3D


Summary of Contents for Rokit IO Pro 3D
- Page 1 We don’t believe in new and different technologies if they don’t provide a meaningful user benefit. This is how we make decisions involving product. We’re incredibly proud of what we’ve accomplished with the IO PRO 3D, allowing us to offer some of the finest smartphone innovations right here and now.
- Page 2 Do not throw, knock or shock the mobile phone, as that will destroy the internal circuits and high-precision components of the mobile phone. In-box content ROKiT IO Pro 3D, gel protective case, hard shell case, SIM tray removal tool, micro USB cable, warranty information card...
- Page 3 Getting to know your IO PRO 3D...
- Page 4 Signing into Google or other accounts When you set up your phone, you were prompted to add a Google account. If you skipped this, be sure to set one up now so you can download apps from Play Store, get a customized information feed, and take full advantage of the Calendar, Gmail, and other apps included with your account.
- Page 5 Move from Android device Learn the basics Your smartphone is, after all, a phone for making and answering calls. But it also has a keyboard for sending texts and emails and a camera for taking photos and videos. The status bar on your home screen displays the time and icons that tell you about your phone's battery and network connections. Get apps Your smartphone comes with many fun and useful apps, but you can really unlock its power by installing apps that suit your lifestyle.
- Page 6 Display your owner info. On your lock screen, you can discreetly display a “please return” message with some of your contact info so that, if your phone is lost, someone can to return it to you. Enable lost phone features. For peace of mind, check out Find My Device , in case you ever need to remotely locate and lock or erase your phone.
- Page 7 Useful to know Tell your phone what to do. Use your phone hands-free with voice commands. Tell it to navigate you and listen to it speak the directions to you as you drive--it'll even reroute you if you've gone off course. Tell it to set alarms, find information on the web, make calls.
- Page 8 you have other devices that need an internet connection (for example, a laptop, tablet, or other phone), you can use your phone as a Wi-Fi hotspot. Reboot phone. In the unlikely event that your phone becomes unresponsive, frozen, shows blank or black screen, or does not respond to the Power button, you can reboot it.
- Page 9 Your old phone showed all apps on your home screen. With your new phone, you can put shortcuts to your most important apps on your home screen for easy access. Or, find your full list by swiping up from your favorites tray. This frees up room on your home screen for widgets, making your new home much livelier.
- Page 10 Setup up as new Upon booting up, proceed through the Google wizard to setup your Google account & sync, setup Face Unlock and more. The IO Pro 3D Setup Wizard gives you the opportunity to personalize your IO PRO 3D, allowing you to craft a smartphone experience that works just the way you want it to.
- Page 11 Inserting and removing SIM and memory card Installing the SIM Card and the Battery A SIM card carries useful information, including your mobile phone number, PIN (Personal Identification Number), PIN2, PUK (PIN Unlocking Key), PUK2 (PIN2 Unlocking Key), IMSI (International Mobile Subscriber Identity), network information, contacts data, and short messages data. Note: After powering off your mobile phone, wait for a few seconds before removing or inserting a SIM card.
- Page 13 Manage dual SIMs This information applies only to phones that support dual SIM cards and have both cards inserted. About dual SIMs When two SIMs are inserted: • You see at the top of the home screen. • Both SIMs can make and receive calls and text messages. •...
- Page 14 Change SIM profile Go to Settings > Network & internet > SIM cards. Touch Dual SIM usage profile. Select a different profile and touch CHANGE PROFILE. Select a new profile. Follow onscreen instructions to complete setup. To keep the same profile but adjust options for data, SMS, voice calls, video calls, or contacts: Go to Settings >...
- Page 16 Add or remove accounts About accounts When you set up your phone, you were prompted to add a Google account. If you skipped this, be sure to set one up now so you can download apps from Play Store, get a customized information feed, and take full advantage of the Calendar, Gmail, and other apps included with your account.
- Page 17 Add non-Google account You can add corporate email accounts, personal email accounts, or other accounts. Many social networking accounts are automatically set up when you install the app. 1.Go to Settings. 2.Touch Accounts > Add account. 3.Do one of the following: •...
- Page 18 Remove account If you remove an account, information you synced will be removed from your phone, but it is not deleted from your account. To remove other accounts: • Go to Settings > Accounts. • Touch the account name. • Touch Remove account.
- Page 19 Set up email Set up personal email You can add multiple email accounts of the following types: • Gmail • Personal email from other providers (IMAP/POP) If you added a Google account on your phone: • When you open the Gmail app for the first time, you'll see your email for that account. You're already set up. •...
- Page 21 Set up corporate email If you use Microsoft Office Outlook on your work computer, your phone can synchronize emails, calendar events, and contacts with the Microsoft Exchange server. Before you start, you'll need the following information from your company's IT department: •...
- Page 22 Battery information Charging information Charging the Battery Your mobile phone can monitor and display the battery state. Normally the remaining energy of the battery is indicated by the battery level icon at the upper right corner of the display screen. When the battery energy is insufficient, the mobile phone prompts "Battery low".
- Page 23 Optimizing battery life You can extend your battery’s life between charges by turning off features that you don’t need. You can also monitor how applications and system resources consume battery power. To guarantee the optimal performance of your battery, please stick to the following rules: •...
- Page 25 Home and lock screen About your lock screen The lock screen appears when you're using a screen lock and you turn on or wake your phone From the lock screen, you can: • View and respond to notifications. Double touch one to open it. •...
- Page 26 You can customize your lock screen to: • Control which notifications, if any, appear. • Add your name or a short message. Screen lock options When you set a screen lock, each time you turn on your phone or wake the screen, you’ll be asked to unlock your phone. No lock: •...
- Page 27 PIN: Enter a four to sixteen-digit numeric code. Longer PINs are more secure. Password: Enter four to sixteen letters, digits, or symbols for the password. A long, strong password is the most secure option.
- Page 28 When you’re using any of the 3 locks, you can also unlock with your fingerprint sensor and set your phone to automatically unlock in certain conditions. • Set or change screen lock • Go to Settings > Security & location. •...
- Page 29 Go to Settings > Security & location > Lock screen preferences. • Turn Show lockdown option on . To use it: Touch & hold the Power button. • • Touch Lockdown. Your fingerprint sensor and automatic unlock settings are disabled and notifications won’t be displayed on your lock screen.
- Page 30 About your home screen You see the home screen when you turn on and unlock your phone or touch. You can add more pages to the right as needed. To add a page, drag an app shortcut or widget to the edge of an existing page and place it on the new page.
- Page 31 lets you open an accessibility menu. Appears after you enable accessibility settings. Note: If you're using the navigation bar, the icons are hidden. To restore these icons, turn off the navigation bar. Folder: Add folders to organize app shortcuts. If you want an entirely new look and feel for your home screen, you can use a different launcher. For a less drastic renovation, just change the wallpaper.
- Page 32 If you receive multiple notifications from an app, they're bundled together. Swipe down to view more details. Some important notifications pop up briefly over your current app so that you can take action. For example, a notification for an incoming call might appear while you're watching a video, so that you can answer or dismiss the call.
- Page 33 Clear all notifications. Swipe to the end of your notifications and touch CLEAR ALL. Some notifications, like voicemails, require an • action and cannot be dismissed. Quick settings Open quick settings Settings you adjust frequently, like Wi-Fi and Bluetooth, are “quick settings”, easy to get to from any screen. To see your first few quick settings, swipe down once from the top of your screen.
- Page 34 Moving objects on the home screen Change wallpaper You can change the background image on your home screen or lock screen. Use your own photos, images that came on your phone, or images from an online category. Open the Wallpapers app. Or, touch &...
- Page 35 shortcuts. To change the app shortcuts: Touch & hold one of the app shortcuts, then drag it up and drop it on Remove. • • Swipe up from the bottom of the home screen to open your app list. Touch & hold the app you want. When the new shortcut appears, drag it to the empty spot in your tray. •...
- Page 36 • Touch & hold a widget to add it You can make some widgets larger to view more content:...
- Page 37 Touch & hold the widget until it's highlighted. • • Release it to see an outline. Drag a corner or side to resize. • Home screen shortcuts Add app shortcuts Swipe up from the bottom of the home screen to open your app list. •...
- Page 38 Do one of the following: To perform the task, touch it. To create a shortcut for that task, drag to an empty space on your home screen. Here are examples of task shortcuts for various apps. Not all apps include task shortcuts. Add web page shortcuts •...
- Page 39 Then you can: • Add more apps. Drag app icons onto the circle from your home screen or app tray. • Use an app in the folder. Open the folder and touch the app's icon. • Name the folder. Open the folder, then touch its name and type a new name. •...
- Page 40 Split screen mode Use split screen view • Open the first app. • Touch In the recent list, touch the app's icon, at the top of the app's preview, to see . Be sure to touch the app's icon instead of •...
- Page 41 • Select the second app to use. Exit split screen view Drag the black divider all the way up or down. Use Picture-in-picture With some apps, you can watch video in a small, movable frame while you do other things. Use it when navigating with Google Maps, too. When you’re playing a video or navigating with Maps, touch .
- Page 43 Screenshots Take a screenshot press & hold Power and Volume Down simultaneously until the screen is captured. A notification will appear allowing you to view or share the screenshot easily. Accessibility settings Visual assistance Adjust colors if you’re color blind Go to Settings >...
- Page 45 Use magnification gestures and icon You can magnify the screen by triple tapping it or by touching by the navigation buttons. To enable these gestures and add the icon: • Settings > Accessibility > Magnification. • Adjust settings as needed: •...
- Page 46 • To zoom temporarily, touch , then touch & hold anywhere on the screen. Drag to move around the screen, then lift your finger to zoom out. • To scroll while zoomed in, drag two fingers across the screen Hear or feel when you touch the screen Go to Settings >...
- Page 47 Use TalkBack to read screens Hear descriptions of everything you touch. To enable TalkBack: • Go to Settings > Accessibility. • Touch TalkBack and turn it on. • Touch Settings and set the options you want. When TalkBack is on: •...
- Page 48 Or, during voice readout, repeatedly press the Volume up or down buttons. • To silence readout and turn off TalkBack: Swipe down and right on the screen. • • Touch Pause feedback, then touch it again twice. • Touch OK twice. •...
- Page 49 Use hearing aids To improve compatibility with hearing aids and reduce sound feedback: • Touch • Touch > Settings > Accessibility. • Turn Hearing aids on Set up TTY device For text-based communication, you can use text messaging and email. If you prefer to connect to a TTY device: •...
- Page 51 Dexterity assistance External switch or keyboard If you’re unable to use a touchscreen, Switch Access lets you control the phone using external switches or keyboard keys to select items, scroll, enter text, and more. To use Switch Access, you must have one of the following: •...
- Page 52 To adjust Switch Access later: • Go to Settings > Accessibility. • Touch Switch Access > Settings. • Adjust options. Use Switch Access • To start scanning and highlighting items on the screen, press the assigned switch or key. • To select a highlighted item, press the assigned switch or key, then press the switch or key assigned to select options.
- Page 53 Use accessibility shortcuts accessibility menu Get quick access to an accessibility menu that gives you better control of your phone. To add the icon: Go to Settings > Accessibility. • • Touch Accessibility Menu. Turn Use service on • To use the menu: At the bottom of the screen, touch •...
- Page 54 To enable the shortcut: Go to Settings > Accessibility. • Touch Volume key shortcut and turn it on • • To change the accessibility feature associated with the shortcut, touch Shortcut service. To use the Volume buttons from the lock screen, turn Allow from lock screen on •...
- Page 55 Dialer / Contacts Make a call Touch • Touch and enter a number. • • If you enter a wrong number, touch • Touch to call the number. • To hang up, touch Other ways to make calls You can place calls from: Phone app •...
- Page 56 In the Phone app, you can place calls in several ways. Dial a number Touch , enter a number and touch . If you enter a wrong number, touch Dial by voice Touch and say a name or number. (If you don't see , swipe down to close the dialer.) Or, skip the Phone app entirely and say a voice command.
- Page 58 During a call Adjust sound during call While listening, you can: Adjust the volume. • Use the Volume button on the side of the phone. • Use speaker. Touch • Use a paired Bluetooth device. Touch use or stop using the device. Mute your microphone.
- Page 59 Use other apps When you hold your phone to your ear, the screen goes dark to avoid accidental touches. To wake it up, move it away from your ear or press the Power button. • To hide the call and use other apps, touch To return to the call, swipe the status bar down and touch On-going call.
- Page 60 Contacts Add contacts automatically When you add an account – such as Google or email – to your phone, the contacts for that account are available on your phone automatically. Add contact with Contacts app • Open the Contacts app. •...
- Page 61 Add contact from text message You can easily create a new contact or add a new number for an existing contact when you receive a text message from an unassigned number. Open the Messages app. • In the message list, touch & hold the number, then touch •...
- Page 62 Edit contacts After creating a contact, you can change the name, photo and other contact information. • Open the Contacts app. • Touch the person's name. • Adjust settings as needed: • assign a custom ringtone, touch > Set ringtone. •...
- Page 63 Merge contacts If you have two contacts for the same person, you can merge the information (including all emails and phone numbers) into a single listing. To automatically merge contacts: Open the Contacts app. Touch > Suggestions. If you don't see Suggestions, no duplicate contacts were found. Touch Merge duplicates.
- Page 64 Touch > Merge. Delete contacts You can delete contacts created and stored on your phone. If the contact is synced from a social network account, you need to delete the contact in that account. For example, a Facebook contact must be deleted from within your Facebook account.
- Page 65 To add someone to your favourites: • Touch the contact icon (photo or other icon). Touch • Block a number Use either app to block both calls and texts from a number. From the Phone app: • Touch • Touch a call from the number to block. •...
- Page 66 Touch OK. • Sort contacts in Contacts app Open the Contact • s app. • Touch > Settings. Set options: • To sort by first or last name, touch Sort by. • To list names with first name first or last name first, touch Name format.
- Page 67 Set options: • To sort by first or last name, touch Sort by. To list names with first name first or last name first, touch Name format. • Share one or a few contacts Open the • ntacts app. • Touch &...
- Page 68 • Touch > Settings > Export. If you use more than one account, select the account. • Touch Export to .vcf file. • Touch SAVE to save it in your Download folder. • Open the Files app. Go to Downloads. •...
- Page 69 Messages Text messages - SMS SMS (Short Message Service) messages contain text only. One text message can contain 160 characters; when you near the limit, a counter appears. If you type more, your message is sent in a series of SMS messages. You can send one SMS message to multiple people, and replies are delivered in separate, not group, conversation threads (unless you and your recipients have group messaging enabled).
- Page 70 When you receive a text message with the Messages app, you'll see the status bar. Swipe the status bar down and touch Do any of the following: • To respond to the message, enter your response in the text box and touch •...
- Page 71 Touch Enter recipients, then type the message. Optionally: • attachment, touch • To add a smiley or other icons, touch the on-screen keyboard. Touch Tips for sending messages: To text your best • friend with touch from your...
- Page 72 Home screen, add a task shortcut. Touch & hold and drag to your Home screen. • To change the text message reply to incoming calls, open the Phone app and touch > Settings > Quick responses. Request text delivery reports See whether recipients receive your messages by requesting delivery reports.
- Page 73 Finish composing the message and touch • Delete the characters in the text field to delete the draft. • Forward a text message Open the Messages app. Open the conversation. Touch & hold the message. Touch > Forward. Copy text from a message Open the Messages app.
- Page 74 You can now paste it elsewhere, like in an email you're composing. Attach files to text message You can attach saved pictures and videos or take one right from your message that has an optimized, reduced file size. Open the Messages app. Compose a reply or a new message.
- Page 75 Open your conversation with that person. Touch their name at the top of the conversation. Touch > Share. Touch the recipient's name, or touch Messages to start a new message. Touch...
- Page 76 Browser Visit and bookmark websites Your phone connects to your carrier's mobile network or to a Wi-Fi network to access the Internet. To save data charges on your mobile plan, use a Wi-Fi connection. Open the Chrome app. Go to a site by touching the bar at the top and typing the address. On a web page: •...
- Page 77 • To print the page, touch > Share > Print. Make sure you set up your print service. To return to the previous page, touch...
- Page 78 Open and switch browser tabs In the Chrome app: • To switch tabs, touch the switcher icon • To open a new tab, touch switcher icon then touch Browse privately with incognito tabs If you don't want Chrome to remember your activity, use incognito tabs.
- Page 79 • Drag to a blank space on your Home screen. To close all incognito tabs: • Swipe the status bar down. Touch • Clear browsing history • Open the Chrome app. • Touch > History. • Touch CLEAR BROWSING DATA. Change default browser You can download other browsers from Play Store.
- Page 80 Or touch Advanced > Default apps > Browser app. • • Touch the app to use. File manager Location of files Files are stored in these folders on your phone: • DCIM: (Digital Camera Images) photos and videos taken with the Camera app •...
- Page 81 ensure the phone is properly connected to the computer using the steps above. If you don't unlock the phone and change the USB connection to allow file transfers, you won't see any files on your phone. On your computer, open File Explorer, click the name of your phone and navigate to its internal storage or SD card.
- Page 82 Unlock the phone. Change the USB connection type to allow file transfers: • Swipe down from the top of your Home screen and touch the Charging this device via USB notification. • To transfer any type of file, touch File transfer. Or, to transfer only photos and videos, touch PTP.
- Page 83 To open or play a file, touch it. • • To sort files by name, date modified or size, touch the label to sort by it. • To share a file, touch and hold it, then touch • To delete a file, touch and hold it, then touch To access downloads from a computer, connect your phone with a USB cable, then open the...
- Page 84 How to take 3D images The IO Pro 3D does not take real 3D images, instead it allows you to take two images one after the other and merges them producing a 3D effect. How to transfer 3D images to and from device Plug your device into your computer (making sure you have file transfers on) and locate the K3DX folder.
- Page 85 Security To keep your phone secure, use a screen lock when it goes to sleep: • Choose a pattern, PIN or password to unlock. • Add a Smart Lock to unlock automatically when connected to a trusted device, when you're at a trusted place (such as home or work), with facial recognition, or until you set your phone down.
- Page 86 • To rescan your phone, touch Screen lock options When you set a screen lock, each time you turn on your phone or wake the screen, you'll be asked to unlock your phone.
- Page 87 No lock: • None: this gives no protection, but you can quickly access your Home screen. • Swipe: swipe up. This prevents accidental dialing but doesn't secure the phone. • Lock: • Pattern: Draw a pattern on a grid. • PIN: enter a four to sixteen-digit numeric code.
- Page 88 Set or change screen lock Go to Settings > Security & location.
- Page 89 Touch Screen lock and select the type of lock you want. Some lock options aren't available if you added a VPN or a work (corporate) email account to your phone. Hide your password or pattern You can hide your password or pattern to prevent others from viewing it when you unlock your screen.
- Page 90 Fingerprint sensor Set up fingerprint security Use the fingerprint sensor to unlock your phone, make fast and secure online and in-store purchases and sign into bank and finance apps. Go to Settings > Security & location. Touch Fingerprint. Follow the onscreen instructions to scan your fingerprint using the sensor on the back of your phone. Add more fingerprints Keep in mind that: If multiple users share the phone, users should add their fingerprints from within their user profile, instead of adding multiple...
- Page 92 Remove a fingerprint Go to Settings > Security & location. Touch Fingerprint and enter your pattern, PIN or password to verify your identity. Touch next to the fingerprint. Use a fingerprint to unlock your phone To wake and unlock your screen, or any time you see on the screen, touch the sensor to verify your identity.
- Page 93 When the sensor can't read the fingerprint • Smart Lock Keep phone unlocked while it's on you You can keep your phone unlocked while you're holding it in your hand or carrying it in your pocket or handbag. Just unlock it once, and it stays unlocked until you set it down (or manually lock it).
- Page 95 SIM lock Set up SIM lock Your SIM card came with a default PIN from your carrier. You can use it to set up an optional SIM card lock, which prevents others from using your mobile plan and accessing account information if your phone is stolen.
- Page 96 Unlock SIM card When prompted, enter the PIN used to set up the SIM lock. If you accidentally disabled the SIM If you enter an incorrect PIN multiple times, the SIM will be disabled. Contact your carrier for a PIN unlock key (PUK) to re-enable the SIM. Find my device Set up lost phone features Find My Device allows you to remotely locate, lock, and erase your phone.
- Page 97 App permissions Adjust app permissions The first time you use an app, and sometimes when you install or update it, you are asked to grant the app permission to access certain data and phone features. You can adjust these permissions any time. To adjust permissions by feature: •...
- Page 98 language settings and other details). You can also control whether apps have access to features such as Picture-in-picture, Battery optimization and Do not disturb. In general, you shouldn't need to adjust these. Gestures Learn gestures Gesture Description Touch Press with one finger and lift. Result: open something (app or email) or choose something (tick box, icon).
- Page 99 Pinch out to zoom Put two fingers on the screen and then drag them apart. Result: zoom in to see larger versions of photos and maps. Or, open expandable notifications. Pinch in to zoom Put two fingers on the screen, far apart, and then drag them together. Result: zoom out to see smaller versions of photos or maps.
- Page 100 Record your IMEI number The IMEI (International Mobile Equipment Identity) number is the unique code that identifies your phone. You'll need it if you contact support regarding a warranty and it's important to have if your phone is stolen. Service providers can use the IMEI to block a stolen phone from mobile networks, and many police departments keep a record of stolen phones using this number.
- Page 101 You may never need your IMEI number, but it's a good idea to record it, just in case. To find the IMEI number: • Go to Settings > System > About phone. • See IMEI for your number. • Record and save the number where you can easily access it. You can also find your IMEI number by dialing *#06# in the Phone app.
- Page 102 Change how the keyboard looks To change the background colour of your keyboard: Go to Settings > System > Language & input > Virtual keyboard. Touch Gboard > Theme. Select a colour to use as the background. Touch Apply.
- Page 103 Adjust keyboard sounds To control whether your keyboard makes sounds: Go to Settings > System > Language & input > Virtual keyboard. • Touch Gboard > Preferences. • To hear sounds when you type, turn Sound on keypress on • To adjust how loud the sounds are, touch Volume on keypress.
- Page 104 Change display language • You selected the language for your phone during setup. To change it: Go to Settings > System > Language & input > Languages. • • Touch & hold the language you want and drag it to the first position in the list. If you don't see the language you want, touch to add it, then drag it to the first position.
- Page 105 Fill in forms automatically Don’t retype your personal information again and again. Save it securely, then with just one touch, fill in passwords, addresses, credit cards and other information saved to your Google account. To set it up:...
- Page 106 Go to Settings > System > Language & input. • • Touch Advanced > Auto-fill service. Select Google, then touch • Touch > CONTINUE. • • Touch categories to review and edit personal information, addresses, credit cards passwords. Resetting your device What a reset does Resetting your phone erases all data and restores it to out-of-the-box condition.
- Page 107 Before you reset • • Back up your data. If your phone works and you can unlock it, be sure to: Copy your photos, videos and music to a computer or to cloud storage. Make sure that any changes you made to contacts or calendar are synced to an account. Make sure you have your security information: •...
- Page 108 If you're resetting because you suspect a third-party app is causing problems, turn off Back up to Google Drive. Instead of automatically restoring apps after the reset, you'll want to restore them one at a time to determine which is causing the problem. Touch then touch Advanced >...
- Page 109 Reset Wi-Fi, mobile data and Bluetooth If you're having problems with connections, review this information first...
-
Page 110: Updating Software
• Wi-Fi • Bluetooth • Mobile data Hotspot (internet sharing) • Then, if you're still experiencing problems, try resetting all network settings: • Go to Settings > System > Advanced > Reset options. Touch Reset Wi-Fi, mobile & Bluetooth > RESET SETTINGS. •... - Page 111 To manually check for updates, go to Settings > System > System updates. If an upgrade is available, follow the onscreen instructions to install it. About device Go to Settings > System > About phone Find legal and product information To view the electronic regulatory label for your phone, go to Settings >...
- Page 112 Change time format Go to Settings > System > Date & time. To change how times are displayed:...
- Page 113 To use military time such as 13:00, turn Use 24-hour format on To use 12-hour format such as 1:00 PM, turn Use 24-hour format off Customization Wallpaper Change the wallpaper: Touch the home screen and hold the • finger on the display Wallpapers, Widgets and Home Settings •...
- Page 114 Connectivity Calling Make a call • Touch • Touch and enter a number. • If you enter a wrong number, touch • Touch to call the number. • To hang up, touch Other ways to make calls You can place calls from: Phone app...
- Page 115 Contacts app Other apps that show contact information. Wherever you see a phone number, you can usually touch it to dial. In the Phone app, you can place calls in several ways. Dial a number Touch , enter a number and touch .
- Page 116 Adjust sound during call...
- Page 117 While listening, you can: • Adjust the volume. Use the Volume button on the side of the phone. • Use speaker. Touch • Use a paired Bluetooth device. Touch to use or stop using the device. • Mute your microphone. Touch .
- Page 118 Wi-Fi Connect to Wi-Fi network Some Wi-Fi networks are open and you can simply connect for Internet access. Other Wi-Fi networks are secure and require you to enter a password. Contact the Wi-Fi network's owner for the password. To search for and connect with available Wi-Fi networks: Open quick settings, then touch &...
- Page 119 Open quick settings, then touch & hold • Touch the network's name and touch FORGET. • Advanced: Disable Wi-Fi scanning • Go to Settings > Security & location. • Touch Location > Advanced > Scanning. • Turn Wi-Fi scanning off Use Airplane mode Airplane mode turns off all wireless connections, preventing your phone from transmitting signals that could interfere with plane communications.
- Page 120 Bluetooth drains your battery, so turn it off when not in use. Open quick settings. Touch the icon to switch on/off: is on. is off. Pair with Bluetooth device To connect with a new Bluetooth accessory or other device, you need to pair with it.
- Page 121 If a pairing code appears on your phone and Bluetooth device, make sure that the codes match. (If they don't, touch Cancel, verify the • name of the device that you want to pair with and try again.) • If your device shows a passkey (like 0000 or 1234), enter it on your phone.
- Page 122 Share photos • • Share contacts Share your phone's internet connection with your computer • Reconnect with Bluetooth device • Open quick settings and touch to turn it on. • Turn on the Bluetooth device. FM Radio Listen to FM stations Your phone automatically tunes to radio stations with the best signal.
- Page 123 number. • To change between headphones or speakers, touch If you're listening to the radio while using another app, use the mini player in notifications to seek stations or turn the radio off. Record current station On the tab, touch start recording. •...
- Page 124 Information Safety information Due to the used enclosure material, the product shall only be connected to a USB. Interface of version 2.0 or higher. The connection to so called power USB is prohibited. The adapter shall be installed near the equipment and shall be easily accessible. Do not use the mobile phone in the environment at too high or too low temperature, never expose the mobile phone under strong sunshine or too wet environment.
-
Page 125: Road Safety Comes First
Health and safety ROAD SAFETY COMES FIRST Do not use a hand-held phone while driving. Use hands-free devices when calls are unavoidable while driving. In some countries, dialing or receiving calls while driving is illegal! SWITCH OFF IN AN AIRCRAFT Wireless devices can cause interference in aircrafts. -
Page 126: Qualified Service
The conversation quality of any mobile phone may be affected by radio interference. An antenna is built inside the mobile phone and located below the microphone. Do not touch the antenna area during a conversation, or the call quality might decrease. QUALIFIED SERVICE Only qualified personnel may install or repair phone equipment. - Page 127 Basic Troubleshooting If you find exceptions when operating the mobile phone, restore the factory settings and then refer to the following table to solve the problem. If the problem persists, contact the distributor or service provider. Fault Cause Solution The SIM card is damaged. Contact your network service provider SIM card error The SIM card is not in position.
- Page 128 The mobile phone cannot be powered The battery energy is exhausted. Charge the battery Calls cannot Call barring is activated Cancel call barring dialed The mobile phone cannot connect the The SIM card is invalid Contact your network service provider network...
- Page 129 The mobile phone is not in a service area Move to the network operator's service area of the GSM network The signal is weak Move to a place where the signal quality is high The charging voltage does not match the Ensure the charging voltage matches the voltage range indicated on the voltage range indicated on the charger charger...
Need help?
Do you have a question about the IO Pro 3D and is the answer not in the manual?
Questions and answers