Table of Contents
Advertisement
Quick Links
Open the carton and remove the top polystyrene sheet. Carefully lift out platter, motor housing, power supply, armboard etc.
Remove the large polystyrene block to enable removal of the metal chassis from the bottom of the carton. Remove the spider
from the underside of the polystyrene block.
Check the contents of the package:
•
one acrylic spider with cable fixing pad installed
•
three conical feet
•
three threaded spring tower sleeves with internal thrust balls
•
three spring assemblies with white Teflon washers
•
three aluminum spring covers
•
one cast aluminum chassis
•
one inverted main bearing assembly
•
one platter nut
•
one partially filled vial of synthetic bearing oil
•
one platter
•
one motor assembly
•
one drive belt
•
one power supply
•
one arm adaptor plate (armboard)
•
three black Delrin armboard de-coupling spacers, three Allen head socket screws
•
one Allen key
•
one record clamp
•
one nylon cable tie
A Note about the inverted main bearing
Michell's unique inverted bearing pumps oil from the well at the base of the bearing shaft and floods the thrust ball at the top
of the shaft. The oil then returns to the well via a relief hole drilled down the shaft to re-circulate once again. The oil well at
the base of the shaft must be filled sufficiently to allow the bearing to pick up the oil. Too little oil and no circulation will occur.
Too much and the oil will overflow when the bronze housing is dropped onto the inverted shaft. Use a tissue if this occurs.
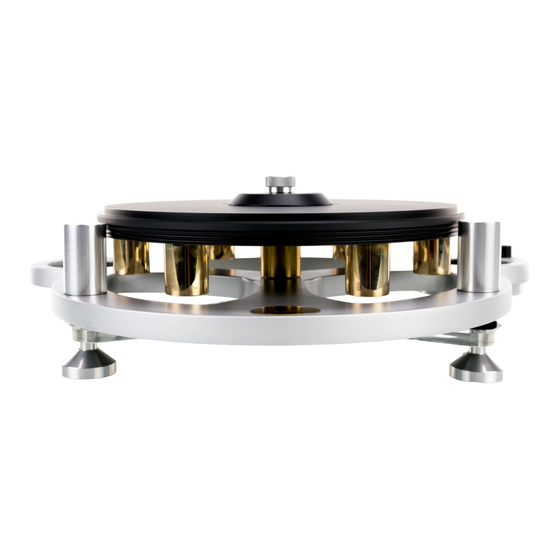
Assembling the turntable
1. Screw the three conical feet fully onto the threaded studs on the underside of the acrylic spider but do not tighten. The feet
will be used for leveling the deck later.
Gyro SE MK II Pictorial Setup Instructions
Advertisement
Table of Contents

Summary of Contents for Michell Engineering Gyro SE MK II
- Page 1 Gyro SE MK II Pictorial Setup Instructions Open the carton and remove the top polystyrene sheet. Carefully lift out platter, motor housing, power supply, armboard etc. Remove the large polystyrene block to enable removal of the metal chassis from the bottom of the carton. Remove the spider from the underside of the polystyrene block.
- Page 2 2. Put the three felt rings over the spring support spindles. These rings serve to protect the acrylic base each time the clamp is used. 3. Screw the spring assemblies onto the threaded spring support sleeves until all the threads are fully showing above the black Delrin bushing.
- Page 3 5. Mount your tonearm to the armboard making sure the word FRONT on the underside is facing towards the front of the arm. If your armboard already has a grounding strap pre-installed go to step 6. If not, locate the grounding strap and install to the left-rear (when viewed from above) arm mounting screw using the nut and washer supplied in the kit as shown below.
- Page 4 7. Fit the armboard / tonearm to the chassis using the socket head screws and Allen Key. The screws should be just snug. Important note: Do not over-tighten or you will over-compress the embedded O-rings, defeating the de-coupling effect. Further tightening will then shear the Delrin studs off the bottom of the spacers. If you find that the top screws bottom out in the spacers before securing the armboard, then they are too long and MUST be changed for shorter ones or you will shear off the Delrin studs below the spacers.
- Page 5 10. From underneath the metal chassis, insert the spindle into the threaded center hole of the metal chassis and screw the slotted base fully home. Using a large coin inserted into the slot underneath, tighten the bearing base as tight as you can to insure that it does not loosen over time as the platter rotates against it.
- Page 6 14. Now carefully lower the platter over the threaded record spindle and secure it in place with the knurled platter nut, insuring that the nut's recessed side is facing downward. Connect the power supply lead to the motor lead. 15. Fit the drive belt around the smaller 33 RPM groove in the motor pulley and in the lowest groove in the platter. (The lower pulley groove is for 45 RPM).
Need help?
Do you have a question about the Gyro SE MK II and is the answer not in the manual?
Questions and answers