Table of Contents
Advertisement
Advertisement
Table of Contents

Summary of Contents for Vremi VRM050696N
- Page 1 This Is A Manual. Portable Air Conditioner Portable Air Conditioner...
-
Page 2: Before First Use
BEFORE FIRST USE: To prevent any internal damage, it is very important to keep refrigeration units (like this one) upright throughout their journey. Please leave it standing upright and outside the box for 24 HOURS before plugging it in. -
Page 4: Important Safety Instructions
Important Safety Instructions This appliance can be used by children aged from 8 years and above and persons with reduced physical, sensory or mental capabilities or lack of experience and knowledge if they have been given supervision or instruction concerning use of the appliance in a safe way and understand the hazards involved. Children shall not play with the appliance. - Page 5 Important Safety Instructions 27. Young children should be supervised to ensure that they do not play with, operate or climb on the appliance. 28. If the appliance is making unusual sounds or is emitting smoke or an unusual odor, unplug it immediately. 29.
- Page 6 Important Safety Instructions IMPORTANT - GROUNDING METHOD This product is factory equipped with a power supply cord that has a three-pronged grounded plug. It must be plugged into a mating grounding type receptacle in accordance with the National Electrical Code and applicable local codes and ordinances.
-
Page 7: Parts Description
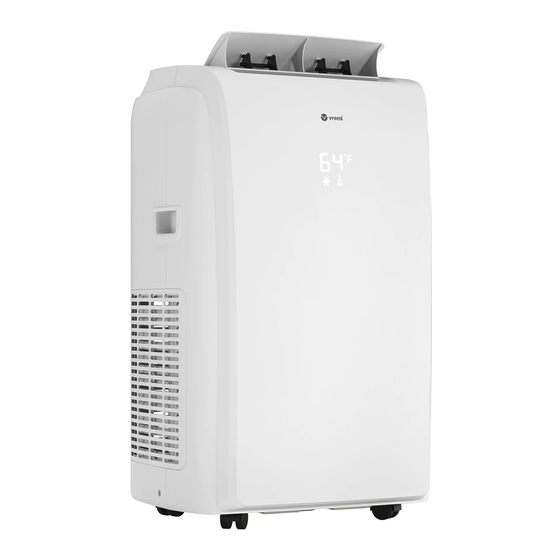
Parts Description DESCRIPTION 1. Deflector 7. Control panel 2. Air outlet grille 8. Intake grille 3. Display screen 9. Air outlet grille 4. Handle (both sides) 10. Condenser drain 5. Intake grille 11. Power cable 6. Castors ACCESSORIES Parts Parts name Quantity Hose inlet 1 set... -
Page 8: Installation Instructions
Installation Instructions EXHAUSTING HOT AIR In the Cool Mode the appliance must be placed close to a window or opening so that the warm exhaust air can be ducted outside. First position unit on a flat floor and make sure there’s a minimum of 12” (30cm) clearance around the unit, and is within the vicinity of a single circuit outlet power source. -
Page 9: Window Slider Kit Installation
Operating Instructions WINDOW SLIDER KIT INSTALLATION Parts: A) Panel (The second panel may not be supplied) B) Panel with one hole C) Panel without hole (may not be supplied) D) Screw to lock window kit in place Assembly: Slide Panel B and C into Panel A to widow width. When adjusting the window width, make sure that the Window kit assembly is free from gaps and/or air pockets when taking measurements. -
Page 10: Description Of The Display Screen
Operating Instructions LOCATION The unit should be placed on a firm ground to minimize noise and vibration. For safe and secure positioning, place the unit on a smooth, level floor to support the unit. To move the unit with casters, make sure to move on smooth and flat surfaces. Be careful when moving on carpeted surfaces. -
Page 11: Operating From The Control Panel
Operating Instructions OPERATING FROM THE CONTROL PANEL 1 ON/OFF button 2 MODE button 3 FAN button 4 INCREASE button 5 DECREASE button TURNING THE APPLIANCE ON Plug into the mains socket, the appliance is now in standby mode. button to turn on the appliance. The last active setting when it was turned off will appear. Press the Never turn the appliance off by unplugging from the mains. -
Page 12: Cool Mode
Operating Instructions COOL MODE To cool and dehumidify the room, follow the settting below: Press the button a number of times until the symbol appears. Select the target temperature 18℃-32℃ (64℉-90℉) by pressing the button until the desired value is displayed. Select the required fan speed by pressing the button. -
Page 13: Fan Mode
Operating Instructions FAN MODE When using the appliance in this mode, the air hose does not need to be attached. Press the button a number of times until the symbol appears. Select the required fan speed by pressing the button. Fan speed can be selected: High, Med, Low. -
Page 14: Self-Diagnosis
Operating Instructions SWITCH THE UNIT OF TEMPERATURE When the appliance is in standby mode, press and hold the button for 20 seconds. Temperature will toggle between ℃ and ℉. For example: In cool mode, the screen displays as fig.7 will change to fig.8. Fig.7 Fig.8 SELF-DIAGNOSIS... -
Page 15: Setting The Timer
Operating Instructions SETTING THE TIMER Programming start up Turn on the appliance. Choose the mode you want, for example cool, 24℃, high fan speed. Turn off the appliance. Press the button, the screen will display 1-24 hours, and the symbol and symbol and symbol will flash together. -
Page 16: About Remote Control
Operating Instructions ABOUT REMOTE CONTROL Fan button Swing button Sleep button Increase button Decrease button On/Off button Mode button Timer button ℃/℉ switch button - Point the remote control at the receiver on the appliance. - The remote control must be no more than 23 feet (7 meters) away from the appliance (without obstacles between the remote control and the receiver). -
Page 17: Replacing The Battery
Operating Instructions REPLACING THE BATTERY To replace the battery, follow the steps below: 1) Press down the pin and remove the battery cover. 2) Replace the battery and reinstall the battery cover Into the remote control. Insert the pin to the cover hole and then press Push the cover out (Accessories... -
Page 18: Water Drainage Method
Operating Instructions WATER DRAINAGE METHOD When there is excess water condensation inside the unit, the appliance stops running and shows “ ” (FULL TANK as mentioned in SELF-DIAGNOSIS). This indicates that the water condensation needs to be drained using the following procedures: Manual Draining (fig.17) Water may need to be drained in high humidity areas... -
Page 19: Cleaning The Cabinet
Operating Instructions CLEANING Before cleaning or maintenance, turn the appliance off by pressing the button on the control panel or remote control, wait for a few minutes then unplug from the mains socket. CLEANING THE CABINET You should clean the appliance with a slightly damp cloth then dry with a dry cloth. Never wash the appliance with water. -
Page 20: Start-End Of Season Operations
Cleaning and Maintenance START-END OF SEASON OPERATIONS START OF SEASON CHECKS Make sure the power cable and plug are not damaged and the earth system is efficient. Follow the installation instructions precisely. END OF SEASON OPERATIONS To empty the internal circuit completely of water, remove the cap (fig.26). Run off all water into a basin. -
Page 21: Troubleshooting
Troubleshooting LIMIT CONDITIONS Temperature of room 18℃-35℃ (64℉-95℉) (Cooling) Temperature of room 10℃-25℃ (50℉-77℉) (Heating) TROUBLESHOOTING Problem Cause Solution The appliance does not • Power supply is off • Plug into the mains firmly turn on • It is not plugged properly into •... -
Page 22: Warranty Information
Vremi offers a 12-month warranty on all of our products purchased new and unused from Vremi LLC or an authorized reseller, with an original proof of purchase and where a defect has arisen, wholly or substantially, as a result of faulty manufacturing, parts or workmanship during the Warranty Period. - Page 24 Portable Air Conditioner | 24...
Need help?
Do you have a question about the VRM050696N and is the answer not in the manual?
Questions and answers
My display screen light seems to be fading out. Is there a way to change the display light? I don't know if I am overlooking it in the manual. Thanks