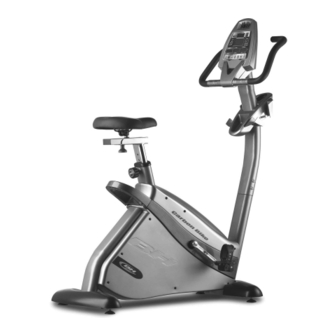
Summary of Contents for BH FITNESS Carbon Bike H8705
- Page 1 H8705 / H871 / H872N Instrucciones de montaje y utilización Instructions for assembly and use...
- Page 2 Fig.1...
- Page 3 Fig.2 Fig.3 Fig.4 Fig.5...
- Page 4 Fig.6 Fig.7 Fig.8 Fig.9...
- Page 5 Fig.10 Fig.11 Fig.12 Fig.13 Fig.14 Fig.15...
- Page 6 Fig.16...
-
Page 7: Instrucciones De Seguridad
Español INSTRUCCIONES DE RIESGO PARA LA SALUD Precaución: Antes de comenzar a SEGURIDAD.- utilizar la bicicleta, consulte a su Este aparato ha sido diseñado y médico. construido de modo que proporcione Esta advertencia es especialmente la máxima seguridad. Sin embargo, importante para personas de edades deben aplicarse ciertas precauciones superiores... -
Page 8: Instrucciones Para El Ejercicio
3.- Compruebe la bici antes de INSTRUCCIONES PARA EL comenzar ejercicio, para EJERCICIO.- asegurarse de que se han montado El uso de la BICICLETA le reportará todas las piezas y que las tuercas, diferentes beneficios, mejorará su tornillos, pedales y brazos se han condición física, tono muscular y, apretado correctamente antes del uso. -
Page 9: Instrucciones De Montaje
Pérdida de peso. Fig.2, introduzca los tornillos (26) con En este caso, el factor importante es las arandelas planas y las tuercas, el esfuerzo realizado. Cuando más apriete fuertemente. intenso y más prolongado sea el A continuación coja el embellecedor trabajo, mayor será... -
Page 10: Montaje De Los Pedales
3. MONTAJE DE LOS Mod. H872N.- Conexione los dos terminales (107 y PEDALES.- 108) Fig.7 que salen del tubo manillar Siga atentamente las instrucciones (12) y del cuerpo central (40). de montaje de los pedales, una Conexione los dos terminales (136) y colocación incorrecta podría dañar (137) que salen del tubo manillar (12) la rosca del pedal o de la biela. -
Page 11: Colocación Del Monitor
REGULACIÓN VERTICAL. del tubo manillar, también los tornillos Para levantar o bajar la tija del sillín, de la parte inferior que en el punto 4 afloje primero un poco el pomo de la se han dejado apretados levemente. tija de sillín (41) girándolo en el Mod. - Page 12 MOVIMIENTO Y ALMACENAJE.- (parte trasera inferior) y conecte el transformador de corriente a la red de La unidad esta equipada con ruedas 220 V, Fig.15. (23) lo que la hace más sencillo su movimiento. Las dos ruedas que se Para cualquier consulta, no dude en encuentran en la parte delantera de ponerse contacto...
-
Page 13: Safety Instructions
English HEALTH HAZARDS SAFETY INSTRUCTIONS.- Caution: Consult your doctor This bicycle has been designed and before beginning to use the bicycle. constructed provide maximum This advice is especially important safety. Nevertheless, certain for those over 35 or suffering from precautions should be taken when health problems. -
Page 14: Exercise Instructions
4. Use original spares from supplier. Place the other foot onto the second The replacement or modification of pedal. Do not step on the plastic cover. any component, other than what is Once you are standing and stable on approved by supplier, will void your of the cross trainer you can grip the left warranty. -
Page 15: Attaching The Pedals
1. ASSEMBLY INSTRUCTIONS.- Then take the finish trim piece for stabiliser (31) and rest it on the The assistance of a second person stabiliser bar with wheels (30) that you is advisable for the assembly work. have just assembled. Attach the trim Take the unit out of its box and make bottom using... - Page 16 Mod. H871. Pull the control knob back and without Connect the two terminals (107 and releasing it, move the saddle post up or 108) Fig.6, coming down. Next, take the horizontal tube for handlebar stem (12) and the main the saddle (34) and attach the saddle body (40).
-
Page 17: Fitting The Monitor
7. FITTING THE MONITOR.- with the flat washers, making sure that the handlebar is aligned correctly, Mod. H8705. securely tighten all of the bolts on the Bring the monitor (2) to the handlebar handlebar stem including the bolts at stem (12) Fig.10, connect the two the base which were left hand tight in terminals (15) and (Q), coming out of point 4. - Page 18 H8705...
- Page 19 H871...
- Page 20 H872N...
- Page 21 Para pedido de repuesto: Indicar el modelo de la máquina Nº correspondiente a la pieza Cantidad To order replacement parts: State the machine model Corresponding parts nº Quantity Ejemplo / E.g: H-8705 H-871 H-872N...
- Page 22 Español Por medio de la presente Exercycle S.L. declara que este producto cumple con los requisitos esenciales y cualesquiera otras disposiciones aplicables o exigibles de las Directivas 2004/108/CE y 2006/95/CE. English Hereby, Exercycle S.L, declares that this product is in compliance with the essential requirements and other relevant provisions of Directives 2004/108/EC and 2006/95/EC.
- Page 23 Tel.: +351 707 22 55 24 902 170 258 Fax: +351 234 729 519 Fax: +34 945 56 05 27 e-mail: info@bhfitness.pt e-mail: sat@bhfitness.com BH FITNESS NORTH AMERICA BH FITNESS MEXICO BH Germany GmbH 20155 Ellipse BH Exercycle de México S.A. de Altendorfer Str. 526...


Need help?
Do you have a question about the Carbon Bike H8705 and is the answer not in the manual?
Questions and answers