Advertisement
Quick Links
TIPS
NOTE:
• KELTY carriers are
meant to be used
BY ADULTS only.
• KELTY carriers are
designed to transport
one child.
• The total load limit
including the child
AND cargo is:
TC 2.0 & 3.0 - 40 lb.
TRANSIT 3.0
JUNCTION 2.0
INSTRUCTIONS
TRANSIT 3.0
JUNCTION 2.0
Save these instructions for future reference.
Advertisement

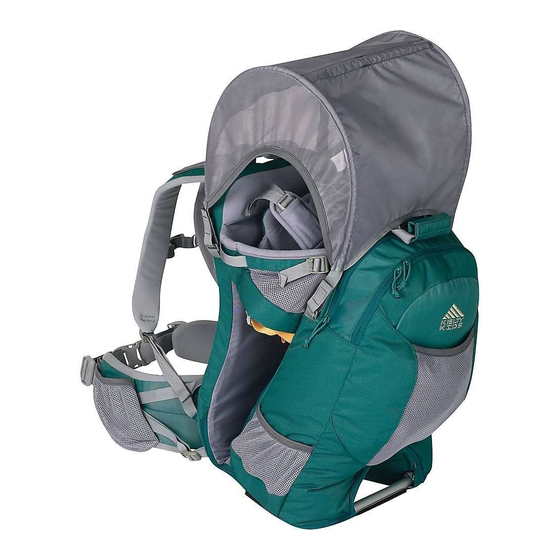
Summary of Contents for Kelty KIDS TRANSIT 3.0
- Page 1 TRANSIT 3.0 JUNCTION 2.0 INSTRUCTIONS TIPS TRANSIT 3.0 NOTE: • KELTY carriers are meant to be used BY ADULTS only. • KELTY carriers are designed to transport one child. • The total load limit including the child AND cargo is: TC 2.0 &...
-
Page 2: Safety Information
SAFETY INFORMATION -IMPORTANT- Read, and follow, all instructions before assembling and using this child carrier! • Everyone who uses this carrier should read this manual and become familiar with all safety warnings and precautions for safe use, assembly, care, maintenance, and storage. - Page 3 SAFETY INFORMATION -IMPORTANT- Read, and follow, all instructions before assembling and using this child carrier! WARNING THIS CARRIER MAY AFFECT YOUR COORDINATION AND BALANCE • DO NOT use the carrier while skating, biking, skiing, or engaging in any activity that will affect your balance. •...
-
Page 4: Care And Cleaning
CARRIER FEATURES -BEFORE YOU START- Sun Hood (3.0 only) Double-hook seat height adjustments CARE AND CLEANING • Clean with mild detergent and a damp cloth. • Allow carrier to air dry. • Do not use bleach or liquid detergent. • Store carrier indoors, in dry location, out of direct sunlight. - Page 5 CARRIER ADJUSTMENT ADULT BACKPACK FITTING TIPS 1. The torso length on your Transit Carrier 3.0 or 2.0 carrier can be adjusted by using the pull cord on the waistbelt, Fig. 1. NOTE: • DO NOT adjust carrier with child in it. •...
- Page 6 CARRIER ADJUSTMENT CHILD’S COCKPIT ADJUSTMENT Figure 4 TOP VIEW OF CARRIER A. Place the carrier on the floor or firm, level ground. B. Make sure the side-release buckles attached to the silver webbing on the child’s shoulder harness are unbuckled (Fig. 4A). C.
-
Page 7: Carrier Use
CARRIER USE CHILD’S COCKPIT TIPS Before starting, make sure the cockpit has been opened (Fig. 5A), the child’s shoulder harness is unbuckled (Fig. 5B), and the NOTE: yellow leg straps located inside the cockpit are unbuckled (Fig. 5C). DO read all safety information prior to using your Kelty Carrier. - Page 8 CARRIER USE CHILD’S COCKPIT- CONTINUED 2. Place child’s shoulder harness over child’s shoulders. 3. Attach the side-release buckles, sewn to the child’s shoulder harness (Fig. 5B) to the mating buckles on the silver webbing sewn to the child’s chest pad. 4.
- Page 9 PUTTING THE CARRIER ON & TAKING THE CARRIER OFF BEFORE PUTTING THE CARRIER ON 1. Make sure the cockpit has been adjusted correctly and that both buckles on the child’s shoulder harness are properly fastened. 2. Make sure the adult backpack shoulder straps are loose and the waistbelt and sternum strap are unbuckled.
- Page 10 6 / 11 KELTY’S LIFETIME WARRANTY Kelty takes pride in its workmanship and undertakes to manufacture the best possible products. Kelty products are covered under warranty, to the original owner, for the lifetime of the product, against defects in materials or workmanship. Since no Kelty product is indestructible, Kelty’s warranty does not cover defects attributa- ble to or resulting from normal wear and tear (ie: exhausted zippers), natural hazard dam- age (ie: weather, animals, ultraviolet [UV] damage on tents), abuse or alteration.


Need help?
Do you have a question about the TRANSIT 3.0 and is the answer not in the manual?
Questions and answers