Table of Contents
Advertisement
Advertisement
Table of Contents

Related Manuals for Newland NLS-NFT10


Summary of Contents for Newland NLS-NFT10
- Page 1 NLS-NFT10 Portable Data Collector User Guide...
- Page 2 All pictures in this manual are for reference only and actual product may differ. Regarding the product modification and update, Fujian Newland Auto-ID Tech. Co., Ltd. reserves the right to make changes to any software or hardware to improve reliability, function, or design at any time without notice.
- Page 3 Revision History Version Description Date V1.0 Initial release. 2020-02-24...
-
Page 4: Table Of Contents
Contents Chapter 1 About This Guide ................................ 1 Introduction ..................................1 Documentation Set ................................1 Chapter Descriptions ................................ 1 More Information ................................2 Chapter 2 Getting Started ................................3 Introduction ..................................3 Getting Started ................................. 3 The NFT10 ................................3 Charging the Battery .............................. - Page 5 Scan Mode ..................................25 Scan Trigger ................................... 26 Prefix & Suffix ................................. 26 Good Read Indicator ..............................27 Encoding ..................................27 Data Edit ..................................28 Broadcast-output settings .............................. 29 Symbologies ................................... 29 Chapter 5 Bluetooth ................................... 31 Chapter 6 Wi-Fi ................................... 33 Introduction ..................................
- Page 6 Chapter 13 Maintenance & Troubleshooting ..........................52 Introduction ..................................52 Important Safety &Handling Information ........................52 Disassembly and Retrofit ............................52 External Power Supply ............................52 Abnormal Situation ..............................52 Drop Damage ................................. 52 LCD Screen ................................52 Stacking Heavy Objects ............................52 Mounting Location ..............................
-
Page 7: Chapter 1 About This Guide
Documentation Set The documentation set for the NFT10 includes: NLS-NFT10 Portable Data Collector Quick Start: Describes how to get the NLS-NFT10 up and running. NLS-NFT10 Portable Data Collector User Guide: Describes how to program and use the NLS-NFT10. -
Page 8: More Information
Chapter 12 App Development Guide Describes the app development environment and the use of non-standard interfaces. Chapter 13 Maintenance & Troubleshooting Provides troubleshooting solutions for issues that might occur when using the NFT10. More Information For more product and support information, please visit our web site: http://www.newlandaidc.com. -
Page 9: Chapter 2 Getting Started
Chapter 2 Getting Started Introduction This chapter lists the parts for the NFT10 and explains how to charge the battery and power on the NFT10 for the first time. Getting Started The NFT10 Volume+ Volume- Power Key Right Scan Key USB Port Left Scan Key SIM/TF Card Slot... - Page 10 Front Camera LEDs Light/Proximity Sensors Rear Camera Flashlight Fingerprint Recognition NFC Detection Area Charging contact...
-
Page 11: Charging The Battery
Charging the Battery Connect the NFT10 to a power outlet using the included AC adapter or USB cable. When the terminal’s battery is less than 5%, it takes about 3 hours to fully charge it (The terminal is shut down or in sleep mode). When charging the NFT10 with AC adapter or USB cable, the user is notified the charging statuses by the LEDs on the terminal. -
Page 12: On-Screen Buttons
On-screen Buttons Back Button Home Button Overview Button The NFT10 has five physical keys and three on-screen buttons. The on-screen buttons include Back Button, Home Button, and Overview Button. Back Button: Tap it to go back to the previous screen. Home Button: Tap it to go back to the home screen. - Page 13 Communicating with PC Step 1: Connect the Micro USB port on the NFT10 to your computer with the included USB cable. Step 2: Switch NFT10 on. On the home screen, swipe from top to open the notification bar. Step 3: Tap "Tap for more options". Step 4: Select "Transfer Files".
-
Page 14: Installing Sim Card/Tf Card
Installing SIM card/TF card Step 1: Pull the SIM / TF card tray out from the slot on the left side of the terminal. Step 2: Place the SIM/TF card into the tray and then gently push the tray all the way into the slot until it locks in place. -
Page 15: Chapter 3 Basics
Chapter 3 Basics Introduction This chapter provides the basics of setting and using the NFT10 Switching On/ Rebooting/ Switching Off the NFT10 After installed with the SIM card and fully charged, you can start to use the NFT10. Switch the NFT10 on: Hold down the Power key on the right side of the terminal until the Android logo is displayed. Note that the initialization is going to take some time before the NFT10 displays the Home screen. -
Page 16: Locking/Unlocking The Nft10
Locking/Unlocking the NFT10 Lock the NFT10: Briefly press the Power key on the right side of the terminal. If no operation is performed on the NFT10 for a preset period of time, the NFT10 locks automatically. You can change how long it takes for the NFT10 to lock. Unlock the NFT10: Briefly press the Power key on the right side of the terminal and swipe up from the bottom of the and then “Security &... - Page 17 and then “Security & location” -> “Fingerprint” and follow the fingerprint Unlock with Fingerprint: Tap the app icon instructions on the screen to finish the steps.
-
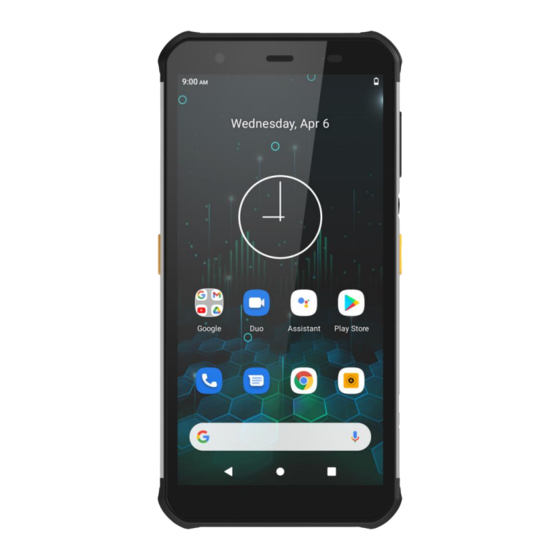
Page 18: Home Screen
Home Screen View another Home screen: Swipe left or right. Go to the Home screen: Tap the Home key. Open an app: Tap it. View all apps/Open apps list: Swipe up from the bottom of the screen to view all the apps. Swipe up Apps list Add an app icon to the Home screen: Swipe up from the bottom of the screen to view all the apps. -
Page 19: Status Icons
Status Icons The icons in the notification bar at the top of the screen give information about the NFT10. Status Icon Description Status Icon Description WLAN on Signal strength Bluetooth on Airplane mode on USB Connected USB debugging Missed calls Battery charging in progress New Message Hotspot &tethering... -
Page 20: Installing App
Installing App Use one of the following methods to install a new app on the NFT10: 1. Download an APK file from online app store and install it. 2. Download software package onto a MicroSD card or PC and copy it to your terminal. Then install it with File Manager. 3. -
Page 21: Date& Time
Date& Time and then “System” -> “Date & time”, and set the date and time on the screen Set the date and time: Tap the app icon shown below as per your needs. -
Page 22: Display
Display and then “Display”, and set the brightness level, night light, adaptive brightness, wallpaper and other Tap the app icon parameters on the screen shown below as per your needs. Ringtones Tap the app icon ->“Sound”. Then set the ringtones and other notification sounds as per your needs. -
Page 23: Restoring Factory Settings
Restoring Factory Settings ->“System” ->“Advanced” -> “Reset options” -> “Erase all data(factory reset)” ->”Reset Phone” Tap the app icon ->”ERASE EVERYTHING”. After this operation, the terminal will be reset to factory defaults and all the personal data on the internal storage, such as music and photos, will be deleted. -
Page 24: Language & Input Method
Language & Input Method ->“System”-> “Languages & input”. Then set the language and input method as per your needs. Tap the app icon... -
Page 25: Floating Button Settings
Floating Button Settings Tapping the floating button can perform tasks such as scanning barcode (Scan), turning on/off flashlight (Flashlight), taking a screenshot (Screen snapshot), turning off screen (Screen off), going to the Home screen (Home),or switching between level and continue scan mode(Toggle level and continue scan mode). Holding down the floating button can make it movable. -
Page 26: Shortcuts To Apps
Shortcuts to Apps Create a shortcut to an app on your Home screen: On the home screen, swipe up from bottom to top with one finger in one smooth motion to view all apps. Tap and hold your desired app and then drag it into the Home screen. Widgets View all widgets: Tap and hold on a blank area of the Home screen and then tap. -
Page 27: Chapter 4 Scanning Barcodes
Chapter 4 Scanning Barcodes Introduction This chapter includes scanning tips and instructions for setting up the scanner. Scanning 1D Barcode Adjust the scan angle or the distance between the NFT10 and the target barcode to ensure the length of laser beam is roughly 8mm greater than that of the barcode, as shown below. -
Page 28: Scanning 2D Barcode
Scanning 2D Barcode Adjust the scan angle and the distance between the NFT10 and the target barcode to make them fall into the following ranges: 1. Point the NFT10’s focus lamp at the center of the barcode. 2. Move the NFT10 until you find the appropriate scan distance. 3. -
Page 29: Programming Scanner
Programming Scanner -> “Extend Settings” -> “Scan Settings”, or tap the app icon Tap the app icon on the Home screen then Then configure the scanner parameters as per your actual needs. Enable Scan Check or uncheck the “Enable scan” item to enable or disable the scanning feature of the NFT10. -
Page 30: Output Mode
Output Mode The NFT10 provides three output modes: Simulate keystroke, Output via API and Fill in EditText directly. 1. Simulate keystroke: Output scanned data to keyboard buffer to simulate keyboard input. Character interval (ms): A character interval of 0-100 milliseconds may be placed between the transmissions of each character of scanned data. -
Page 31: Scan Mode
Scan Mode The NFT10 provides the following four scan modes: 1. Level mode: Press and hold the scan trigger to start a decode session which continues until the trigger is released. 2. Continuous mode: Press the scan trigger to continuously read barcodes. To suspend or resume scan operation, simply press the scan trigger. -
Page 32: Scan Trigger
Scan Trigger Left/Right SCAN key: Use the Scan key on the left/right side of the terminal as scan trigger. Enable or disable them as per your actual needs. Prefix & Suffix To set the prefix/suffix, enter the hexadecimal value of a desired prefix/suffix and then tap “OK”. For example, if you want to add a Line Feed character after each barcode, set the suffix to “0A”;... -
Page 33: Good Read Indicator
Good Read Indicator The terminal can use sound/ vibration/ LED to indicate a good read. Choose one or more options as per your actual needs. 1. Sound: The NFT10 issues a short beep to indicate a good read. 2. Vibrating: The NFT10 vibrates to indicate a good read. 3. -
Page 34: Data Edit
Data Edit This feature allows you to edit barcode data with a script. Tap “load script” and then select the desired script file on the terminal, or scan the 2D barcode that contains a script, to load the script. Then select “exec script” and tap “OK”. -
Page 35: Broadcast-Output Settings
Broadcast-output settings When using broadcast as the scan output method, the NFT10 will output the scan information with the specified broadcast ACTION and EXTRA. Symbologies Note that supported symbologies depend on the scan engine integrated in the terminal. Here we will take CM20 for example. - Page 36 Advanced: The features listed here are designed to improve the scanning performance and energy efficiency of the terminal. 1. Accurate Decoding: When selected, the terminal only decodes the barcode aimed squarely by the aiming pattern. It is advised to select it to insure that only the desired barcodes are read if multiple barcodes are placed closely together. 2.
-
Page 37: Chapter 5 Bluetooth
Chapter 5 Bluetooth This chapter describes how to connect the NFT10 to other Bluetooth device. You can set up a Bluetooth connection between the NFT10 and other Bluetooth devices, such as PC, mobile phone. Note that Bluetooth connection works better if there are no obstacles between them. Before you can use a Bluetooth device with the NFT10, you must first pair them. - Page 38 Unpair/rename a paired Bluetooth device: To rename the paired Bluetooth device, edit its name manually and then tap “OK”. To unpair it, tap “FORGET”.
-
Page 39: Chapter 6 Wi-Fi
Chapter 6 Wi-Fi Introduction This chapter describes how to connect the NFT10 to a Wi-Fi network. Wi-Fi Settings Join a Wi-Fi network: then “Network & Internet” -> “Wi-Fi”, and turn Wi-Fi on to find available Wi-Fi networks. If Wi-Fi is 1. -
Page 40: Ip Settings
IP Settings To set the IP, follow the first two steps of joining a Wi-Fi network, tap “Advanced options” then “DHCP”, and select the desired option. -
Page 41: Chapter 7 Mobile Network
Chapter 7 Mobile Network Introduction The NFT10 can also use 4G network to connect to the internet. To establish 4G connection, you must have a SIM card installed in your NFT10. This terminal can support 4G/3G/2G network provided by Telecom, Unicom or Mobile Mobile Network Settings If no Wi-Fi networks are available, or if you have turned Wi-Fi off, then the NFT10 connects to the Internet via your cellular data network when available. -
Page 42: Apn Settings
Option Two: APN Settings If you cannot connect to the internet when using your terminal’s cellular data, you may need to change your APN settings on the NFT10 to fix it: Go to Settings-> “Network & Internet” ->”Mobile network” -> “Access Point Names”. - Page 43 2. Tap in the top right corner of the screen or tap the carrier of your SIM card on the screen. Then manually enter the APN settings. You can contact your carrier or visit their website to get the correct APN settings, or check the APN settings on a mobile device that can access the internet using the SIM card.
-
Page 44: Chapter 8 Others
Chapter 8 Others Camera Tap the app icon to launch the Camera app. Tap to switch between front and rear camera Turn on/off HDR Normal Modes Turn on/off flash light Tap to take photo or video Tap to view photos Tap normal modes icon >... -
Page 45: Gps
then “Security & location” -> “Location”, and then turn Location on. Tap the app icon... -
Page 46: Nfc
->“Connected devices” ->“Connection preferences” -> “NFC”, and then To enable the NFC feature, tap the app icon turn on NFC. Then you can install an NFC writer on the NFT10 to read and write NFC tags. -
Page 47: Key Map
Key Map This app allows you to remap the keys on the terminal to function as a different key or to make them into shortcuts to launch an application. Start the Key map app: Swipe up from the bottom of the screen to view all the apps. Then tap the icon to start the kep map app. -
Page 49: Chapter 9 Admin Tool
Chapter 9 Admin Tool Introduction The Admin Tool app is used to specify the apps that users can run on the NFT10. Launching the Admin Tool to launch the admin tool and enter the User mode. Tap the “Back Button” on the screen and then Tap the app icon enter the password (default: 112233). - Page 50 When in the Admin mode, you may set the following parameters as per your actual needs. 1. App Manager: Tap “App Manager” -> “Select App”, then select or deselect the apps available to normal users. 2. Reset Password: Change the Admin password.
-
Page 51: Switching Between User Mode And Admin Mode
Switching between User Mode and Admin Mode Enter User Mode: To switch from the Admin mode to the User mode, tap in the top right corner of the screen. Exit User Mode: Press the Back Button on the NFT10 and then enter the password (default: 112233). -
Page 52: Chapter 10 Whitelist Manager
Chapter 10 Whitelist Manager Introduction The Whitelist Manager app is used to specify the apps that users can install on the NFT10. Logging in to Whitelist Manager , enter the password (default: 112233), and tap “Login” to log in to Tap the app icon on the Home screen then the whitelist manager. -
Page 53: Chapter 11 System Update
Chapter 11 System Update Introduction This chapter introduces two methods to update the system software of the terminal: Online update and local update. Online Update ->“CHECK FOR UPDATES”. Update the system online: Tap system updates icon Local Update Zip File to the NFT10 Drive 1. - Page 54 2. Copy the update zip file to the NFT10 drive or NFT10’s Micro SD card. 3. Tap to access the System Update screen. in the top right corner of the System Update screen then select “Local Update”. 4. Tap 5. Select the update zip file. Then select “NEXTREBOOT” or “UPDATE”.
- Page 55 Zip File to TF Card Copy the update zip file to TF Card. TF Card 2. Insert the TF card to the NFT10 and then power on the terminal. 3. Tap to access the System Update screen.
- Page 56 in the top right corner of the System Update screen, and then select “Local Update” ->”External Storage”. 3. Tap Select the update zip file. Then select “NEXTREBOOT” or “UPDATE”.
-
Page 57: Chapter 12 App Development Guide
Chapter 12 App Development Guide Development Environment The NFT10 runs on Android 9 operating system, so you should use Android SDK 9 or lower when developing apps for the NFT10. Use of Non-standard Interfaces See Newland Android PDA API Handbook. - Page 58 Continued use in this case may result in fire or electric shock. Drop Damage If the terminal is damaged due to a drop from high place, immediately cut off the power and contact your dealer or Newland customer service center.
- Page 59 Wireless Functionalities Do not use the terminal’s wireless functionalities where wireless device use is prohibited or where it may cause interference or danger, such as in aircrafts, petrol stations. Use & Maintenance If the terminal cannot be switched on after experiencing a sudden or unexpected power loss or other abnormalities, remove and then reinstall its battery to reset the terminal.
- Page 60 Unresponsive keypad or This problem may be caused by unreliable cable connection between keypad Keypad incorrect response to any and mainboard or keypad malfunction. Please contact Newland after -sales key entry. service. Charging LED is OFF when Ensure the AC adapter is plugged in properly.
- Page 61 Newland Auto-ID Tech. Co., Ltd. (Headquarters) No.1, Rujiang West Rd., Mawei, Fuzhou, Fujian, China 350015 Tel: +86 - (0) 591-83978605 Fax: +86 - (0) 591-83979216 E-mail: contact@nlscan.com Web: www.newlandaidc.com Newland Europe BV Rolweg 25, 4104 AV Culemborg, The Netherlands Tel: +31 (0) 345 87 00 33...
Need help?
Do you have a question about the NLS-NFT10 and is the answer not in the manual?
Questions and answers