Table of Contents
Advertisement
Advertisement
Chapters
Table of Contents
Troubleshooting

Related Manuals for Weidmuller PrintJet PRO


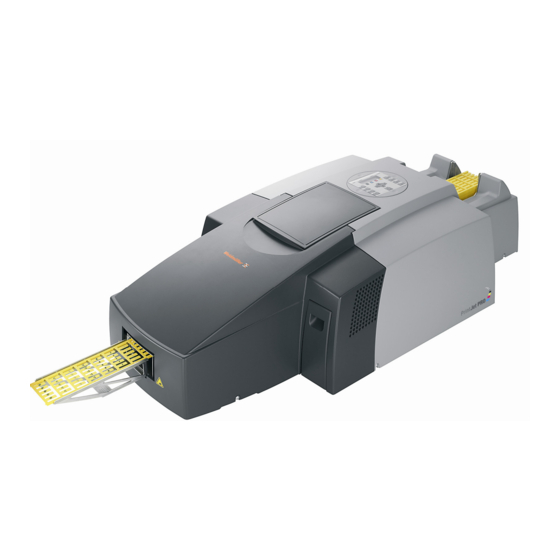
Summary of Contents for Weidmuller PrintJet PRO
- Page 1 PrintJet PRO Manual...
-
Page 3: Foreword
Foreword Foreword Revisions Version Date Modification 06/08 First release 5661290000/00/06.08... -
Page 4: Table Of Contents
Contents Contents Foreword ..........................3 Revisions................................3 Contents ..........................4 General........................7 Terms of use ............................8 Information concerning the technical documentation ..............8 Accuracy of the technical documentation..................8 Prescribed use...........................8 Safety and the environment ......................9 Recycling in accordance with WEEE ....................9 Important notice ....................11 Application............................12 Symbol explanation ........................12 Safety precautions ..........................13 Precautionary measures ........................14... - Page 5 Adjust marker type..........................67 Cleaning the print head ........................67 The first time printing ..................71 Check list ............................72 Turning on the PrintJet PRO......................72 Inserting the MultiCards in the PrintJet PRO loader ..............73 Heating settings ..........................75 Cleaning instructions ..................77 Cleaning the printer ........................78 Maintenance ......................79 General maintenance ........................80...
- Page 6 Contents 5661290000/00/06.08...
-
Page 7: General
General General Terms of use ............................8 Information concerning the technical documentation ..............8 Accuracy of the technical documentation..................8 Prescribed use...........................8 Safety and the environment ......................9 1.5.1 Safety instructions........................9 Recycling in accordance with WEEE ....................9 1.6.1 Disposal of the ink cartridge ....................10 1.6.2 Disposal of the ink waste pad ....................10 5661290000/00/06.08... -
Page 8: Terms Of Use
Only by carefully Software/PrintJet PRO following these instructions the proper and trouble- free operation of the PrintJet PRO printer can be You can contact us by e-mail: guaranteed. printer@weidmueller.de These operating instructions have been written with or call our service number: due care and attention. -
Page 9: Safety And The Environment
WEEE 1.5.1 Safety instructions BtoB disposal Depending on the model, the PrintJet PRO printer is configured with a power supply for AC voltage of ei- Dear Weidmüller Customer, purchasing our product ther 115 V or 240 V. gives you the opportunity to return the device to Weidmüller at the end of its service life. -
Page 10: Disposal Of The Ink Cartridge
General 1.6.1 Disposal of the ink cartridge The empty ink cartridges can be disposed of with general waste. 1.6.2 Disposal of the ink waste pad If the operating panel displays the following mes- sages: Ink Collector is full/Replace Ink Collector Unit Ink Collector almost full the ink waste pad must be replaced. -
Page 11: Important Notice
Important notice Important notice Application............................12 Symbol explanation ........................12 Safety precautions ..........................13 Precautionary measures ........................14 5661290000/00/06.08... -
Page 12: Application
Warning – Hot surface! stability, and high printing resolution for all MultiCard Do not touch. markers. The PrintJet PRO allows you to print very small fonts, graphics, logos and even images. Even the CAUTION! smallest diagrams are easy to read - permitting you to increase the marker's information density. -
Page 13: Safety Precautions
CAUTION! openings. Do not open the printer! • Do not spill any fluids onto the PrintJet PRO. Do not open the printer cover! • The mains voltage must correspond to the system voltage given on the PrintJet PRO type plate. -
Page 14: Precautionary Measures
• After printing, remove your printouts immediately • Fluid has penetrated into the PrintJet PRO. from the output rail of the PrintJet PRO. • The PrintJet PRO is come off or the enclosure is damaged. • The PrintJet PRO does not operate normally or the CAUTION! standard of performance varies noticeably. - Page 15 Suitable location for the PrintJet PRO a horizontal position. Improper transport can lead • Place the PrintJet PRO on a flat, stable surface to leaked ink and contamination or damage to the larger than the base area of the printer. The Print- printer.
- Page 16 Important notice 5661290000/00/06.08...
-
Page 17: Printer Description
Printer description Printer description General functioning ........................18 What is located where? ........................18 3.2.1 Printer overview .........................18 3.2.2 Connections ........................19 3.2.3 Enclosure ...........................19 3.2.4 Display ..........................21 3.2.5 Rotating the operating and control panel (display) ............23 5661290000/00/06.08... -
Page 18: General Functioning
Finally, the MultiCard is fed out of the system and MultiCard series. can be removed. The data is created on a PC; this can be done con- The PrintJet PRO should not be turned off as it ® veniently with the M-Print PRO labelling software. -
Page 19: Connections
Printer description 3.2.2 Connections 3.2.3 Enclosure Figure 5 Enclosure A Recessed grips Figure 4 Connections A. Mains power supply connection CAUTION! Figure 6 Ink-cartridge lid Verify the power supply voltage! B. Fuses Fuse 1 Load circuit Fuse 2 Supply circuit C. - Page 20 Printer description Figure 10 Input (loader) Figure 8 Maintenance cover 1 (printing sys- tem) Openings Figure 11 Output Figure 9 Openings A Output B Input 5661290000/00/06.08...
-
Page 21: Display
Printer description 3.2.4 Display [ Menu ] button Press this button in order to change or view the printer settings. Temp. Status Transport Data In [ Online ] button This button indicates if the printer is offline or online. Press this button in order to switch between the off- line and online modes. - Page 22 Printer description [▲] [▼] buttons Status / Error display These buttons can be used to raise or lower the set- Status indicator when printing. A blue LED lights up ting values on the display. to indicate that an error has occurred that prevents further printing or if a print job is sent before the Mul- By holding down one of the buttons, you can quickly tiCard was drawn into the printer.
-
Page 23: Rotating The Operating And Control Panel (Display)
Printer description 3.2.5 Rotating the operating and con- trol panel (display) The printer is shipped with the display set for operat- ing from the right. For user convenience the display can be rotated 180° in an anticlockwise direction and back in 90°steps, where it locks into place. - Page 24 Printer description 5661290000/00/06.08...
-
Page 25: Initial Commissioning
Initial commissioning Initial commissioning Unpacking ............................26 Included in delivery.........................27 Setup ..............................27 4.3.1 Inserting the output rail ......................28 4.3.2 Inserting the ink cartridges....................28 Connecting the power cord......................30 5661290000/00/06.08... -
Page 26: Unpacking
Initial commissioning Unpacking Carefully take all parts out of the packaging. Always use two people to move the printer and make use of the grips available on the device. NOTE Please keep the original packaging in case you need to re-ship the printer in the future! Figure 16 Necessary clearance space A 250 mm... -
Page 27: Included In Delivery
• Place the PrintJet PRO on a flat, stable surface • PrintJet PRO printer larger than the base area of the printer. • The PrintJet PRO will not operate properly if it is • Power cord tilted or at an angle. -
Page 28: Inserting The Output Rail
• Ink is used each time a new ink cartridge is in- serted or the ink cartridge cover is opened, as the PrintJet PRO always carries out a reliability check in each case. 4.3.2 Inserting the ink cartridges •... - Page 29 Initial commissioning 1 Place the four ink-cartridge carriers (included) 3 Insert the toner cartridges into corresponding car- ready. riers. 2 Take the toner cartridges from the starter kit. Figure 18 Ink cartridge Figure 19 Ink cartridge and ink-cartridge car- System variants rier A Ink cartridges Black version: 1 x black, 3 x fluid...
-
Page 30: Connecting The Power Cord
Connecting the power cord The mains voltage must correspond to the system voltage given on the PrintJet PRO type plate. Connect the plug-in power connection to a nearby Figure 21 Inserting the ink-cartridge carrier mains socket, ensuring it is easily accessible. - Page 31 Power supply all of the devices connected to the ex- Connect the power cord to the PrintJet PRO and the tension cable does not exceed the am- socket outlet (220-240 VAC or 100-120 VAC). Make pere rating for that extension cable.
- Page 32 Initial commissioning 5661290000/00/06.08...
-
Page 33: Installing The Printer Driver
Installing the printer driver Installing the printer driver General notice before installation ....................34 WIN XP / WIN 2000...........................36 5.2.1 USB port - WIN XP / WIN 2000 ..................36 5.2.2 Network connection - WIN XP / WIN 2000 ................40 WIN VISTA............................47 5.3.1 USB port - WIN VISTA.......................47 5.3.2... -
Page 34: General Notice Before Installation
(shown below). If the CD does not start privileges. automatically, start the Setup.exe file found on the If you wish to operate the PrintJet PRO both in a network and via a direct USB connection you must first install the net- work driver. - Page 35 Installing the printer driver Figure 24 Operating System for printer driver 2 Select your operating system. 5661290000/00/06.08...
-
Page 36: Win Xp / Win 2000
Installing the printer driver WIN XP / WIN 2000 5.2.1 USB port - WIN XP / WIN 2000 Figure 25 Licence agreement 1 Accept the license agreement and click on [Next]. Figure 26 Connecting the printer 2 Select the USB cable option and click on [Next]. 5661290000/00/06.08... - Page 37 Installing the printer driver Figure 27 Installing the printer driver 3 Make sure that the printer is turned off. Click on [Next]. Figure 28 Automatic recognition of the USB connection 4 Turn on the printer when this window appears. The printer driver will now be installed. 5661290000/00/06.08...
- Page 38 Installing the printer driver Figure 29 Standard printer 5 Do not define the printer as the standard printer. Click on [No]. Figure 30 Status monitor 6 Deactivate the status monitor and click on [Next]. 5661290000/00/06.08...
- Page 39 Installing the printer driver Figure 31 Installation of printer driver successful 7 Click on [Finish]. The driver installation is finished and your computer will be re-booted. 5661290000/00/06.08...
-
Page 40: Network Connection - Win Xp / Win 2000
If the CD does not start automatically click SETUP.EXE on the CD. Ensure you have administrator rights for your local computer. On the main menu 'Printer Driver & Software' select the option 'Printer drivers', 'PrintJet PRO' and the Oper- ating System 'WIN XP / 2000'. - Page 41 Installing the printer driver Figure 33 Licence agreement 1 Accept the license agreement and click on [Next]. Figure 34 Connecting the printer 2 Select the LAN Connection option and click on [Next]. 5661290000/00/06.08...
- Page 42 Installing the printer driver Figure 35 Installing the printer driver 3 Select the option shown above and click on [Next]. Figure 36 Standard printer 4 Double click on the printer names to display the printer settings. 5 Click on [Continue]. 5661290000/00/06.08...
- Page 43 Installing the printer driver Figure 37 Status monitor 6 Deactivate the status monitor and click on [Next]. Figure 38 Installation of printer driver successful 7 Select the option shown above and click on [Finish]. 8 Open Start → Settings → Printer (Windows 2000), or Start → Printer and Fax (XP). Select the printer which you have just installed and then click with the right mouse button on the [Properties] icon.
- Page 44 Installing the printer driver Figure 39 Printer driver properties 9 Click on the [Ports] tab and then on [Add Port]. Figure 40 Printer connections 10 Select [Standard TCP/IP Port] and [New Port]. 5661290000/00/06.08...
- Page 45 Installing the printer driver Figure 41 TCP/IP printer port 11 Click on [Next]. Figure 42 Add port 12 Enter the hostname (see above - RNPAXXXXX) of the printer in this window. (Here, XXXX is the number of your printer.) 5661290000/00/06.08...
- Page 46 Installing the printer driver Figure 43 Exiting the Install Wizard The connection is then added. 13 Verify that a connection to the selected printers exists in [Device]. 14 In the dialog box for the finished installation, click on [Finish]. 15 Close out the installation by re-starting the computer. 5661290000/00/06.08...
-
Page 47: Win Vista
If the CD does not start automatically, start the Setup.exe file found on the CD. 2 On the main menu 'Printer Driver & Software' select the option 'Printer drivers', 'PrintJet PRO' and the Operating System. The Operating System will now issue a message stating that 'an unidentified pro- gramme wants to access your computer'. - Page 48 Installing the printer driver Figure 45 Printer Port 2 Select the option 'Connect with USB cable' then click [Next]. Figure 46 Installing the printer driver 3 Make sure that the printer is turned off. Click on [Next]. 5661290000/00/06.08...
- Page 49 Installing the printer driver Figure 47 Automatic recognition of the USB connection 4 When this window appears, turn on the printer. The printer driver will now be installed. Figure 48 Standard printer 5 Do not set this printer as the system default printer. Click on [No]. 5661290000/00/06.08...
- Page 50 Installing the printer driver Figure 49 Status monitor 6 Deactivate the status monitor and click on [Next]. Figure 50 Installation of printer driver successful 7 After you click on [Finish], the installation of the printer driver if finished. 8 Re-start the computer. 5661290000/00/06.08...
-
Page 51: Network Connection - Win Vista
Installing the printer driver 5.3.2 Network connection - WIN VISTA 1 On the printer press the Menu key, the arrow keys and the Enter key to select the submenu 'Host inter- face' followed by 'Network setup' and 'IP address'. 2 Press the Enter key again to display the IP address of the printer. 3 Now enter <http://IP address/ipp>... - Page 52 If the CD does not start automatically click SETUP.EXE on the CD. Ensure you have administrator rights for your local computer. 5 On the main menu 'Printer Driver & Software' select the option 'Printer drivers', 'PrintJet PRO' and the Operating System 'WIN VISTA'.
- Page 53 Installing the printer driver Figure 53 Licence agreement 7 Accept the license agreement and click on [Next]. Figure 54 Connecting the printer 8 Select the LAN Connection option and click on [Next]. 5661290000/00/06.08...
- Page 54 Installing the printer driver Figure 55 Installing the printer driver 9 Select the option shown above and click on [Next]. Figure 56 Standard printer 10 Double click on the printer names to display the printer settings. 11 Click on [Continue]. 5661290000/00/06.08...
- Page 55 Installing the printer driver Figure 57 Status monitor 12 Deactivate the status monitor and click on [Next]. Figure 58 Installation of printer driver successful 13 Select the option shown above and click on [Finish]. 14 Open Start-Control Panel and under "Hardware and Sound" select [Printer]. Select the printer which you have just installed and then click with the right mouse button on the [Properties] icon.
- Page 56 Installing the printer driver Figure 59 Printer driver properties 15 Click on the [Ports] tab and then on [Add Port]. Figure 60 Printer connections 16 Select [Standard TCP/IP port] and [New Port]. 5661290000/00/06.08...
- Page 57 Installing the printer driver Figure 61 TCP/IP printer port 17 Click on [Next]. Figure 62 Add port 18 Enter the hostname (see above - RNPAXXXXX) of the printer in this window. (Here, XXXXX is the number of your printer.) 5661290000/00/06.08...
- Page 58 Installing the printer driver Figure 63 Exiting the Install Wizard The connection is then added. 19 Verify that a connection to the selected printers exists in [Device]. 20 In the dialog box for the finished installation, click on [Finish]. 21 Close out the installation by re-starting the computer. 5661290000/00/06.08...
-
Page 59: The M-Print ® Pro Software
The M-Print® PRO Software The M-Print PRO Software ® ® Installing the M-Print PRO software ....................60 ® Activating the M-Print PRO software...................62 Printer driver settings ........................65 Printer setup ............................67 Adjust marker type..........................67 Cleaning the print head ........................67 6.6.1 Cleaning the print head......................68 6.6.2 Head flushing ........................69 5661290000/00/06.08... -
Page 60: Installing The M-Print Pro Software
The M-Print® PRO Software ® Installing the M-Print PRO software Please note that this printing system is optimized for Microsoft Windows 2000, XP and VISTA. For installa- tion and operation, you require a basic knowledge of Microsoft Windows. Before you begin with the installation of the software and the printer driver, insert the "Printer Driver & Soft- ware"... - Page 61 The M-Print® PRO Software 3 The installation starts automatically and the installation assistant appears on the screen. Please follow the instructions in the installation assistant by clicking on the [Next] button. Figure 66 Installation wizard 4 After the installation successfully concludes, click on the [Finish] button. Figure 67 Completing installation 5 The software can now be started from its desktop icon, or from the selection →...
-
Page 62: Activating The M-Print Pro Software
The M-Print® PRO Software ® Activating the M-Print PRO software ® The M-Print PRO can be evaluated for a period of 30 days. The software must be activated within 30 days ® in order to enable all of the M-Print PRO printer's functions beyond this period. - Page 63 The M-Print® PRO Software Figure 69 Licence key 5 Please enter the 11-digit "license key" found on the CD-ROM sleeve. Then click on the "Next" button. If you register the software over the Internet you will receive additional information concerning software up- dates and new functions.
- Page 64 The M-Print® PRO Software Figure 70 Registering 6 Click on the "Finish" button to finish the registration process. Figure 71 Completing installation 5661290000/00/06.08...
-
Page 65: Printer Driver Settings
PRO software. Please take the following steps: 1 Select "Tools" from the menu pull-down, and then click on "Options". 2 In the Options window, click on the "PrintJet PRO" folder. Figure 72 Configuring PrintJet PRO 3 Click on the button "Execute Printerdriver configuration". - Page 66 The M-Print® PRO Software Figure 74 Allocating the black cartridge 7 Select the print quality. The recommended setting is "Standard quality". Please select "High quality" only when you will be printing intricate graphics. This will result in more ink usage and a slower print process. 8 Confirm the driver settings by clicking on the [Finish] button.
-
Page 67: Printer Setup
PRO software. Please take the follow- ing steps: 1 Select "Tools" from the menu pull-down, and then click on "Options". 2 In the Options window, click on the "PrintJet PRO" folder and then on the selection "Cleaning". Figure 76 Print head cleaning option... -
Page 68: Cleaning The Print Head
3 The cleaning process is initiated. This can take several minutes to run. 4 After the process has been executed by PrintJet PRO, print out a MultiCard and check the printing qual- ity. Repeat this process if necessary or run through a complete head-flushing process. -
Page 69: Head Flushing
2 Click on the button [Execute Head-Cleaning]. 3 The cleaning process is initiated. This can take several minutes to run. 4 After the process has been executed by PrintJet PRO, print out a MultiCard and check the printing qual- ity. Repeat the process if necessary. - Page 70 The M-Print® PRO Software 5661290000/00/06.08...
-
Page 71: The First Time Printing
The first time printing The first time printing Check list ............................72 Turning on the PrintJet PRO......................72 Inserting the MultiCards in the PrintJet PRO loader ..............73 Heating settings ..........................75 5661290000/00/06.08... -
Page 72: Check List
Make sure that a "Ready" message is then shown ® Print PRO file in the PrintJet PRO loader. on the operating panel. 6 On the PrintJet PRO select the correct fuser set- ting for the inserted MultiCards. ® 7 Start printing with M-Print PRO. -
Page 73: Inserting The Multicards In The Printjet Pro Loader
The first time printing Inserting the MultiCards in the PrintJet PRO loader NOTE The PrintJet PRO Loader is suitable for use with Weidmüller MultiCards only. Bent or broken side strips or markers can result in the loader malfunctioning. Description of the MultiCard... - Page 74 Make sure the MultiCards are inserted in the correct Do not stack the MultiCards above the height of the way with the project marking surface facing towards loader paper stop. the PrintJet PRO. Figure 82 Stacking heights in the loader Figure 81...
-
Page 75: Heating Settings
Cable markers V0: SF 6 all colors Table 1 Heating settings without project field NOTE The required Fixing Settings are depending on markertype, -color, -material and operating time of the PrintJet PRO. Please check the wipe and scratch resistance in regular intervals. 5661290000/00/06.08... - Page 76 If a print job is unintentionally carried out without fusing it is possible send an 'empty' print job to the printer and set the correct fusing settings H1/H2. The PrintJet PRO is now prepared for the first printing. ® Start up a new print job with the M-Print PRO software.
-
Page 77: Cleaning Instructions
Cleaning instructions Cleaning instructions Cleaning the printer ........................78 5661290000/00/06.08... -
Page 78: Cleaning The Printer
Cleaning instructions Cleaning the printer Clean the outside of the printer regularly. Clean the printer housing by wiping it with a soft cloth that is either dry or moist. If the dirt does not come off, wipe the printer next with a cloth moistened with a neutral cleaning agent. -
Page 79: Maintenance
Maintenance Maintenance General maintenance ........................80 Maintenance via the display......................80 Printing a nozzle test pattern ......................81 Head cleaning via the display ......................82 Head flushing via the display......................83 Replacing the ink collector unit.....................84 Transport and shipment .........................85 5661290000/00/06.08... -
Page 80: General Maintenance
Maintenance General maintenance Maintenance via the display If the printer will not be used for a prolonged period, The "Maintenance" menu allows you to change turn off the printer. Then disconnect the USB cable, printer maintenance settings, such as shading and the Ethernet cable, and the power cord. -
Page 81: Printing A Nozzle Test Pattern
Maintenance A test pattern is then printed. Registration 5 Press the [Online] button. You can print out a test pattern and adjust the print starting point. The output display is then shown. P r e s s # t o p r i n t p a t t e r n Key Repeat You can enable or disable repetition of an operation 6 Check the printed test pattern. -
Page 82: Head Cleaning Via The Display
Maintenance Head cleaning via the dis- play The head cleaning process can be executed via the ® corresponding function in the M-Print PRO soft- ware. Read Chapter 6 "The M-Print® PRO" for more information. Figure 84 Test pattern – cleaning the print head In order to execute a normal head cleaning, proceed as described below. -
Page 83: Head Flushing Via The Display
Maintenance Head flushing via the dis- play The head flushing process can be executed via the ® corresponding function in the M-Print PRO soft- ware. Read Chapter 6 "The M-Print® PRO" for more information. Figure 85 Test pattern – thorough cleaning In order to execute a head flushing, proceed as de- scribed below. -
Page 84: Replacing The Ink Collector Unit
Maintenance Replacing the ink collector Replace the ink collector unit if the following mes- sage is issued in the display: unit R e p l a c e I n k C o l l e c t o r U n i t NOTE Please dispose of properly by returning 1 Switch off the device. -
Page 85: Transport And Shipment
Maintenance Transport and shipment 9 Press the [Menu] key 10 Use the arrow keys to select 'System' then press 'Enter'. NOTE 11 Confirm the following display texts: Please do not throw away the original M e n u : packaging. S y s t e m Always use the original packaging when transporting the printer over long dis-... - Page 86 Maintenance 5661290000/00/06.08...
-
Page 87: 10. Troubleshooting
Troubleshooting 10. Troubleshooting 10.1 Troubleshooting ..........................88 10.1.1 LED error displays ......................88 10.1.2 General troubleshooting ....................89 10.1.3 Error and status messages on the display ................91 5661290000/00/06.08... -
Page 88: Troubleshooting
Troubleshooting 10.1 Troubleshooting 10.1.1 LED error displays Cause Troubleshooting / INFO Transport Flashing A MultiCard may be stuck Turn off the system and then turn it on in the heating unit. again in order to initialize. The MultiCard is then transported out of the printer. -
Page 89: 10.1.2 General Troubleshooting
Troubleshooting Cause Troubleshooting / INFO Loader Flashing No MultiCard could be Insert MC and press the "Loader" button. separated and fed in. Illuminated Loader mode is activated. Loader mode is not acti- vated. Inlay Flashing No inlay or MultiCard could Place an inlay on the conveyor and press be fed in. - Page 90 Troubleshooting The print is irregular, either too strong or too Opening the maintenance cover during printing weak. Printing will be aborted if the maintenance cover is opened when the printer is printing. After the cover If there is a problem with the print quality, such as ir- is closed printing will resume briefly and then be regular print or inappropriate ink quantity, the follow- aborted.
-
Page 91: Error And Status Messages On The Display
Troubleshooting 10.1.3 Error and status messages on Energy Saver the display The printer is in low-energy mode. The printer is This section describes the meaning of the display ready for use. messages, and what can be done when a message appears on the display. - Page 92 Troubleshooting Close Top Cover or reset the Duplex Unit cor- Remove Misfeed Output rectly Reset the driver settings using the ® M-Print PRO software. This will re-establish the A cover or lid is open or not seated correctly. Close correct settings. all covers and make sure they are all seated cor- rectly.
- Page 93 Troubleshooting Waiting... Please wait for a moment. Maintenance in process... The printer is currently cleaning or flushing the print head. Please wait for a moment. Low Ink The ink is running out. Replace the ink cartridge. 5661290000/00/06.08...
- Page 94 Troubleshooting 5661290000/00/06.08...
-
Page 95: Appendix
Appendix Appendix Appendix A: Technical data ..........................96 Appendix B: Ordering data..........................97 Appendix C: CE Declaration..........................98 Index .................................100 5661290000/00/06.08... -
Page 96: Appendix A: Technical Data
Appendix Appendix A: Technical data Technical data Application: Printing Weidmüller MultiCards Technology: Ink-jet process with heat fusing Printing quality: 600 dpi to 1200 dpi Printer drivers: RPCS driver; WIN XP/ 2000; Vista; ® Printing software: M-Print PRO recommended System requirements: WIN XP/ 2000;... -
Page 97: Appendix B: Ordering Data
Appendix Appendix B: Ordering data Designation Article order number PrintJet PRO 230V 1001180001 PrintJet PRO 115V 1024050000 PJ PRO TNTK INK SET BK 1027090000 Black starter set kit: 1 x black, 3 x fluid PJ PRO TNTK INK SET COL 1027110000 Colour starter set kit: 1 x each of black;... -
Page 98: Appendix C: Ce Declaration
Appendix Appendix C: CE Declaration 5661290000/00/06.08... - Page 99 Appendix 5661290000/00/06.08...
-
Page 100: Index
Appendix Index Figure Page Figure 1 Insertion instructions Figure 2 Warning label on device Figure 3 Printer components Figure 4 Connections Figure 5 Enclosure Figure 6 Ink-cartridge lid Figure 7 Loader and maintenance cover 2 (ink waste pad) Figure 8 Maintenance cover 1 (printing system) Figure 9 Openings... - Page 101 Appendix Figure Page Figure 33 Licence agreement Figure 34 Connecting the printer Figure 35 Installing the printer driver Figure 36 Standard printer Figure 37 Status monitor Figure 38 Installation of printer driver successful Figure 39 Printer driver properties Figure 40 Printer connections Figure 41 TCP/IP printer port...
- Page 102 Activating M-Print PRO Figure 69 Licence key Figure 70 Registering Figure 71 Completing installation Figure 72 Configuring PrintJet PRO Figure 73 Selecting the print mode Figure 74 Allocating the black cartridge Figure 75 Selecting the print quality Figure 76 Print head cleaning option...
- Page 103 Appendix Table Page Table 1 Heating settings Table 2 LED error displays Table 3 Technical data Table 4 Ordering data 5661290000/00/06.08...
- Page 104 Appendix 5661290000/00/06.08...
- Page 106 Weidmüller Interface GmbH & Co. KG Postfach 3030 32720 Detmold Klingenbergstraße 16 32758 Detmold Phone +49 (0) 5231 14-0 +49 (0) 5231 14-2083 E-Mail info@weidmuller.com Order number: 5661290000/00/06.08 Internet www.weidmueller.com...
Need help?
Do you have a question about the PrintJet PRO and is the answer not in the manual?
Questions and answers