Diono Radian 3 R Instruction Manual
All-in one convertible
Hide thumbs
Also See for Radian 3 R:
- Instruction manual (172 pages) ,
- Instruction manual (220 pages) ,
- Instruction manual (67 pages)
Table of Contents
Advertisement
Available languages
Available languages
radian
all-in-one convertible
from birth up to 120 lb / 54 kg
convertible todo en uno
desde el nacimiento hasta las
120 lb / 54 kg
car seat
Instruction Manual
silla de carro para infantes
manual de instrucciones
READ INSTRUCTION MANUAL
before using this child restraint
LEA LAS INSTRUCCIONES
antes de usar este asiento de seguridad para niños
®
3 R
Advertisement
Chapters
Table of Contents

Related Manuals for Diono Radian 3 R


Summary of Contents for Diono Radian 3 R
- Page 1 radian ® all-in-one convertible from birth up to 120 lb / 54 kg convertible todo en uno desde el nacimiento hasta las 120 lb / 54 kg car seat Instruction Manual silla de carro para infantes manual de instrucciones READ INSTRUCTION MANUAL before using this child restraint LEA LAS INSTRUCCIONES antes de usar este asiento de seguridad para niños...
-
Page 2: Table Of Contents
Rear-Facing Checklist WE LOVE TO HELP 32–35 LATCH installation 36–37 Lap/Shoulder Belt installation Lap Belt Installation 38–39 Hello there, Welcome to the Diono family! 40–51 FORWARD-FACING INSTALLATION Forward-Facing Checklist 41–42 We’ve created this lovingly engineered car seat 43–46 LATCH installation 47–49... -
Page 3: Register This Car Seat
For recall information, call the U.S. Government’s Vehicle People who own Diono products can be found in all four Safety Hotline at 1-888-327-4236 (TTY: 1-800-424-9153), or corners of the big blue green ball, we all call home. Some are go to http://www.NHTSA.gov. -
Page 4: Certification
Carefully read and understand all instructions and warnings in this manual. Your child’s safety depends Diono and the Federal Aviation Administration (FAA) on you knowing how to setup, install and use this child strongly urge you to secure your child in a child restraint restraint properly. -
Page 5: Safe Use Checklist
Booster Mode with Lap/Shoulder ONLY information on proper installation. 40–120 lb (18–54 kg) Check all installation configurations before discarding the box. Diono cannot guarantee proper fit in all vehicles. 1-855-463-4666 diono.com... - Page 6 Child MUST weigh at least even when it is unoccupied. It could injure other 40 lb (18 kg), with shoulders positioned at the 4th slot occupants in a sudden stop or crash. and remain properly seated for the entire ride. 1-855-463-4666 diono.com...
- Page 7 DO NOT use any accessories, inserts or products shown in the instructions. not included with this child restraint, unless approved by Diono. Items not tested with this child • NEVER install in rear-facing, side-facing or on the restraint could injure your child.
- Page 8 Call 1-855-463-4666 to find out if the • Contact us by visiting the Diono website at damaged part or parts can be replaced. diono.com or call 1-855-463-4666.
-
Page 9: Car Seat Use After A Crash
No vehicle occupants were injured; AND • • There is no visible damage to the car seat; AND • The airbags (if present) did not deploy. NEVER use a car seat that has been involved in a MODERATE or SEVERE crash. 1-855-463-4666 diono.com... -
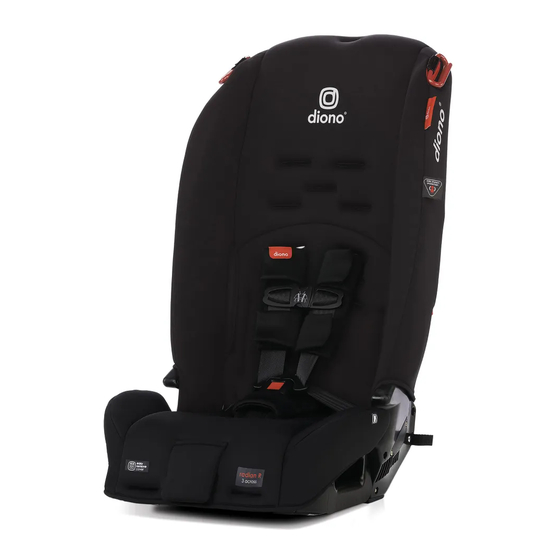
Page 10: Parts Listing
6. Harness Straps Side Nubs Harness Strap Hook 19. Detachable Rear-Facing 8. Forward-Facing Belt Path Base 9. Chest Clip 20. Rear-Facing Top Tether Connecting Strap 10. Harness Pads 21. Lap Belt Cushion 11. Buckle 12. Buckle Pad RADIAN 3 RX 1-855-463-4666 diono.com... -
Page 11: Vehicle Seating Locations
FRONTAL AIR BAG. If the airbag inflates, it can cause seating positions. serious injury or death to your child. For vehicles with side air bags, refer to your vehicle owner’s manual for information on your child restraint installation. Vehicle LATCH Anchors 1-855-463-4666 diono.com... -
Page 12: Latch
* Ford Inflatable seat belts are permitted vehicle seat belt at the same time. to be used for installation of this child restraint in all configurations. No other inflatable seat belts have been tested with this child restraint. 1-855-463-4666 diono.com... -
Page 13: Top Tether
“D” ring through the loop at the end of BACK WALL the tether connecting strap. Pull strap to form a knot. 3. Now, use metal “D” ring as an anchorage point for top tether metal hook. BACK OF SEAT FLOOR OF VEHICLE 1-855-463-4666 diono.com... -
Page 14: First Setup
4. Tuck the red strap through the harness slot and store behind the cover. 5. To fold, push lever shown and secure with red strap. US & CA EN Rear-Facing (harness AT or just below shoulders) 1-855-463-4666 diono.com... -
Page 15: Rear-Facing Installation
Forward-Facing (Harness just above shoulders) REAR-FACING installation instructions FORWARD-FACING Children 22–30 lb Children above 30 lb (10–13.6 kg) (13.6 kg) MUST use the MUST use the middle forward most buckle buckle slot ONLY! slot ONLY! 1-855-463-4666 diono.com... - Page 16 This car seat can remain rear-facing up to 50 lb (22.7 kg). Vehicle Lap Belt Rear-facing top tether is available. For rear-facing top tether installation instructions, refer to pages 24–25. 1-855-463-4666 diono.com...
- Page 17 Confirm base is locked and does not move. From back of seat, unfasten the right side of the cover from seat shell. Feed LATCH connectors down, keeping under the cover and out the bottom. Once completed, refasten the cover to seat shell. 1-855-463-4666 diono.com...
- Page 18 Attach LATCH connectors to vehicle LATCH anchors and listen for audible click to 10. To remove LATCH strap from confirm engagement. vehicle — Use LATCH release on the LATCH connectors and pull them off the anchor bars. 1-855-463-4666 diono.com...
- Page 19 2. Slide the vehicle seat belt not test by grasping the top or through the rear-facing belt back of the seat. path and out the other side. Buckle it. The seat belt should lie flat and not be twisted. 1-855-463-4666 diono.com...
- Page 20 Do not test 2. Slide the vehicle seat belt by grasping the top or back of through the rear-facing belt the seat. path and out the other side. Buckle it. The seat belt should lie flat and not be twisted. 1-855-463-4666 diono.com...
- Page 21 22–65 lb (10–29.5 kg) NOTE: If the child is UNDER 40 LB (18 KG), install the Diono SafeStop by following the instructions on page 59 before proceeding. IMPORTANT: The SafeStop will need to be removed once the child reaches 40 lb (18 kg).
- Page 22 NHTSA recommend that children be rear-facing maximum length by pressing until they reach the maximum rear-facing height the grey button and pulling and weight. This car seat can remain rear-facing up to 50 lb (22.7 kg). on the strap. 1-855-463-4666 diono.com...
- Page 23 Consult vehicle’s side-to-side and front-to-back. owner manual for specific If the seat moves less than 1 in. 10 9 location. (2.5 cm), it is tight enough. Do not test by grasping the top or front of the seat. 1-855-463-4666 diono.com...
- Page 24 The entire seat bottom should button to loosen, then unclip sit as flat as possible on the the top tether. vehicle seat. 13 12 3. Loosely attach top tether strap. Do not tighten. Consult vehicle’s owner manual for specific location. 1-855-463-4666 diono.com...
- Page 25 Press down firmly in the center of the car seat. To tighten, pull from the lap/shoulder belt on the side nearest to the buckle while feeding the slack back into the retractor. 1-855-463-4666 diono.com...
- Page 26 1 in. (2.5 cm), it side. Buckle it. The seat belt is tight enough. Do not test by should lie as flat as possible grasping top of the seat. and not be twisted. 1-855-463-4666 diono.com...
- Page 27 3. Buckle the vehicle lap/shoulder belt. Be sure the lap/shoulder belt lies across your Radian 3 R child’s shoulders, between the neck and edge of the shoulder. Be sure the lap portion of the Radian 3 RX vehicle seat belt goes under the side nubs and the belt lies low across your child’s hips.
- Page 28 NOTE: The addition or removal of clothing will change the fit of the harness, especially bulky winter jackets. Diono recommends harnessing your child first and placing a blanket over them or putting their jacket on backwards. Rear-Facing...
- Page 29 4. Buckle the chest clip. You will hear a “click” when seat cover clips. Reach into the rear-facing belt the chest clip is securely buckled. path. You will feel the buckle strap metal retainer. 5. Place the chest clip at armpit level. 1-855-463-4666 diono.com...
- Page 30 Rebuckle belt. Check that lap engagement to the metal plate. belt does not move by pulling Take care to ensure harness hard. If belt loosens or lengthens, straps are not twisted and are repeat procedure. clear from any obstructions. 1-855-463-4666 diono.com...
-
Page 31: Forward-Facing Installation
4. Guide buckle through seat cover bottom and memory foam cushion. Reattach cover to seat bottom. 5. Reinstall the center buckle pad. Should you need a longer buckle, these are available by calling Customer Care. 1-855-463-4666 diono.com... - Page 32 6. Slide the new harness straps through the buckle tongues, re-attach the chest clip and reinstall the harness pads. Slide the harness straps through to the back of the seat and re-install them to the metal hook in Step 1. 1-855-463-4666 diono.com...
- Page 33 ADJUSTING EXPANDABLE SIDE WINGS NOTES The side wings can be adjusted for comfort as shown. These will not impact the safety of the car seat in any manner. Simply push the side wings outward as shown to extend. 1-855-463-4666 diono.com...
-
Page 34: Care And Maintenance
NOTE: Buckle should fasten with a “click” if not, rinse Spot clean only with Towel dry DO NOT bleach under warm running water. Towel dry completely warm water. Use mild completely before detergent re-use before re-use or storage. DO NOT use detergents or lubricants. 1-855-463-4666 diono.com... -
Page 35: Warranty
NON INFRINGEMENT. retailer or authorized online retailer to purchase Diono products. A list of Diono authorized retailers can be found on our website. Not all products are available at all retailers. Diono products purchased from unauthorized retailers, online auction sites, or as second-hand items, are not covered under warranty. - Page 36 NOTAS NOTAS 1-855-463-4666 diono.com...
- Page 37 Instalación del cinturón de regazo y hombro Instalación de regazo 108–109 110–121 INSTALACIÓN ORIENTACIÓN HACIA ADELANTE Hola, ¡Bienvenido a la familia Diono! Lista de verificación orientada hacia adelante 111–112 113–116 Instalación del LATCH Hemos creado esta silla de auto para bebé diseñada 117–119...
- Page 38 Seguridad Vehicular del gobierno de los Estados Unidos al 1-888-327-4236 (TTY: 1-800-424-9153), o Las personas que han comprado productos de Diono se vaya a http://www.NHTSA.gov. pueden encontrar en las cuatro esquinas de la gran bola verde azul, que todos llamamos nuestro hogar.
-
Page 39: Certificación
Lea cuidadosamente y comprenda todas las instrucciones y advertencias de este manual. La Diono y la Administración Federal de Aviación (FAA por seguridad de su hijo depende de que usted sepa cómo sus siglas en inglés) le exhortan a que proteja a su hijo... -
Page 40: Lista De Verificación De Uso Seguro
Modo asiento con cinturón de seguridad del vehículopara el hombro y la falda Verifique todas las configuraciones de instalación antes 40–120 lb (18–54 kg) de descartar la caja. Diono no puede garantizar un ajuste adecuado en todos los vehículos. 1-855-463-4666 diono.com... - Page 41 4ta ranura y permanecer a otros ocupantes en una parada o choque repentino. en esta posición durante todo el viaje Deser necesario, ajuste el reposacabezas colocándolo adecuadamente deslizándolo hacia arriba o hacia abajo. 1-855-463-4666 diono.com...
- Page 42 Diono. • NUNCA lo instale viendo hacia atrás, de lado o en Los artículos no probados con este asiento de...
- Page 43 1-855-463-4666 para averiguar si la parte dañada o partes pueden ser reemplazadas. • Contáctenos visitando el sitio web de Diono en PRÁCTICAS SEGURAS us.diono.com o llame al 1-855-463-4666. • deje objetos sueltos, como libros, bolsas, etc., en la parte trasera del vehículo.
- Page 44 Si el vehículo cuenta con bolsas de aire, las bolsas de aire no se desplegaron en el choque; Y • No hay daño visible en el asiento para automóvil. NUNCA utilice un los asiento para automóvil que ha estado expuesto a un choque MODERADO o SEVERO. 1-855-463-4666 diono.com...
-
Page 45: Listado De Piezas
8. Orientación hacia adelante de la correa superior orientada hacia atrás 9. Gancho de pecho 21. Acolchado del cinturón 10. Almohadillas del arnés de regazo 11. Hebilla 12. Almohadilla de hebilla 13. Liberación del arnés RADIAN 3 RX 1-855-463-4666 diono.com... - Page 46 Para vehículos con bolsas de aire laterales, consulte el manual de propietario de su Anclajes de vehículo para obtener información sobre la instalación LATCH del de su sistema de seguridad para niños. Vehículo 1-855-463-4666 diono.com...
-
Page 47: Latch
No se instale usando el anclaje inferior conectores de LATCH ha probado ningún otro cinturón de y el cinturón de seguridad del vehículo al mismo tiempo. seguridad inflable con este sistema de retención infantil. 1-855-463-4666 diono.com... -
Page 48: Correa Superior
PARTE de atadura. Tire de la correa para formar un nudo. POSTERIOR DEL ASIENTO PISO DEL 3. Ahora, use un anillo de metal “D” como punto de VEHÍCULO anclaje para el gancho de metal de la atadura superior. 1-855-463-4666 diono.com... -
Page 49: Primera Configuración
4. Meta la correa roja a través de la ranura del arnés. Orientación hacia atrás (arnés A NIVEL DE o justo debajo de los hombros) 5. Para plegar, empuje la palanca que se muestra y asegúrela con la correa roja. 1-855-463-4666 diono.com... - Page 50 Instrucciones de instalación FORWARD-FACING ¡Los niños de 22–30 lb ¡Los niños mayores de 30 lb (10–13.6 kg) deben usar (13.6 kg) deben usarla la Ranura de hebilla Ranura de hebilla que intermedia SOLAMENTE! estémás orientada hacia adelante SOLAMENTE! 1-855-463-4666 diono.com...
- Page 51 Las correas del arnés DEBEN estar en o justo debajo de la parte superior de los hombros de su hijo. Coloque el clip de pecho al nivel de la axila. 1-855-463-4666 diono.com...
- Page 52 Confirme que la base está asegurada y no se mueva. Desabroche el lado derecho de la funda del asiento. Alimente los conectores LATCH hacia abajo, manteniéndolos debajo de la cubierta y saliendo desde la parte inferior. Una vez completado, vuelva a colocar la cubierta en el asiento. 1-855-463-4666 diono.com...
- Page 53 LATCH a los anclajes LATCH inferiores de vehículo y espere 10. Para quitar la correa LATCH del escuchar el clic para confirmar vehículo, presione la liberación el enganche. LATCH en los conectores LATCH y retírelos de las barras de anclaje. 1-855-463-4666 diono.com...
- Page 54 El cinturón de seguridad debe quedar plano y no estar retorcido. 1-855-463-4666 diono.com...
- Page 55 2. Pase el cinturón de seguridad del vehículo a través del recorrido del cinturón orientado hacia adelante y sáquelo por el otro lado. Abróchelo. El cinturón de seguridad debe quedar plano y no estar retorcido. 1-855-463-4666 diono.com...
-
Page 56: Instalación Orientación Hacia Adelante
22–65 lb (10–29.5 kg) NOTA: Si el niño ES MENOR DE 40 LB (18 KG) instale el Diono SafeStop siguiendo las instrucciones en la página 129 antes de continuar. IMPORTANTE: El SafeStop tendrá que ser retirado una vez que el niño alcanza 40 lb (18 kg). - Page 57 LATCH a su longitud máxima máximos en posición orientada hacia atrás. Este presionando el botón gris y asiento para automóvil puede permanecer orientado tirando de la correa. hacia atrás hasta 50 lb (22.7 kg). 1-855-463-4666 diono.com...
- Page 58 6. Coloque sin ajustar la correa lo suficientemente ajustado. de atadura superior no la No realice pruebas agarrando ajuste. Consulte el manual de la parte superior o frontal del propietario del vehículo para asiento. conocer la ubicación específica. 1-855-463-4666 diono.com...
- Page 59 El fondo del asiento debe estar lo más plano posible sobre el asiento del vehículo. 3. Fije sin ajustar la correa de atadura superior. No la ajuste. Consulte el manual de propietario del vehículo para conocer la ubicación específica. 1-855-463-4666 diono.com...
- Page 60 Presione firmemente en el centro del asiento para automóvil. Tire del cinturón del regazo/hombro más cercano a la trayectoria del cinturón para apretarlo mientras alimenta la holgura en el retractor. 1-855-463-4666 diono.com...
- Page 61 1 pulgada (2.5 cm), está lo Abróchelo. El cinturón de suficientemente ajustado. No seguridad debe quedar plano haga la prueba agarrando la y no estar retorcido. parte superior del asiento. 1-855-463-4666 diono.com...
-
Page 62: Instalación Del Modo De Asiento
3. Abroche el cinturón de seguridad del regazo/ Radian 3 R hombro del vehículo. Asegúrese de que el cinturón Radian 3 RX del regazo/hombro esté sobre los hombros de su hijo, entre el cuello y el borde del hombro. - Page 63 NOTA: El agregar o quitar ropa cambiará el ajuste del arnés, especialmente las chamarras de invierno voluminosas. Diono recomienda asegurar a su hijo primero y colocar una manta sobre ellos o ponerse la Orientación hacia atrás Orientación hacia adelante chamarra al revés.
- Page 64 Sentirá el retenedor metálico de la correa de la hebilla. 5. Coloque el clip de pecho al nivel de axila. 1-855-463-4666 diono.com...
- Page 65 Regazo no se acoplamiento apropiado a la mueva tirando de el con fuerza. placa de metal. Tengo cuidado de asegurar que la Si la correa se afloja o se alarga, repita el procedimiento. correa esté libre de cualquier obstrucción. 1-855-463-4666 diono.com...
-
Page 66: Instalación En Aeronaves
5. Vuelva a instalar la almohadilla de la hebilla central. Si necesita una hebilla más larga, puede obtenerlas llamando a Servicio al Cliente. 1-855-463-4666 diono.com... - Page 67 Deslice las correas del arnés hasta la parte posterior del asiento y vuelva a instalarlas en el gancho de metal en el Paso 1. 1-855-463-4666 diono.com...
- Page 68 AJUSTE DE ALAS LATERALES EXPANDIBLES NOTAS Las alas laterales se pueden ajustar para mayor comodidad, como se muestra. Esto no afectará la seguridad del asiento para automóvil de ninguna manera. Simplemente empuje las alas laterales hacia afuera como se muestra para extender. 1-855-463-4666 diono.com...
-
Page 69: Cuidado Y Mantenimiento
NOTA: La hebilla debe ajustarse con un “clic”, de lo Use un detergente antes de volver a contrario, enjuague con agua tibia. Seque al aire suave usar completamente antes de volver a usar o guardar. use detergentes o lubricantes. 1-855-463-4666 diono.com... -
Page 70: Garantía
Diono no está aprobado por Diono. Su uso podría a otro. Ni Diono, ni el minorista que vende este producto, autoriza a causar que un producto de restricción falle en los Estándares de... - Page 71 © 2018 Diono LLC | 14810 Puyallup Street E | Suite 200 Sumner | WA | 98390 | United States Made in China | Hecho en China | diono.com | 1-855-463-4666 All rights reserved | Reservados todos los derechos revised/revisado 20200102...
Need help?
Do you have a question about the Radian 3 R and is the answer not in the manual?
Questions and answers