Table of Contents
Advertisement
Quick Links
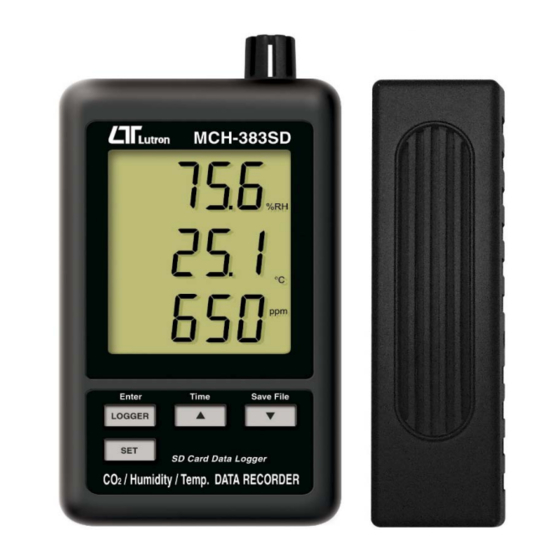
SD card real time datalogger
CO2/HUMIDITY/TEMP.
DATA RECORDER
Model : MCH-383SD
Your
purchase
RECORDER marks a step forward for you into the field of
precision measurement. Although this DATA RECORDER is a
complex
and
developed. Please read the following instructions carefully and
always keep this manual within easy reach.
OPERATION MANUAL
of
this
delicate
instrument,
CO2/HUMIDITY/TEMP.
its
durable
DATA
structure
Advertisement
Table of Contents

Related Manuals for Lutron Electronics MCH-383SD


Summary of Contents for Lutron Electronics MCH-383SD
- Page 1 SD card real time datalogger CO2/HUMIDITY/TEMP. DATA RECORDER Model : MCH-383SD Your purchase this CO2/HUMIDITY/TEMP. DATA RECORDER marks a step forward for you into the field of precision measurement. Although this DATA RECORDER is a complex delicate instrument, durable structure developed.
- Page 2 TABLE OF CONTENTS 1. FEATURES................. 1 2. SPECIFICATIONS............... 2 3. FRONT PANEL DESCRIPTION..........5 3-1 Display................3-2 Logger button, Enter button..........button, Time button............▲ button................▼ 3-5 SET button................ 3-6 Humidity/Temp. sensor............3-7 Hanging holes ( main meter )..........3-8 Stand................3-9 Battery cover/Battery compartment........
- Page 3 1. FEATURES * Monitor with real time data logger, save the measuring data along the time information ( year, month, date, minute, second ) into the SD memory card and can be down load to the Excel, extra software is no need. user can make the further data or graphic analysis by themselves.
-
Page 4: Specifications
2. SPECIFICATIONS 2-1 General Specifications Circuit Custom one-chip of microprocessor LSI circuit. Display LCD size : 60 mm x 50 mm Measurement CO2 ( Carbon dioxide ) Humidity and Temperature Unit Humidity Temp. ℃ ℉ CO2 Sensor NDIR Structure CO2 : Response Time for CO2 <... - Page 5 Advanced * SD memory card Format setting * Set clock time ( Year/Month/Date, Hour/Minute/ Second ) * Set sampling time * Set beeper sound ON/OFF * Set SD card Decimal character * Select the Temp. unit to ℃ ℉ * Set RS232 data output ON/OFF * Set CO2 height ( meter ) compensation value * Set CO2 height ( feet ) compensation value Update Time...
- Page 6 Accessories * CO2 probe........1 PC Included * AC to DC 9V adapter.....1 PC * Main meter hanging unit ( with sticker ) ........... 1 PC * CO2 hanging unit ( with sticker )... 1 PC * Instruction manual......1 PC Optional SD Card ( 2 GB ), SD-2GB.
-
Page 7: Front Panel Description
3. FRONT PANEL DESCRIPTION Fig. 1 3-1 Display 3-2 Logger button, Enter button button, Time button ▲ button ▼ 3-5 SET button 3-6 Humidity/Temp. sensor 3-7 Hanging holes ( main meter ) 3-8 Stand 3-9 Battery cover/Battery compartment 3-10 Screw of the battery cover 3-11 Reset button 3-12 RS-232 output terminal 3-13 SD card socket... -
Page 8: Measuring Procedure
4. MEASURING PROCEDURE 1) Plug the " Output plug " of " AC/DC 9V adapter " to " DC 9V power input socket ( 3-14, Fig. 1 ), plug the " Input plug " of the " AC/DC 9V adapter " into a properly AC outlet ( AC 100 V to 240 V ) following. - Page 9 b. SD card Format If SD card just the first time use into the meter, it recommend to make the " SD card Format " at first, please refer chapter 7-1, page 12. * It recommend strongly, do not use memory cards that have been formatted by other meter or by other installation ( such as camera...) Reformat the memory card with your meter.
- Page 10 5-2 Datalogger a. Start the datalogger Press the " Logger button ( 3-2, Fig. 1 ) > 2 seconds continuously, until the Display show the indicator " DATALOGGER ", release the " Logger Button " ( 3-2, Fig. 1 ), then the measuring data along the time information will be saved into the memory circuit.
- Page 11 5-3 Check time information Press " Time button " ( 3-3, Fig. 1 ) > 2 seconds continuously, the LCD display will present the time information of Year/Month/Date, Hour/Minute/Second and the sampling value. 5-4 SD Card Data structure 1) When the first time, the SD card is used into the meter, the SD card will generate a folder : CHA01 2) If the first time to execute the Datalogger, under the...
- Page 12 6. Saving data from the SD card to the computer ( EXCEL software ) 1) After execute the Data Logger function, take away the SD card out from the " SD card socket " ( 3-13, Fig. 1 ). 2) Plug in the SD card into the Computer's SD card slot ( if your computer build in this installation ) or insert the SD card into the "...
-
Page 13: Advanced Setting
EXCEL graphic screen ( for example ) 7. ADVANCED SETTING Under do not execute the Datalogger function, press the " SET button " ( 3-5, Fig. 1 ) > 2 seconds continuously will enter the " Setting " mode., then release the " SET button ". Following press the "... - Page 14 Remark : During execute the " Setting " function, if within 5 seconds , do not press any buttons further, the LCD Display will return to normal screen. 7-1 SD memory card Format When the Display show " Sd F " 1) Use the "...
- Page 15 Remark : The adjusted unit will be flashed. 2) After set all the time value ( Year, Month, Date, Hour, Minute, Second ), press the " SET button " ( 3-5, Fig. 1 ) once will save the time value, then the screen will jump to Sampling time "...
- Page 16 yES - Meter's beep sound will be ON with default when save each data. no - Meter's beep sound will be OFF with default. when save each data. 2) After select the upper text to " yES " or " no ", press the "...
- Page 17 7-6 Select the Temp. unit to ℃ ℉ When the Display show " t-CF " 1) Use the " Button " ( 3-3, Fig. 1 ) or " Button " ▲ ▼ ( 3-4, Fig. 1 ) to select the upper Display text to " C " or "...
-
Page 18: Power Supply From Dc Adapter
7-8 Set CO2 height ( meter ) compensation value When the Display show " High- " For precision CO2 measurement, it recommend to set the meter's environment altitude ( height ) value for the compensation. 1) Use the " Button " ( 3-3, Fig. 1 ) or " Button "... -
Page 19: Clock Backup Battery Replacement
9. CLOCK BACKUP BATTERY REPLACEMENT 1) When do not plug the AC/DC 9V adapter to the meter, if the left corner of LCD display show " ", and text " LoBAt ", it is necessary to replace the battery. 2) Loose the " Screw of the battery cover " ( 3-10, Fig. 1 ) and take away the "... -
Page 20: Rs232 Pc Serial Interface
Then make the system RESET will fix the problem. The system RESET procedures will be either following method : During the power on, use a pin to press the " Reset Button " ( 3-11, Fig. 1 ) once a while will reset the circuit system. - Page 21 Each digit indicates the following status : End Word D1 & D8 Display reading, D1 = LSD, D8 = MSD For example : If the display reading is 1234, then D8 to D1 is : 00001234 Decimal Point(DP), position from right to the left 0 = No DP, 1= 1 DP, 2 = 2 DP, 3 = 3 DP Polarity...
- Page 22 12. ANNEX The follow CO2 value are for the requirement for different environment, however it is for reference only. Building, office, home 1,000 PPM ≦ School 1,500 PPM ≦ Hotel, public area 1,500 PPM ≦ Indoor swimming pool 1,500 PPM ≦...
Need help?
Do you have a question about the MCH-383SD and is the answer not in the manual?
Questions and answers