
Related Manuals for Martinsound MultiMAX EX

Summary of Contents for Martinsound MultiMAX EX
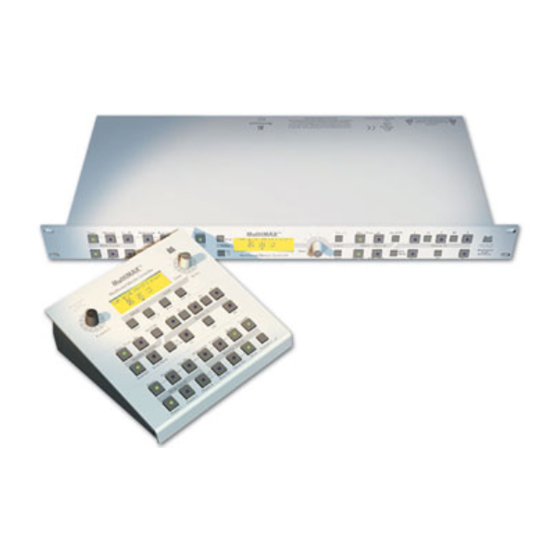
- Page 1 Martinsound User Manual MultiMAX EX & EXR Multiformat Monitor Controllers User Manual...
- Page 3 MultiMAX EX & EXR Multiformat Monitor Controllers User Manual Martinsound, Inc., 1151 West Valley Boulevard, Alhambra, CA 91803 (800) 582-3555 +1 (626) 281-3555 www.martinsound.com...
- Page 4 Under the copyright laws, this manual may not be copied, in whole or in part, without the written consent of Martinsound. Every effort has been made to ensure that the information in this manual is accurate. Martinsound is not responsible for printing or clerical errors.
-
Page 5: Table Of Contents
Table of Contents EXR and MXEX 2.00 Firmware Addendum ..............Introduction to MultiMAX EX & EXR ................Information Cautions & Warnings ....................FCC Compliance ..................... Safety Instructions ....................Important........................Getting Connected ......................Block Diagram ......................Standard 5.1/7.1 Interface ..................Comprehensive EX/6.1 Interface ................ -
Page 6: Exr And Mxex 2.00 Firmware Addendum
The Menu system has been improved to make navigation easier. Dual Splash Screen on Remote The MultiMAX EX Remote now displays two splash screens when powering up the system. Splash screen 1 indicates the Remote firmware version (UR #.##). Splash screen 2 indicates the Controller firmware version (EX #.##). -
Page 7: Introduction To Multimax Ex & Exr
The most important thing to understand about MultiMAX EX is that it is not just a surround sound level control. It is an integration of fundamental surround mixing building blocks within one unit, with an easy to use interface. -
Page 9: Cautions & Warnings
Information: Cautions & Warnings CAUTION AVIS RISK OF ELECTRIC SHOCK DO NOT OPEN RISQUE DE CHOC ÉLECTRIQUE NE PAS OUVRIR CAUTION: TO REDUCE THE RISK OF ELECTRIC SHOCK DO NOT REMOVE COVER (OR BACK) NO USER-SERVICEABLE PARTS INSIDE REFER SERVICING TO QUALIFIED PERSONNEL ATTENTION: POUR ÉVITER LES RISQUES DE CHOC ÉLECTRIQUE, NE PAS ENLEVER LE COUVERCLE. -
Page 10: Fcc Compliance
Subpart B of Part 15 of FCC rules. CAUTION: Changes or modifications to this equipment not expressly approved by Martinsound for compliance could void the user’s authority to operate this equipment. -
Page 11: Safety Instructions
To prevent electric shock, do not use this polarized plug unless all the blades can be fully inserted into the receptacle or other outlet. Refer all servicing to the Martinsound Service Department. For continued protection replace only with like fuse. -
Page 12: Important
Information: Important Please read the following before installing and operating the unit. Fuse replacement 120V~ For continued protection replace only with T 315 mA – 250V fuse. (5x20mm time-delay fuse rated for 315 milliamps at 250 volts) 230V~ For continued protection replace only with T 160 mA – 250V fuse. (5x20mm time-delay fuse rated for 160 milliamps at 250 volts) DB25 Connectors –... -
Page 13: Getting Connected
Getting Connected Introduction The small size of MultiMAX EX belies its capabilities. With 55 inputs, 38 outputs, and 3 logic inputs, MultiMAX EX is able to manage sophisticated monitoring setups quickly and easily. To handle that amount of I/O MultiMAX EX utilizes DB25 connectors formatted to the Tascam standard. Addition- ally, a logic voltage appears on the spare pin of several connectors for logic interface, if needed. -
Page 14: Block Diagram
Getting Connected: Block Diagram CAUTION! FOR CONTINUED PROTECTION AGAINST A RISK OF FIRE, REPLACE Direct Inputs Playback Inputs FUSE ONLY WITH SAME TYPE 120V 60Hz 20W 250V T 315mA 230V 50Hz 20W Meters Outs Other Monitor Outs 250V T 160mA Wide Inputs Monitor Source Console In... - Page 15 Getting Connected: Block Diagram Premix 1 Inputs Premix 2 Inputs Premix 3 Inputs Wide Sends Main Monitor Outs 4:2:4 Sends & Downmix Outs Wide Returns Other Inputs & Returns Source On Level Monitor System (And Solo Mode) Main (Front) L LC C RC R L R C LFE LS RS LC RC Meter Out Mute...
-
Page 16: Standard 5.1/7.1 Interface
Getting Connected: Standard 5.1/7.1 Interface... -
Page 17: Comprehensive Ex/6.1 Interface
Getting Connected: Comprehensive EX/6.1 Interface Remote... -
Page 18: Db25 Pin Outs - Top Row
Getting Connected: DB25 Pin Outs - Top Row... -
Page 19: Db25 Pin Outs - Bottom Row
Getting Connected: DB25 Pin Outs - Bottom Row... -
Page 20: Logic Interface - Example 1
Getting Connected: Logic Interface - Example 1 Note 1: External Logic – Used when the console can provide logic/power Note 2: Standard Tascam D-sub cable does not bring pin 13 through. Console Logic Circuit Example Connects To: 4:2:4 SENDS & DOWNMIX OUTS Dim Logic Line (Dim=+5v) -
Page 21: Logic Interface - Example 2
Getting Connected: Logic Interface - Example 2 Note 1: External Contacts – Used when the console cannot provide logic/power Conditions exist only when relay or switch contacts are closed Note 2: Standard Tascam D-sub cable does not bring pin 13 through Console Contact Circuit Example... -
Page 23: Monitor Formats
In order for MultiMAX EX to “know” what to do, the correct speaker format must be selected for your Main Monitor System as well as the width format of your Wide Inputs and Wide Return monitor sources. - Page 24 Monitor Format: F5/S2 Source – Wide Inputs: 7.1 / Wide Return: 7.1 Source – Wide Inputs: 6.1 / Wide Return: 6.1 Wide Inputs Wide Inputs Alt L Alt C Alt R Wide Return Wide Return (L+LC) (LC+C+RC) (R+RC) Not Applicable Redir Alt Fronts display...
- Page 25 Monitor Format: F5/S2 Source – Wide Inputs: 5.1 / Wide Return:5.1 Source – Wide Inputs:LCRS / Wide Return:LCRS Wide Inputs Wide Inputs Alt L Alt C Alt R Alt L Alt C Alt R LCRS Wide Return Wide Return LCRS Redir Redir (LS)
- Page 26 Monitor Format: F3/S2 Source – Wide Inputs: 7.1 / Wide Return: 7.1 Source – Wide Inputs: 6.1 / Wide Return: 6.1 (L+LC) (LC+C+RC) (R+RC) Wide Inputs Wide Inputs Alt L Alt C Alt R 7.1>5.1 Wide Return Wide Return (L+LC) (LC+C+RC) (R+RC) Not Applicable...
- Page 27 Monitor Format: F3/S2 Source – Wide Inputs: 5.1 / Wide Return:5.1 Source – Wide Inputs:LCRS / Wide Return:LCRS Wide Inputs Wide Inputs Alt L Alt C Alt R Alt L Alt C Alt R LCRS Wide Return Wide Return LCRS Redir Redir (LS)
- Page 28 Monitor Format: F3/S3 Source – Wide Inputs: 7.1 / Wide Return: 7.1 Source – Wide Inputs: 6.1 / Wide Return: 6.1 Wide Inputs Wide Inputs Alt L Alt C Alt R Wide Return Wide Return Not Applicable Redir (Alt CS) RC/OS LC/CS Fronts:...
- Page 29 Monitor Format: F3/S3 Source – Wide Inputs: 5.1 / Wide Return:5.1 Source – Wide Inputs:LCRS / Wide Return:LCRS Wide Inputs Wide Inputs Alt L Alt C Alt R Alt L Alt C Alt R LCRS Wide Return Wide Return LCRS Redir (LS) (Alt LS)
-
Page 30: F3/S4
Monitor Format: F3/S4 Source – Wide Inputs: 7.1 / Wide Return: 7.1 Source – Wide Inputs: 6.1 / Wide Return: 6.1 Wide Inputs Wide Inputs Alt L Alt C Alt R Alt L Alt C Alt R Wide Return Wide Return Redir Redir (Alt OS) - Page 31 Monitor Format: F3/S4 Source – Wide Inputs: 5.1 / Wide Return:5.1 Source – Wide Inputs:LCRS / Wide Return:LCRS Wide Inputs Wide Inputs Alt L Alt C Alt R Alt L Alt C Alt R LCRS Wide Return Wide Return LCRS Redir Redir (LS)
-
Page 32: F3/Sx
Monitor Format: F3/SX Source – Wide Inputs: 7.1 / Wide Return: 7.1 Source – Wide Inputs: 6.1 / Wide Return: 6.1 Wide Inputs Wide Inputs Alt L Alt C Alt R Alt L Alt C Alt R Wide Return Wide Return Redir Redir LC/CS... - Page 33 Monitor Format: F3/SX Source – Wide Inputs: 5.1 / Wide Return:5.1 Source – Wide Inputs:LCRS / Wide Return:LCRS Wide Inputs Wide Inputs Alt L Alt C Alt R Alt L Alt C Alt R LCRS Wide Return Wide Return LCRS Redir Redir (LS)
-
Page 34: Nearfield
Monitor Format: Nearfield Source Downmix: Stereo / Stereo Rtn: Stereo Source Downmix: Mono / Stereo Rtn: Mono Downmix Downmix x.1>ST x.1>ST>M Stereo Rtn Stereo Rtn Mono Mono Prod Prod (L+R) (L+R) x.1>ST x.1>ST>M Fronts: Nearfield L/R Fronts: Nearfield L+R Note: Production Track appears on Small Mono Note: Production Track appears on Small Mono... -
Page 35: Small Mono
Monitor Format: Small Mono Source – Downmix: Mono / Stereo Rtn: Mono Downmix x.1>ST>M Stereo Rtn Mono Prod (.7L+.7R) x.1>ST>M Fronts: Small Mono Note: Source – Console: Mono / Solo Mono Console LCRS>M Solo Mono Mono Prod (.7L+.7R+.7C+.7S) LCRS>M Fronts: Small Mono Note: Applies if Wide Return Format... -
Page 37: Operation:front Panel
Operation: Front Panel Introduction The MultiMAX front panel is divided into six sections. Each section contains a set of controls pertain- ing to specific functions of MultiMAX. In the center is the LCD screen, providing an easy-to-read window of the current monitor configuration, applied downmixing, and levels. In setup mode, the LCD displays the Setup menus. - Page 38 Operation: Front Panel Wide Sends (rear connection) The Wide Sends connection outputs the Wide Inputs mix directly. The Wide Sends is typically used to feed an external processor for monitoring purposes. (See pg. 10) 4:2:4 Sends (rear connection) The 4:2:4 Sends connection outputs the Wide Inputs mix downmixed to LCRS format for use with a Dolby 4:2:4 monitoring processor.
-
Page 39: Monitor Source
The width of the Wide Return may be set for 7.1, 6.1, 5.1, or LCRS, depending upon the Main Moni- tor format. In addition, MultiMAX EX has new compound formats for the Wide Return to facilitate monitoring the effects of the new Dolby EX/DTS ES matrix processors. (See pg. 43-44) Note: When the Formats: Wide Rtn menu is set to LCRS, the LS input serves as the S input for the Wide Returns connection. - Page 40 The non-destructive solo (APL/AFL/PFL) sense/logic bus of the mixing console may be connected to the Ext Cntrl: Solo input of MultiMAX EX. Refer to your mixing console manual for details of how to access the non-destructive solo sense. Refer also to Getting Connected. (See pages 13-15)
-
Page 41: Setup
Operation: Front Panel Setup The Setup controls are used to enter, setup, and exit the Setup menus. Setup allows adjustment of parameters that determine how MultiMAX operates for your session. Enter Enter opens the Setup menus on first press. Subsequently, it toggles through the parameters of the highlighted field for a Setup menu item. -
Page 42: Level
External Mute in the External Controls Menu then allows the external device(s) to automatically select and deselect MultiMAX EX’s Dim and/or Mute. Refer to your equipment manual for details on how to access the relevant remote logic lines. Refer also to Getting Connected in this manual. -
Page 43: Monitor System
The five Monitor System buttons select and indicate the active monitor system. Two different wide format monitor systems, as well as stereo and mono system, can be controlled by MultiMAX EX. To avoid the potential mismatch of Monitor Sources that are too wide for the selected Monitor System, simple logic has been incorporated to avoid these situations. -
Page 44: Source On
Operation: Front Panel Source On The eight Source On buttons select and indicate the monitor status of the individual channels of the Monitor Source. Film mixers use speaker mutes to help isolate problems in the mix, but traditional speaker mutes would interfere with the bass redirection capabilities of MultiMAX. To avoid this prob- lem, MultiMAX mutes the individual source channels to the monitor matrix, before bass redirect. -
Page 45: Operation: Lcd: Main Screen
Monitor Source, the source format, the monitoring width including downmixing, the monitor SPL, the Production SPL, and dim attenuation. Splash Screen When MultiMAX EX is powered up, a splash screeen will appear for a few moments displaying the revision of software residing in the unit. You can check at www.martinsound.com to confirm that your unit has the latest version of software. -
Page 47: Operation: Setup Menus
Inputs & Wide Return width, Downmix coefficients, external interfaces, etc., are all addressed within the Setup Menus. Once configured, hundreds of decisions are made transparent to the user, making the operation of MultiMAX EX simple and intuitive to use. Getting From Here To There From the Main Screen, press the Enter button to access the Setup Menus. -
Page 48: Format
Operation: LCD: Setup Menus Format The parameter settings in the Format Menu tell MultiMAX EX the mix configuration in which you will be working. Important issues are addressed such as the number of speakers and their layout, the number of channels in the mix, the number of channels returning from an external processor, and whether the mix is for theatrical release. - Page 49 Dolby Digital EX and DTS ES. The first version of MultiMAX simply selected a dedicated 8 channel input for returning external processors. In MultiMAX EX, the dedicated input is still there, but the ability has been added to monitor the Wide Return surround inputs with the L, R, C, &...
- Page 50 Operation: Setup Menus Format (cont.) F:S = In:Rtn Mode Set the Main Mon format before selecting this parameter. The Wide Return width may be formatted for 7.1 F:S = In:Rtn or 6.1 F:S = In:Rtn, depending upon the Main Mon format selected.
-
Page 51: Calibration
Trim to calibrate. Note: All monitor trims come from the factory set to 0dB. This ensures that MultiMAX EX delivers maximum level and the best signal to noise out of the box. The trim values will be restored to the factory preset... - Page 52 Operation: Setup Menus Calibration (cont) Trim Procedure Position an SPL meter (average reading, true RMS calibrated VU detector) at the mix position. Set the SPL meter to C Weighted/Slow. Select the Monitor System to be calibrated. Solo the required channel/speaker from the Source On section. (MultiMAX won’t allow an invalid selection). Deselect Mute and Dim.
-
Page 53: Options
Options Downmix The Downmix settings allow MultiMAX EX to use your preferred coefficients for downmixing the Wide Inputs combined mix to Lo Ro stereo for compatibility checking and outputting to a reference recorder. Notes should be given to the mastering engineer specifying your downmix settings, to ensure that he listens, masters, and sets the Dolby Digital downmix bits to the same value. -
Page 54: Interfaces
Note: You must recalibrate your monitors after changing the SPL Display Range SPL Reference Tic MultiMAX EX allows the user to place the Main Screen SPL Reference Tic mark at his or her preferred calibrated level. The tic mark may be set anywhere from 35dB to 105dB in 1dB steps. -
Page 55: Levels
Operation: Setup Menus Levels The Levels Setup settings are the same as the press and hold button functions on the front panel. Dim sets the monitor system attenuation level when Dim is selected on the front panel. The Dim attenuation can be varied between -1dB and -30dB. -
Page 56: External Controls
Operation: Setup Menus External Controls The settings in the External Control Menu allow certain functions of MultiMAX to be controlled by external devices. These settings affect the operation of MultiMAX only if the External Control inputs are interfaced. (See pages 13-15) With the Ext Cntrl inputs connected to logic devices, the External Control Menu allows easy enabling and disabling of the external devices’... -
Page 57: Bass Redirect Main
Operation: Setup Menus Bass Redirect Main Bass Redirect Main allows the user to augment the low frequency response of bass deficient speakers associated with the Main Monitor System. Bass redirect allows a channel being sent to a limited band- width speaker to also have its low frequency information sent to the subwoofer or left & right speakers. Once the user selects the monitor channels to be bass redirected, the audio for those monitor channels is summed and an 80Hz low pass filter is applied. -
Page 58: Bass Redirect Alt
Operation: Setup Menus Bass Redirect Alt Bass Redirect Alt allows the user to augment the low frequency response of bass deficient speakers associated with the Alt Monitor System. Bass redirect allows a channel being sent to a limited band- width speaker to also have its low frequency information sent to the subwoofer or left & right speakers. Once the user selects the monitor channels to be bass redirected, the audio for those monitor channels is summed and an 80Hz low pass filter is applied. -
Page 59: Diagnostics
Operation: Setup Menus Diagnostics This is a diagnostic tool for checking continuity to and from external equipment, for the Wide Send, 4:2:4 Send, Downmix Outs, Wide Return, and Stereo Return. After selecting Pink Noise or Band Pass Noise and entering the Diagnostics Screen, the Wide Inputs are muted while noise is applied as a Wide Input source, thereby feeding all Sends and Downmix. -
Page 61: Remote Control
Monitor Source and the Production track. The remote may also be ordered with an optional console mount faceplate. A standard 9-pin serial extension cable provides both power and data exchange for the remote. MultiMAX Martinsound MultiMAX Audio Excellence... -
Page 62: Connections
9-wire shielded extension cable with ‘straight through’ wiring. The main unit utilizes a female DB9 and the remote control a male DB9. Both DB9 connectors use metric jackscrew threads. Martinsound has verified proper remote operation with cables of #26 gauge wire, up to 50 feet in length. -
Page 63: Diagrams
Remote Control: Drawings MultiMAX Desktop Remote - 9-pin D-Sub connector indicated 6.375" 1.125" 2.625" Martinsound MultiMAX MultiMAX Audio Excellence Multiformat Monitor Controller Select Setup Level Production Monitor Enter Exit Mute Main - Front - Alt Srnds Monitor System Source On... -
Page 65: Specifications
Specifications: Audio Audio Inputs Impedance: 20 kΩ, Balanced Level: +4 dBu nominal, +26 dBu maximum Outputs Note: 50Ω/50Ω designates 50Ω resistors in each leg of an output. Monitor Amplifier Outputs: Impedance: 50Ω/50Ω Single ended Level: –2 dBu nominal, +20 dBu maximum for loads > 2.5 kΩ Nominal level can be trimmed from -2 dBu to -22 dBu in .1 dB steps Wide Send, 4/2/4 Send, Meter Outputs: Impedance: 50Ω/50Ω... -
Page 66: Other
Specifications: Other External Logic Controls Opto-isolated; 3.3 kΩ internal build out resistor permits 5V-24V DC control voltages. A tap off the internal 5V source is brought out to the rear connectors through a 100 Ω build out resistor as VCC_LIM to power the opto-isolators in custom interfaces. AC power 115 Volt units 115 VAC +/- 10% 50-60 Hz...
Need help?
Do you have a question about the MultiMAX EX and is the answer not in the manual?
Questions and answers