Table of Contents
Advertisement
Advertisement
Table of Contents

Related Manuals for APRAMO ONE


Summary of Contents for APRAMO ONE
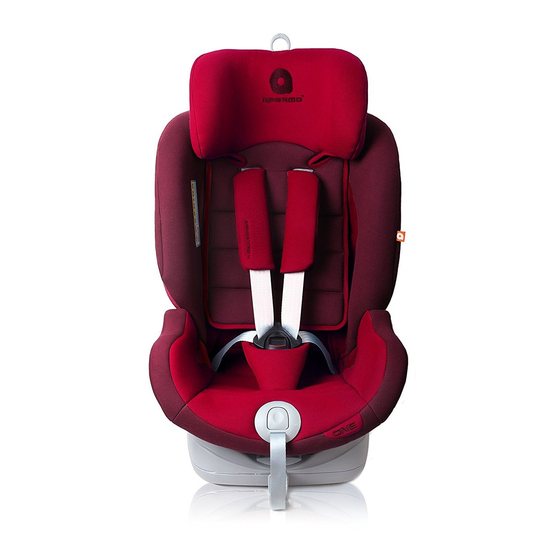
- Page 1 APRAMO® ONE CHILD CAR SEAT 0 - 36KG www.apramo.com...
-
Page 2: Table Of Contents
Thank you for purchasing the APRAMO® ONE seat, 4. Rearward Facing Installation ... 05-08 if you have any questions regarding the installation 4.1 Group 0+ (0 - 13 KG approx.) with 5-point harness + ISOFIX + Top tether and use of this seat, or require spare parts or 4.2 Group 0+ (0 - 13 KG approx.) -
Page 3: Important Information
1. Important Information 1. This child seat is suitable for children up to 36KG, (Group 0+, I, II & III – from birth to approximately 12 years of age). 2. Please follow the instructions in this manual carefully, failure to follow the instructions may affect your child’s safety. 3. -
Page 4: Installation Notes
2. Installation Notes A I R B A G W A R N I N G DO NOT USE FORWARD FACING BEFORE THE CHILD’S WEIGHT EXCEEDS 9KG. This seat uses two fitting methods: GROUP 0+ (0 - 13KG APPROX.) GROUP I, II & III (9 - 36KG APPROX.) ISOFIX SYSTEM AND TOP TETHER WHICH IS SUITABLE FOR GROUP 0+ &... -
Page 5: Before Use
CAUTION: The shoulder belts (05) must not run behind the 3. Preparing the back of the child or at ear height or above the ears. APRAMO® ONE before Use 3.1 ISOFIX Setup 1. If your vehicle does not have ISOFIX guide socket, please insert the guide socket (02) into the ISOFIX anchor (01). -
Page 6: Headrest Adjustment For Group Ii
3.3 Headrest adjustment for Group II & III 1. Using the release handle (09), adjust the headrest (08) up or down as required, then release the handle and the headrest will lock into place automatically. (fig. 6) 2. If required, the headrest (08) can be further adjusted by using the adjusting ring (07), please refer to section 3.2 for details. -
Page 7: Rearward Facing Installation
4. Rearward Facing Installation 4.1 Group 0+ (0 - 13 KG approx.) with 5-point harness + ISOFIX + Top tether 4.1.1 Prepare the ISOFIX. (See section 3.1) 4.1.2 Ensure that the 5-point harness is correctly installed. (Refer to section 8) 4.1.3 Ensure that the 5-point harness is correctly adjusted. - Page 8 4. Guide the two buckle latches together (20) and insert into the buckle (19) There will be an audible click when the buckle is secured. (fig. 18, 19, 20) 4.1.12 Pull on the free end of the Top tether strap until the indicator shows green.
-
Page 9: Group 0+ (0 - 13 Kg Approx.) With 5-Point Harness + Vehicle Belt
4.2 Group 0+ (0 - 13 KG approx.) 4.2.7 Pass the diagonal portion of the vehicle seatbelt through with 5-point harness + vehicle belt the 2 belt guide rings in the belt lock-off pics (17). (fig. 25) 4.2.1 Ensure that the 5-point harness is correctly installed. 4.2.8 Pull the seat belt webbing upwards as far as possible to (Refer to section 8) remove any slack, ensuring that no part of the vehicle... -
Page 10: Forward Facing Installation
For your child’s safety, ensure that the following checks are carried out before every journey: • The vehicle belt is passed through both of the belt guide rings. • The vehicle seat belt is taut, remove any slack if necessary and is not twisted. - Page 11 7. Insert the ISOFIX connectors (15) into the guide socket (02) 10. Hook the snap hook (18) onto the Top tether anchorage until an audible click is heard and the indicators (16) are point in your vehicle. To find this, look for this sign green.
-
Page 12: With 5-Point Harness + Vehicle Belt
5.1.2 With 5-point harness + vehicle belt 7. Pass the diagonal portion of the vehicle seatbelt through 1. Ensure that the 5-point harness is correctly installed. the 2 belt guide rings (17). (fig. 35) (Refer to section 8) 8. Pull the seat belt webbing upwards as far as possible to 2. -
Page 13: Group Ii (15 - 25 Kg Approx.)
5.2 Group II (15 - 25 KG approx.) • The 5-point harness is fitted snugly to the child. with 5-point harness + vehicle belt + Top tether • The shoulder straps are not twisted. 1. Follow the steps shown in section 5.1.2 to install the seat •... - Page 14 8. Place the lap belt portion of the seatbelt on the opposite side For your child’s safety, ensure that the following checks to the vehicle seat buckle through the red belt guide. (28) are carried out before every journey: (fig. 42) •...
-
Page 15: Removing The Apramo® One
6. Removing the APRAMO® ONE from the Vehicle 1. Push back both of the ISOFIX release buttons to release the ISOFIX connectors. 2. Undo the vehicle seat belt buckle, and remove the vehicle seatbelt from the belt guide rings (17) and the lower guides (22). -
Page 16: Installing The 5-Point Harness
9. Turn the car seat around so that the front is facing you. 8. Installing the 5-Point Harness 10. Pull out the shoulder straps (05) and shoulder pads (06) from the harness slots (37). (fig. 50) 11. Open the buckle (19) of the 5-point harness. (fig. 51) 1. - Page 17 4. Bring the 2 latches of the buckle (44) into the buckle (19). 8. Unlatch the rear cover (32) by using the cover latch (31). (fig. 56) (fig. 60) CAUTION: Ensure that the straps are not twisted at 9. Fix the loops of the shoulder pads (35) on the headrest lever any point.
-
Page 18: Care And Maintenance
9. Care and Maintenance 9.2 Cleaning the car seat covers The seat covers are removable and washable, please refer to the fabric care label on the seat cover for full instructions. 9.1 Harness buckle maintenance Buckle failure can cause injury; do not use any oil or other To remove the seat covers lubricants on any part of the buckle. -
Page 19: Applicable Car List
"Universal" 10.1 The category of child car seat child car seat for this age Group in the vehicle handbook. The APRAMO® ONE seat is classified for "Universal" and "Semi-universal" use, the suitable fitting methods as below: 10.3 As a "Semi-universal"... - Page 20 Car Manufacture Model 3-Point ISOFIX Vechicle Belt Alfa Romeo Guilietta (2010>) Mito (2009>) Audi A1 (2011>) A1 Sportback (2012>) A4 Allroad (2009>) A4 Av ant (2008>) A4 S4 (2009>) A5 (2007>) A5 Sportback (2009>) A6 (2011>) A6 Allroad (2011>) A6 Avant (2011>) A6 S6 (2011>) A7 Sportback (2011>) A8 (2011>)
- Page 21 Car Manufacture Model 3-Point ISOFIX Vechicle Belt 1 Series Convertible (2008>) 1 Series Coupe (2008>) 3 Series Coupe (2007>) 5 Series (2011>) 6 Series Coupe (2011>) 7 Series (2010>) X3 F25 (2011>) X5 (2007>) X6 (2008>) 5-GT (2010>) Cadillac BLS Saloon (2006-2011) Chevrolet Aveo 3dr (2012>) Aveo 5dr (2012>)
- Page 22 Car Manufacture Model 3-Point ISOFIX Vechicle Belt Ford B Max (2012>) Fiesta (2008>) Focus (2010>) KA (2009>) Kuga (2013>) Mercedec Benz A Class (2013>) B Class (2012>) C Class (2008>) CLA (2013>) E Class (2009>) GL Class (2006-2012) R Class (2006-2012) S Class (2006-2013) Nissan Juke (2010>)
- Page 24 APRAMO UK LTD UNITS 46-48, DRAYTON MANOR BUSINESS PARK, COLESHILL ROAD, TAMWORTH B78 3GL www.apramo.com...
Need help?
Do you have a question about the ONE and is the answer not in the manual?
Questions and answers