ASCO POWER TECHNOLOGIES Series 300 Operator's Manual
Automatic transfer switches g design 1000 through 3000 amps
Hide thumbs
Also See for Series 300:
- Installation manual (12 pages) ,
- Installation & operation manual (8 pages)
Table of Contents
Advertisement
Operator's
Manual
1000, 1200, 1600 amp. sizes
DANGER is used in this manual to warn of high
voltages capable of causing shock, burns, or death.
!
WARNING is used in this manual to warn
of possible personal injury.
!
CAUTION is used in this manual to warn
of possible equipment damage.
Refer to the outline and wiring drawings provided
with ASCO Series 300 ATS for all installation details.
ASCO POWER TECHNOLOGIES L.P .
Automatic Transfer Switches
G design 1000 through 3000 amps
50 Hanover Road, Florham Park, New Jersey 07932 USA
Series 300
An experienced licensed electrician must install the ATS.
TABLE OF CONTENTS
INSTALLATION
. . . . . . . . . . . . . . . . . . . . . . . . . .
SEQUENCE OF OPERATION
TESTING & SERVICE
ADJUSTMENTS
. . . . . . . . . . . . . . . . . . . . . . . . .
CONTROL FEATURES
INDEX
. . . . . . . . . . . . . . . . . . . . . . . . .
www.asco.com
2000 amp. size
section
1
. . . . . . . . . . . . .
2
. . . . . . . . . . . . . . . . . . . .
3
4
. . . . . . . . . . . . . . . . . . .
5
back cover
381333–122 B
Advertisement
Table of Contents

Related Manuals for ASCO POWER TECHNOLOGIES Series 300


Summary of Contents for ASCO POWER TECHNOLOGIES Series 300
- Page 1 CAUTION is used in this manual to warn of possible equipment damage. Refer to the outline and wiring drawings provided with ASCO Series 300 ATS for all installation details. ASCO POWER TECHNOLOGIES L.P . 50 Hanover Road, Florham Park, New Jersey 07932 USA...
- Page 2 The Transfer Switch nameplate includes data for each specific ASCO Series 300 ATS. Use the ATS only within the limits shown on this nameplate. G300 Neutral Phase Poles – single Ø – switched – three Ø – overlapping blank – solid...
-
Page 3: Installation
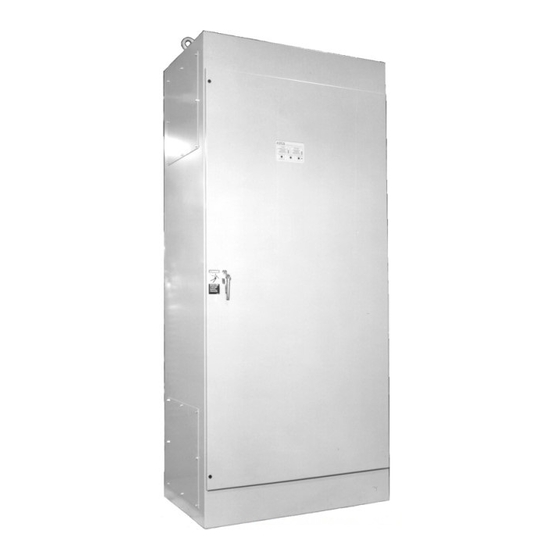
Mounting Refer to the applicable enclosure outline drawing fur- nished with this switch and mount the Series 300 according to details and instructions shown on diagram. SECTION 1 INSTALLATION Auxiliary Cable Box for 1000–2000 amp... -
Page 4: Auxiliary Circuits
TB which is mounted on the front lower left of the transfer switch. Refer to wiring diagram provided with the Series 300 ATS and connect the engine start wires to the appropriate terminals. See Figure 1–1 and Table A. -
Page 5: Functional Test
The Functional Test consists of three checks: manual operation, voltage checks, and electrical operation. Do these checks in the order presented to avoid damaging the automatic transfer switch. Read all instructions on the Wiring Diagram and labels affixed to the automatic transfer switch. Note the control features that are provided and review their operation before proceeding. -
Page 6: Voltage Checks
2 – Voltage Checks First check nameplate on transfer switch; rated voltage must be the same as normal and emergency line voltages. Verify that the feeders have been connected to the proper lugs. Use extreme caution when using a meter to measure voltages in the following steps. -
Page 7: Electrical Operation
Transfer will only occur when the phase relationship between sources is correct. This completes the Functional Test of the ASCO Series 300 Automatic Transfer Switch. Leave the engine–generator starting control in the automatic position. INSTALLATION... -
Page 8: Section 2 Sequence Of Operation
SECTION 2 SEQUENCE OF OPERATION Transfer To Emergency The sequence for load transfer to emergency source begins automati- cally when normal source voltage falls below the preset dropout point or when Transfer Switch Test button is pressed. An under voltage condi- tion on any phase of the normal source is detected by the sensor. -
Page 9: Preventive Maintenance
SECTION 3 PREVENTIVE MAINTENANCE Reasonable care in preventive maintenance will insure high reliability and long life for the automatic transfer switch. Operate the switch at least once a month. Perform this four step Electrical Operation Test. This is a test with load transfer. -
Page 10: Troubleshooting
MANUAL LOAD TRANSFER This procedure will manually transfer the load if the controller is disconnected. Do not manually operate the transfer switch until both power sources are disconnected: open both circuit breakers. Note the control features that are activated or furnished on the switch and review their operation. -
Page 11: Section 4 Adjustments
Time Delay Adjustment Standard time delays are set to customer specifications (if none specified, standard factory settings are used). DESCRIPTION LABELS Override Momentary Override Momentary TD ES TD ES Normal Source Outages TIMER TIMER Transfer to Emergency Transfer to Emergency Override Momentary —... -
Page 12: How To Change A Setting
Do not make any setting changes while the controller is energized. How to Change a Setting 1. Prevent the transfer switch from operating by discon- necting one source first, then the other, as follows: If the transfer switch is in the Normal position, open the emergency source circuit breaker. -
Page 13: Control Features
4–2 for location of DIP switches, battery (provided), and jumper block in the controller. BUILT–IN ENGINE EXERCISER The engine exerciser included in ASCO Series 300 Automatic Transfer Switches provides a once a week 20–minute exercise period. It occurs immediately when... -
Page 14: Dip Switch Settings
CONTROL FEATURES (continued) OPTIONAL PROGRAMMABLE ENGINE EXERCISER (Accessory 11CD) The optional programmable engine exerciser provides seven days of different exercise periods. The timer is connected and mounted below the controller. A permanent backup battery maintains the setting; when power is lost to timer, output switch deenergizes. DIP Switch Settings S1 DIP FUNCTION... -
Page 15: Manual Override
CONTROL FEATURES (continued) How to Set Optional Programmable Engine Exerciser (Accessory 11CD) Proceed with care! The automatic transfer switch is energized. Setting the Clock (Time and Day) Step Press Button Display 1234567 (blink) 00 00 reset ¬ f hold h, then 1 2 3 4 5 6 7 press ±1h AM 12 00... -
Page 16: Remote Control Features
CONTROL FEATURES (continued) INPHASE MONITOR FOR MOTOR LOAD TRANSFER Inphase monitoring logic controls transfer and retransfer of motor loads, so that inrush currents do not exceed normal starting currents. It avoids nuisance tripping of circuit breakers and mechanical damage to motor couplings. - Page 17 CONTROL FEATURES (continued) OPTIONAL STRIP HEATER (Accessory 44) Accessory 44 Strip Heater is designed to keep ambient temperatures within the Automatic Transfer Switch enclosure at acceptable levels. This accessory consists of a mounting bracket with strip heater, thermostat, and terminal block. A transformer with fuses is included when the power for the assembly is derived from voltages above 120 V ac.
- Page 18 accessories, 5–2, 5–3, 5–4, 5–5 auxiliary circuits, 1–2 barriers, 1–3 battery, 4–2, 5–1 buttons, push, 3–1 bypass time delay, 1–4, 2–1, 3–1 cable lugs, 1–1 preparation, 1–1 spacers, 1–1 illustration of, 1–1 catalog number, inside cover cleaning, 3–1 connections engine control contact, 1–2 line, 1–1 conact position indicators, 1–3 control features, 5–1...
Need help?
Do you have a question about the Series 300 and is the answer not in the manual?
Questions and answers