Advertisement
Advertisement
Table of Contents

Related Manuals for Farberware FCD06ABBWHA


Summary of Contents for Farberware FCD06ABBWHA
- Page 1 6-PLACE SETTING COUNTERTOP DISHWASHER Model: FCD06ABBWHA Read these instructions carefully before using your dishwasher, and to maintain its upkeep. If you follow the instructions, your unit will provide you with many years of good service. KEEP THESE INSTRUCTIONS IN A SAFE PLACE...
- Page 2 Farberware is a registered trademark of Farberware Licensing Company, LLC Manufactured and sold pursuant to a license from Farberware Licensing Company, LLC © 2019 Farberware Licensing Company, LLC. All rights reserved.
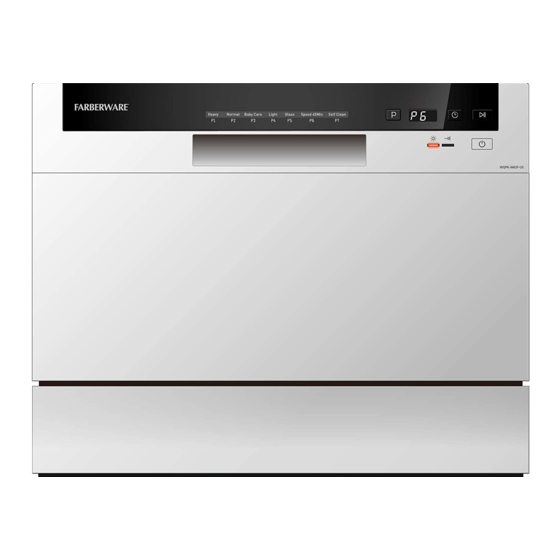
-
Page 3: Table Of Contents
Tables of Contents SAFETY INFORMATION����������������������������������������������������������������������������������������������������������������������� 4 OPERATION INSTRUCTION ����������������������������������������������������������������������������������������������������������������� 6 FIRST TIME USE ���������������������������������������������������������������������������������������������������������������������������������� 7 LOADING THE DISHWASHER������������������������������������������������������������������������������������������������������������� 10 STARTING A WASHING PROGRAM��������������������������������������������������������������������������������������������������� 13 MAINTENANCE & CLEANING����������������������������������������������������������������������������������������������������������� 15 INSTALLATION �������������������������������������������������������������������������������������������������������..��������������.������� 19 TROUBLESHOOTING������������������������������������������������������������������������������������������������������������������������ 23 TECHNICAL INFORMATION �����������������������������������������������������������������������������������������������������������.� 26 WARRANTY INFORMATION �����������������������������������������������������������������������������������������������������.������ 27... -
Page 4: Safety Information
IMPORTANT SAFETY INFORMATION READ ALL INSTRUCTIONS BEFORE USING GROUNDING INSTRUCTIONS This appliance must be grounded. In the event of a malfunction or breakdown, grounding will reduce the risk of electric shock by providing a path of least resistance of electric current. This appliance is equipped with a cord having an equipment-grounding conductor and a grounding plug. - Page 5 -When using your dishwasher, you should prevent plastic items from coming into contact with heating element. (This instruction is only applicable to machines with a visual heating element.) -Check that the detergent dispenser is empty after completion of the wash cycle. -Do not wash plastic items unless they are marked dishwasher safe or the equivalent.
-
Page 6: Operation Instruction
OPERATION INSTRUCTION CONTROL PANEL Power Button: To turn on/off the power Start/Pause Button: Press this button to start or pause the dishwasher. supply. Display screen: to show the reminding Washing Program Selector: Press the button time and the state (running state, delay to select wash cycles. -
Page 7: First Time Use
PRIOR TO USING FOR THE FIRST TIME A. Fill the Rinse Aid Dispenser Rinse Aid Dispenser The rinse aid is released during the final rinse to prevent water from forming droplets on your dishes. That can leave spots and streaks. It also improves drying by allowing water to sheet off the dishes. Your dishwasher is designed to use liquid rinse aids. - Page 8 Adjusting Rinse Aid Dispenser The rinse aid dispenser has four settings.The recommended setting is on "3". If the dishes Adjust lever still are not drying properly or are spotted, adjust the dial to the next higher number on (Rinse) "4". NOTE: Increase the dose if there are drops of water or lime spots on the dishes after washing.
- Page 9 Detergent Dispenser The dispenser must be refilled before the start of each wash cycle following the instructions provided in the Wash Cycle Table . Your dishwasher uses less detergent and rinse aid then conventional dishwasher. Generally, only one tablespoon of detergent is needed for a normal wash load. Also, more heavily soiled items need more detergent.
-
Page 10: Loading The Dishwasher
LOADING THE DISHWASHER BASKETS Recommendation A. Consider buying utensils which are identified as dishwasher-proof. B. Use a mild detergent that is described as 'kind of dishes'. If necessary, seek further information from detergent manufacturers. C. For particular items, select a program with as low a temperature. D. - Page 11 NOTE: Very small items should not be washed in the dishwasher as they could easily fall out of the basket. A. Load hollow items such as cups, glasses, pans etc. With the opening downwards so that water cannot collect in the container or a deep base. B.
- Page 12 Plate racks of Basket The basket is fitted with plate racks which can be stowed horizontal if required. Cutlery Basket Cutlery should be placed in the cutlery basket with handles at the bottom. If the rack has side baskets, the spoon should be loaded individually into the appropriate slots, especially long utensils should be placed in the horizontal position at the front of the upper basket as shown.
-
Page 13: Starting A Washing Program
Heavy Normal Baby Care Light Glass Speed 45Min Self Clean... - Page 14 Turning on the appliance Starting a wash cycle: 1. Draw out the basket(see the section entitled "Loading the Dishwasher " ); 2. Pour in the detergent (see the section entitled "Detergent and Rinse Aid " ); 3. Insert the plug into the socket. The power supply is 120V/60 Hz; 4.
-
Page 15: Maintenance & Cleaning
At the end of a wash cycle When the working cycle has finished, the buzzer of dishwasher will sound 8 seconds, then stop. Turn off the appliance using the ON/OFF button, shut off the water supply and open the door of the dishwasher. Wait a few minutes before unloading the dishwasher to avoid handling the dishes and utensils while they are still hot and more susceptible to breakage. - Page 16 Filter assembly The filter efficiently removes food particles from the wash water, allowing it to be re-cyclated during the cycle. For best performance and results, the filter assembly must be regularly. For this reason, it is a good idea to remove the larger food particles trapping in the filter after each wash cycle by rinsing the filter and cup under running water.
- Page 17 Remarks: -Inspect the filters for blocking every time the dishwasher has been used. -By unscrewing the coarse filter. you can remove the filter system. Remove any food remnants and clean the filters under running water. NOTE: The entire filter assembly should be cleaned once a week. Cleaning the Filter: To clean the coarse filter and the fine filter, use a cleaning brush.
- Page 18 Protect Against Freezing: Please take frost protection measures on dishwasher in winter. Each time after washing cycles, please operate as follows: Cut off electrical power to the dishwasher. Turn off the water supply and disconnect the water inlet pipe from the water valve. Drain water from the inlet pipe and water valve.
-
Page 19: Installation
Protect against freezing: After every wash: After every wash, turn off the water supply to the appliance and leave the door slightly open so that moisture and odors are not trapped inside. Remove the plug: Before cleaning or performing maintenance, always remove the plug from the socket. - Page 20 Installation Preparation: The installation position of dishwasher should be near the existing inlet and drain hoses and power cord. One side of the cabinet sink should be chosen to facilitate the connection of drain hoses of the dishwasher. Positioning the Appliance: Position the appliance in the desired location.
- Page 21 Grounding Instructions: This appliance must be earthed. In the event of a malfunction or breakdown, earthing will reduce the risk of electric shock by providing a path of least resistance for the electric current. This appliance is equipped with a cord having an equipment-earthing conductor and an earthing plug. The plug must be plugged into an appropriate outlet that is installed and earthed in accordance with all local standards and requirements.
- Page 22 Attach the quick connect onto the faucet adapter, by pulling down the outer locking collar on the quick connect, while pushing the quick connect upward onto the faucet adapter. 7. When the quick connect snaps onto the faucet adapter, release the locking collar. Verify the connection is secure.
-
Page 23: Troubleshooting
Start of Dishwasher The following things should be checked before starting the dishwasher. 1. The dishwasher is level and fixed properly 2. The inlet valve is open 3. There is a leakage at the connections of the conducts 4. The wires are tightly connected 5. - Page 24 Suds in the tub Improper detergent Use only the special dishwasher detergent to avoid suds. If this occurs, open the dishwasher and let suds evaporate. Add 1 gallon of cold water to the tub. Close and latch the dishwasher, then Start the "soak" wash cycle to drain out the water .
- Page 25 Cloudiness Combination of soft Use less detergent if you have soft water and select water and too much a shortest cycle to wash the glassware and to get on glassware detergent. them clean. Black or gray Aluminum utensils Use a mild abrasive cleaner to eliminate those marks. have rubbed against marks on dishes dishes.
-
Page 26: Technical Information
Technical Information 438mm Height: Width: 550mm 500mm Depth: see rating label Voltage connected Load : Water pressure: .04-1.0MPa should be 120 °F Hot water connection : see rating label Power supply: 6 place settings Capacity:... - Page 27 ONE YEAR LIMITED WARRANTY This warranty applies to products purchased and used in the U.S. and Canada. This is the only expressed warranty for this product and is in lieu of any other warranty or condition. This product is warranted to be free from defects in material and workmanship for a period of one (1) year from the date of original purchase.
Need help?
Do you have a question about the FCD06ABBWHA and is the answer not in the manual?
Questions and answers
im getting a e4 code
The E4 code for the Farberware FCD06ABBWHA dishwasher means "Overflow." It indicates that some element of the dishwasher is leaking. If overflow occurs, turn off the main water supply before calling for service.
This answer is automatically generated
I have a warning code F4 unit will not work Beeps and shuts off