Table of Contents
Advertisement
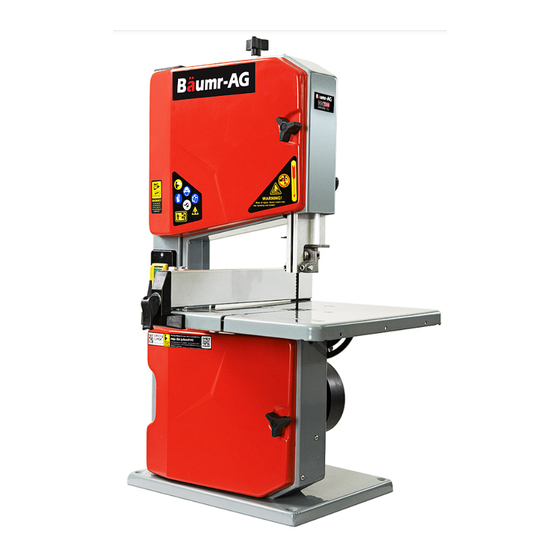
Bandsaw - BS30 Series II
User Manual
[Revision 1.0 May 2019]
READ THIS MANUAL CAREFULLY BEFORE USE – FAILURE TO DO SO MAY RESULT IN INJURY, PROPERTY DAMAGE AND
MAY VOID WARRANTY. • KEEP THIS MANUAL FOR FUTURE REFERENCE. • Products covered by this manual may vary in
appearance, assembly, inclusions, specifications, description and packaging.
E&OE
© 2019 Baumr-AG
Advertisement
Table of Contents

Related Manuals for Baumr-AG BS30 II Series


Summary of Contents for Baumr-AG BS30 II Series
- Page 1 READ THIS MANUAL CAREFULLY BEFORE USE – FAILURE TO DO SO MAY RESULT IN INJURY, PROPERTY DAMAGE AND MAY VOID WARRANTY. • KEEP THIS MANUAL FOR FUTURE REFERENCE. • Products covered by this manual may vary in appearance, assembly, inclusions, specifications, description and packaging. E&OE © 2019 Baumr-AG...
-
Page 2: Safety
• Use combustion engines OUTSIDE only, • If devices are provided for connecting dust and far away from windows, doors and extraction / collection facilities, ensure vents. these are connected and used properly. Dust collection can reduce dust-related hazards. E&OE © 2019 Baumr-AG... - Page 3 • Do not overreach. Do not operate the machine while barefoot or when wearing sandals or similar lightweight footwear. Wear protective footwear that will protect your feet and improve your footing on slippery surfaces. Keep proper footing and balance at all times. This enables better control of the machine in unexpected situations. E&OE © 2019 Baumr-AG...
- Page 4 • Keep cutting tools sharp and clean for better and safer performance. • Follow instruction for lubricating and changing accessory. • Inspect tool cords periodically and if damaged have them repaired by an authorized service facility. • Inspect extension cords periodically and replace if damaged. E&OE © 2019 Baumr-AG...
- Page 5 • The push stick has to be stored on the intended device, so that it can be reached from normal working position and is always ready to be used. • In the normal operating position, the operator is in front of the machine. E&OE © 2019 Baumr-AG...
-
Page 6: Safety Symbols
Wear appropriate clothing Always wait for moving parts to fingers, limbs, blood etc. Take and protective devices. stop fully before handling the due care when handling and product, adjusting, maintenance using the product. etc. E&OE © 2019 Baumr-AG... - Page 7 Carry hook to load – do NOT Wear appropriate eye protection Laser may be in use – do NOT throw or run. for welding. Direct exposure to look directly at laser or allow weld arcs may cause permanent others to. eye injury. E&OE © 2019 Baumr-AG...
-
Page 8: Table Of Contents
Adjusting the Blade Tension ............................. 22 Band Saw Blade Alignment ............................22 Upper Blade Guide Alignment ..........................23 Lower Blade Guide Alignment ..........................24 Table Insert Replacement ............................26 Transportation ............................27 Storage ..............................27 Troubleshooting ............................28 Specifications ............................29 E&OE © 2019 Baumr-AG... -
Page 9: Parts Identification
The band saw comes partially assembled and is shipped in carefully packed carton. After all the parts have been removed from the carton, you should have: Name Main machine Push stick Work table Rip fence Table insert Allen key, 4mm Allen key, 3mm Blade key Hardware bag E&OE © 2019 Baumr-AG... -
Page 10: Know Your Machine
Bandsaw - BS30 Series II Know Your Machine E&OE © 2019 Baumr-AG... -
Page 11: Assembly
5. Attach two screws and two knurled nuts with U shape block that were removed in step one and fasten. Before fastening the work table, make sure table be aligned in two planes. Laterally, in order for the blade to run dead centre through the table insert. At right angles to the blade. E&OE © 2019 Baumr-AG... -
Page 12: Push Stick
1. Fix the screw and nuts on the machine, leaving room for push stick. 2. Hang the push stick on the screw. Rip Fence Clamp the rip fence. It can be used on both sides of blade. E&OE © 2019 Baumr-AG... -
Page 13: Set-Up
This tracking adjustment is required to have the blade run dead centre on the rubber tyres of the band saw wheels: • Turning the setting knob clockwise increases the blade tension. • Turning the setting knob counter- clockwise reduces the blade tension. E&OE © 2019 Baumr-AG... -
Page 14: Work Table Alignment
Aligning the Work Table at Right Angles to the Blade 1. Raise upper blade guide fully. Check band saw blade tension. 2. Loosen locking screws. 3. Using a try square, set the table at right angles to the blade and tighten the locking screws again. E&OE © 2019 Baumr-AG... -
Page 15: Setting Up The Rip Fence
4. Loosen locking nut and adjust limit stop screw until it touches the working table. 5. Tighten locking nut. Setting Up the Rip Fence The rip fence is clamped to the front. It can be used on both sides of the blade. E&OE © 2019 Baumr-AG... -
Page 16: Adjusting The Blade Guard
(max. distance 3 mm). 1. Loosen the locking knob. 2. Rotate the setting knob to adjust the blade guard in the right position, then fasten the locking knob. E&OE © 2019 Baumr-AG... -
Page 17: Operation
Mounting the Saw 1. Drill 4 holes in the supporting surface. 2. Put fixing bolts through the base plate and secure with nuts. E&OE © 2019 Baumr-AG... -
Page 18: On/Off Switch
7. Cut workpiece in a single pass. 8. Switch OFF if no further cutting is to be done immediately afterwards. Machine has suction connector, user can connect the machine to a proper suction unit when working. E&OE © 2019 Baumr-AG... -
Page 19: Maintenance
Saw Blade Change Danger! Risk of injury, even with the band saw blade at standstill. Wear gloves when changing blades. Use only suitable band saw blades. 1. Loosen the 2 knurled screws and remove the U shape blocker. E&OE © 2019 Baumr-AG... - Page 20 Bandsaw - BS30 Series II 2. Open both housing doors. 3. Loosen setting knob until the band saw blade has slackened. E&OE © 2019 Baumr-AG...
- Page 21 7. Tighten setting knob until blade does no longer slip off the band saw wheels. 8. Close both housing doors. 9. Tension band saw blade; Align band saw blade and align blade guides; let saw test run for at least one minute; Stop saw, unplug and recheck settings. E&OE © 2019 Baumr-AG...
-
Page 22: Adjusting The Blade Tension
Turn setting knob clockwise if the band saw blade runs towards the front of the saw. − Turn setting knob counter- clockwise if the band saw blade runs towards the rear of the saw. 3. Tighten locking nut. E&OE © 2019 Baumr-AG... -
Page 23: Upper Blade Guide Alignment
2. Loosen the thrust bearing’s locking screw. 3. Adjust thrust bearing position (distance thrust bearing - band saw blade = 0.5 mm - if the band saw blade is turned by hand, it shall not touch the thrust bearing. E&OE © 2019 Baumr-AG... -
Page 24: Lower Blade Guide Alignment
Periodically check thrust bearings and guide pins for wear, if necessary, replace both guide pins at the same time. Thrust Bearing Adjustment 1. Loosen the two screws and remove the under blocks. 2. Loosen the three screws and Remove the working table from the table trunnion. E&OE © 2019 Baumr-AG... - Page 25 8. Adjust thrust bearing position (distance thrust bearing - band saw blade = 0.5 mm) if the band saw blade is turned by hand, it shall not touch the thrust bearing. 9. Tighten the thrust bearing locking screw. E&OE © 2019 Baumr-AG...
- Page 26 5. Fit the U shape under block to the working table. Table Insert Replacement The table insert needs replacement when its slot has become enlarged or damaged. 1. Remove table insert from saw table (push up from underneath). 2. Fit new table insert. E&OE © 2019 Baumr-AG...
-
Page 27: Transportation
Store the equipment and accessories in a dark and dry place at above freezing temperature. The ideal storage temperature is between 5 and 30°C. Store the electric tool in its original packaging. Cover the electric tool in order to protect it from dust and moisture. E&OE © 2019 Baumr-AG... -
Page 28: Troubleshooting
Change the saw blade Blunt saw blade Saw blade jams during cutting Clean the saw blade Deposits on the saw blade work Set the saw blade guide according to the Guide has been set poorly operating instructions E&OE © 2019 Baumr-AG... -
Page 29: Specifications
240V 50Hz Blade Length 1400 mm Blade Wheel Diameter 205 mm Max. Cutting Height 80 mm @ 90° | 45 mm @ 45°" Cutting Speed 950 m/min Table Size 302x304 mm Table Tilt 0° - 45° E&OE © 2019 Baumr-AG... - Page 30 ©2019 Baumr-AG. All rights reserved. No part of this document, including descriptive content, concepts, ideas, diagrams or images may be reproduced or transmitted in any form or by any means, electronic or mechanical, including photocopying, scanning or recording, or any information storage and retrieval system,...
Need help?
Do you have a question about the BS30 II Series and is the answer not in the manual?
Questions and answers