
Subscribe to Our Youtube Channel
Related Manuals for Clarke CDS3


Summary of Contents for Clarke CDS3
- Page 1 DRILL STAND WITH VICE Model No: CDS3 Part No: 6500224 ASSEMBLY INSTRUCTIONS GC09/13...
- Page 2 INTRODUCTION Thank you for purchasing this CLARKE product. Please read and follow the instructions carefully. In doing so you will ensure the safety of yourself and others around you, and you can look forward to the product giving you long and satisfactory service.
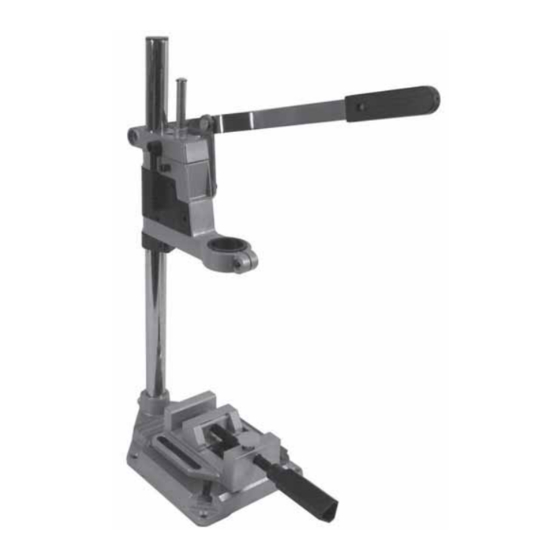
- Page 3 RELEASE MOUNTING HOLE FIG 1 The component parts of your CDS3 drill stand are shown in fig 1. • Any electric drill with a standard 43mm diameter neck may be fitted directly to the head assembly. • A reducing sleeve is provided, allowing a drill with a 38mm diameter neck also to be accommodated.
- Page 4 ASSEMBLY 1. Insert the column into the base and secure with the bolt using a 14mm wrench. • Ensure the column does not project below the base. 2. Slide the lower collar onto the column and secure approximately half way up the column using the hex key.
- Page 5 6. Secure the vice to the base using two suitable bolts with nuts and washers (not supplied). • To position the vice relative to Bolt/nut the column, slacken the two vice securing bolts and manoeuvre the vice as required. Fig 5 IMPORTANT! Secure the base to a workbench or sturdy table using suitable bolts (not supplied).
- Page 6 DRILLING THE HOLE 1. Lower the head assembly until the drill bit is just touching the workpiece as in Fig 8, and set the head assembly in position using the hex key shown in Fig 3. 2. Switch the drill on, and press down on the operating lever as the drill bit starts drilling.
- Page 7 NOTES __________________________________________________________________________ __________________________________________________________________________ __________________________________________________________________________ __________________________________________________________________________ __________________________________________________________________________ __________________________________________________________________________ __________________________________________________________________________ __________________________________________________________________________ __________________________________________________________________________ __________________________________________________________________________ __________________________________________________________________________ __________________________________________________________________________ __________________________________________________________________________ __________________________________________________________________________ Parts & Service: 020 8988 7400/E-mail:Parts@clarkeinternational.com or Service@clarkeinternational.com...
Need help?
Do you have a question about the CDS3 and is the answer not in the manual?
Questions and answers