Table of Contents
Advertisement
Advertisement
Table of Contents

Related Manuals for Blaupunkt TRAVELPILOT LUCCA 3.3


Summary of Contents for Blaupunkt TRAVELPILOT LUCCA 3.3
- Page 1 Mobile Nav igation TravelPilot Lucca 3.3 Operating Instructions (long version)
-
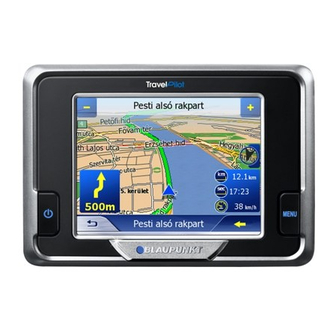
Page 2: Device Overview
Device Overview Device Overview... - Page 3 The following button are located be- side the display: 1. Power (Screen ON/OFF): Long press (longer than three seconds): Switches the power on/off. Short press: Switches the screen on/off. (battery saving mode) 2. Menu: Long press (longer than three seconds): Opens the main menu screen of the device.
- Page 4 Device Overview The underside features the following controls: 7. USB Port 8. Connects the Lucca to the suction cup...
-
Page 5: Table Of Contents
Device Overview ...2 Safety notes ...9 Safety Notes for Navigation ... 9 Safety Notes for Handling the Lucca ... 9 Initial Startup of Lucca ...10 Lucca Scope of Delivery ... 10 Protective Films and Covers ... 11 Power On/Off ...11 Setting the Language ...12 Charging the Battery ...12 Installation in the Vehicle ...13... - Page 6 Contents Exiting the Menu ... 22 Additional Functions ... 22 GPS Info ... 23 Route Planning ... 23 Select Map ... 23 Performing Basic Settings ... 23 Setting the Time Zone ... 23 Entering the Home Address ... 24 Specifying a Destination ... 25 Entering a Destination ...
- Page 7 Managing Routes ... 45 Saving a route ... 45 Loading a route ... 46 Calculating a Route ... 46 Displaying the Route on the Map . 47 Simulation (demo mode) ... 47 Specifying Route Options ...47 Destination Guidance ...49 Disturbed GPS Reception ... 50 Quitting the Destination Guidance...
- Page 8 Contents Unblocking ... 63 Confi guring Lucca/ Basic Settings ...64 Settings ... 64 Language ... 64 Home Address ... 65 Map Information ... 65 Route Information ... 65 Routing Options ... 66 Route Planning ... 66 Signpost Information ... 66 Speed Limit ...
-
Page 9: Safety Notes
Safety notes For your personal benefi t, please carefully read the following safety notes and warnings before operating your Lucca for the fi rst time. Safety Notes for Navigation Caution: Do not operate the Lucca while driv- ing to protect yourself and others against accidents! View the display only if you are in a safe travel situation! -
Page 10: Initial Startup Of Lucca
Safety notes the engine since the GPS receiver constantly uses electricity and could discharge the vehicle bat- tery. • Do not unplug the connector by pulling on the wire. The wire could be damaged! • Do not use harsh solvents to clean the device;... -
Page 11: Protective Films And Covers
Initial Startup • CD/DVD with european road map and operating instructions (long versions) Optional Accessories: • Carrying Case • DC Adapter • USB Cable • Second car kit • VAN/SUV Suction Cup • Holder for air vent opening Protective Films and Covers Prior to the initial use, remove the protective fi... -
Page 12: Setting The Language
Setting the Language Setting the Language If the Lucca is switched on for the fi rst time, US English is used as the standard language. If necessary, you may have to set the desired language for the menus and the voice output: ➜... -
Page 13: Installation In The Vehicle
Charging the Battery state of the battery (0 to 3 seg- ments). Note: If the charge state of the battery is very low, a warning message is displayed. ➜ To charge the battery, attach the supplied charger to the charging socket. -
Page 14: Removing The Suction Cup
Installation in the Vehicle ➜ Press the suction plate of the sup- port against the glass. ➜ Push the lever on the suction cup towards the glass. ➜ The track for mounting the Lucca must be aligned vertically. Removing the Suction Cup If you change vehicles, you can simply remove the suction cup. -
Page 15: Power On/Off
Power On/Off Power-on ➜ To power on the Lucca, push the Power button. The device switches on and dis- plays the logo screen. Activating the Idle State ➜ To activate the idle state, briefl y push the Power button. The Lucca switches to the idle state (screen off state). -
Page 16: Menu Button
Menu Button Menu Button Quick Settings In the Quick Settings menu volume and brightness can be adjusted. The Quick Settings menu can be entered at any time independent of the cur- rent menu being active. ➜ Touch the Menu button. The Quick Settings menu displays. -
Page 17: Operating The Navigation Menus
Menu Button cordingly before the battery runs out. Press the OK button to confi rm. Operating the Navigation Menus Operating the Navigation Menus Software Keyboard If text entries are required, the touch- screen displays a software keyboard. You can perform all entries using your fi... -
Page 18: Switching Between Number, Umlaut And Character Input
Operating the Navigation Menus Switching between Number, Umlaut and Character Input To enter numbers, such as postcode, ➜ touch the button To return to the character entry mode, ➜ touch To enter an umlaut, ➜ touch the button. The umlaut keyboard is displayed. -
Page 19: Buttons
er, you can also directly touch an entry to accept it. ➜ : Touch this button to scroll up in the list by one page (5 ele- ments). ➜ : Touch this button to scroll down in the list by one page (5 elements). - Page 20 Operating the Navigation Menus ➜ Touch the GPS Info button. The GPS Status menu displays. • GMT: Greenwich Mean Time Lon- don time without daylight savings time. • Longitude/Latitude, current Posi- tion: Information of the east longi- tude and north latitude. •...
-
Page 21: Navigation
Navigation General Notes about the Navigation The use of the Lucca is at your own risk. Caution: Do not operate the Lucca while driv- ing to protect yourself and others against accidents! View the display only if you are in a safe travel situation! The street routing and traffi... -
Page 22: Entering A Destination
Navigation The Navigation menu allows access to all the functions of the navigation. Entering a Destination ➜ Touch the Destination entry but- ton to enter a destination for the navigation. For further details, please read the section "Entering a Destination". Navigating Home ➜... -
Page 23: Gps Info
GPS Info ➜ Touch the GPS Info button to ob- tain information about the current GPS status and about your current position. Route Planning ➜ Touch the Itinerary button to plan a route with several stages. For further details, please read the section "Route Planning with Stag- es". -
Page 24: Entering The Home Address
Navigation Note: The selection is facilitated by the display of the capitols in the re- spective time zone. ➜ Touch the OK button. ➜ If daylight savings time currently applies to your position, touch the Daylight saving time button. The button displays a check mark. Note: If the time is changed at your po- sition or if you drive into a differ-... -
Page 25: Specifying A Destination
Specifying a Destination This section contains information about the different methods for en- tering, selecting and managing desti- nations with the Lucca. How to start the navigation to a des- tination is described in the chapter "Destination Guidance". Entering a Destination With the Lucca, you can enter or se- lect destinations in different ways: •... -
Page 26: Entering A Destination Address
Navigation ➜ Touch the Country button. The list of countries displays. ➜ Touch the country in which your destination is located. The Address menu displays. Note: You can only select countries which are at least partially displayed on the currently loaded map. Entering a Destination Address ➜... -
Page 27: Additional Functions
Note: If the country containing your des- tination is not displayed in the top line, touch the select the correct country. How to select a country is described in the chapter "Entering a Destina- tion Country". ➜ Touch the Town fi eld and enter the target location. -
Page 28: Selecting A Point Of Interest
Navigation • Save: – This function allows you to save the specifi ed address to your favourites. For further details, please read the chapter "Saving one of the recent destinations". Selecting a Point of Interest Special destinations, also referred to as POI (Point of interest), are part of the map and can be displayed on the map. - Page 29 ➜ Touch the Surrounding Ra- dius fi eld and select the radius in which you are looking for a point of interest. ➜ Touch the Category fi eld and select the category (e.g. petrol station) from which you want to look for points of interest.
-
Page 30: Additional Functions
Navigation Note: You do not have to fi ll out the fi elds Category and Subcategory. They are only intended to restrict the list of points of interest in the Point of interest fi eld. This list can quickly become very extensive, particularly at larger locations. - Page 31 ➜ In the Point of interest menu, touch the ...in a town button. The submenu displays. Note: If the country containing your des- tination is not displayed in the fi rst line, touch the and select the correct country. How to select a country is described in the chapter "Entering a Destination Country".
-
Page 32: Special National Destination
Navigation category (e.g. museum, theatre, ...) from which you want to look for points of interest. Only those subcategories are avail- able for selection for which points of interest can be located in the speci- fi ed town. ➜ Touch the Point of Interest fi... - Page 33 ➜ In the Point of interest menu, touch the ...nationwide button. The submenu displays. Note: If the country containing your destination is not displayed in the fi rst line, touch the twice and select the correct coun- try. How to select a country is de- scribed in the chapter "Entering a Destination Country".
-
Page 34: Copying A Destination From The Map
Navigation category. They also contain the characters you entered (if you en- tered any characters). ➜ Touch the entry of the point of in- terest to which you want to navi- gate. ➜ If you desire more detailed infor- mation about the point of interest, touch the More button, followed by Show details. - Page 35 ing in the top left corner. You can zoom out by plotting a di- agonal starting in the bottom right corner. Note: You can also zoom in and out using buttons. – Move In the move mode (button pressed), you can move the map.
- Page 36 Navigation • Touch the Start navigation but- ton to use the selected location as place of destination for the naviga- tion. Notes: – This function is only available with GPS reception. – If you use this function during a navigation, all previously de- fi...
-
Page 37: Copying The Destination From The Favourites
Copying the Destination from the Favourites The favourites contain all the destina- tions you saved using the Save but- ton. You can perform the following in this menu: • Accepting destinations for the navigation, • renaming navigation destinations, • deleting saved destinations. Copying a Favourite for Destination Guidance ➜... -
Page 38: Additional Functions
Navigation Additional Functions ➜ Touch the More button to gain ac- cess to additional functions of the Favourites menu. The list of Additional functions displays. It contains the following functions: • Show details: – Touch the Show details button to show the address of the se- lected destination. -
Page 39: Additional Functions
➜ Select the desired destination. ➜ Touch the OK button. The destination is copied and the address is entered in the corre- sponding fi elds. Additional Functions ➜ Touch the More button to gain ac- cess to additional functions of the Last destinations menu. -
Page 40: Managing Destinations
Navigation Note: The route type used for the route calculation is automatically select- ed from the setting which you de- fi ned in the Routing options menu. Managing Destinations Managing Destinations Two lists are available in which indi- vidual destinations are saved: •... -
Page 41: Saving One Of The Recent Destinations
A menu for entering a name is dis- played. ➜ Enter a name for the destination. ➜ Touch the OK button. The destination is saved in the Fa- vourites. Saving one of the Recent Destinations Prerequisite: • You opened the Last destinations list as described in the chapter "Copying one of the Recent Desti- nations". -
Page 42: Deleting A Destination
Managing Destinations ➜ Touch the More button. ➜ Touch Rename entry. A menu for entering a name is dis- played. ➜ Enter a new name for the destina- tion. ➜ Touch the OK button. The destination is renamed. Deleting a Destination Prerequisite: •... -
Page 43: Route Planning With Stages
Managing Destinations ➜ Touch Delete all. A confi rmation is displayed. ➜ Touch OK to delete the list - or - ➜ touch not to delete the list. Route Planning Route Planning with Stages You can also perform the route plan- ning without GPS receiver, e.g. -
Page 44: Editing, Saving And Managing Routes
Route Planning The Destination entry menu dis- plays. ➜ Defi ne the route point similar to the destination entry. For more in- formation, see the chapter "Enter- ing a Destination". ➜ Touch the Add button. The Itinerary menu displays. The defi... -
Page 45: Changing The Order
Changing the Order • Move route point up: ➜ Select the route point to be moved. ➜ Touch the More button. ➜ Touch the Move target up button. The Itinerary menu is displayed again, the selected route point is moved up in the route list by one position. -
Page 46: Loading A Route
Route Planning Loading a route ➜ Touch the More button. ➜ Touch Load route. ➜ Select the desired route. ➜ Touch OK. Calculating a Route A planned route can also be calculat- ed without GPS reception so that you can gain an overview of the trip. In this case, the fi... -
Page 47: Displaying The Route On The Map
Route Planning Displaying the Route on the Map ➜ Touch the Show button to display the entire route on the map. The map is displayed. The route is highlighted in blue. The specifi ed route points are identifi ed by fl ags. Simulation (demo mode) ➜... - Page 48 Specifying Route Options ➜ Touch the Speed profi le fi eld to change between the available pro- fi les. ➜ Touch the Type of routing fi eld to change between the various modes: • Fast route – This option calculates shortest route for the required time.
-
Page 49: Destination Guidance
Destination Guidance Prerequisite: • You specifi ed a place of destina- tion as described in the chapter "Entering a Destination" - or - • you selected a place of destination from the Favourites as described in the chapter "Copying the Destina- tion from the Favourites"... -
Page 50: Disturbed Gps Reception
Destination Guidance Disturbed GPS Reception A message appears after entering the destination if no adequate GPS signal is received. • If you are in an enclosed room, move to the outside. The Lucca re- quires a vertical line towards the sky. -
Page 51: Working With The Map
Working with the Map Map Operation In this section you learn which in- formation and which processing op- tions are available in the map view. Depending on whether you display a map without or during the navigation, different options are available for op- eration. -
Page 52: Buttons
Working with the Map Buttons Different buttons are available in the map view with which you can adjust the display according to your needs. With Map View without GPS Reception • Show/hide buttons – More This button allows you to hide the other buttons to gain a better overview of the map. - Page 53 constantly jump back to the cur- rent position. This mode should also be set if you want to select destination points from the map during the navigation. • Zooming/Moving – Touch the Zoom/Move button to switch between zoom and move mode. –...
-
Page 54: Additional Functions
Working with the Map • Zoom out – Touch this button out of the map. • Zooming level bar between the buttons – Touch one of the sections of the bar to zoom in or zoom out of the map. •... -
Page 55: Inserting An Interim Destination
ther details, please read the section "Blocking Route Segments". Inserting an Interim Destination ➜ Touch the Interim destination button to insert a new interim des- tination during the navigation. The route is recalculated so that this interim destination can be ap- proached as the next destination. -
Page 56: Map Display During Destination Guidance
Map Display during Destination Guidance Map Display during Destination Guidance During a navigation, the map display shows different navigation tools, route information and one additional button: Navigation Tools The left and lower area of the map dis- play the following navigation tools: •... -
Page 57: Route Information
• The lower street fi eld displays the current street name. Route Information The right area of the map displays the following route information: – : This symbol represents stages. All information below it refers to the next destination. – : Estimated time of ar- rival. -
Page 58: Showing Additional Map Information
Map Display during Destination Guidance Caution The information on the digital road maps may be incorrect due to short- term changes (construction, etc.)! The traffi c situation and the local signpost information have priority over the information of the Lucca. Showing Additional Map Information You can use the Lucca to defi... -
Page 59: Route Information
➜ Touch the button to return to the Settings menu. Route Information ➜ Select the Route information set- ting with the button. ➜ Switch the desired route informa- tion on or off with the correspond- ing buttons. The corresponding information for the next stage (upper area) and the complete route (lower area) is displayed on the map. - Page 60 Map Display during Destination Guidance In the Speed limit menu you can de- fi ne whether speed limits should be displayed during the navigation and whether you should be warned au- dibly if you are exceeding the speed limit. • Display signs ➜...
-
Page 61: Additional Functions During Navigation
Additional Functions during Navigation The following functions can be used during a navigation: • Inserting an interim destination • Skipping a stage • Blocking route segments Inserting an Interim Destination During the navigation, you can insert a new interim destination at any time. The route is then recalculated so that this interim destination can be ap- proached as the next destination. -
Page 62: Approaching The Next Destination
Additional Functions during Navigation Approaching the Next Destination This function is only available during a navigation on a route with at least one interim point. Use this function if you want to skip the next route point. ➜ Touch the Next destination but- ton to approach the next to one route point. -
Page 63: Unblocking
➜ Briefl y touch any position on the map. ➜ Select the Block road entry. The Block road menu displays. ➜ Enter the number of kilometres, starting with your current posi- tion, which you want to block. The route is recalculated and the blocked route segment is evaded. -
Page 64: Confi Guring Lucca/Basic Settings
Confi guring Lucca Confi guring Lucca/ Basic Settings Settings You can perform settings in the Lucca for the following areas: • Language • Home address • Map information • Route information • Routing options • Route planning • Signpost information •... -
Page 65: Home Address
Home Address In the Home address menu, you can store your home address so that you can quickly navigate home from any location. ➜ Touch the Enter your home ad- dress button. ➜ Touch the Address button and enter your home address in the "Entering a destination address"... -
Page 66: Routing Options
Confi guring Lucca Note: This information is only displayed if you navigate to several loca- tions. Routing Options In the Routing options menu, you can defi ne the speed profi le of your ve- hicle, select the type of routing and exclude certain streets from usage. -
Page 67: Auto Mode
• Display signs ➜ Touch the Show traffi c signs but- ton to change between the follow- ing modes: – Show traffi c signs: Always, – Show traffi c signs: On speed- ing only or – Show traffi c signs: Never •... -
Page 68: Time Zone
Confi guring Lucca • 3D auto zoom – Select whether you desire auto zoom or no auto zoom as de- fault in 3-D view during a navi- gation. • 2D auto zoom – Select whether low auto zoom, standard auto zoom, high auto zoom or no auto zoom during a navigation with 2-D view. -
Page 69: Representation
• Time ➜ Touch this fi eld to toggle between 12-hour and 24-hour display. • Distance ➜ Touch this fi eld to toggle between the display in kilometres and miles. Representation In the Representation menu, you can set the brightness for day and night mode. -
Page 70: Product Information
Confi guring Lucca Product Information ➜ Touch this fi eld to display the ver- sion of the map being used and the version of the navigation soft- ware. GPS Mode of Operation GPS Mode of Operation The Global Positioning System (GPS) was developed in the 70s by the US military. -
Page 71: Mp3 Mode
GPS Mode of Operation If the Lucca receives the signals from at least 3 satellites, it can determine its position and display it on the map. This position can then be used as the starting point for a route calculation. Since a positioning and position dis- play is carried out once every second, you can view your movement on the... -
Page 72: Selecting Mp3 Mode
MP3 Mode ➜ Push the SD card into the SD card slot according to the marking on the slot until the card engages. Selecting MP3 Mode If you are in a different operating mode, ➜ Press the Menu button longer than 3 seconds. -
Page 73: Playback The Mp3 File
➜ Touch the fi le to which you want to listen by using the arrows to scroll up and down in the list. The MP3 menu is displayed again and the selected MP3 fi le starts playing. Playback the MP3 File ➜... -
Page 74: Removing The Sd Card
MP3 Mode Removing the SD Card ➜ You quit the MP3 mode by touch- ing the button in the Mp3 menu. ➜ Carefully push on the SD card in the slot until it disengages. The SD card is ejected a little bit and can be removed. -
Page 75: Selecting A Picture Fi Le
➜ Touch the Picture Viewer button. The Pictures viewer menu displays. The fi rst picture in the picture fi le recognised by the Lucca is dis- played. Picture Viewer Mode Selecting a Picture fi le ➜ To select the next picture in the fi... -
Page 76: Starting The Full Screen
Picture Viewer Mode At the last slide the Question No- tice where the slide show is fi n- ished will appear. Starting the Full Screen ➜ Touch the Full button to view the full screen with all the pictures in the fi... -
Page 77: Removing The Sd Card
Picture Viewer Mode Removing the SD Card ➜ You quit the Picture Viewer mode by touching the the Pictures viewer menu. ➜ Carefully push on the SD card in the slot until it disengages. The SD card is ejected a little bit and can be removed. -
Page 78: Removing The Sd Card
Installing Street Maps ➜ Switch off and on the Lucca again by pressing the Power button for a few seconds. A dialog menu displays. Follow the instruction to install the street map. Determine whether to load the con- tent of the road map into the main memory of the device or whether the Lucca should load the data from the SD card during the navigation. -
Page 79: Disposal Of Old Unit
In some countries Blaupunkt offers a specifi c repair service including a pick-up service. In case your Lucca has to be sent to Blaupunkt for service you can order a pick-up service for your device on the internet. Refer www.blaupunkt.com check if this service is available in your country. -
Page 80: Warranty
European Union, the warranty terms issued by our re- spective responsible domestic agen- cy are valid. The warranty terms can be called up under www.blaupunkt.com/de or re- quested directly from: Blaupunkt GmbH, Hotline Robert-Bosch-Str. 200 D-31139 Hildesheim... - Page 81 The internal navigation software re- mains intact and you can use either the internal navigation software or the one on the SD card for the selec- tion. Is the old internal navigation soft- ware overwritten with a change of the navigation software? No, the system can navigate with the internal as well as the external data.
- Page 82 66-817 000 2185 00144 902 52 77 70 08-7501850 01-8471644 02-6130 0446 76 511 803 0800-118922 0212-335 06 71 Blaupunkt GmbH, Robert-Bosch-Straße 200, D-31139 Hildesheim 10/06 CM-AS/SCS1 (GB) 8 622 405 254 Fax:/www: 05121-49 4002 www.blaupunkt.com 01-610 39 391 02-525 5263...
-
Page 83: Mobile Navigation
Mobile Navigation TravelPilot Lucca 3.3 Die Lucca hat eine neue Ein-/Ausschaltlogik! The Lucca features a new switch-on/switch-off logic! Power Le Lucca répond à une nouvelle logique de mise en marche et d'arrêt ! Il Lucca ha una nuova logica di accensione/spegnimento. - Page 84 De Lucca is voorzien van een nieuwe aan-/uitschakellogica! Power Power Lucca har en ny på-/avslagningslogik! Power Power ¡El Lucca tiene una nueva lógica de conexión y desconexión! O Lucca possui uma nova lógica de activação/desactivação! Power Power Power Power Power Power Power Power...
- Page 85 Lucca-navigationssystemet er udstyret med et logisk tænd/sluk-system! Lucca har nye logiske funksjoner for å slå apparatet på og av! Power Power Lucca-järjestelmässä on uusi kytkentä-/katkaisulogiikka! Power Power Lucca'da yeni bir açma/kapatma sistemi mevcuttur! Power Power Power Power Power Power Power Power Power Power...
- Page 86 A Lucca új be-és kikapcsoló logikával rendelkezik! Urządzenie Lucca posiada nowy układ logiczny włączania/wyłączania! Přístroj Lucca má nový způsob vypínání/zapínání! Prístroj Lucca má nový spôsob zapínania/vypínania! Το Lucca έχει μια νέα λογική ενεργοποίησης/απενεργοποίησης! Power Power Power Power Power Power Power Power Power Power...
- Page 87 Mobile Navigation TravelPilot Lucca 3.3 CC Beiliegendes Kartenmaterial (Backup CD-ROM) Ihrer Lucca 3.3 CC liegt detailliertes Kartenmaterial zu den auf der Verpa- ckung genannten Ländern (bzw. dem Land) bei. Entgegen den Angaben in den Bedienungsanleitungen umfasst dies nicht Gesamt-Europa. Kartenmate- rial anderer Länder Europas erhalten Sie im Fachhandel.
- Page 88 Mapas anexos (CD-ROM de segurança) Juntamente com o seu Lucca 3.3 CC, recebe mapas pormenorizados dos países (ou país) mencionados na embalagem. Contrariamente às indicações nas instruções de serviço, eles não abrangem toda a Europa. Poderá adquirir mapas de outros países europeus no comércio da especialidade. Ekteki kart malzemesi (Backup CD-ROM) Lucca 3.3 CC 'nizin detaylı...
Need help?
Do you have a question about the TRAVELPILOT LUCCA 3.3 and is the answer not in the manual?
Questions and answers