Table of Contents
Advertisement
Quick Links
Advertisement
Table of Contents

Summary of Contents for Demco Excalibar 3
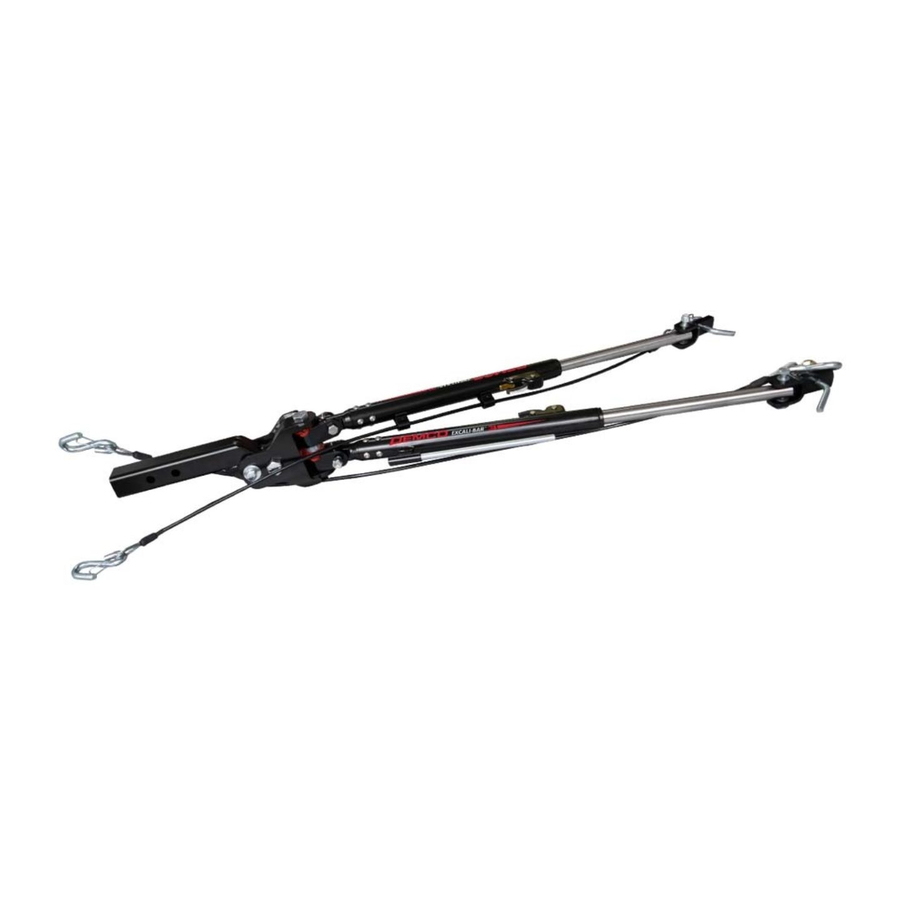
- Page 1 TB20061, Rev 2 09/19 SELF-ALIGNING TOW BAR Excalibar 3...
-
Page 2: Table Of Contents
Introduction Warranty Policy, Operator Manuals & Registration Go online to www.demco-products.com to review Demco warranty policies, operator manuals and register your Demco product. WARNING: Exceeding weight limitations or not using a towing vehicle larger and at least 500 lbs. heavier than the tow bar... -
Page 3: Signal Words
If you have questions not answered in this manual, or require additional copies, please contact your dealer or Demco, 4010 320th Street, Boyden, IA 51234, ph: (712) 725-2311 or (712) 725-2302, Toll Free: 1-800-543-3626 Fax: (712) 725-2380, http://www.demco-products.com... -
Page 4: Safety Sign Locations
SAFETY Sign Locations Types of safety sign and locations on the Excalibar 3 are shown in illustration below. Good safety requires that you fa- miliarize yourself with various safety signs, type of warning, and particular function related to that area, that requires your SAFETY AWARENESS. -
Page 5: During Operation
Safety Information During Operation • Always follow state and local regulations regarding auxiliary lighting when towing. Be sure to check with local law enforcement agencies for your own particular regulations. Only safety cables (not elastic or nylon/plastic tow straps) should be used to retain connection between towing unit and towed vehicle in event of separation. -
Page 6: Performing Maintenance
A fire extinguisher and first aid kit should be kept readily accessible while performing maintenance on this tow bar. • Any disassembly of the Excalibar 3 must be performed by an authorized dealer or sent back to Demco for repair and maintenance. Page 6... -
Page 7: Bolt Torque Data For Standard Nuts, Bolts, And Capscrews
Bolt Torque Bolt Torque Data for Standard Nuts, Bolts, and Capscrews Tighten all bolts to torques specified in chart unless otherwise noted. Check tightness of bolts periodically, using bolt chart as guide. Replace hardware with same grade bolt. NOTE: Unless otherwise specified, high-strength Grade 5 hex bolts are used throughout assembly of equipment. Torque figures indicated are valid for non-greased or non-oiled threads and heads unless otherwise specified. -
Page 8: Important Notice
Be sure to check that receiver on towing vehicle is not inset to far. When attaching a Demco towing product it is important that turning clearance is adequate. A receiver that is inset to far on a towing vehicle will shorten turning radius. Failure to check this may result in towing or towed vehicle to be damaged. -
Page 9: Latch Disassembly
Latch Maintenance Instructions Latch Disassembly You may leave the Excalibar 3 in the hitch receiver or take it out and work on it on a work bench. 4. If sear washer has excessive dirt or wear, the shaft will need to removed. Remove connecting clevis from shaft, note location of washers. -
Page 10: Hooking Up The Vehicle To Be Towed
Tow Bar Instructions Step 1. Out of the box, the Excalibar 3 tow bar is setup for the Step 4. Position the vehicle to be towed approx. 24” be- recommended positions for the safety cables and light wire stor- hind the towing vehicle. Perform a tow bar check, look for any age rod. -
Page 11: Unhooking The Towed Vehicle
Down Position Up Position NOTE: The Excalibar 3 comes with a 1-1/2” off-set receiver that can be flipped to help level the tow bar with the towed ve- hicle. The receiver is in the down position from factory, to change to the lower position, remove both 1/2”... -
Page 12: Receiver Parts Brteakdown
Parts Breakdown Receiver Parts Brteakdown ITEM # PART # DESCRIPTION 00084 .50 LOCKWASHER 00085 .50 FLAT WASHER 00967 BOLT .50NC X 1.25 GR5 HEX 02961 .75NC NYLON INSERT LOCK NUT 07248 RECEIVER PIN 07251 HAIRPIN, RECEIVER PIN 13169 RECEIVER JOINT 13297 BOLT, .75 NC X 3.75 W/ 2.50 SHANK 13570... -
Page 13: Connecting Leg Parts Breakdown
CLEVIS GROOVED PIN, .313 X 1.25, SS If tow bar needs servicing, please bring it to an au- 13250 RETAINING RING F/ .313 SHAFT thorized dealer or send it to Demco. 13431 STORAGE PIN 13432 RETAINING E-CLIP, SS F/ .25 SHAFT 13527 CONNECTING CLEVIS F/INDEP.ARM TB... -
Page 14: Connecting Legs To Pivot Head Parts Breakdown
Parts Breakdown Connecting Legs to Pivot Head Parts Breakdown ITEM # PART # DESCRIPTION 02178 NUT, .50NC LOCK, NY. INSERT 13212 RAIL CLIP HOLDER 13213 SCREW, SOCKET HD, #8-32 X .625 SS 13273 SAFETY CABLE 54” 13305 BOLT, .50NC X 2.38 W/1.75 SHANK SS 13317 CLEVIS SPACER WASHER Please order replacement parts by PART NO. -
Page 15: Saftey Cables
Tow Bar Options Saftey Cables ITEM # PART # DESCRIPTION 9523051 54”Safety Cable Kit (complete) 9523055 64”Safety Cable Kit (complete) Optional 13273 Straight Safety Cable w/Hooks 54” 13507 Straight Safety Cable w/Hooks 64” Please order replacement parts by PART NO. and DESCRIPTION. Safety Cable Extensions ITEM # PART #... -
Page 16: 4" Or 6" Drop/Lift Receiver Hitch
9523006 & Towed Vehicle Tail Light Wiring/Diode Kit 9523054 7 to 6-WayAuxiliary Coiled Lighting Cable w/recpt. Please order replacement parts by PART NO. and DESCRIPTION. NOTE: For replacement parts, call original manufac- turer or DEMCO at 1-800-543-3626 Page 16 TB20061... -
Page 17: 3-Piece Locking Pins
Tow Bar Options Tow Bar to Base PLate Locking Pins PARTS LIST ITEM # PART # DESCRIPTION 9523067 Tow-Bar to Base Plate Locking Pin Set 14054 Tow-Bar to Base Plate Single Locking Pin Assembly Please order replacement parts by PART NO. and DESCRIPTION. 3-Piece Locking Pins PARTS LIST ITEM #... -
Page 18: Light Bar
PARTS LIST ITEM # PART # DESCRIPTION KKLB Excalibar 3 Light Bar (complete) TESTING LIGHTS BEFORE USE 01772 Nylon Security Strap with hooks & tightener 1. With headlights in “ON” position, the tail lights and the 01857 Left Tail/ Brake and Signal Light w/Lenses clearance lights should be lighted. - Page 19 TB20061 Page 19...
Need help?
Do you have a question about the Excalibar 3 and is the answer not in the manual?
Questions and answers