Table of Contents
Advertisement
Advertisement
Table of Contents

Related Manuals for Schwinn 810


Summary of Contents for Schwinn 810
- Page 1 ™ 810 / 510T ASSEMBLY MANUAL / OWNER’S MANUAL...
-
Page 2: Table Of Contents
Nautilus, Inc., 5415 Centerpoint Parkway, Groveport, OH 43125 USA, www.NautilusInc.com - Customer Service: North America (800) 605-3369, csnls@nautilus.com | Nautilus (Shanghai) Fitness Equipments Co, Ltd, Room 1701 &1702, 1018 Changning Road, Changning District, Shanghai, China 200042, www.nautilus.cn - 86 21 6115 9668 | outside U.S. or Canada: www.nautilusinternational. com | Printed in China | © 2019 Nautilus, Inc. Schwinn, the Schwinn Quality logo, Schwinn 810, Schwinn 510T, Schwinn Toolbox, Bowflex, and Nautilus are trademarks owned or licensed by Nautilus, Inc., registered or otherwise protected by common law in the United States and other nations. Google Play is a trademark of Google Inc. App Store is a service mark of Apple Inc. The Bluetooth ®... -
Page 3: Important Safety Instructions
IMPORTANT SAFETY INSTRUCTIONS When using an electrical appliance, basic precautions should always be followed, including the following: This icon means a potentially hazardous situation which, if not avoided, could result in death or serious injury. Obey the following warnings: Read and understand all warnings on this machine. Carefully read and understand the Assembly instructions. - Page 4 • SAVE THESE INSTRUCTIONS. Before using this equipment, obey the following warnings: Read and understand the complete Manual. Keep the Manual for future reference. Read and understand all warnings on this machine. If at any time the Warning labels become loose, unreadable or dislodged, replace the labels.
- Page 5 • Always connect the power cord to a circuit capable of handling 15 amperes for 110V AC or 10 amperes for 220-240V AC with no other loads applied. • Connect this machine to a correctly grounded or earthed outlet; consult a licensed electrician for assistance. •...
-
Page 6: Safety Warning Labels / Serial Number
- Contact may cause electrical shock or burn. 30.5mm - Turn off and lock out power before servicing. (These labels are in English and WARNING! French Canadian on the 810 machine, 72mm - Moving parts can crush and cut. and English, French Canadian and can crush and Chinese on the 510T machine.) -
Page 7: Grounding Instructions
Grounding Instructions (for a 120V AC system ) This product must be grounded. If it should malfunction or break down, grounding provides a path of least resistance for electric current to reduce the risk of electric shock. This product is equipped with a cord having an equipment-grounding conductor and a grounding plug. The plug must be plugged into an appropriate outlet that is properly installed and grounded in accordance with all local codes and ordinances. -
Page 8: Emergency Stop Procedure
Emergency Stop Procedure The Treadmill machine is equipped with a Safety Key that can prevent serious injury, as well as prevent children from playing with and/or being injured on the machine. If the Safety Key is not correctly inserted into the Safety Key Port, the belt will not operate. Always attach the Safety Key Clip to your clothing during your workout. When you use the machine, only remove the Safety Key in an emergency. -
Page 9: Specifications
• Do not use any power tools for assembly. Machine Mat The Schwinn™ Machine Mat is an optional accessory that helps keep your workout area clear and adds a layer of protection to your fl oor. The rubber machine mat provides a non-slip, rubber surface which limits static discharge and reduces the possibility of display errors. If possible, put your Schwinn™ Machine Mat in your selected workout area before you begin assembly. -
Page 10: Parts
PARTS Item Description Item Description Tray, Left Handlebar Shroud, Left Inner (L-R) Console Assembly Handlebar Shroud, Left Outer (L-L) Tray, Right Upright, Left Upright, Right Base Shroud, Left Base Shroud, Right Safety Key Base Assembly ( * ) Power Cord Handlebar Shroud, Right Outer (R-R) Audio Cable (not shown) Handlebar Shroud, Right Inner (R-L) -
Page 11: Hardware
HARDWARE / TOOLS Item Description Item Description Button Head Hex Screw, M8x1.25x85 Button Head Hex Screw, M8x1.25x16 Flat Washer, M8 Self Tapping Screw, M3.9x13 Lock Washer, M8 Phillips Head Screw, M4x0.7x12 Curved Washers, M8 Note: Select pieces of Hardware have been provided as spares on the Hardware Card. Be aware that there may be remaining Hardware after the proper assembly of your machine. Tools Included 6 mm... - Page 12 1. Fold the Walking Deck on the Base Assembly Cut the Shipping Strap on the Base Assembly. Make sure that there is safe clearance around, on and above your tread- mill. Make sure there is no object to spill or cause blockage from the fully folded position. Be sure there is adequate height clearance for the raised deck. Using the support bar found below the rear of the walking belt, lift the walking deck fully upward and engage the hydraulic lift.
- Page 13 2. Route the Cables through the Right Upright, and Attach the Uprights to Frame Assembly Note: Do not crimp the Cables. Do not fully tighten Hardware until instructed.
- Page 14 3. Unfold the Walking Deck Slightly push the walking deck forward toward the front of the machine. With your left foot lightly push the top part of the hydraulic lift forward until the locking tube releases and you can pull the walking deck slightly toward the rear of the machine.
- Page 15 4. Connect the Cables and Attach the Console to Frame Assembly Note: Do not crimp the Cables. Be sure the hooks on the Console are set into the notches of the Uprights. *Install the front hardware first.
- Page 16 5. Fully tighten all Hardware from previous Steps 6. Attach the Handlebar Shrouds to the Frame Assembly NOTICE: *Install the Inner Handlebar Shrouds first. The parts are marked to assist with assembly.
- Page 17 7. Snap the Trays into the Console Assembly NOTICE: Tray edges should be flush with the face of Console.
- Page 18 8. Attach the Base Shrouds to the Frame Assembly...
- Page 19 9. Connect the Power Cord and Safety Key to the Frame Assembly Connect this machine to a properly grounded outlet only (see Grounding or Earthing Instructions). 10. Final Inspection Inspect your machine to ensure that all hardware is tight and components are properly assembled. Be sure to record the serial number in the field provided at the front of this manual.
-
Page 20: Moving The Machine
BEFORE YOU START Moving and Storing the Machine The machine can be moved by one or more persons. Use caution when you move the machine. The tread- mill is heavy and can be awkward. Make sure that your own physical strength is capable of moving the machine. - Page 21 7. Make sure that the locking mechanism is engaged. Carefully pull back on the Walking Deck and make sure that it does not move. When you do this, keep clear of movement path in case the treadmill lock is not engaged. Do not lean against the treadmill when it is folded.
-
Page 22: Unfolding The Machine
Unfolding the Machine 1. M ake sure there is sufficient space to lower the walking deck. Keep a minimum clearance behind the machine of 79” (2 m) and 24” (0.6 m) on each side. This is the recommended safe distance for access, movement and emergency dismounts from the machine. Place the machine on a clean, hard, level surface, free from unwanted material or other objects that may hamper your ability to move freely with a sufficient clear workout area. -
Page 23: Leveling The Machine
Leveling the Machine The machine needs to be leveled if your workout area is uneven. To adjust: Place the machine in your workout area. 2. A djust the levelers until they all contact the fl oor. Do not adjust the levelers to such a height that they detach or unscrew from the machine. Injury to you or damage to the machine can occur. -
Page 24: Features
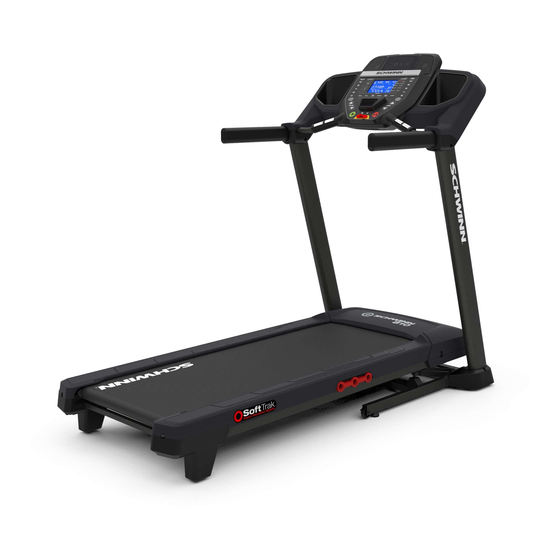
FEATURES Console Hydraulic Lift Speaker Base Media Tray Leveler MP3 Input Transport Wheel USB Port Dampener Storage Tray Side Foot Support Rails Handlebar Deck Support Bar Ergo Bar Walking Belt and Deck Contact Heart Rate (CHR) Sensors Power Switch Emergency Safety Key Port Power Inlet Media Cable (not shown) Motor Cover... -
Page 25: Console Features
Console Features The Console provides important information about your workout and lets you control the resistance and incline levels while you exercise. The Console features touch control buttons to navigate you through the exercise programs. Note: Though your machine is Bluetooth enabled, it is unable to receive input (possibly from a Bluetooth enabled ® ® chest strap) or play audio across the Bluetooth connection. - Page 26 PAUSE / STOP button- Pauses an active workout, ends a paused workout, or exits to the previous menu Pre-Set Speed buttons- Selects a speed value for the Walking Belt. After pushing a Pre-Set Speed button, push the Speed Enter button within 5 seconds for the Walking Belt to be adjusted to the desired speed. Speed Enter button- Adjusts the speed of the Walking Belt to the selected Pre-Set Speed value.
- Page 27 This fitness machine has integrated Bluetooth connectivity which allows it to work with a number of digital partners. For ® our latest list of supported partners, please visit: www.nautilus.com/partners Updates to Your Machine using the “Schwinn Toolbox™” App This fitness machine is equipped with Bluetooth connectivity and can be wirelessly updated with the “Schwinn Toolbox™” ® App. Once the App is installed on your device, the App will inform you of when there is an update to your machine.
- Page 28 2. Install the App. When notified that there is an update to your fitness machine, follow the prompts on the App. Place the device that is run- ning the App on the Media Tray. The App will update the software on the machine with the latest version. Do not remove your device from the Media Tray until the update is complete. The machine will return to the Welcome Screen when the update is completed.
- Page 29 heart rates. It is more accurate to find this value by completing a stress test than by using an age related formula. Your at-rest heart rate is influenced by endurance training. The typical adult has an at rest heart rate of approximately 72 BPM, whereas highly trained runners may have readings of 40 BPM or lower. The Heart Rate table is an estimate of what Heart Rate Zone (HRZ) is effective to burn fat and improve your cardiovascu- lar system. Physical conditions vary, there- fore your individual HRZ could be several FAT-BURNING TARGET HEART RATE beats higher or lower than what is shown. The most efficient procedure to burn fat dur- ing exercise is to start at a slow pace and gradually increase your intensity until your...
-
Page 30: Operations
OPERATIONS What to Wear Wear rubber-soled athletic shoes. You will need the appropriate clothes for exercise that allow you to move freely. How Often Should You Exercise Consult a physician before you start an exercise program. Stop exercising if you feel pain or tightness in your chest, become short of breath, or feel faint. Contact your doctor before you use the machine again. Use the values calculated or measured by the machine’s computer for reference purposes only. -
Page 31: Power Up / Idle Mode
• Always attach the Safety Key Clip to your clothing during workouts. • If there is an emergency, pull out the Safety Key to shut off the power to the Belt and Incline Motors. This will quickly stop the belt (brace yourself- this is an abrupt stop) and clear the workout. Push the PAUSE/STOP button to stop the belt and pause the program. Push the USER button to select the desired User for the workout. -
Page 32: User Profiles
2. P ush the User button to select the correct User profile. If you do not have a User profile set up, you can select a User profile that has no customized data (default values only). 3. Push the Manual Category button. 4. Push the START button to begin the Manual program. Note: The Safety Key must be installed for a workout to begin. If not installed, the Console will display ,”INSERT SAFETY KEY “. -
Page 33: Profile Programs
kilometers. Push the OK button to set the LAP distance value. The Console will go to the Power-Up Mode screen with the user selected. Changing Incline Levels Push the Incline Level Increase() or Decrease() buttons to change the incline angle of the Deck at any time with the Safety Key installed. - Page 34 MANUAL Workout Program 1. Push the MANUAL Category button. 2. Push the OK button. 3. The Console will display the “READY ?” prompt. 4. Push START to begin the goal-oriented workout. GOALS Workout Programs TIME (Speed), CALORIE (Incline), DISTANCE (Incline), 1 MILE/1K (Incline), 5 MILE/5K (Incline), 10 MILE/10K (Incline) 1.
- Page 35 accepted. 5. Push the User Option Increase() or Decrease() buttons to adjust the Maximum Speed of the Belt, and push the OK button. The Profile Program will adjust so the Maximum Speed value is the highest Speed of the Profile Program when accepted. During a Workout, the User can directly adjust the speed of the belt above the Maximum Speed setting if desired. 6. Use the User Option Increase() or Decrease() buttons to select a type of Goal (Distance, Time or Calories), and push the OK button.
-
Page 36: Pausing Or Stopping
adjusts the speed and/or incline during a workout to keep your heart rate in the selected zone. Note: The console must be able to read the heart rate information from the Contact Heart Rate sensors or Heart Rate Monitor for the Heart Rate Control program to work correctly. The Target Heart Rate programs use your age and other User information to set the Heart Rate Zone values for your workout. - Page 37 Results / Cool Down Mode All workouts except Quick Start and the Heart Rate Control programs have a 3 minute Cool Down period. During this Cool Down period, the Console shows the Workout Results. The Console will cycle through the workout results every 2 sec- onds while counting down the remaining time of the Cool Down period. Note: The Cool Down values are not added to Workout Result values. During the Cool Down period, the incline setting of the walking belt will adjust to zero.
-
Page 38: Maintenance
MAINTENANCE Read all maintenance instructions fully before you start any repair work. In some conditions, an assistant is required to do the necessary tasks. Equipment must be regularly examined for damage and repairs. The owner is responsible to make sure that regular maintenance is done. Worn or damaged components must be repaired or replaced immediately. Only manufacturer supplied components can be used to maintain and repair the equipment. If at any time the Warning labels become loose, unreadable or dislodged, replace the labels. -
Page 39: Adjusting The Belt Tension
NOTICE: T o prevent damage to the finish of the machine or Console, do not clean with a petroleum based solvent. Do not apply too much moisture to the Console. Adjusting the Belt Tension If the walking belt starts to slip during use, it is necessary to adjust the tension. Your treadmill has tension bolts at the rear of the treadmill. - Page 40 To reduce the risk of electrical shock, always unplug the power cord and wait 5 minutes before cleaning, maintaining or repairing this machine. Place the power cord in a secure location. Note: Make sure the treadmill is located on a surface that is easy to clean. Apply a few drops of the lubricant on the deck below the belt.
-
Page 41: Maintenance Parts
Maintenance Parts Console Assembly Upright, Right Handlebar Shroud, Right Inner Tray, Left Base Shroud, Right Handlebar Shroud, Left Inner Safety Key Port Power Cord Handlebar Shroud, Left Outer Safety Key Upright, Left Contact Heart Rate Sensor Base Cable Base Shroud, Left Console Cable Base Assembly Tray, Right... - Page 42 Maintenance Parts ( Frame ) Front Back Motor Cover Base Support Incline Adjuster Power Switch Deck Cushioners Pivot Assembly Power Input Transport Wheel GG Belt Tensioner Motor Control Board Leveler Rear Roller Cover Side Foot Support Rails Lifting Cylinder...
-
Page 43: Troubleshooting
TROUBLESHOOTING Condition/Problem Things to Check Solution No display/partial display/ Check electrical (wall) Make sure unit is plugged into a functioning wall outlet. Test the unit will not turn on outlet outlet with a known functioning device such as a lamp. Check connection at front Connection should be secure and undamaged. - Page 44 Condition/Problem Things to Check Solution Thumping sound when Walking belt Walking belt needs to be used for wear in period. Sound will go belt operates away after the wear in period. Walking belt not aligned Machine leveling Make sure the machine is level. Refer to the procedure for leveling the machine in this manual.
-
Page 47: Warranty (Us/Canada Only)
WARRANTY ( if purchased in US/Canada ) Who Is Covered This warranty is valid only to the original purchaser and is not transferable or applicable to any other person(s). What Is Covered Nautilus, Inc. warrants that this product is free from defects in materials and workmanship, when used for the purpose intended, under normal conditions, and provided it receives proper care and maintenance as described in the Product’s Assembly and Owner’s manual. - Page 48 ™ Nautilus Bowflex Schwinn ™ ™ ™ 8021118.061519.A...
Need help?
Do you have a question about the 810 and is the answer not in the manual?
Questions and answers
While trying to lower the incline to 0 (zero) at the end of my workout, I pressed the "0" and then enter button (left side of the console - "incline"). The unit raised to 15 and nothing I have tried will lower the incline. I've tried using the "0" then enter repeatedly, using the up & down buttons, unplugging from the wall, unplugging from the unit, starting & stopping the belt, switching users. Are there any suggestions on how to "reset" the incline? Thank you.