Panasonic NN-GD38HS Operating Instructions Manual
Microwave/grill oven
Hide thumbs
Also See for NN-GD38HS:
- Operating instructions manual (476 pages) ,
- Operating instruction and cook book (58 pages) ,
- Operating instruction and cook book (58 pages)
Table of Contents
Advertisement
Operating Instructions
Gebruiksaanwijzing
Mode d'emploi
Manuale di istruzioni
Instrucciones de funcionamiento
Bruksanvisning
Betjeningsvejledning
Käyttöohje
Instrukcja obsługi
Návod k obsluze
Kezelési útmutató
Microwave/Grill Oven
Magnetron/Grill Oven
Four à Micro-ondes-Gril
Forno a Microonde e Grill
Horno Microondas/Grill
Kombinationsugn med mikrovågor/grill
Mikrobølgeovn/Grill
Mikroaalto/Grilliuuni
Kuchenka Mikrofalowa z Grillem
Mikrovlnná / trouba/ Gril
Grillezős/mikrohullámú sütő
FOR DOMESTIC USE ONLY
UITSLUITEND VOOR HUISHOUDELIJK GEBRUIK
À USAGE DOMESTIQUE UNIQUEMENT
PER USO DOMESTICO
SOLO PARA USO DOMÉSTICO
ENDAST FÖR HUSHÅLLSBRUK
KUN TIL BRUG I HJEMMET
AINOASTAAN KOTITALOUSKÄYTTÖÖN
TYLKO DO UŻYTKU DOMOWEGO
URČENO POUZE PRO POUŽITÍ V DOMÁCNOSTECH
KIZÁRÓLAG HÁZTARTÁSI HASZNÁLATRA
Model No.
NN-GD38HS
NN-GD36HM
NN-GD38HS
Advertisement
Table of Contents

Related Manuals for Panasonic NN-GD38HS


Summary of Contents for Panasonic NN-GD38HS
- Page 1 UITSLUITEND VOOR HUISHOUDELIJK GEBRUIK À USAGE DOMESTIQUE UNIQUEMENT PER USO DOMESTICO SOLO PARA USO DOMÉSTICO ENDAST FÖR HUSHÅLLSBRUK KUN TIL BRUG I HJEMMET AINOASTAAN KOTITALOUSKÄYTTÖÖN TYLKO DO UŻYTKU DOMOWEGO URČENO POUZE PRO POUŽITÍ V DOMÁCNOSTECH KIZÁRÓLAG HÁZTARTÁSI HASZNÁLATRA NN-GD38HS Model No. NN-GD38HS NN-GD36HM...
- Page 2 IMPORTANT SAFETY INSTRUCTIONS. Before operating this oven, please read these instructions carefully and keep for future reference. BELANGRIJKE VEILIGHEIDSINSTRUCTIES. Alvorens u deze microgolfoven gebruikt, raden wij u ten zeerste aan deze gebruiksaanwijzing door te lezen en bij te houden voor eventueel toekomstig gebruik.
-
Page 3: Table Of Contents
Thank you for purchasing this Panasonic appliance. Contents Safety Instructions ����������������������������������� 2-6 Grilling ������������������������������������������������������ 22 Disposal of Waste Products ����������������������� 7 Combination Cooking ������������������������������� 23 Installation and Connection ������������������������ 8 Using the Steam Plus Pot (Manual Operation)����������������������������������� 24 Placement of your Oven ����������������������������� 8 Using the Steam Plus Pot�������������������������... -
Page 4: Safety Instructions
Safety Instructions Important safety instructions. Before operating this oven, „ please read these instructions carefully and keep for future reference. This appliance can be used by children aged from „ 8 years and above and persons with reduced physical, sensory and mental capabilities or lack of experience and knowledge if they have been given supervision or instruction by a person responsible for their safety concerning the use of the appliance in a safe way... - Page 5 Safety Instructions Repairs should only be by a qualified service person. „ Warning! Do not place this oven near an electric or gas „ cooker range. Liquids and other foods must not be heated in sealed „ containers since they are liable to explode. Warning! Only allow children to use the oven without „...
- Page 6 Safety Instructions Microwave heating of beverages can result in delayed „ eruptive boiling, therefore care must be taken. The contents of feeding bottles and baby food jars are to „ be stirred or shaken. The temperature has to be checked before consumption to avoid burns.
- Page 7 Safety Instructions A steam cleaner is not to be used for cleaning the „ appliance. Do not use harsh, abrasive cleaners or sharp metal „ scrapers to clean the oven door glass since they can scratch the surface, which may result in shattering of the glass.
- Page 8 Safety Instructions Users are advised to avoid a downward pressure on the „ microwave oven door when in the open position. There is a safety risk that the oven will tilt forward. The oven lamp must be replaced by a service technician „...
-
Page 9: Disposal Of Waste Products
Disposal of Waste Products Penalties may be applicable for incorrect Information on Disposal disposal of this waste, in accordance with for Users of Waste national legislation� Electrical & Electronic For business Users in the Equipment (private European Union households). If you wish to discard electrical and electronic equipment, please contact your This symbol on the products and/or dealer or supplier for further information�... -
Page 10: Installation And Connection
Installation and Connection Examine Your Oven Important! Unpack the oven, remove all packing This unit has to be properly earthed material, and examine the oven for any for personal safety. damage such as dents, broken door Operation Voltage latches or cracks in the door. If you find any damage, notify your dealer immediately�... -
Page 11: Important User Instructions
Important User Instructions Use of Your Oven Heater Operation 1� Do not use the oven for any 1� Before using combination or grill reason other than the preparation of function for the first time operate the food. This oven is specifically designed oven without food and accessories to heat or cook food�... - Page 12 Important User Instructions Oven Light Piercing Skin When it becomes necessary to replace the Food with non porous skins, such as oven light, please consult your dealer� potatoes, egg yolks and sausages must be pierced before cooking by microwave to Cooking Times prevent bursting�...
- Page 13 Important User Instructions Liquids Utensils/Foil Do not heat any closed cans or bottles When heating liquids, e�g� soup, because they might explode� sauces and beverages in your oven, overheating the liquid beyond boiling point Metal containers or dishes with can occur without evidence of bubbling� metallic trim should not be used during This could result in a sudden boil over of the microwave cooking�...
-
Page 14: Oven Accessories
Oven Accessories Accessories Steam Plus Pot The oven comes equipped with a variety of 1. The Steam Plus Pot is specifically accessories� Always follow the directions designed for this oven� The material of given for use of the accessories� the lid is stainless steel and the crispy pot is aluminum�... -
Page 15: Parts Of Your Oven
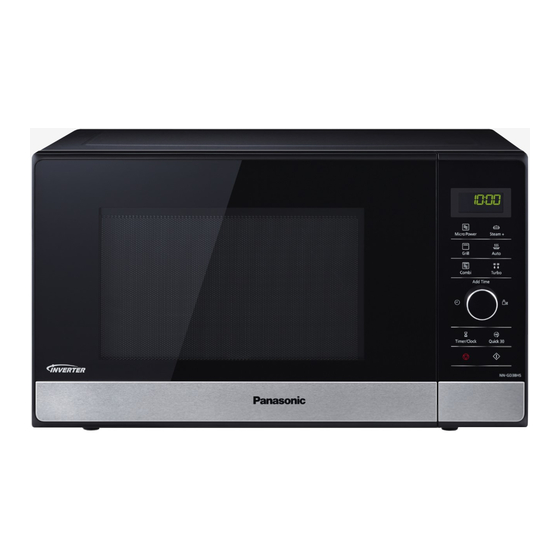
Parts of your Oven 1. Door release 10. Identification label Press to open the door� When you 11. Glass tray 12. Roller ring open the oven door during cooking, the cooking is stopped temporarily without 13. Grill elements 14. Caution label (hot surfaces) clearing earlier made settings�... -
Page 16: Control Panel
Control Panel Display window Micro Power button (page 17) Grill button (page 22) Combi button (page 23) Turbo defrost button (page 33-34) Auto programs button (page 31-32) Steam Plus programs button (page 28-30) Dial Enter time or weight of food by turning the dial�... -
Page 17: Setting The Clock
Setting the Clock When the oven is first plugged in “88:88” appears in display window. Press Timer/Clock Turn dial Press Timer/Clock twice Enter the time by turning the The colon stops blinking� A colon starts dial� The time appears in the Time of day is now locked to blink�... -
Page 18: Cooking Modes
Cooking Modes The diagrams shown below are examples of the accessories. It may vary depending on the recipe / dish used. Accessories Cooking modes Uses Containers to use Defrosting • Microwave Reheating • Microwavable Melting: butter, chocolate, • ® (e�g� Pyrex cheese�... -
Page 19: Microwave Cooking And Defrosting
Microwave Cooking and Defrosting The glass tray must always be in position when using the oven. Power Press Wattage Level Once High 1000 W Twice Defrost 270 W 3 Times Medium 600 W 4 Times 440 W Press Micro Power Set the cooking Press Start 5 Times... -
Page 20: Defrosting Guidelines
Defrosting Guidelines Tips for Defrosting Bread Loaves will require a standing time of Check the defrosting several times, even if 5-30 minutes to allow the centre to thaw� you use the auto programs� Observe the Standing time can be shortened if slices are standing times�... -
Page 21: Defrosting Chart
Defrosting Chart Food Weight/Quantity Time & mode Method 1 pce 85 g Bread rolls (3) 1000 W 20-30 secs Stand 5 mins 1 pce 400 g Brioche large (3) Combi 2; 3 mins 30 secs Stand 5 mins 1 pce 250 g Cheese (camembert) (3) 270 W 7 mins 30 secs Stand 1 hour minimum... -
Page 22: Using The Quick 30 Function
Using the Quick 30 Function This function allows you to quickly set cooking time in 30 second increments. Press Quick 30 to set the desired Press Start cooking time (up to 5 minutes)� The cooking will start and the time Each press is 30 seconds�... -
Page 23: Using The Add Time Function
Using the Add Time Function This feature allows you to add cooking time at the end of previous cooking. After cooking, turn dial to Press Start select Add Time function. Time will be added� Maximum cooking time: The time in the display Microwave: 1000 W up to 30 window will count minutes;... -
Page 24: Grilling
Grilling The grill system on the oven gives fast efficient cooking for a wide variety of foods e.g. chops, sausages, steaks, toast, etc. There are 3 different grill settings available. The glass turntable must always be in position when using the oven. Press Grill to Set time Press Start... -
Page 25: Combination Cooking
Combination Cooking This combination mode is suitable for foods which are normally grilled and for reheating small savoury items. The Grill will glow on and off during cooking - this is normal. Select Combi level Set time Press Start Press Combi to select level� Select cooking time by The time counts The combination indicator lights,... -
Page 26: Using The Steam Plus Pot
Using the Steam Plus Pot (Manual Operation) Function Accessory to Use Concept Instructions Some foods cooked by microwave For best results, pre-heat the Crispy pot can have soft and soggy crusts� crispy pot before using� Place The crispy pot accessory will directly on the glass tray and brown and crisp pizzas, quiches, pre-heat on Microwave 1000 W... -
Page 27: Using The Steam Plus Pot
Using the Steam Plus Pot Care of the Steam Plus Pot 1� Never cut pizzas, quiches or any other food directly in the crispy pot as this will damage the non-stick surface� 2� After use, wash the Steam Plus Pot in hot soapy water and rinse in hot water�... -
Page 28: Using The Timer
Using the Timer Delay Start Cooking By using the timer, you are able to program delay start cooking. Example Press Set the delay time by Press Start Set the desired Timer/Clock turning the dial cooking program (up to 9 hours)� and cooking time. -
Page 29: Multi-Stage Cooking
Multi-stage Cooking 2 or 3 Stage Cooking Example: Press Micro Press Micro Set the cooking Set the cooking Press Start Power Power time using the dial. time using the dial. The cooking program Select desired Select desired will start and the time power level�... -
Page 30: Steam Plus Programs
Steam Plus Programs With this feature food can be cooked or reheated according to the weight. The weight has to be entered in grams� Select desired category Press Start After preheating beeps sound. Place Press and place the crispy to preheat the food in the crispy pot and set Start pot in the oven directly... - Page 31 Steam Plus Programs With this feature food can be steamed according to the weight. The weight has to be entered in grams. Select desired category Set Weight Press Start The Steam Plus and cooking Set the weight of the food by using the function indicators light and the dial�...
- Page 32 Steam Plus Programs Program Weight Accessories Instructions 6. Steam Potatoes To steam potatoes without skins� Peel potatoes and cut into even sized pieces� Pour 150 ml tap water in the crispy pot� Place prepared potatoes onto steam 150 g - 500 g plate inside crispy pot�...
-
Page 33: Auto Cook Programs
Auto Cook Programs With this feature food can be cooked or reheated according to the weight. The weight has to be entered in grams. Select desired category Set Weight Press Start The auto and cooking function Set the weight of the food by using the indicators light and the program dial�... - Page 34 Auto Cook Programs Program Weight Accessories Instructions 11. Fresh To cook fresh vegetables. Place prepared vegetables into a suitable Vegetables sized container� Sprinkle with 1 tbsp water per 100 vegetables� Cover with pierced cling film or a lid. Press Auto cook - 800 three times�...
-
Page 35: Turbo Defrost
Turbo Defrost This feature allows you to defrost minced meat, chops, chicken portions, meat joints and bread. Press Turbo defrost to select the correct defrost category and then enter in the weight of the food in grams (see page 34)� Foods should be placed in a suitable dish, whole chickens and joints of meat should be on an upturned saucer or on a microwave safe plate�... - Page 36 Turbo Defrost With this feature you can defrost frozen food according to the weight. Select the desired Turbo defrost Set the weight of the frozen food Press Start program by using the dial Remember to stir or Auto program number appears in the Turning the dial slowly will count turn the food during up in 10 g steps�...
-
Page 37: Reheating & Cooking Charts
Reheating & Cooking Charts Note Always check that food is piping hot after reheating in the microwave� If unsure return to oven� Foods will still require a stand time, especially if they cannot be stirred� The denser the food the longer the stand time�... - Page 38 Reheating & Cooking Charts Weight/ Food Fresh Frozen Quantity Gratins 400 g Fish bordelaise – Combi 1; 16-18 mins 400 g Combi 1; 8 mins (3) Combi 1; 13-14 mins Lasagne Combi 1; 9-10 mins 1000 W 13 mins & 600 g &...
-
Page 39: Cooking Charts With Steam Plus Pot
Cooking Charts with Steam Plus Pot Weight/ Food Fresh Frozen Quantity Crispy grill; use crispy pot 1 pce 130 g Combi 2; 1 min 30 secs Combi 1; 3 mins Bretzel with cheese/bacon (P) 2 pcs 250 g – Combi 1; 3 mins 30 secs 8 pcs 100 g Chicken nuggets (P, 1) –... -
Page 40: Recipes
Minestrone Soup 1� Combine all the ingredients in the Steam Plus pot� Cover with lid, ingredients place on the glass tray and cook on 1000 W for 30 minutes, or Serv es 4 -6 until vegetables are soft� Stir halfway through cooking time� 1 o n io n, ch o pped 2�... - Page 41 Ratatouille 1� Combine all ingredients in the Steam Plus pot� Cover with lid, ingredients place on the glass tray and cook on 1000 W for 20-25 minutes, or Serv es 4 until vegetables are soft� Stir halfway through cooking time� 1 a uberg in e, Season to taste�...
- Page 42 Croque Monsieur 1� Place the bread, buttered side up on the wire rack and cook on ingredients Grill 1 for 4 minutes or until brown� Serves 1 2� On one slice of the bread, spread the untoasted side with mustard 4 slic e s b rea d , b u tt er e d and top with ham and cheese�...
-
Page 43: Questions And Answers
Questions and Answers Q: Why won’t my oven turn on? Q: Can I use a conventional oven A: When the oven does not turn on, check thermometer in the oven? A: Only when you are using grill cooking the following: 1. -
Page 44: Care Of Your Oven
Care of your Oven 1� Turn the oven off before cleaning� 8. The roller ring and oven cavity floor should be cleaned regularly to avoid 2� Clean the inside of the oven, door seals excessive noise� Simply wipe the and door seal areas regularly� bottom surface of the oven with mild When food splatters or spilled liquids detergent and hot water then dry with... -
Page 45: Technical Specifications
Class B means that this product may be used in normal household areas� Manufactured by: Panasonic Appliances Microwave Oven (Shanghai) Co., Ltd. 888, 898 Longdong Road. Pudong, Shanghai, 201203, China. Imported by: Panasonic Marketing Europe GmbH REP. - Page 48 Panasonic Corporation http://www.panasonic.com © Panasonic Corporation 2017...