Table of Contents
Advertisement
Quick Links
Advertisement
Table of Contents
Troubleshooting

Related Manuals for AirSep Centrox


Summary of Contents for AirSep Centrox
- Page 1 Centrox PSA Oxygen Concentrator INSTRUCTION MANUAL...
- Page 3 Ownership Data Take a moment to note important information below about your AirSep Centrox PSA Oxygen Concentrator. Keep this instruction manual, along with your invoice, to serve as a permanent record of your purchase. PSA Oxygen Concentrator Model Number Serial Number...
- Page 4 Symbols can also permit easier comprehension of a concept within a restricted space. The following table is a list of symbols and definitions that may be used with AirSep oxygen equipment. These symbols are referenced from the appropriate International Electro-technical Commission (IEC) standards:...
-
Page 5: Table Of Contents
Tables of Contents 1.0 Introduction GENERAL WARNINGS, CAUTIONS, AND NOTES REFERENCES TO CONTROLS AND INDICATORS WITH LABELS 2.0 Safety GENERAL POTENTIAL HAZARDS SAFETY PUBLICATIONS 3.0 System Description INTRODUCTION 4.0 Controls, Parts, and Connections INTRODUCTION OXYGEN CONCENTRATOR CONTROLS AND INDICATORS OXYGEN CONCENTRATOR PARTS AUXILIARY KITS INFORMATION (OPTIONAL) CONNECTIONS 5.0 Installation... - Page 6 7.0 Maintenance/Service WEEKLY MAINTENANCE SEMI-ANNUAL MAINTENANCE ANNUAL MAINTENANCE PRESSURE SWITCH ADJUSTMENT PROCEDURE 8.0 Troubleshooting TROUBLESHOOTING CHART SOLENOID VALVE TROUBLESHOOTING A. Appendix Technical Data SPECIFICATIONS DRAWINGS AND SCHEMATICS B. Appendix Warranty/Returns PRODUCT WARRANTY LIMITS OF LIABILITY RETURNING THE OXYGEN CONCENTRATOR OR A COMPONENT FOR SERVICE C.
- Page 7 Optional Starter Kits for the Concentrator Purchased Table 4.2: Description of the Parts included in the Starter Kits Figure 4.5: Oxygen Receiver Figure 5.1: General Arrangement of the Centrox Concentrator Figure 6.1: PSA Module Supply Valve Assembly Table 7.3: Maintenance Chart Figure 7.1: Pressure Switch Table A.1:...
-
Page 9: Introduction
AirSep Corporation 1.0 Introduction GENERAL This instruction manual provides a description of the AirSep Centrox Pressure Swing Adsorption (PSA) Oxygen Concentrator as well as instructions for its installation, operation, and maintenance. Pertinent drawings and component information are also included. To ensure safe operation and proper system maintenance, AirSep Corporation recommends that you keep this instruction manual readily available for reference. -
Page 11: Safety
AirSep Corporation strongly recommends that you review this section periodically. POTENTIAL HAZARDS Before you attempt to install, operate, or repair the Centrox Oxygen Concentrator, read and thoroughly understand this instruction manual. Improper operation can result in severe bodily injury, damage to the system, or poor performance. - Page 12 To avoid a fire or an explosion, keep gasoline, kerosene, oil, grease, cotton fibers, paint, and any other combustible material away from any part of the Centrox Oxygen Concentrator or optional auxiliary oxygen receiver. Do not smoke or use an open flame near the oxygen concentrator or optional auxiliary oxygen receiver.
-
Page 13: Safety Publications
Box 9101; Quincy, Massachusetts 02269-9101 USA. ■ “Oxygen;” Pamphlet G-4; Compressed Gas Association; 1725 Jefferson Davis Highway; Arlington, Virginia 22202-4102 USA. ■ “Cleaning Equipment For Oxygen Service,” Pamphlet G-4.1; Compressed Gas Association; 1725 Jefferson Davis Highway; Arlington, Virginia 22202-4102 USA. Centrox Instruction Manual... -
Page 15: System Description
AirSep Oxygen Concentrator separates this small percentage of the oxygen from the compressed air through a unique Pressure Swing Adsorption (PSA) process. The Centrox unit consists of two modules. The smaller module contains two compressors that supply air for the process. Each compressor has a dedicated switch and circuit breaker. - Page 16 The molecular sieve does not normally require replacement. This instruction manual serves as the guidelines for the Centrox oxygen concentrator. Refer to the illustrations, located in the Appendix A of this instruction manual, for the detailed flow diagram and electrical schematic of the oxygen concentrator referenced in this instruction manual.
-
Page 17: Controls, Parts, And Connections
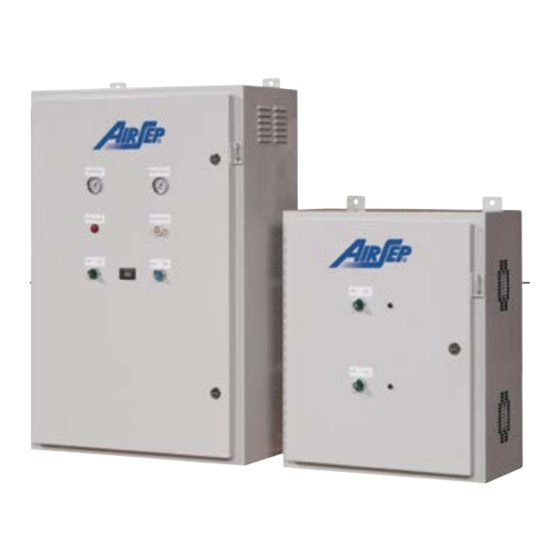
AirSep Corporation 4.0 Controls, Parts, and Connections INTRODUCTION The section describes the various parts, controls, indicators and connections required for the Centrox oxygen concentrator. OXYGEN CONCENTRATOR CONTROLS AND INDICATORS 4.2.1. COMPRESSOR MODULE Figure 4.1 shows the compressor module along with all the controls and indicators. - Page 18 Figure 4.2 shows the controls and indicators of the PSA concentrator module. Feed Air Product Pressure Gauge Pressure Gauge Low Purity Low Purity Light Alarm On/Off Auto/Manual (Power) Switch Hour Meter Figure 4.2: PSA Concentrator Module Controls and Indicators Centrox Instruction Manual...
- Page 19 The FEED AIR PRESSURE gauge indicates the pressure of the feed air before it enters the PSA concentrator module (See Figure 4.2). Product Pressure Gauge The PRODUCT PRESSURE gauge indicates the pressure of oxygen coming out of the adsorber beds (See Figure 4.2). Centrox Instruction Manual...
-
Page 20: Oxygen Concentrator Parts
AirSep Corporation OXYGEN CONCENTRATOR PARTS Figure 4.3 and Figure 4.4 show the internal components of the Centrox oxygen concentrator. 4.3.1. COMPRESSOR MODULE Compressors Heat Exchanger Coils Resonators Cabinet Fans Check Valve Assembly Figure 4.3: Compressor Module Internal Components Compressors The compressors compress the air entering the module before it is supplied to the PSA concentrator module (See Figure 4.3). - Page 21 1 sec at the start of standby mode. This removes any pressure that builds up inside the compressor to ensure easy start-up. Check Valve Check Valve assembly prohibits the back flow of compressed air. Centrox Instruction Manual...
- Page 22 6 for the description of different types of mode). See Figure 4.4 for the location of the product valve. Coalescing Filter The coalescing filter serves as bacteria filter and removes any bacteria present in the oxygen supply (See Figure 4.4). Centrox Instruction Manual...
-
Page 23: Auxiliary Kits Information (Optional)
(AirSep Supplied Tank) Tank) KI470-1 KI470-1 AS074-1 KI046-1 KI046-1 VAC/60 Hz TA150-1 KI470-1 KI470-1 AS074-2 KI046-1 KI046-1 VAC/50 Hz TA150-1 KI470-1 KI470-1 AS074-3 KI046-1 KI046-1 VAC/60 Hz TA150-1 Table 4.1: Optional Starter Kits for the Concentrator Purchased Centrox Instruction Manual... - Page 24 TA150-1 Table 4.2: Description of the Parts included in the Starter Kits Please contact an AirSep Corporation Sales representative for ordering the starter kits. Below is a brief description of items included in the starter kits. Primary Oxygen Ball Valve The primary oxygen ball valve controls the flow of oxygen from the oxygen concentrator to your oxygen distribution system.
-
Page 25: Connections
The supply valve assembly limits the amount of flow to the oxygen receiver during purge. Refer to Figure 5.1 and 6.1. Power Cord This power cord and its grounded electrical plug supply power to the Centrox when connected to a grounded electrical outlet. Centrox Instruction Manual... -
Page 27: Installation
5. Remove the accessory kit and inspect the contents for damage. 6. Although the Centrox is carefully inspected, tested, and packed, it can be damaged during shipment due to improper handling. If you find any concealed damage (loss or damage not found until the concentrator is unpacked), immediately call the delivery carrier and file a concealed- damage claim. - Page 28 AirSep Corporation carrier’s inspection. YOU MUST MAKE A CONCEALED-DAMAGE CLAIM WITHIN 24 HOURS OF DELIVERY. Only the consignee can file this claim. Follow these unpacking guidelines carefully to protect yourself against loss from any damage caused during shipment. Centrox Instruction Manual...
-
Page 29: Pre-Installation Guidelines
AirSep Corporation PRE-INSTALLATION GUIDELINES Before you install the Centrox oxygen concentrator, and the oxygen receiver, if supplied, refer to the Specifications section in the Appendix of this instruction manual to determine the applicable space, and the power requirements for your particular model. -
Page 30: Installation Instructions
AirSep Corporation INSTALLATION INSTRUCTIONS To assure proper installation and safe operation of your Centrox PSA Oxygen Concentrator, AirSep Corporation recommends that you review this entire section before you attempt to install the unit. Do not turn off power to any component unless you are sure the medical facility does not require any oxygen, or there is a sufficient alternative/backup source of oxygen. - Page 31 Figure 5.1: General Arrangement of the Centrox Concentrator 9. Attach a regulator set at 48 psig (331 kPa) (not supplied by AirSep Corporation) to the outlet of the back up cylinder. 10. Connect the inlet of the secondary oxygen ball valve to the outlet of the above regulator using oxygen-clean hose.
-
Page 33: Operation
AirSep Corporation 6.0 Operation INITIAL START-UP Before you attempt to install, operate, or repair the Centrox Oxygen Concentrator, read and thoroughly understand this instruction manual. Improper operation can result in severe bodily injury, damage to the system, or poor performance. - Page 34 85% ±3%. The oxygen monitor alarms intermittently after 30 minutes if the Centrox does not reach proper oxygen purity. During start-up, this alarm is silenced for 30 minutes.
- Page 35 25. Make sure that the regulator at the outlet of the backup oxygen supply is set at 48 psig (331kPa). 26. Open backup cylinder isolation valve (secondary oxygen ball valve). 27. Check all fittings and connections for leaks. Centrox Instruction Manual...
-
Page 36: Operation
Use the MANUAL mode during initial start-up or start-up after an extended shutdown of the oxygen concentrator and, depending on the oxygen flow, pressure, and purity requirements of your application, as directed by your AirSep Corporation representative. Centrox Instruction Manual... -
Page 37: Shutdown
When the Centrox oxygen concentrator is turned on after an extended shutdown, the oxygen receiver may be full of air or low purity oxygen. Before the Centrox can supply oxygen within purity specifications, you must purge all air from the oxygen receiver. - Page 38 Using the oxygen generator at flows higher than 15% above those specified in Appendix A of this manual, will result in the likely contamination of the molecular sieve beds. This damage is not covered under the standard warranty. Centrox Instruction Manual...
-
Page 39: Maintenance/Service
AirSep Corporation 7.0 Maintenance/Service To ensure the long life of your Centrox Oxygen Concentrator, maintain the unit as described in the following sections. Follow the procedures described in this section of the instruction manual for daily, semi-annual, and annual maintenance. -
Page 40: Semi-Annual Maintenance
3. Set the ON/OFF switch on the PSA module to the OFF position. 4. Open the PSA module. 5. Pull outward on the oxygen monitor regulator knob and turn it fully counterclockwise. Centrox Instruction Manual... - Page 41 8. Set the AUTO/MANUAL switch to MANUAL position 9. Set the ON/OFF switch to ON position. The interior of the Centrox Oxygen Concentrator contains electrical parts that can produce an electrical hazard if not handled properly. To prevent electrical shock, use extreme care when you service the system.
-
Page 42: Annual Maintenance
ANNUAL MAINTENANCE The expected life of the coalescing filter element is approximately 12 months. Failure to replace the filter element on schedule results in a void AirSep Product Warranty. AirSep selects concentrator filters based on their ability to perform in severe conditions. Use of other than Original Equipment Manufacturer filters/elements can cause damage not covered under the AirSep Product Warranty. -
Page 43: Pressure Switch Adjustment Procedure
14. Leak test the coalescing filter assembly. PRESSURE SWITCH ADJUSTMENT PROCEDURE In the Centrox units, typically the normally open contact of the pressure switch is used for the wiring purposes. Please refer to Figure 7.1 for the following adjustment procedure: 1. - Page 44 (counter-clockwise) top Terminal Circuit) adjusting nut until switch actuates (set point increasing). Lower pressure to desired re-actuation signal. Then turn dead band adjusting Normally Open Off (Open knob counterclockwise until Terminal Circuit) switch re-actuates (set point decreasing). Centrox Instruction Manual...
- Page 45 Follow adjustment instruction. Be sure switch can be test operated without affecting the other equipment. Centrox Instruction Manual...
-
Page 47: Troubleshooting
AirSep Corporation 8.0 Troubleshooting The AirSep Centrox Oxygen Concentrator runs pressurized during normal operation. You must depressurize the unit BEFORE you attempt any REPAIRS. Use the following procedure to depressurize the oxygen concentrator safely. 1. Shut down the oxygen concentrator as described in Section6.3. -
Page 48: Troubleshooting Chart
AirSep Corporation TROUBLESHOOTING CHART The chart on the following pages is a guide for troubleshooting the AirSep Centrox Oxygen Concentrator. The interior of the oxygen concentrator contains electrical parts that can produce an electrical hazard if not handled properly. To prevent electrical shock, use extreme care when you service the system. - Page 49 Defective power wire to switch is set to MANUAL Repair or replace wire. circuit board. position, and blue light is off. Low voltage condition. Call electric company. Defective transformer. Replace transformer. Defective circuit board. Replace circuit board. Centrox Instruction Manual...
- Page 50 Defective wire. Repair or replace wire. Oxygen concentrator cycles, but blue light does not turn Defective AUTO/MANUAL Replace AUTO/MANUAL ON. AUTO/MANUAL switch switch. switch. is set to AUTO position. Repair or replace circuit Defective circuit board. board. Centrox Instruction Manual...
- Page 51 Defective wire to pressure Repair or replace wire to Oxygen Receiver Pressure switch. pressure switch. gauge registers 63 psig (435 kPa) or higher. Defective pressure switch Replace pressure switch. Replace circuit board. (Refer Defective circuit board. to Section 8.2.2). Centrox Instruction Manual...
- Page 52 Repair as necessary. Low purity oxygen (21-82%) Check the oxygen usage. continuously after start-up. The oxygen system must not Oxygen System overdrawn. Alarm sounds. Oxygen be used beyond the rated monitor light illuminates. capacity. Centrox Instruction Manual...
- Page 53 Low voltage condition. Check power supply. Dirty valve. Clean or rebuild valve. Solenoid valve chatters Worn valve core. Rebuild valve. loudly. Bad Coil. Replace Coil. Low voltage to valve from Replace circuit board. (Refer circuit board. to Section 8.2.2). Centrox Instruction Manual...
- Page 54 Faulty electrical connections. wiring diagrams in Appendix audible alarm for more than A.) If problem continues, 15 minutes. Oxygen monitor replace alarm board. light is not illuminated. Low purity oxygen (21-82%). Defective oxygen monitor Replace oxygen monitor light. light. Centrox Instruction Manual...
-
Page 55: Solenoid Valve Troubleshooting
To determine if a solenoid valve, main circuit board, or wire is defective, review the following: Solenoid Valves Set a voltmeter to DC, and carefully connect the leads to the two terminal spades energized, and 0 when de-energized. Centrox Instruction Manual... - Page 56 This valve is normally closed. A problem with the valve exists only if air constantly escapes from the outlet. Whenever you start up the Centrox, it is normal for air to escape from the feed air dump valve for 3-5 seconds.
- Page 57 4. Remove the suction tube and the other end of the stainless-steel hose that comes out from the compressor outlet. 5. Disconnect the two power cords from the terminal block and the two capacitor wires. 6. Also disconnect the ground wire from the compressor. Centrox Instruction Manual...
- Page 58 6. Turn the compressor right side up. Make sure that the springs are centered on the black plastic bushings. 7. Thread the brass fittings and pressure relief valve into the compressor. 8. Follow the compressor removal procedure in reverse order. 9. Reconnect both side panels on the unit. Centrox Instruction Manual...
-
Page 59: Appendix Technical Data
AirSep Corporation Appendix Technical Data SPECIFICATIONS Data in this section refer to Centrox Oxygen Concentrators. This data may vary as per the customer’s requirements. Centrox Product Flow 32 SCFH (0.84 Nm /hr or 15 LPM)* Product Pressure 50 psig (345 kPa or 3.5 barg)*... -
Page 60: Drawings And Schematics
AirSep Corporation DRAWINGS AND SCHEMATICS Figure A.1: Flow Schematic Centrox Instruction Manual... - Page 61 AirSep Corporation Figure A.2: Wiring Schematic (120 V, 60 Hz) – PSA Module Centrox Instruction Manual...
- Page 62 AirSep Corporation Figure A.3: Wiring Schematic (240 V, 50 Hz) – PSA Module Centrox Instruction Manual...
- Page 63 AirSep Corporation Figure A.4: Wiring Schematic (120 V, 60 Hz) – Compressor Module Centrox Instruction Manual...
- Page 64 AirSep Corporation Figure A.5: Wiring Schematic (240 V, 50 Hz) – Compressor Module Centrox Instruction Manual...
-
Page 65: Appendix Warranty/Returns
OTHER PARTY. AirSep’s obligations under this warranty are limited, at AirSep’s option, to the repair, replacement or refunding the purchase price of any such unit of equipment (or part thereof) found by AirSep to be defective in parts or workmanship; provided, however, that AirSep shall... -
Page 66: Limits Of Liability
THAT THE SOLE AND EXCLUSIVE REMEDY FOR ANY DEFECT IN PARTS OR WORKMANSHIP IS LIMITED TO ENFORCEMENT OF AIRSEP’S OBLIGATIONS AS SET FORTH ABOVE, AND AIRSEP SHALL NOT BE LIABLE TO ORIGINAL PURCHASER OR ANY OTHER PARTY FOR LOSS OF USE OF THE EQUIPMENT,... - Page 67 AirSep Corporation AirSep Corporation accepts no item(s) for service or credit unless prior written authorization was issued by AirSep Corporation. 3. Return item(s) in their original packaging material. Pack merchandise for a safe return. AirSep Corporation assumes no responsibility for damage that occurs in transit.
-
Page 69: Appendix
An assessment report on type and cost of repairs (if required) should also be prepared. Also, probable future owners should be identified and advised of the availability of the device Centrox Instruction Manual... - Page 70 4. Scrapping Oxygen generator that cannot be reused shall be scrapped to a scrap metal recycling center following all the governing ordinances and recycling plans. Centrox Instruction Manual...
- Page 72 © 2019 AirSep Corporation. All Rights Reserved. AirSep reserves the right to discontinue its products, or change the prices, materials, equipment, quality, descriptions, specifications and/or processes to its products at any time without prior notice and with no further obligation or consequence.
Need help?
Do you have a question about the Centrox and is the answer not in the manual?
Questions and answers