Table of Contents
Advertisement
Advertisement
Table of Contents

Related Manuals for Amiko HD8140C SE

Summary of Contents for Amiko HD8140C SE
-
Page 2: Table Of Contents
CONTENTS 1. Safety......3 11.2 A/V Control ....22 2. -
Page 3: Safety
USER’S MANUAL 1. SAFETY This HD Receiver has been manufactured to satisfy the international safety standards. Please read the following safety precautions carefully. MAINS SUPPLY: 100~240V AC, 50/60Hz OVERLOADING: Do not overload wall outlet, extension cord or adapter as this may result in fire or electric shock. LIQUIDS: Keep liquids away from the HD Receiver. -
Page 4: Remote Control
USER’S MANUAL 4. REMOTE CONTROL (AMIKO HD8140C SE / HD8142 / HD8155 / HD8265+ / MINI HD265 / MINI COMBO EXTRA / MIRA WIFI / IMPULSE T2C) You can power on/off the receiver, operate on screen menu, and use a variety of hot key function. - Page 5 USER’S MANUAL (AMIKO T60 / T70) POWER To switch your receiver on from standby or standby to on. MUTE Used to enable or disable the audio NUMERIC KEYS Used to select channels or enter programming parameters TV / RADIO Receiver switches between TV and Radio mode.
-
Page 6: Front Panel
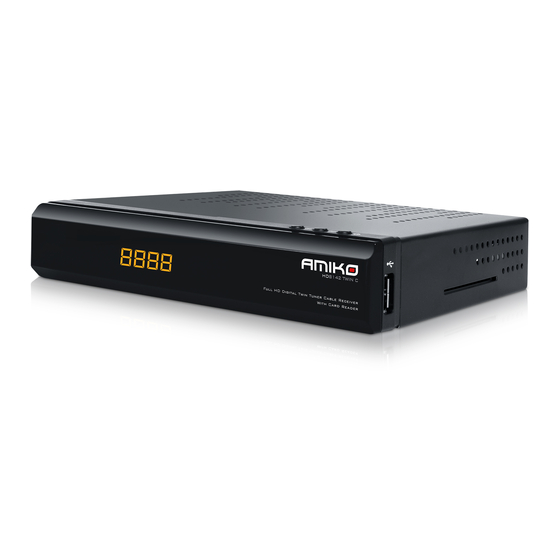
USER’S MANUAL 5. FRONT PANEL AMIKO HD8140C SE STANDBY KEY: To switch the receiver power on/stand by. MENU KEY: To enter the Main Menu. OK KEY: To see TV/Radio channel list, or to confirm in the menu. V-/V+ KEY: To adjust volume level, or to move cursor left or right in the menu. - Page 7 RS 232 (on the side): This is used to connect your receiver to a computer through a serial cable. IR IN( on the side): Connect an External IR-Sensor (Infrared). AMIKO MINI COMBO EXTRA Remote Sensor: Detects infrared signal from remote control unit.
- Page 8 USER’S MANUAL AMIKO IMPULSE T2C Remote Sensor: Detects infrared signal from remote control unit. POWER Indicator: Lit whilst the receiver is powered on and at standby mode. Signal Indicator: When received signal is strong, the signal indicator is lit. Card Slot: One CA Interface for Conax. Under the receiver.
-
Page 9: Rear Panel
USER’S MANUAL 6. REAR PANEL AMIKO HD8140C SE RF IN: This port is to connect the coaxial cable from Cable Antenna. S/PDIF: Digital Audio interface, connect to AV amplifier S/PDIF input terminal. USB: USB 2.0 Host, connect to USB hard disk, or flash disk,and wifi dongles. - Page 10 RCA: This RCA connector is used to connect TV using AV cable. DC 12V: This is used to connect an external 12V adapter. AMIKO MINI COMBO EXTRA Please refer to the diagram above for all possible connections of your receiver Do not connect the unit to the mains socket until all other connections have been made and checked.
-
Page 11: Connecting Your System
HDMI connector can output stereo audio or Dolby Digital audio. 2. Connect one end of RCA cable to the RCA jack on the back of the receiver and the other end to a RCA jack on your TV. AMIKO HD8140C SE AMIKO HD8142... - Page 12 USER’S MANUAL AMIKO HD8155 AMIKO HD8265+ AMIKO MINI HD265...
- Page 13 USER’S MANUAL AMIKO MINI COMBO EXTRA AMIKO MIRA WIFI AMIKO IMPULSE T2C...
- Page 14 USER’S MANUAL AMIKO T60 AMIKO T70...
-
Page 15: Basic Operations
USER’S MANUAL 8. BASIC OPERATIONS 8.1 TURN ON STB First, open the power switch to turn on the unit. When the STB is first used, there will play the first channel from the default Channel List. If the STB is not first used, STB will play the same channel as last time before turning off. -
Page 16: Tv/Radio
USER’S MANUAL 2. Press [Red] key to change the different group. Which you can watch like below. 3. Press [Green] key to display details information for EPG Now. 4. Press [Yellow] key in EPG menu can set one record timer or go to Timer List menu. -
Page 17: Sleep
USER’S MANUAL 8.18 TV/SAT • Lock: Accumulated all locked channels and list in the last of TV Channel List. Press [TV/Sat] key can switch between TV mode and STB • Name (A-Z): Sorting in Alphabetical Order, ignore ”$” symbol. mode •... - Page 18 USER’S MANUAL Lock 5. Press color key can implement the corresponding function in 1. Select the channels which you want to edit in channel list by ”Organizing Services”. press [OK] key or other select mode. 2. Then press [Right] key to move the high light to right toolbar. 3.
-
Page 19: Organizing Favourites
USER’S MANUAL 3. Press [Up/ Down] key to select menu items. Press [menu] 3. Move highlight to ”OK” and press [OK] key can close ”Find” key to go back to main menu. window and you can select channel from the channels list directly. -
Page 20: Fastscan Satellite
USER’S MANUAL a) Disable: without DiSEqC. 5. In the ”TP Scan” item, press [Exit] key to exit the scanning b) 1/2, 2/2: two ports DiSEqC and save the current parameters. c) 1/4, 2/4, 3/4, 4/4: 4 ports DiSEqC Single Scan d) 1/8, 2/8…... -
Page 21: Terrestrial Installation
USER’S MANUAL 3. band is VHF and region is ”France”, the range of Ch No. is from 1 to 9. (it’s according to region) 4. Press [Red] key to enter blind scan menu, or press [Green] key to enter TP scan menu. 5. -
Page 22: A/V Control
USER’S MANUAL 1. Language: press [Left/Right] key to select menu languag- and 4:3 picture source will be too wide in a 16:9 TV but will be es, the selections of languages include: French, English, good display in a 4:3 TV. Spanish,Russian, German, Greek, Italian, Portuguese,Arabic, •... -
Page 23: Time Setting
USER’S MANUAL 11.5 TIMER then the IP Address, Subnet Mask, Gateway and DNS options become enabled. You have to set these options Press [OK] key to open timer menu. according to your IP address. • Current time information will display on the first column; if the 4. -
Page 24: Parental Control
USER’S MANUAL XI. Press [MENU] key to exit the current menu. Watt. if it’s set to ”Fake” ,Press power key, receiver will be in fake standby status. 11.6 PARENTAL CONTROL 4. OSD Timeout: When you switch channels in full screen, there will show up some information about current channel on the 1. -
Page 25: Ftp Upgrade
USER’S MANUAL 11.8.3 Ftp Upgrade This function can upgrade the software through signal lines from the satellite 1. Select the satellite and TP or input the TP value and down- load PID, these parameters you can get from your provider. When connected to the Internet, receiver can make software 2. -
Page 26: Default Value
USER’S MANUAL 11.9.1 Default Value 2. Press [MENU] key to draw back to ”System” menu. When you press [OK] key In the ”Default Setting” item: 12. CONDITIONAL ACCESS 1. There will pop a dialogue for you to enter the password, and the default password is ”0000”. -
Page 27: Media
USER’S MANUAL We provide two CI slots (option, some model only has one slot) for user to use. Using different CAM & cards provided by different CAS operator, user can view many type or scrambled channels. We provide this menu to display the detail information of the CAM &... -
Page 28: Image
USER’S MANUAL [FAV] key: To add mp3 or jpeg to play list. 13.4 IMAGE In this menu you can press [left/right] button to select the USB disk that you want to visit. Then Press [ok] button to enter the Image list. [Yellow] key: To edit the files or folders in the USB storage.press this button you can see the picture like the below. -
Page 29: Disk Manage
USER’S MANUAL 7. Timeshift Path operation your disk can support..In this menu,and you can press You can select the timeshift path by press[left/right] key. ”Red” button refurbish the USB disk speed. 13.6 DISK MANAGE 13.7 REMOVE USB DEVICE SAFELY! In this menu you can select USB disk for HDD Format,HDD Use this menu you can remove the USB Device safely. -
Page 30: Rss Reader
USER’S MANUAL shows video in the centre of your screen. Now press [zoom] key, the video will play in full screen. 3. Press [vol+/vol-] to control volume. 4. Press [pause] key to pause video, or press [stop] key to stop play. 5. -
Page 31: Web Tv
USER’S MANUAL In case of no any files on server, this function will not work. 1. You can press ”II” button to pause the video. 2. You can press ”◄ ◄” or ”► ►” button to Fast Backward or Fast 14.6 WEB TV Forward. -
Page 32: Trouble Shooting
USER’S MANUAL 17. TROUBLE SHOOTING If you suspect there is a fault with your receiver, please check the following trouble shooting guide before calling authorized service agent. Warning! Under no circumstances attempt to repair the receiver yourself. Tampering with the receiver may result in fatal electric shock and will invalidate your warranty.
Need help?
Do you have a question about the HD8140C SE and is the answer not in the manual?
Questions and answers