Table of Contents
Advertisement
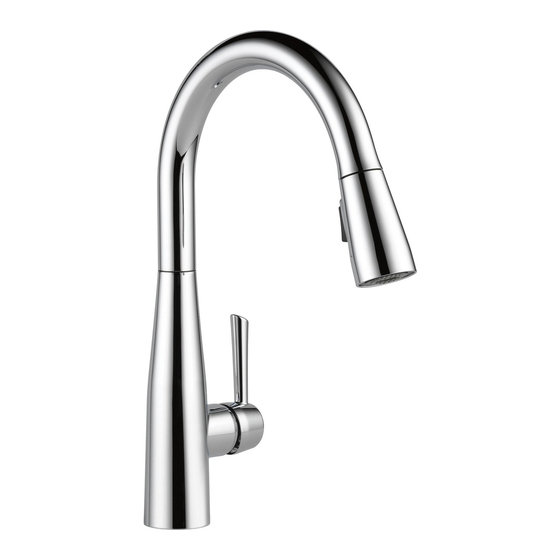
Models/Modelos/Modèles
CASSIDY™, ESSA
®
TRINSIC
& TRASK™
Write purchased model number here.
Escriba aquí el número del modelo comprado.
Inscrivez le numéro de modèle ici.
You may need/Usted puede necesitar/Articles dont vous pouvez avoir besoin:
3/32"
Read all instructions prior to installation.
Lea todas las instrucciones antes de hacer la insta-
lación.
Veuillez lire toutes les instructions avant l'installation.
To access additonal technical documents & product info, visit www.deltafaucet.com/p/Your-Model-Number-Here
(example: www.deltafaucet.com/p/9159T-DST)
Para acceder a documentos técnicos adicionales e información sobre el producto, visítenos en www.deltafaucet.
com/p/Your-Model-Number-Here (ejemplo: www.deltafaucet.com/p/9159T-DST)
Pour avoir accès à des documents techniques supplémentaires et à de l'information sur le produit, visitez www.delta-
faucet.com/p/Votre-numéro-de-modèle-ci (exemple : www.deltafaucet.com/p/9159T-DST)
92728
, MATEO
,
®
®
PULL-OUT KITCHEN & BAR/ PREP FAUCET
LLAVE DE AGUA/GRIFO EXTRAÍBLE PARA COCINAS Y
FREGADEROS PARA PREPARATIVOS/BARES
ROBINET À BEC RÉTRACTABLE POUR ÉVIER D'ÎLOT,
DE BAR ET DE CUISINE
9113-DSTp
9159-DSTp
9913-DSTp
9959-DSTp
1
9183-DSTp
9197-DSTp
9983-DSTp
9997-DSTp
19933-DSTp
?
www.deltafaucet.com
1-800-345-DELTA (3358)
customerservice@deltafaucet.com
01/16/2019
Rev. D
Advertisement
Table of Contents

Subscribe to Our Youtube Channel
Related Manuals for Delta ESSA 9113-DST


Summary of Contents for Delta ESSA 9113-DST
- Page 1 Para acceder a documentos técnicos adicionales e información sobre el producto, visítenos en www.deltafaucet. www.deltafaucet.com com/p/Your-Model-Number-Here (ejemplo: www.deltafaucet.com/p/9159T-DST) 1-800-345-DELTA (3358) Pour avoir accès à des documents techniques supplémentaires et à de l’information sur le produit, visitez www.delta- customerservice@deltafaucet.com faucet.com/p/Votre-numéro-de-modèle-ci (exemple : www.deltafaucet.com/p/9159T-DST) 01/16/2019...
- Page 2 Pièces et finis. Tous les pièces (autres que les composants électroniques et les piles) et les finis de ce toutes les demandes en vertu de la garantie, sauf si le produit a été enregistré auprès de Delta Faucet robinet Delta sont protégés contre les défectuosités du matériau et les vices de fabrication par une garan-...
- Page 3 92728 Rev. D...
- Page 4 92728 Rev. D...
- Page 5 Insert Mount Faucet to Deck Adjust position of faucet above sink then tighten Insert faucet tubes and shank through locking screws (5) using a Phillips screwdriver. mounting hole in sink; and, place faucet (1) HINT: Turn the spout tube opposite the handle to over mounting hole.
- Page 6 OPTIONAL / OPCIONAL / FACULTATIVE OPTIONAL / OPCIONAL / FACULTATIVE Optional Escutcheon Installation Optional Escutcheon Installation Models: 9113 and 19933 only. For optional Models: 9159, 1983 and 1997 only.For optional installations using the 10 1/2” escutcheon, order installations using the 10 1/2” escutcheon, RP92233 (specify finish) not supplied.
- Page 7 Loop tubing created. Delta is not responsible for tubing that is ● Tubing is cut too short: buy a coupling union and a (9) if it is too long. Note: Recommended tubing...
- Page 8 Correct method Incorrect Installation Instalación Incorrecta Método Correcto Installation Incorrecte Bonne méthode Do not install sleeve Ensure cut is straight. upside down. No instale la manga Asegúrese que el corte boca abajo. esté recto. Custom Fit Connections - Plastic Sleeve Installation Instructions 1.
- Page 9 Flush Supply Lines Clip Installation Because your sprayer has been factory assembled to the hose, Insert hose end (1) through hose weight assembly (2). Push hose end (1) onto faucet we do not recommend removing to flush the lines. Instead, if outlet (3).
- Page 10 Maintenance If faucet exhibits very low flow – Unscrew hose from spray head and clean debris from screen (1) (the screen is located just inside the spray) . IMPORTANT: Reinstall screen to the spray head (failure to reinstall the screen could damage internal parts).
- Page 11 CLEANING AND CARE Care should be given to the cleaning of this product. Although its finish is extremely durable, it can be damaged by harsh abrasives or polish. To clean, simply wipe gently with a damp cloth and blot dry with a soft towel. LIMPIEZA Y CUIDADO DE SU LLAVE Tenga cuidado al ir a limpiar este producto.
- Page 12 92728 Rev. D...
Need help?
Do you have a question about the ESSA 9113-DST and is the answer not in the manual?
Questions and answers
Installed a new Delta 9113 -BL-DST kitchen faucet. There is little to no water coming thru the hot water line. I switched the hot and cold water feeds and water pressure is the same. Something is wrong on the hot water side.
Low water flow from the hot water line in a Delta ESSA 9113-DST kitchen faucet could be caused by one or more of the following:
1. Clogged Supply Line or Valve: The hot water supply line or shut-off valve may be partially blocked by debris or mineral buildup.
2. Blocked Faucet Aerator: Mineral deposits in the aerator can reduce flow. Removing and cleaning the aerator may help.
3. Debris in Cartridge: Debris inside the faucet cartridge may obstruct flow. The cartridge may need to be cleaned or replaced.
4. Kinked Hose: The hot water hose may be kinked or twisted under the sink, restricting flow.
5. Low Hot Water Supply Pressure: The issue could originate from the home's plumbing, causing reduced pressure on the hot water line.
Inspecting and cleaning each of these components can help identify and fix the issue.
This answer is automatically generated
Water does not come out when the handle is approximately 3/4 of the way to the hot side. It originally worked properly. How do I fix this problem?
To fix the issue of no water coming out when the handle is 3/4 toward the hot side on the Delta ESSA 9113-DST faucet, follow these steps:
1. Check the supply lines: Ensure both hot and cold water supply lines are properly connected, not kinked, and valves are fully open.
2. Inspect the cartridge:
- Shut off the water supply.
- Loosen the set screw inside the handle and remove the handle.
- Remove the cap and bonnet nut.
- Pull out the cartridge.
- Check for blockages or damage.
- Replace the cartridge if needed and reassemble.
3. Check for leaks or loose fittings: Tighten all connections, especially at the supply lines and cartridge, using a wrench as specified.
4. Flush the system: Debris in the lines can block flow. Remove the cartridge and flush water through the valve body briefly before reinstalling.
If the issue persists after these steps, the cartridge may need replacement.
This answer is automatically generated
What size hole do I drill in my countertop? Where is the battery pack located?