
Subscribe to Our Youtube Channel
Summary of Contents for Tribe Fitness Resistance Band Set
- Page 1 Comprehensive guide to using your Tribe Fitness resistance band set Don’t forget to register your unlimited lifetime warranty at http://register.tribefitnessusa.com/...
- Page 2 IMPORTANT: BEFORE YOU BEGIN Before starting, you should consult your doctor to ensure you are medically fit to begin an exercise program. In the event of chest pain, shortness of breath, nausea, dizziness or pain you should stop exercising immediately and call your doctor. As with all strength training, your muscles may be sore after an intense workout! Most of the time this is normal and can even be a sign that you had a great workout! However, if the pain is prolonged you should take a break from working out and call your doctor. Before starting a workout, make sure that you are dressed appropriately in athletic clothing and footwear. Always ensure movements with Tribe Fitness resistance bands are performed in a controlled manner. Never let go of a resistance band when it has been stretched. These resistance bands are serious pieces of fitness equipment. They are not toys. Always keep resistance bands out of reach of children.
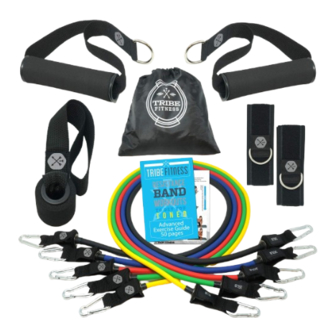
- Page 3 Getting Started… Thank you for purchasing our Tribe Fitness Resistance Band Set! At Tribe Fitness, we believe in providing quality and value for life. That is why all of our products come with a lifetime warranty. If you experience any issues with your order, please contact us and we will make every effort to resolve any problems for you. Your satisfaction is our guarantee! Thank you! Tribe Fitness Website: www.tribefitnessUSA.com Email: support@tribefitnessUSA.com First let’s make sure you have everything! You should have: 2 handles (A), 5 color coded resistance bands (B), 2 ankle straps (C) and 1 door anchor (D).
- Page 4 A few more details before we begin our workout… Our resistance bands are color coded corresponding to their strength. The table below is a useful starting point, but keep in mind that all resistance bands actually get stronger the more you stretch them! For example, if you pick the green band expecting it to be similar to the 10 lb weight you typically use and find that it is lighter, try stretching the band further! For example, if you are doing bicep curls with the band pinned under your feet, you can widen your stance to further stretch the band. What are these? Ankle straps! Place one Velcro strap around each ankle. Instead of the handles, connect the resistance bands directly to your ankle for powerful leg & butt exercises! We’ll let you know in each exercise if you should put on an ankle strap! Door anchor. One side of the door anchor has a hard ball in it. Open a door, place this end through the gap where the hinges connect the door to the wall and close the door leaving the ball on one side of the door and the loop on the side where you are! Connect a resistance band directly to the loop and let the door hold the other side of the band for you! Learn more on the next page!
- Page 5 Door anchor how‐to: Door anchors must be Place the end of the Make sure the anchor used on the side of the door anchor with the loop is accessible and door that has hinges hard insert through the gently close the door. ONLY. This provides door above either the Tug firmly on the loop maximum strength top, middle or bottom to ensure it is well and safety. hinge. positioned and secure. For some exercises, you may be asked to place the door anchor above the top, middle (left) or bottom (right) door hinges. By adjusting the location of the door angle the ideal position of the resistance bands can be obtained to optimize your workout for a particular exercise! In the upcoming guide, exercises that work best using the door anchor will be marked with the icon on the left!
- Page 6 CHEST WORKOUT Standing single sided chest fly Setup: Place a band through the door anchor loop and attach both hooks to a single handle. The standing single sided chest fly can be performed at an incline, decline or flat (neutral position). Incline single side fly: Place the door anchor by the bottom hinge of your door Flat single side fly: Place the door anchor by the middle hinge of your door Decline single side fly: Place the door anchor by the top hinge of your door How to do it: With your upper body fixed and your shoulders square, keep your arm straight and slowly bring it directly across your chest toward your other shoulder. As you reach the end of the movement, squeeze a bit harder to increase muscle contraction. If you are performing an incline single side fly, bring your arm across and up so that at the finish position, your hand is at the level of your ear. For the decline fly, do the opposite—your hand should end up at the level of your belly‐ button. Remember, perform this movement slowly! Especially at the end of the movement, it adds a lot to the exercise to give one final squeeze and contract the muscle group as hard as you can! Do 12 repetitions alternating from left to right side between sets. Try to do at least 4 sets before moving onto another exercise! FLEX! Progress from left (relaxed) to right (flexed). Feel the burn!
- Page 7 Standing chest press Setup: Place a band through the door anchor loop and the hook on each side to one of the handles. For added resistance, you may wish to combine 2 or more resistance bands. The standing chest press can be performed at an incline, decline or flat (neutral position). Incline chest press: Place the door anchor by the bottom hinge of your door Flat chest press: Place the door anchor by the middle hinge of your door Decline chest press: Place the door anchor by the top hinge of your door How to do it: With your upper body fixed and your shoulders square, push handles forward until your arms are extended in front of you. We’ve all seen people doing bench‐presses at the gym with a large weight, the movement is the same here except we are standing and pushing the resistance handles in‐front of us! Do 8‐12 repetitions and try to do about 4 sets FLEX! with a 45 second break in between each! Progress from left (relaxed) to right (flexed). Feel the burn! Wall power push‐up Setup: Place a band (without handles) around your back and under your arms. Grab the tube portion of the band in both hands and pin it against the wall while leaning forward. How to do it: The band can help increase the difficulty of standing wall pushups, while keeping them just a bit easier than a conventional pushup on the floor. Use larger resistance bands or increase the distance from your feet to the wall in order to increase the difficulty of the exercise! FLEX! Progress from left (relaxed) to right (flexed). Feel the burn!
- Page 8 Resistance band mega pushup Setup: If regular pushups aren’t hard enough for you, try this one! Place a resistance band (without handles) around your back and under your arms. Pin it under your palms and assume a conventional floor push‐up position. You can use a wide grip to focus on your chest. You can also use a narrower grip to focus more on your tricep muscles in your arms! How to do it: Slowly lower your body down to the ground as you would in a conventional floor pushup. As you push back up straightening your arms, you should feel increased resistance provided by the resistance band. If you don’t, you may need to switch to a heavier band! Kneeling chest fly Setup: Place a band through the door anchor loop and attach both hooks to a single handle. The door anchor should be placed by the highest hinge on your door. How to do it: Kneel a few feet away from the door with the arm you want to exercise closest to the door. In the relaxed position your elbow should be slightly flexed and in a fixed position. Slowly draw your entire arm across your body to the other side. As you reach the end of the movement squeeze your chest to get an extra burn! Do 12 reps and then reposition yourself to work out the other side. Try to do at least 4 sets on each side!
-
Page 9: Standing Lateral Shoulder Raise
SHOULDER WORKOUT Standing lateral shoulder raise Setup: Place a band under your feet with handles attached to either side of the band. If you need more resistance, you can spread your legs wider to stretch the resistance band more, or simply change to a heavier band. How to do it: With your arms down at your side, slowly raise up both arms directly to the side, while keeping them straight. Stop when your hands are at the level of your ears, hold the position for a few seconds and slowly lower your arms back down to your sides. Remember, perform this movement slowly! Do 12 repetitions and 4 sets before moving onto another exercise! FLEX! Standing front shoulder raise Progress from left (relaxed) to right (flexed). Feel Setup: the burn! Same as the lateral rise above! How to do it: This time, in the starting position, keep your hands down in front of your thighs. Slowly raise your arms directly out in front of you with your elbows locked. After your hands are at the level of your ears, you can start slowly lowering them to the starting position. Like the lateral rise, do 12 repetitions and 4 sets before moving on to another exercise. ... -
Page 10: Standing Shoulder Press
Standing shoulder press Setup: Place a band under your feet with handles attached to either side of the band. If you need more resistance, you can spread your legs wider to stretch the resistance band more, or simply change to a heavier band. How to do it: With your upper arms parallel to the ground, push both handles upward toward the ceiling. Pause for a second after your arms have been completely extended before slowly lowering the handles back to the starting position. Remember, perform this movement slowly! Do 12 repetitions and 4 sets before moving onto another exercise! Reverse shoulder fly FLEX! Setup: Progress from left (relaxed) to right Place a band through the door anchor loop and (flexed). Feel the burn! attach handles to both ends of the band. How to do it: Start holding one handle in each hand with your arms straight in front of you and your hands together. While keeping each arm straight, slowly bring your arms out directly to the side. Once your arms are all the way to the side, hold the position while continuing to squeeze your muscles to keep your arms fixed. After a few seconds, slowly return to the starting position. Repeat for 8 reps and 4 sets. This exercise effectively works your rear deltoids, otherwise known as the rear part of your shoulder muscles! - Page 11 Lying lateral shoulder rise Setup: If standing shoulder rises are too challenging, or you just want to change things up, place the anchor at the level of the lower hinge in your door. Lie on a soft exercise mat a few feet from the door with one handle connected to each end of the resistance band. How to do it: With your arms down at your sides, slowly bring them up to the level of your ears. During the movement keep your arms straight and gently touching the ground. At the end of the movement, hold the flexed position for a few seconds before slowly returning to the starting position. 12 repetitions and 4 sets is the way to go for this exercise! Lying front shoulder rise Setup: Setup is the similar to the lying lateral shoulder rise above except that you should connect both ends of the resistance band to a single handle! Once again, use the door anchor positioned by the lowest hinge on your door! How to do it: Grab the handle with both hands with your hands down by your legs. Keep your arms straight and slowly bring your hands up to the level of your face, stretching the resistance band. Pause for a few seconds to feel the burn before slowly lowering your hands back to the starting position. 8‐10 repetitions per set is ideal!
-
Page 12: Bent Over Row
BACK WORKOUT Standing one arm row Setup: Place a band through the door anchor loop and attach both hooks to a single handle. The door anchor should be placed near the middle hinge on your door. How to do it: With your upper body fixed and your shoulders square, grab the handle and keep it directly in front of you. When you are ready, draw it back by moving your elbow straight back and keeping your upper body fixed. Once your elbow is directly below your shoulder, slowly return to the starting position. After completing 10 reps, switch to the other side without a break. 3‐4 sets with each arm is a great way to strengthen your back. Bent over row FLEX! Setup: Progress from left (relaxed) to right (flexed). Place a handle on 1 side of a resistance Feel the burn! band and step on the other side (middle) of the band with 1 foot. Spread your feet apart and bend over. How to do it: Grab the handle with the opposite hand to the foot that you are using to pin the resistance band down. Slowly draw your arm back pointing your elbow directly at the ceiling! Once you have drawn the band as far back as you can, squeeze for a few seconds before slowly returning to the starting position. Alternate arms following each set of 8 repetitions! - Page 13 Two‐handed upright row Setup: Place the door anchor at the level of the lowest hinge and guide a resistance band through the door anchor loop. Attach one handle to each end of the resistance band. How to do it: Squat slightly while keeping your back straight and grab each handle and hold them in front of you with your arms extended. Slowly draw each elbow straight back, keeping your upper arms close to your body. Once you can bring your elbow back no further, squeeze the position for a few seconds before relaxing. Do 12 reps of this one with the heaviest band you feel comfortable with! Straight‐arm lat pulldown FLEX! Setup: Progress from left (relaxed) to right Place the door anchor at the level of the (flexed). Feel the burn! highest hinge and guide a resistance band through the door anchor loop. Attach both ends of the resistance band to a single handle! How to do it: Start by kneeling on an exercise mat. Grab one handle with each hand and position your hands directly out in front of you, with your arms straight, so that your hands are at the level of your head. While keeping your elbows locked and your arms straight, bring your hands straight down until they are positioned at your sides. Perform this movement slowly, pausing for a few seconds when your hands are at your slides before slowly raising your hands back up in front of you. This exercise is another excellent way to work out the lats in your back. At least 14 reps is recommended with 4 sets in total!
- Page 14 Straight‐arm lat pulldown Setup: Place the door anchor at the level of the highest hinge and guide a resistance band through the door anchor loop. Attach both ends of the resistance band to a single handle! How to do it: Start by kneeling on an exercise mat. Grab one handle with each hand and position your hands directly out in front of you, with your arms straight, so that your hands are at the level of your head. While keeping your elbows locked and your arms straight, bring your hands straight down until they are positioned at your sides. Perform this movement slowly, pausing for a few seconds when your hands are at your slides before slowly raising your hands back up in front of you. FLEX! This exercise is another excellent way to work Progress from left (relaxed) to right (flexed). out the lats in your back. At least 14 reps is Feel the burn! recommended with 4 sets in total!
- Page 15 ARM WORKOUT Standing one arm preacher curl Setup: With one foot in front of you, stand on the center of a resistance band and attach both ends to a single handle. How to do it: If you are standing on the band with your right foot, prepare to workout your right arm. Place your left arm across your upper abdomen and use your left hand to brace your right elbow. Grab the handle with your arm extended. Slowly curl your right arm, leaving your right elbow pinned against your left hand for support. At the top of the movement, your right hand should be close to your right shoulder. Squeeze hard then lower your hand. Repeat 12 times and do at least 4 sets, alternating arms between sets. FLEX! One arm preacher curl with anchor! Progress from left (relaxed) to right (flexed). Setup: Feel the burn! Place a door anchor below the lowest hinge on your door and loop a band through it. Connect both ends of the resistance band to a single handle. How to do it: Stand a few feet away from the door with your feet shoulder width apart. Once again, place the arm you aren’t working out across your body so that this hand can steady the active arm’s elbow. With the active arm extended, grab the handle and slowly flex your arm keeping your elbow locked in position. Once your hand is near the shoulder on the same side, squeeze and slowly lower your hand. 12 repetitions with 4 sets, alternating arms between sets is ideal!
-
Page 16: Hammer Curls
2‐arm standing bicep curls Setup: With your feet shoulder width apart, stand on a resistance band with both feet and attach each end to its own handle. How to do it: With one handle in each hand and your palms facing forward, ensure that your arms are straight and your elbows are fixed at your sides. Slowly bring up both hands while keeping your elbows completely fixed at your sides. When both hands are close to your shoulders, squeeze hard for 2 seconds before slowly lowing your hands back to the starting position. 12 repetitions and 4 sets are ideal for most arm exercises and this one is no exception! FLEX! Hammer curls! Progress from left (relaxed) to right (flexed). Setup: Feel the burn! With your feet shoulder width apart, stand on a resistance band with both feet and attach each end to one of the ankle straps. How to do it: Grab an ankle strap in each hand. Orient your hands so that your thumb is facing up and your hands are down at your sides with your elbows pinned to your sides. Once again, slowly bring up both hands while keeping your elbows fixed at your sides. When both hands are close to your shoulders, squeeze hard before returning to the starting position. 12 repetitions and 4 sets. Both this exercise and the 2 arm standing bicep curl above can be done effectively with both arms at the same time, or alternating one rep on each side. Try both and see what works best for you! - Page 17 1 arm flex curls Setup: Place the door anchor by the upper hinge on your door. Loop a resistance band through the anchor and attach both ends to a single handle. How to do it: With the handle in one hand, extend your arm directly out to the side so that your palm is up and at the level of your shoulder. Keep your elbow completely fixed and bend your arm toward your shoulder. When your arm is nearly touching your shoulder, give an extra squeeze for 2 seconds before slowly returning to the starting position. 8‐10 slow reps and 3 sets is ideal for this one. You should feel the burn! Seated preacher curls FLEX! Setup: Progress from left (relaxed) to right (flexed). Feel the burn! Place a door anchor by the bottom hinge in your door and take a seat a few feet from the door with your knees bent and in front of you. Attach each end of the resistance band to a handle. How to do it: Place your elbows on your knees with your palms up and grab the handles. With your elbows fixed on your knees slowly curl your arms until they come close to touching your shoulders. Squeeze hard as you reach the end of the movement and slowly return to the starting position. . 8‐10 slow reps and 3 sets is ideal for this one. You can do this exercise one arm at a time or with both arms at the same time. If you want to try doing one arm at a time you may find that connecting both ends of the resistance band to a single handle makes the exercise easier. ...
-
Page 18: Overhead Triceps Extension
Overhead triceps extension Setup: Step on one end of a resistance band and attach a single handle to the other end. If you are using your right foot to step on the band, grab the handle with your right arm. How to do it: Raise the handle above your head so that your arm is straight with the resistance band behind you. Keep your upper arm straight up through the exercise and bend your elbow, slowly lowering your hand so that it is behind your head. During the motion, keep your palm down. Once your elbow is fully bent, slowly reverse the motion, stretching the resistance band and exercising your tricep. You should try to do 4 sets of 8‐10 reps! Alternate arms between sets. Donkey kicks FLEX! Setup: Progress from left (relaxed) to right (flexed). Feel the burn! Place a door anchor by the middle hinge of your door and loop a band through it. Attach both ends of the resistance bands to a single handle. How to do it: Stand a few feet from the door and bend over, keeping your back straight. Grab the handle with one hand with your arm flexed and your elbow locked at your side. Slowly extend your arm, keeping your elbow pinned at your side the entire time. After your arm is fully extended reverse the motion. Perform 10 reps and try to do 4 sets, alternating arms between sets. ... - Page 19 Kneeling triceps pulldown Setup: Use a door anchor and place it above the top hinge on your door. Place a band through the anchor and attach an ankle strap to each end of the band. How to do it: Get on your knees facing away from the door and grab an ankle strap in each hand. Bend over slightly keeping your back straight and start with your hands by your ears and your elbows forward. Keep your elbows and upper body fixed in position and slowly straighten your arms. The resistance bands themselves should be near your ears when your arm is fully extended! Slowly return to the starting position. 12 reps and 4 sets is recommended for this exercise! Forward extension FLEX! Setup: Progress from left (relaxed) to right (flexed). Place a door anchor by the upper hinge of your Feel the burn! door, loop a band through it and attach both ends to a single handle. Stand facing away from the door. How to do it: With your right arm, grab the handle and place your elbow in front of you. Place your left hand under your elbow for additional bracing. Start with your palm forward and your hand by your ear. Slowly extend your arm until it is straight keeping your elbow fixed in position. Once arm is straight in front of you, slowly return to the starting position. You can make the exercise more or less challenging by increasing or decreasing your distance from the door without even changing the resistance band! Try for 12 reps and 3 sets. Make sure you alternate arms between sets!
- Page 20 ABDOMINAL WORKOUT Kneeling crunch Setup: Place the door anchor above the top hinge on your door and loop a resistance band through it. Attach one ankle strap to each end of the resistance band. How to do it: Kneel close to the door and grab one ankle strap in each hand with your elbows bent and in front of you and your hands positioned near your ears. Your upper body should be straight up. Slowly crunch your abdomen, bringing your elbows down to the ground and keeping your arms and hands locked. You should feel the force of the resistance band making the crunch more difficult. If not, try using multiple resistance bands for added difficulty! 4 sets of 8 should have your abs feeling good! FLEX! High‐wood chop for obliques Progress from left (relaxed) to right (flexed). Feel the burn! Setup: Place an anchor below the lowest hinge on the door and slide a resistance band through the anchor loop. Attach both ends of the band to a single handle. How to do it: With your feet shoulder width apart, grab the single handle with both hands. Keep your arms straight for the whole motion. Start with your hands down by one of your knees and slowly rotate your hands across your body and bring them up at the same time to the level of your ear. This exercise targets many primary core muscles, including your abs and obliques. 12 reps and 4 sets is good for this one!
- Page 21 Assisted situp Setup: Place the door anchor near the middle hinge of your door. Loop a resistance band through and attach an ankle strap to each end of the resistance band. How to do it: If regular situps are too challenging, don’t worry, Tribe Fitness has you covered. Lie down with an ankle strap in each hand facing the door. Do a situp as you normally would but use the elasticity of the resistance band to help you! It is helpful to keep your arms rigid, holding the resistance ankle straps to your chest. Increasing your distance from the door will make the situps a bit easier, while moving closer to the door will make the situp harder! Weighted situp Setup: Place the door anchor near the middle hinge of your door. Loop a resistance band through and attach each end of the band to an ankle strap. How to do it: Maybe regular situps are just too easy? Lie down on a mat facing away from the door holding each ankle strap in one hand with your hands crossed and pinned near your shoulders. Perform a situp and note the added resistance provided by the stretching band. This one can be challenging to do without a partner! For best results, have a partner hold your feet while you situp against added resistance to create those abs of steel!
- Page 22 LEGS AND BUTT WORKOUT Squat Setup: With your feet shoulder width apart, step on a resistance band and grab one handle in each hand. How to do it: Brace each hand against each shoulder while squatting down with your back straight. Keeping your arms fixed in position, slowly stand up while keeping your back straight, then slowly return to a squatted position. Because leg muscles are generally quite strong, you may find using multiple resistance bands is necessary. Do 16 reps and at least 4 sets to ensure a good leg burn! Lunge FLEX! Setup: Progress from left (relaxed) to right (flexed). Feel the burn! Stand on a resistance band with just 1 foot. Attach handles to each end of the band and grab one handle in each hand, pinning your arms with your hands at your shoulders. How to do it: Keeping your arms and hands locked in position through the exercise, lift up the foot that is not anchoring the resistance band and move it behind you. Slowly bend your knees and dip down, keeping your back straight, until your back knee just touches the ground. Reverse the motion against the resistance provided by the band. Do at least 16 reps and 4 sets, alternating legs between each set. For a stronger burn you can do 4 sets in a row on a single side before switching to the other side. Lunges are the best exercise for toning your butt!
- Page 23 Standing leg curls Setup: Attach the door anchor at the level of the lowest hinge on the door and loop a resistance band through it. Attach both ends of the resistance band to a single ankle strap. How to do it: Stand several feet from the door with your feet together and the ankle strap around one of your ankles. Keep your knees together through the movement and slowly kick the ankle strap back. This motion should be done bending just your knee. The slower you make this movement, the better. This excellent hamstring and butt exercise should be done with about 12 reps and 3‐4 sets, alternating sides between sets. FLEX! Face‐down leg curls Progress from left (relaxed) to right (flexed). Feel the burn! Setup: Attach the door anchor at the level of the lowest hinge on the door and loop a resistance band through it. Attach both ends of the resistance band to a single ankle strap. How to do it: Lie down on the floor face down, with your feet toward the door. Place the resistance band around one of your ankles. Start with your legs straight and slowly curl your leg until your heel is close to touching your butt. Hold your leg in the flexed position for several seconds before returning it to the starting position. This is the best exercise that we have found for targeting your hamstrings and butt. Once you have done 4 sets of 12 repetitions, switch the ankle strap to the other ankle and repeat. You can combine this exercise with standing leg curls and lunges for an exceptional butt workout!
-
Page 24: Leg Adduction
Leg adduction Setup: Attach the door anchor at the level of the lowest hinge on the door and loop a resistance band through it. Attach both ends of the resistance band to a single ankle strap. How to do it: Stand several feet from the door with your feet together and the ankle strap around the ankle closest to the door. Use the other foot to bear your weight and let the force of the elastic band draw your leg out to the side. Slowly pull your leg back in so that your feet are together. Increase or decrease your distance from the door to make the exercise more or less challenging—or change to another resistance band! Do 12 repetitions and at least 4 sets! Leg abduction FLEX! Setup: Progress from left (relaxed) to right (flexed). Feel the burn! Attach the door anchor at the level of the lowest hinge on the door and loop a resistance band through it. Attach both ends of the resistance band to a single ankle strap. How to do it: The opposite of the exercise above. This time put the ankle strap around the ankle farthest from the door. Slowly draw your leg out to the side, while keeping it straight to exercise your hip abductors. Again, you can change the difficulty of the exercise by adjusting your distance from the door. These two exercises are excellent for eliminating the dreaded “hip fat and flab!”. 12 repetitions and 4 sets is ideal for this one too. Take just a short 30 second break between your sets. ...
Need help?
Do you have a question about the Resistance Band Set and is the answer not in the manual?
Questions and answers