
Related Manuals for Cognex In-Sight Micro Series


Summary of Contents for Cognex In-Sight Micro Series
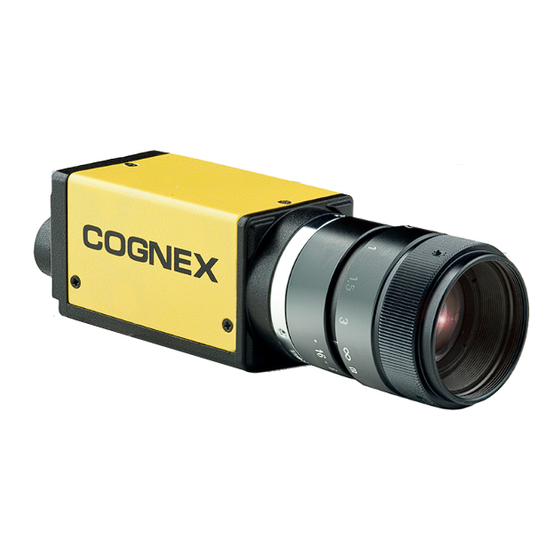
- Page 1 ® In-Sight Micro Series Vision System Installation Manual 2019 August 24 Revision: 5.7.4.3...
-
Page 2: Legal Notices
Copyright © 2008 - 2019. Cognex Corporation. All Rights Reserved. Portions of the hardware and software provided by Cognex may be covered by one or more U.S. and foreign patents, as well as pending U.S. and foreign patents listed on the Cognex web site at: cognex.com/patents. -
Page 3: Regulations/Conformity
Regulations/Conformity Regulations/Conformity Note: For the most current CE declaration and regulatory conformity information, see the Cognex support site: cognex.com/support. Declaration of Conformity Cognex Corporation Manufacturer One Vision Drive Natick, MA 01760 USA In-Sight Micro 1020/1050/1100/1110/1400/1410: Type 821-0043-1R In-Sight Micro 1100C/1400C: Type 821-0044-1R... -
Page 4: For European Community Users
Regulations/Conformity For European Community Users Cognex complies with Directive 2012/19/EU OF THE EUROPEAN PARLIAMENT AND OF THE COUNCIL of 4 July 2012 on waste electrical and electronic equipment (WEEE). This product has required the extraction and use of natural resources for its production. It may contain hazardous substances that could impact health and the environment, if not properly disposed. -
Page 5: Precautions
Precautions Precautions To reduce the risk of injury or equipment damage, observe the following precautions when you install the Cognex product: An IEEE 802.3af compliant, and UL or NRTL listed, Power over Ethernet (PoE) power source rated Class 0, 2, 3 or 4 must be used. -
Page 6: Table Of Contents
Table of Contents Table of Contents Legal Notices Regulations/Conformity For European Community Users Precautions Table of Contents Introduction Support Standard Components Cables Ethernet Cable Breakout Cable I/O Module Cable Installation Connectors and Indicators Install the Mounting Block (Optional) Install the Lens Connect the Inputs and Outputs (Optional) Option 1: Connect the Breakout Cable Option 2: Connect the I/O Module Cable... -
Page 7: Introduction
Many information resources are available to help you use the vision system: ® The In-Sight Explorer Help and EasyBuilder Help files, provided with In-Sight Explorer software. On-demand training: cognex.com/on-demand-training.aspx. The In-Sight online support site: cognex.com/support/insight. Standard Components In-Sight Micro vision system is shipped with the following standard components. Component Description... -
Page 8: Cables
Introduction Cables Note: Cables are sold separately. CAUTION: All cable connectors are keyed to fit the connectors on the vision system. Do not force the connections or damage may occur. Ethernet Cable The Ethernet cable provides the Ethernet connection for network communications and supplies power to the vision system. -
Page 9: Breakout Cable
Introduction Breakout Cable The Breakout cable provides access to the vision system’s trigger and high-speed outputs. The Breakout cable can be connected to devices, such as a PLC, trigger sensor or strobe light. The pin-outs for the cable are listed in the Breakout Cable Specifications on page 25. -
Page 10: Installation
Read this section to learn how the vision system connects to its standard components and accessories. For a list of options and accessories, contact your Cognex sales representative. Note: Cables are sold separately. If a standard component is missing or damaged, immediately contact your Cognex Authorized Service Provider (ASP) or Cognex Technical Support. Connectors and Indicators Connector/Indicator... -
Page 11: Install The Mounting Block (Optional)
Installation Install the Mounting Block (Optional) The mounting kit includes a mounting bracket and M3 screws (quantity 4) for mounting the vision system and securing it to a mounting surface. The mounting bracket also has 1/4 - 20 and M6 mounting holes available for mounting the vision system to a mounting surface. -
Page 12: Connect The Inputs And Outputs (Optional)
Installation Connect the Inputs and Outputs (Optional) The vision system’s I/O connector supplies connections for the acquisition trigger and high-speed outputs. CAUTION: All cable connectors are keyed to fit the connectors on the vision system. Do not force the connections or damage may occur. -
Page 13: Option 2: Connect The I/O Module Cable
Installation Option 2: Connect the I/O Module Cable 1. Connect the I/O Module cable's M8 connector to the vision system I/O connector. 2. Connect the I/O Module cable’s DB15 connector to the I/O module’s I/O connector. -
Page 14: Connect The Ethernet And Power
Installation Connect the Ethernet and Power The vision system’s PoE connector provides the Ethernet connection for network communications and supplies power to the vision system. The following steps illustrate how to connect the In-Sight Micro vision system to the In-Sight CIO-MICRO or CIO-MICRO-CC I/O module. -
Page 15: Connect The Frame Ground Wire
Installation Connect the Frame Ground Wire Connect a frame ground wire to the I/O module’s Frame Ground terminal. Connect the other end of the frame ground wire to frame ground. CAUTION: The shield ground connections of the RS-232 port, LAN port, PoE port, I/O port and Frame Ground terminal are internally connected. -
Page 16: Connect An Rj-45 Lan Cable
Installation Connect an RJ-45 LAN Cable To connect the vision system to an Ethernet network, plug a LAN cable (RJ-45 connector) into the I/O module’s LAN port and connect the other end of the cable to a switch/router or PC, as applicable. Connect the Ethernet Cable CAUTION: All cable connectors are keyed to fit the connectors on the vision system. - Page 17 Installation 2. Connect the Ethernet cable’s RJ-45 connector to the I/O module’s PoE port. 3. Restore power to the 24VDC power supply and turn it on if necessary.
-
Page 18: Specifications
Specifications Specifications The following sections list general specifications for the In-Sight Micro vision systems. In-Sight Micro Vision System Specifications Specifications 1020/1050 1100/1110 1100C 1400/1410 1400C 1402/1412 1403/1413 1403C 1500 Minimum In-Sight version 4.4.3 In-Sight In-Sight version In-Sight Firmware version 4.4.3 version 4.9.1 Requirement 4.6.0... - Page 19 Specifications Specifications 1020/1050 1100/1110 1100C 1400/1410 1400C 1402/1412 1403/1413 1403C 1500 Discrete Inputs None. (Eight additional general-purpose inputs available when using the optional CIO-MICRO or CIO- MICRO-CC I/O module.) Discrete 2 opto-isolated, NPN/PNP high-speed outputs. (Eight additional general-purpose outputs available Outputs when using the optional CIO-MICRO or CIO-MICRO-CC I/O module.) Status LEDs Network, 2 user-configurable.
-
Page 20: I/O Specifications
Specifications I/O Specifications Cable and connector specifications and connection examples for the acquisition trigger input and the high-speed outputs are provided in the following sections. Acquisition Trigger Input The vision system features one acquisition trigger input, which is optically isolated. You can configure the acquisition trigger input to trigger from an NPN (current sinking) or PNP (current sourcing) device. -
Page 21: High-Speed Outputs
Specifications High-Speed Outputs The In-Sight Micro vision system features two built-in, high-speed outputs, which are optically isolated. The high-speed outputs can be used as either NPN (current sinking) or PNP (current sourcing) lines. Specification Description Voltage 28VDC maximum through external load. Current 100mA maximum sink current. - Page 22 Specifications High-Speed Output - NPN Configuration The Breakout cable can be used to connect to an NPN-compatible PLC input. Connect HS OUT 0 or HS OUT 1 directly to the PLC input. When enabled, the output pulls the PLC input down to less than 3VDC. For more information, refer to the Breakout Cable Specifications on page 25.
- Page 23 Specifications High-Speed Output - Relay/LED Configuration The Breakout cable can be used to connect the high-speed outputs to a relay, LED or similar load. Connect the negative side of the load to the output and the positive side to +24VDC. When the output switches on, the negative side of the load is pulled down to less than 3VDC, and greater than 21VDC appears across the load.
-
Page 24: Ethernet Cable Specifications
Specifications Ethernet Cable Specifications The Ethernet cable provides the Ethernet connection for network communications and supplies power to the vision system. P1 Pin# Signal Name Wire Color P2 Pin# TPO+/+48VDC (Mode A) White/Orange TPO-/+48VDC (Mode A) Orange TPI+/+48VDC RTN (Mode A) White/Green +48VDC (Mode B) Blue... -
Page 25: Breakout Cable Specifications
Specifications Breakout Cable Specifications The Breakout cable provides access to the vision system’s trigger and high-speed outputs. The Breakout cable can be connected to devices, such as a PLC, trigger sensor or strobe light. The Breakout cable is not terminated. P1 Pin# Signal Wire Color... -
Page 26: I/O Module Cable Specifications
Specifications I/O Module Cable Specifications The I/O Module cable is used with the CIO-MICRO or CIO-MICRO-CC I/O module. The I/O Module cable connects the vision system directly to the I/O module via the DB15 connector. When connected, the I/O Module cable provides access to the vision system’s trigger and high-speed outputs. -
Page 27: Dimensions
Specifications Dimensions The following sections list dimensions of the vision system and optional accessories. Vision System Dimensions Note: Dimensions are in millimeters [inches] and are for reference purposes only. All specifications are for reference purposes only and can change without notice. -
Page 28: Vision System Dimensions (With Mounting Block)
Specifications Vision System Dimensions (with Mounting Block) Note: Dimensions are in millimeters [inches] and are for reference purposes only. All specifications are for reference purposes only and can change without notice. -
Page 29: Appendix A - Cleaning And Maintenance
Appendix A - Cleaning and Maintenance Appendix A - Cleaning and Maintenance Clean the Vision System Housing To clean the outside of the vision system housing, use a small amount of mild detergent cleaner or isopropyl alcohol on a cleaning cloth. Do not pour the cleaner on the vision system housing. CAUTION: Do not attempt to clean any In-Sight product with harsh or corrosive solvents, including lye, methyl ethyl ketone (MEK) or gasoline.
Need help?
Do you have a question about the In-Sight Micro Series and is the answer not in the manual?
Questions and answers