Table of Contents
Advertisement
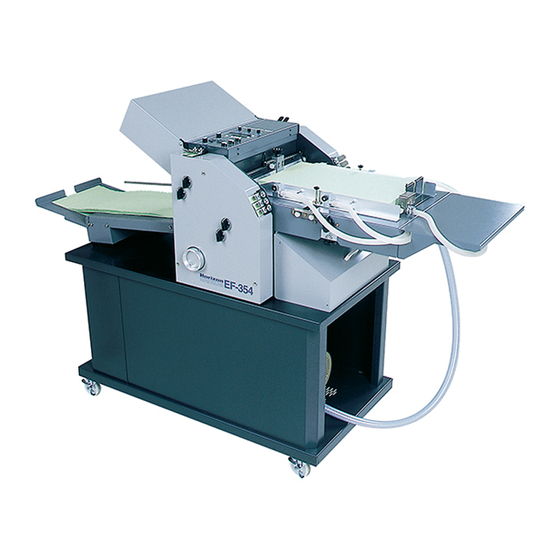
PAPER FOLDER
- This manual is designed to help you to install, operate and maintain the EF-354 Paper
Folder. Please read and understand this manual and keep it in a safe and convenient place.
- Do not operate the EF-354 until you have read and understand the instructions in this
manual.
- Horizon International Inc. shall not be liable for incidental consequential damages result-
ing from: improper or inadequate maintenance by customer, unauthorized modification or
misuse, or operation outside of the environmental specifications for the product.
- Horizon International Inc. pursues a policy of continuing improvement in design and
performance of the product. Therefore, the product design and specifications are subject to
change without prior notice and without our legal obligation.
- All rights are reserved. No part of this manual may be photocopied, reproduced or trans-
lated to another language without the prior written consent of Horizon International Inc.
051213/EF354/05E/HS
Important Information
I
EF-354
UM203023-05
Advertisement
Table of Contents

Related Manuals for Horizon International EF-354

Summary of Contents for Horizon International EF-354
- Page 1 PAPER FOLDER Important Information - This manual is designed to help you to install, operate and maintain the EF-354 Paper Folder. Please read and understand this manual and keep it in a safe and convenient place. - Do not operate the EF-354 until you have read and understand the instructions in this manual.
- Page 2 - Please read and understand all safety instructions which include the terms WARNING and CAUTION. If these safety instructions are ignored, personal injury may result. - Horizon International Inc. cannot anticipate every possible situation that might involve a potential hazard. Therefore, the instructions in this manual and the warning labels on the machine are not all-inclusive.
-
Page 3: Table Of Contents
CONTENTS Important Information .................... I Safety Precautions ....................II 1. Before You Begin ..............1 1-1 Machine Features ....................1 1-2 Machine Descriptions ..................2 1-2-1 Main Part of Machine ..................2 1-2-2 Fold Section....................3 1-2-3 Feed Section ....................4 1-2-4 Delivery Section ..................... - Page 4 4-3 Cleaning the Sheet Sensor on the Optional KTU-35 ........57 4-4 Replacing the Battery ..................58 5. Installation................59 5-1 Installation Overview for the EF-354 ..............59 5-2 Installing the Blower and Vacuum Pump ............60 5-3 Installing the Delivery Section ................61 5-4 Installing the Feed Section ................63...
-
Page 5: Before You Begin
1. Before You Begin This chapter explains the futures of this machine, and lists the parts descriptions and functions. Machine Features The sheets are fed from the The gaps between the fold rollers can be Small folded sheets can be stacked bottom. -
Page 6: Machine Descriptions
Machine Descriptions 1-2-1 Main Part of Machine Delivery Section Fold Section 1 The ejected sheets are The first and third buckle plates are mounted inside this conveyed and stacked on the section. Each buckle plate has an adjustable folding receiving tray. mechanism. -
Page 7: Fold Section
Machine Descriptions 1-2-2 Fold Section First Buckle Plate (Upper)/ Third Buckle Plate (Lower) Stopper 1 Angle Adjust Locking Knob Stopper 1 Locking Screw This screw can be used to make Stopper 1 Fine Adjusting Knob a rough setting for stopper 1. This screw can be used to make a fine adjustment on the stopper 1. -
Page 8: Feed Section
Machine Descriptions 1-2-3 Feed Section Gate Plate Up/Down Adjusting Knob This knob is used to adjust the gap between the gate plate and feed rotor to match the sheet thickness. Feed Rotor Gate Plate Positioning Knob This rotor provides vacuum to the bottom sheet in the stack This knob is used to adjust the gate and feeds it into the fold... -
Page 9: Delivery Section
Machine Descriptions 1-2-4 Delivery Section Delivery Rollers These rollers are set to match the folded sheet. Change the set position according to the fold type and sheet size. Conveyor Belts These belts drive the delivery rollers and transport the ejected sheets to the receiving tray. - Page 10 KTU-35 Cross Folder The KTU-35 Cross Folder can be used to cross-fold sheets which already have parallel folds made by the EF-354. After this unit has been installed, the EF-354 can only do parallel folding. Buckle The sheet makes the second cross fold.
-
Page 11: Blower / Vacuum Pump
Machine Descriptions 1-2-5 Blower / Vacuum Pump Combined unit used for 115 V Vacuum Regulator Pressure Regulator This regulator is used to adjust the vacuum. This regulator is used to adjust the air pressure. PRESSURE Vacuum Hose Vacuum Gauge Pressure Gauge About 30 KPa Compressed Air Hose Separate units used for 230 V... -
Page 12: Control Panel 1
Machine Descriptions 1-2-6 Control Panel 1 Mode Lamp The LED for the selected mode is lighted. When the continuous folding mode is selected, both the preset stop and preset pause LEDs go out. Mode Select Button This button is used to change the mode for continu- ous folding, preset stop, and the preset pause counter. - Page 13 Machine Descriptions 1-2-6 Control Panel 2 Pause LED This LED lights while the machine is paused, and also after a preset stop. Feed Rotor Vacuum LED This LED lights while the feed rotor is providing vacuum to sheet, and blinks when the continuous folding mode is selected.
- Page 14 This page intentionally left blank.
-
Page 15: Operating Procedures
2. Operating Procedures This chapter explains how to set and adjust each part before operation, and lists the operation procedures. Refer to this chapter when changing the sheets, fold pattern, or the operation mode. Setup Procedure 1. Check the fold pattern (p.12) (4) Number of sheet to pinch (1) Fold Type (2) Buckle Plate... -
Page 16: Check The Fold Pattern
(1) Determine the fold pattern. - The EF-354 can do parallel folding. - The EF-354 can create various folding patterns by setting the buckle plate and gap adjusting levers in various ways, although the table below shows only the general folding patterns. - Page 17 Check the Fold Pattern Buckle (4) Number of sheets (1) Fold Pattern Plate (3) Stopper Position Orien- Number tation Zig-Zag Fold (four panels) of the sheet One way to fold ( Zig-Zag Fold (five panels) One way to fold ( Short Fold Two ways to fold ( Gate Fold...
-
Page 18: Setup Details
Setup Details Setting the buckle plates 4) Pull out the buckle plate. - Each buckle plate can be pulled out by See the table in section 2-2 to determine loosening the locking knobs on the front and which buckle plates to use, and where to set rear covers. - Page 19 Setup Details Setting the gap adjusting levers - There is a hexagonal hole on the stopper locking Pinch the correct number of sheets under screw. Tighten this using an Allen wrench to set the each gap adjust lever. See column 4 in the stopper.
- Page 20 Setup Details Setting the feed table Setting the gate plate Load the sheets on the feed table. The gate plate allows the machine to feed only one sheet at a time. In order to prevent Load the sheets on the feed table and set double feeding or misfeeding, adjust the gate the feed guides to the edges of the plate properly.
- Page 21 Setup Details When loading the sheets on the feed table, be careful If the sheets are very narrow, place the rear end about the followings: stopper lengthwise. 1. Fan the sheets well before loading them. Otherwise, double feeding or misfeeding may occur. 2.
- Page 22 Setup Details Setting the delivery section This section explains how to set the delivery conveyor or the optional standing delivery. When using the delivery conveyor When using the ED-354 standing delivery Install the delivery rollers. Set the height guide. - Loosen the roller locking knob. - Set the height guide to match the height of the - Set the delivery rollers so that the distance folded sheet.
- Page 23 Setup Details 3) Move the back stop close to the main part of the machine. Use a back stop which is as tall as the folded - Push the back stop back until it reaches the sheet, or slightly shorter. Use the proper size of delivery mechanism.
-
Page 24: Adjusting The Feeding Operation
Adjusting the Feeding Operation Adjust the blower air outlets. The machine setup is complete. Next, adjust the feed section by actually 1) Adjust the air valves as shown in the figure operating the machine. below. In the feed section, adjust the blower air and the position of the vacuum in the feed rotor. - Page 25 Adjusting the Feeding Operation 2) After adjusting each blower air outlet, check Set the feeding interval time. that the sheets are separated correctly. Set the knob at position 1 to 2. 1. Temporarily remove the back stop. 2. Move the sheets to the right and left. If the sheets are separated correctly, they will be able to slide smoothly.
-
Page 26: Setting The Control Panel
Setting the Control Panel Adjusting the Production Speed and the Working Condition This section explains how to adjust the working condition. Vacuum Timing Pause Time Feed Interval The pause time can be adjusted Adjust the vacuum timing for the feed Adjust the feed interval. -
Page 27: Setting The Operation Mode
Setting the Operation Mode The machine can fold the sheets using three operation modes. Names and Functions of Operation Modes Preset Stop Continuous Folding Preset Pause The machine performs continuous The machine stops folding auto- The machine pauses for a preset matically when the feeding folding until the Sheet Feed / time when the feed counter reaches... - Page 28 Setting the Operation Mode When performing continuous folding, skip steps 1 and 2 and begin with step 3. Continuous folding can also be done in another way. Set the preset number to 0 in step 1. The machine will do continuous folding regardless of the operation mode.
-
Page 29: Start The Folding Operation
Start the Folding Operation Start and stop the folding operation using the buttons shown in the figure to the left. Start Folding Stop Folding Start the fold rollers and the delivery Stop folding. conveyor. - Press (Roller/Feed Stop button). - Press (the Roller/Feed Start button). -
Page 30: Optional Ed-354 Standing Delivery
Optional ED-354 Standing Delivery When the pause function is used with the standing delivery installed, the folded sheets are delivered in an offset stack. Standing Delivery Select the preset pause mode. Refer to page 23. Pause On/Off Adjust the knob for the Pause Time to a setting of “1” Pause Time or more. -
Page 31: Check The Fold Pattern (Ktu-35 Cross Folder)
(4) Check the number of the sheets to pinch using the gap adjusting lever. (Refer to page 36 for details.) Gap Adjustment Position between (Number of sheets) EF-354 Fold Roller and the sheets Fold Pattern Folding in KTU Position of Buckle Stopper... -
Page 32: Setting The Ktu-35 Cross Folder
Anti-Static Brush Setting Turn off the power switch. Attach the anti-static brush in the posi- tion shown in the figure below. - Remove the anti-static brush from the EF-354 folder and attach it to the KTU-35 Cross Folder. Anti-static Brush... - Page 33 Unused Stoppers Placed - When doing the cross folding in the center of a Here sheet which is delivered from the EF-354 Locking Knob folder, adjust the KTU positioning knob to 0 on the scale.
- Page 34 2-10 Setting the KTU-35 Cross Folder Sheet Guide Setting Belt Position Setting Position the belts to match the sheet size. Set the sheet guides to match the sheet size. - Move the belts so that they come close to the right and left edges of the sheet.
- Page 35 2-10 Setting the KTU-35 Cross Folder Top/Bottom Guide Settings Repercussion Prevention Brush Settings Position the repercussion prevention Set the bottom guides to support the brushes. sheets. (Set each guide in a space be- tween the belts.) - Move each brush to a position where it slightly touches one end of the sheet when the other end is hitting the stopper.
- Page 36 2-10 Setting the KTU-35 Cross Folder Hold-Down Ball Settings Scoring Setting This section explains the rules used to posi- If the sheets are not folded correctly, or the tion the balls. fold position is not consistent, use the scor- ing rolls to make the folding action more reliable.
- Page 37 2-10 Setting the KTU-35 Cross Folder Perforation Setting Install the perforation blade and the When perforating the sheet, set the perfora- lower rolls to each shaft as shown in the tion blade. drawing below. - Install the perforation blade to the scoring Remove the scoring shaft.
- Page 38 - Push the perforation guide shaft to the hole A Square Connector KTU-35 and insert the rear side of the shaft to the hole Adjust the speed between the EF-354 Perforation Guide Shaft and the KTU-35. - The speed adjuster can be adjusted the speed between the EF-354 and the KTU-35.
- Page 39 2-10 Setting the KTU-35 Cross Folder Buckle and Deflector Settings When you are not using a buckle plate to Install the buckle plate. do folding, install the deflector. 1) Lift the buckle set lever and slide the buckle - Lock the deflector using the set screw. plate under the block.
- Page 40 2-10 Setting the KTU-35 Cross Folder Knife Movement Setting Gap Adjust Lever Setting To make the knife setting, use three buttons See the table on page 27 for the correct described below. number of sheets to use when setting the gap adjusting levers.
-
Page 41: When Not Using The Ktu-35 Cross Folder
2-11 When Not Using the KTU-35 Cross Folder This section explains the set up procedures when not using the KTU-35 Cross Folder. Set the Knife ON/OFF switch. Move the delivery section brush to the side of the delivery as shown in the - Turn off the Knife ON/OFF switch. - Page 42 This page intentionally left blank.
-
Page 43: Troubleshooting
3. Troubleshooting This chapter explains how to correct problems which may occur during fold- ing. Problems During Folding Symptom Cause Remedy Reference The gap between the gate plate and the Adjust the height of the gate plate to feed rotor is too narrow. match the sheet weight. - Page 44 Problems During Folding Symptom Cause Remedy Reference The sheets stick together because of excess Fan the sheets correctly. ink. The position of the blower air outlet is not Move the air outlet position to the correct. right. [See Fig.1] The blower air is too strong. Turn the rear blower air nozzle away from the sheets to reduce the blower air.
- Page 45 Problems During Folding Symptom Cause Remedy Reference The motor overload circuit is operating. Turn off the power switch, wait to 10 The fold roller and seconds, then turn it on again. the feed rotor do not The roller speed setting is too slow. Increase the roller speed.
-
Page 46: Problems With Fold Quality
Problems With Fold Quality Symptom Cause Remedy Reference The sheet is not The stoppers are not positioned correctly. Reposition the stoppers. folded in the center. The sheet is folded The gap between the rollers is too narrow. Add a sheet when setting the gap twice. - Page 47 Problems With Fold Quality Symptom Cause Remedy Reference The sheets are The sheets are not flat because of the Straighten the sheets before beginning folded diagonally. humidity. the folding operation. The sheets are curled. Remove the curl from the sheets. The sheet is not square because it has been Use the sheets which are square.
-
Page 48: Problems Using Standing Delivery
Problems Using Standing Delivery Symptom Cause Remedy Reference The sliding backstop does not slide Loosen the slide adjusting knob. smoothly. A sheet jam occurs. The height guide is not set to match the Set the height guide to match the height height of the folded sheet. -
Page 49: Problems During Folding When Using Cross Folder
Set the speed of the KTU-35 slower. The speed in the KTU-35 is too fast. (The KTU-35 may operate faster than the EF-354 depending on the machine.) The transport belts do Turn off the power switch, wait about The motor overload protection feature not move. -
Page 50: Problems With Fold Quality When Using Cross Folder
The buckle stopper is set diagonally. the buckle stopper angle adjusting knob. Adjust the buckle roller gap on the The scoring line is diagonal. EF-354. The sheet guides are not positioned Set the sheet guides correctly to match correctly. the sheet size. -
Page 51: Other Problem
Problems With Fold Quality When Using Cross Folder Symptom Cause Remedy Reference The sheet is Increase the number of the sheets wrinkled. The buckle roller gap is too narrow. when setting gap adjusting lever 2. The sheets are not flat because of Straighten the sheets before humidity. -
Page 52: Adjusting A Clearance Between Buckle And Fold Roller
Adjusting a Clearance between Buckle and Fold Roller If you are folding a thick sheet, and the gap Adjust the screws on the installation between the buckle plate and the fold roller guides. is narrow, the first sheet can not be inserted into buckle plate and a sheet jam may - Set the amount of projection on each screw occur. -
Page 53: Removing A Sheet Jam
Removing a Sheet Jam Warning Turn off the power switch before turning the manual knob or removing the sheet. If the manual knob or fold rollers accidentally begin to turn suddenly, this can cause severe personal injury. Turn off the power switch. Turn the manual knob to eject the sheet to the delivery section. -
Page 54: Resetting The Circuit Breakers
Resetting the Circuit Breakers If one of the circuit breakers trips, correct the problem and then reset it. Check to see if the breakers are turned WARNING off. - Turn off the power before correcting the cause of the overload. Otherwise, Breaker 1: Main power you may be injured by a sudden Breaker 2: Pump power... -
Page 55: Opening The Soundproof Buckle Cover (If Installed)
3-10 Opening the Soundproof Buckle Cover (If Installed) If the optional standing delivery prevents the soundproof buckle cover from opening or closing, move the standing delivery. Soundproof Buckle Cover Press the Standing Delivery Shift button. - The standing delivery moves to operator’s side so the soundproof buckle cover can be opened or closed. -
Page 56: Removing A Sheet Jam When Using The Ktu-35
Lift the knob and pull it to the right. Warning If the EF-354 movable board knob is not lifted, the EF- 354 is locked and will not move. Turn off the power switch before turning the manual knob or removing the sheet. -
Page 57: Resetting The Motor When Using The Ktu-35
3-12 Resetting the Motor When Using the KTU-35 If a sheet jam occurs in the KTU-35, the protection circuit may operate to protect the mechanical parts from too much load. Reset the motor by following the procedure listed below. Turn off the power switch. Wait for 30 seconds. - Page 58 This page intentionally left blank.
-
Page 59: Maintenance
4. Maintenance This chapter explains how to clean some of the parts in order to keep this machine in good condition. Cleaning the Counter Sensor If paper dust sticks to the counter sensor, the Remove any dust on the sensor. sensor may not function correctly. -
Page 60: Cleaning The Vacuum Pump Filter
Cleaning the Vacuum Pump Filter The capacity of the vacuum pump can be reduced if the air inlet filter is not maintained correctly. If the vacuum is low even if it is clean, replace the cartridge every six months. Turn off the power switch on the ma- chine. -
Page 61: Cleaning The Sheet Sensor On The Optional Ktu-35
Cleaning the Sheet Sensor on the Optional KTU-35 If paper dust sticks to the sensor, the sensor may not function correctly. Clean the sensor regularly. To use compressed air to clean the sensor: 1) Turn off the power switch. 2) Open the cover and remove the center stopper. WARNING 3) Blow the compressed air onto the bottom of the sensor. -
Page 62: Replacing The Battery
Replacing the Battery If the counter does not indicate the number correctly, replace the battery. Replace the battery. - Lift the (1) part and - Push the (2) part to the direction that the arrow shows. Panel Section CR2032 Battery Life of the battery is about 10 years. -
Page 63: Installation
Installation is complete WARNING - This machine weighs about 182 kg (400 lb). Be careful when installing this machine. Otherwise, you may be hurt or the machine may be damaged. - Install the EF-354 in a suitable location with a level floor. -
Page 64: Installing The Blower And Vacuum Pump
Installing the Blower and Vacuum Pump WARNING Connect the power cord for the pump to the connector on the left on the main part Do not plug the power cord for the of the machine. machine until told to do so. Power Cord Connect the pump circuit breaker to the vacuum pump and blower. -
Page 65: Installing The Delivery Section
Installing the Delivery Section When using the standing delivery instead of Attach the delivery conveyor. the regular conveyor, see section 5-7, “In- 1) Hang the delivery conveyor on the two screws stalling the Optional Standing Delivery” on inside the end of the main part of the machine. page 67. - Page 66 Installing the Delivery Section Attach the other parts on the conveyor. 4) Mount the guides on the shaft on the main 1) Attach the delivery roller rod onto the shaft part of the machine. Tighten each guide using on the main part of the machine. the locking knob.
-
Page 67: Installing The Feed Section
Installing the Feed Section Attach the blower air hose to the nipple Attach the feed table to the main part of under the feed table. the machine. 1) Insert the blower air hose through the hole in - Hook the four slots on the feed table over the the feed table. -
Page 68: Installing The Buckle Plates
Installing the Buckle Plates Attach the soundproof covers for the Mount the buckle plates. first and third buckle plates. 1) Mount the first and third buckle plates in the 1) Attach the two cover plates to the sides of the main part of the machine. -
Page 69: Checking The Pump Rotation Direction
Checking the Pump Rotation Direction Plug the power cable into an outlet. If the unit has a pump designed for 115V, check the vacuum and air pres- sure. Pressure gauge: 40 kpa Vacuum gauge: 30 kpa WARNING Close the two side blower air valves and the rear Do not connect too many cables to one blower air valve before adjusting the air pressure using outlet. - Page 70 Checking the Pump Rotation Direction Check the direction of rotation of the pump and blower. - Check that the direction of rotation is the same as the arrow shown in the figure blower. Direction of Rotation Turn off the air. 1) Press (the Feed/Roller Stop button) on the control panel.
-
Page 71: Installing The Optional Standing Delivery
4) Install the belt support roller. Attach the standing delivery to the main - Place the roller between the end of the part of the EF-354. mounting bracket. 1) Hang the delivery on the main part of the - Slide the shaft into the roller and the machine. - Page 72 4) Attach the holding guide. Screws - Attach the guide using the knob. 2) Install the support bar. - Lock the bar using the screw. Screw Holding Guide Plug in the connector from the standing delivery to the EF-354. Screw Connector Support Bar...
-
Page 73: Installing The Optional Cross Folder
100 kg (220 lb). Use two or more EF-354 people to move the machine. Mounting Board Put off the EF-354 from the table. Install the EF-354 bracket. - Attach using the three screws. Attach the bush. Screw 1) Remove the cap. - Page 74 Install the EF-354. - Mount the EF-354 on the EF-354 mounting board. The EF-354 of Serial number 007099 or less is not - Attach using the three screws. equipped with the receptacle for small connector. These machine is not necessary to connect the small connector.
- Page 75 If you first bought the EF-354 separately, the pump mounting screws. circuit breaker is not located on the KTU-35. Reposi- tion the pump circuit breaker from the EF-354 to the KTU-35. Conveyor Bracket Remove the delivery conveyor from the EF-354 and attach it to the KTU-35.
- Page 76 Installing the Optional Cross Folder 5) Attach the delivery conveyor to the KTU-35. Connect a wire of the conveyor. - Loosen the two locking screws on the - Plug in the black connector from the conveyor conveyor bracket and fit the slots over the to the KTU-35 as shown in the figure below.
-
Page 77: Additional Information
Knife Section: Max. 235 mm (9.2") Min. 35 mm (1.4") Fold Length Buckle Section: Max. 175 mm (6.8") Min. 20 mm (0.8") Knife Moving Amount Maximum +/- 60 mm (2.3") (from the center of EF-354) Minimum Scoring Position 22 mm (0.9") Production Speed 15,000 sheets/hr. -
Page 78: Accessories
Accessories Feed Tray 1 pc First and Second Buckle Plates 1 Table 1 pc pc each 1.5 mm (0.06”) thickness Third and Fourth Buckle Plate 1 First Buckle Plate Soundproof Second Buckle Plate Soundproof pc each Cover 1 pc Cover 1 pc 2.0 mm (0.8”) thickness Static Discharge Brush... - Page 79 Accessories Back Stop 1 pc Support Plate 1 pc Rear Blower Air Nozzle 1 pc M095121-02 M072578-03 Cover Plates 2 pcs Delivery Roller Assembly 1 pc Deflectors 3 pcs M095010-10 Delivery Roller Rod 1 pc Delivery Guides 2 pcs Delivery Guide Shafts 2 pcs M095215-02 M095212-05...
- Page 80 Accessories M4-7 Mounting Screws 4 pcs M5-10 Mounting Screws 2 pcs B4-10ZP Mounting Screws4 pcs M001999-01 M002005-01 Ground Wire 1 pc 2.5 mm Ball Point Driver 1 pc 4 mm Allen Wrench 1 pc 4001439-00 4014295-00...
-
Page 81: Accessories For Optional Ed-354 Standing Delivery
Accessories for Optional ED-354 Standing Delivery Delivery Unit Drive Belt 1 pc Sliding Back Stop 2 pcs Holding Guide 1 pc M6-10 Mounting Screws 2 pcs Drive Belt Support Roller 1 set Side Guides 2 pcs M002106-01 Delivery Tray 1 pc... -
Page 82: Accessories For Optional Ktu-35 Cross Folder
Accessories for Optional KTU-35 Cross Folder Cross Folder KTU-35 Accessories Conveyor Leg 1 pc Steel Balls (4003011-00) Plastic Ball 30 pc for each machine 20 pc for each machine Support Table 1 pc Buckle Plate 1 pc Stoppers 5 pcs Small Deflector 1 pc Large Deflector... - Page 83 Mounting Screws for Mounting Mounting Screws for Support Table Set Screws for KTU-35 4 pcs Board 6 pcs 4 pcs Mounting Screws for EF-354 3 pcs Mounting Screws for Bracket 3 pcs EF-354 Bracket 1 pc KTU-35 Options Perforation Guide Shaft Perforation Blade...
-
Page 84: Index
Index Installation Back stop .............. 4 Blower and Vacuum Pump ......60 Blower Air Pressure Adjustment ......20 Buckle Plates ..........64 Buckle Plate Adjustment ........14 Delivery Section ........... 61 Buckle Stopper Adjustment ....... 14 Feed Section ..........63 Cross Folder (Optional) ........
Need help?
Do you have a question about the EF-354 and is the answer not in the manual?
Questions and answers