Table of Contents
Advertisement
Quick Links
Advertisement
Table of Contents

Related Manuals for Toshiba TDP TDP-EX20


Summary of Contents for Toshiba TDP TDP-EX20
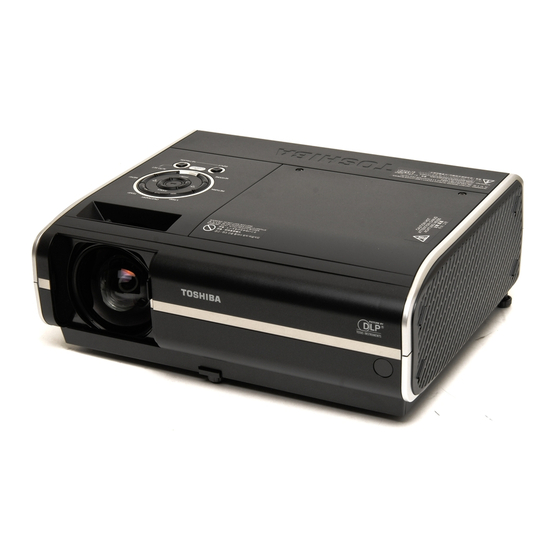
- Page 1 TDP-EX20 DATA PROJECTOR OWNER’S MANUAL...
-
Page 2: Before Using
Phone: (949) 583-3000 Changes or modifications made to this equipment, not expressly approved by Toshiba, or parties authorized by Toshiba, could void the user’s authority to operate the equipment. This Class B digital apparatus complies with Canadian ICES-003. Cet appareil... -
Page 3: Important Safety Instructions
IMPORTANT SAFETY INSTRUCTIONS CAUTION: PLEASE READ AND OBSERVE ALL WARNINGS AND INSTRUCTIONS GIVEN IN THIS OWNER'S MANUAL AND THOSE MARKED ON THE UNIT. RETAIN THIS BOOKLET FOR FUTURE REFERENCE. This unit is fully transistorized and does not contain any parts that can be repaired by the user. - Page 4 IMPORTANT SAFETY INSTRUCTIONS (Continued) 11. Lightning storms 13. Do not place or keep the projector within the reach For added protection for this product during storm, or when it of the children. is left unattended and unused for It may fall down or tip over, which long periods of time, unplug it from could result in severe injury.
- Page 5 IMPORTANT SAFETY INSTRUCTIONS (Continued) 20. If glass components, 23. Safety Check including lens and lamp, Upon completion of any service or repairs to this product, ask should break, contact your the service technician to perform dealer for repair service. safety checks to determine that This product incorporates glass the product is in proper operating components, including a lens and...
-
Page 6: Power Supply Information
Toshiba Corporation. • Toshiba bears no responsibility for information being intercepted or leaked due to the use of a wireless LAN, or any damages therefore. In the spaces provided below, record the Model and Serial No. located at the bottom of your projector. -
Page 7: Other Information
OTHER INFORMATION Copyrights Showing or transmitting commercial imaging software or broadcast or cable-broad casting programs with the purpose of other than the personal and private viewing, including modifying images using the freeze or resize functions, or displaying with the varying aspect ratio of the images, could violate the direct or indirect copyrights of the imaging software or broadcast program, etc., if done without first consulting with the copyright holder. -
Page 8: Table Of Contents
CONTENTS Before Using SAFETY PRECAUTIONS ... IMPORTANT SAFETY INSTRUCTIONS ... POWER SUPPLY INFORMATION ... IMPORTANT PRECAUTIONS ... EXEMPTION CLAUSES ... OTHER INFORMATION ... REMOTE CONTROL BATTERIES ... CONTENTS ... Preparations Checking the package contents ... Names of each part on the main unit ... Names of each part on the control panel and remote control ... -
Page 9: Preparations
Preparations Checking the package contents Please make sure that the following items are included in the box, along with the main unit. If any item is missing, please contact the store immediately where you purchased the product. (1) Remote control (2) LR03 (SIZE AAA) batteries for remote control (2) (3) CD-ROM (4) Owner’s Manual... -
Page 10: Names Of Each Part On The Control Panel And Remote Control
Names of each part on the control panel and remote control Control panel Remote Control (11) (12) (13) (14) (10) (16) (15) (23) (10) CAUTION • Do not look into the laser light (19) source of the remote control (20) or direct the laser pointer toward a person or a mirror. -
Page 11: Names Of The Terminals On The Rear Panel
Names of the terminals on the rear panel (9)(10) (11) (12) (13) (14) Name : Main Function (1) LAN terminal : Connects a network cable. (2) USB terminal : Connects a commercial USB memory. (3) COMPUTER 2 IN terminal : Input RGB signal from a computer or other source, or a component video signal (Y/P (4) AUDIO IN terminal : Input audio signals from a computer, or from video... -
Page 12: Operating A Computer Using The Remote Control
Windows Vista™ OS, that is equipped with a USB port which can support USB1.1 (The mouse remote control receiver is also supported on OS 9 or OS X for the Macintosh). However, please note that Toshiba does not guarantee the operation of all computers. Connecting a computer Connect the mouse remote control receiver (supplied) to a computer. -
Page 13: Connection
Connection Before connection • Read the owner’s manual of the device you are connecting to the projector. • Some types of computer cannot be used or connected to this projector. Check for an RGB output terminal, supported signal • Turn off the power of both devices before connecting. •... -
Page 14: Operations
Operations Turning the power on and off Connecting the power cord Insert the power cord connector into the AC IN socket of the projector. Insert the power cord plug into a wall or other power outlet. Turning the power on Open the lens cover. -
Page 15: Basic Operations
Basic operations Turn on the power. Turn on the power by following the instructions in “Turning the power on” Select the language and the lamp power (When using the first time). When the projector is used for the first time after purchase, the start menu for language (to display the menus and messages on the screen) and lamp power selection and configuration is displayed in English. -
Page 16: Using Handy Features
Basic operations (Continued) Notes • Note that lamp characteristics may rarely cause the brightness to fluctuate slightly. • A lamp is consumable item. If used for extended periods, images will appear dark, and the lamp could burn out. This is characteristic of a lamp, and is not malfunction. (The lifetime of the lamp depends on conditions of use.) ®... -
Page 17: Zooming Out The Images
Using handy features (Continued) Zooming out the images This projector is provided with the digital zoom (electric zoom: 100 - 62%). (Note that the display, if digitally zoomed out, may suffer from some degradation.) Press the ZOOM – button. Each time the ZOOM – button is pressed, the image is reduced in size. -
Page 18: Cutting Off The Picture And Sound Temporarily (Mute)
Using handy features (Continued) Cutting off the picture and sound temporarily (Mute) When you want to project the images of another projector, overhead projector, etc. temporarily, this projector’s images and sound can be turned off. Press the remote control’s MUTE button. The picture and sound are cut off. -
Page 19: Using The Menus 1
Using handy features (Continued) How to set password (from [Off] to [On]) Select [Password] in the Default setting 2 menu and press the button. Select [Password setting] in the password registration, setting menu, and press the button. Select [On]. Select [OK] and press the button. -
Page 20: The Image Adjustment Menu
Using the menus 1 (Continued) The image adjustment menu Use this menu to set or adjust image-related items. Items that can be set or adjusted are marked with “Yes”, and those that cannot are marked with “No”. (When an item is masked, it indicates that you cannot select for the current input.) Item Description... -
Page 21: The Display Setting Menu
TOSHIBA is set for [Logo] by factory setting. If user’s logo has been registered, it is displayed when [Logo] is set for... -
Page 22: The Default Setting Menu
Using the menus 1 (Continued) <Logo registration> How to register user logo Project a picture to register. Select [User logo] in the Display setting menu, and press the button. Select <Logo registration> from the displayed menu list and press button. button. -
Page 23: Displaying Information (Status Display)
Using the menus 1 (Continued) Default setting 2 menu Item Description Projection Sets projection mode in accordance with Placement Style. mode (Standard) (Rear) Fan mode Sets the cooling fan speed. Remote control When 2 projectors are used and controlled by the remote control respectively, this menu sets the code for the projector and the remote control. -
Page 24: Before Connecting Via Network
Ad hoc communication mode the projector is in range of the computer’s wireless signals. Toshiba does not guarantee the converage of the radio wave in the form of figures. The converage varies depending on the performance of each wireless LAN equipment, existence of obstacles or other wireless LAN equipment used by nearby working groups, etc. -
Page 25: How To Use The Usb Terminal
Backing up data Toshiba recommends that you back up the data saved in the USB memory onto your computer and the like before use. (Toshiba assumes no liability for losses incurred by data lost through the use of this projector.) Supported files... -
Page 26: Using The Menus 2
Using the menus 2 Setup using the Setting display (2) Projector settings (Be sure to read this subsection.) Using the factory settings as-is may suffer security damage, so be sure to change the projector settings. 1. Press the NETWORK button and press the MENU button twice The Setting display (2) is displayed. - Page 27 Using the menus 2 (Continued) Category Description Item Remote Specify whether to allow the remote control of the projector from a computer. Appli- cation control Allowed Presentation Allowed: The projector always accepts remote commands from a computer. Presentation: Accepts only the remote commands from the computer by which an image is projected on the projector (Update automatically) using Network Utility.
- Page 28 Using the menus 2 (Continued) • [Security for wireless LAN settings] <Network authentication> Set the authentication to enhance network security. Select a method identical to that of wireless LAN terminal to be connected with. <Encryption> Set Encryption according to the setting you made for Network authentication, as follows.
-
Page 29: Computer Settings
Using the menus 2 (Continued) Note • If you select [Network Projector] in the Setting display (2) menu, the same items in [Network Utility] will be displayed except for the following 2 items. [Easy Connect (USB memory)] feature is not available. In the item [Application], [Password] and [Disconnect] are available as follows. -
Page 30: Setting Slideshow Options
Using the menus 2 (Continued) Precautions • When purchased, <PJLink authentication> is set to [Off] and <Password> is not set by factory setting. You are recommended to make authentication setting as soon as possible. • If you forget a passwork, set it again. •... -
Page 31: Checking The Projector Status
Using the menus 2 (Continued) Common • [Play icon] The slideshow icon can be displayed. • Standard The projector handles the slideshow icon as follows depending on the “On/Off” setting of Icon on the projector’s menu. Icon On: The projector displays the icon upon the start of playing a slide show and turns it off after a few seconds. -
Page 32: Installing The Applications
JPEG Conversion Tool → Operations p.78 How to uninstall Uninstall [Toshiba Data Projector] and [Jpeg Conversion Tool] programs by using a program removal utility in the [Control Panel]. Notes XP and Windows Vista™ (Ultimate, • Your computer screen may temporarily go out during installation, but it is not an error. -
Page 33: Using The Network Utility
Using the Network Utility Displaying a computer’s screen via the projector Launch the Network Utility software application. When the Network Utility launches, the Screen Image transmission mode window appears on the computer screen. To switch to the Screen Image transmission mode window from another mode, click on the Screen Image icon Select Transmission mode. -
Page 34: Displaying A Jpeg Image Saved On A Computer Via The Projector
Using the Network Utility (Continued) • To transmit sound, press the button then launch the application that plays the contents including the sound. When you operate the projector using Windows Vista™, “Switching audio play device” window will be displayed after pressing the start button of Network Utility. - Page 35 Using the Network Utility (Continued) • Autostart Check the Start playing the file automatically when starting transmission checkbox to automatically start playing the video file when connecting to the projector. • Repeat Check the Play repeatedly after the end of playing checkbox to automatically repeat from the beginning when the file reaches the end.
-
Page 36: Easy Connect Utility
Using the Network Utility (Continued) Easy Connect utility This feature allows users to easily connect the projector to a computer over wireless networks, without making Wireless LAN settings via Network Utility. Launch the Network Utility software application and click the Tool button the Wireless LAN Settings Utility dialog box. - Page 37 Using the Network Utility (Continued) 2) Modifying the computer settings using the projector settings • Setting on the projector Turn the projector power on. Switch the input to Network. Press the MENU button twice, then select Easy Connect (USB memory) in Network Utility settings from the Setting display (2) menu and press the button.
-
Page 38: Operating The Projector
Using the Network Utility (Continued) Operating the projector This function can be used with any projector input. Launch the Network Utility software application. The Screen Image transmission mode window appears on the computer’s screen. Click on the Remote Control button. The Remote Control window appears. - Page 39 Projecting images stored in a USB memory (Continued) Plug a USB memory. Plug a USB memory according to the procedure in “Connecting USB device” p.48 The projector starts loading data from the USB memory and displays a thumbnail list on the screen.
-
Page 40: How To Use The Jpeg Conversion Tool
How to use the JPEG Conversion Tool The JPEG Conversion Tool converts JPEG files not supported by the projector, image ® ® files in other formats, Microsoft PowerPoint files, and the like into JPEG files supported by the projector. The JPEG files converted with this tool can be displayed by sending them using the wireless LAN p.66 , or saving them on a USB memory. -
Page 41: Making A Presentation With Converted Jpeg Files
How to use the JPEG Conversion Tool (Continued) (9) (a) In the JPEG Conversion Tool window, click on the Conversion button. (b) The resolution selection dialog box appears. Select a desired resolution and click on the OK button. (c) A confirmation dialog box opens. Click Yes. The computer begins to convert the file. -
Page 42: Setting Up The Projector Using A Web Browser
Status Display: Features: to display p.61 Top: TOSHIBA Projector Site: The browser will display the home page at http://multimedia. Projector name Projector ID Make settings for the Network or USB memory input menu. Verify the projector state. Shows the functions available with the Network or USB memory. -
Page 43: Maintenance
Setting up the projector using a Web browser (Continued) Details on major items • Settings When Browser authentication has been set to On, access to the setup page requires the input of the password. Wireless LAN: The items displayed on the screen can be set. Entering individual items and press the Execute button to update their setting. -
Page 44: Lamp Replacement
• If the projector is mounted on the ceiling, it is recommended to use your Toshiba dealership when the lamp has to be exchanged. Uncovering the lamp while the projector is mounted on a ceiling may lead to a danger of damage from falling pieces of glass if the lamp is broken. -
Page 45: Lens And Main Unit Cleaning
Lamp replacement (Continued) Notes and Precautions • The [Lamp time] item in the Status display menu indicates the time of lamp use (as a rough guide) p.45 • Please replace the lamp after 2000 hours of use with [Lamp power] in the Default setting 2 menu set to [Standard], and 3000 hours of use with [Lamp power] in the Default setting 2 menu set to [Low]. -
Page 46: Others
Others Trouble indications The indicator lights to inform you of internal abnormalities. No power ⇒ Problem with projector (Off) • Unplug the power cord, and contact your dealer. Lamp went out during use, or won’t come on ⇒ Lamp temperature is high so that it is difficult to turn on, the (Red lit) lifetime of the lamp has ended or the projector is malfunctioning. -
Page 47: Specifications
Before calling service personnel (Continued) If This Happens Check Remote control • Is the remote control code identical with the projector's code? doesn’t work • Are the remote control’s batteries drained? • Are the batteries inserted into the remote control correctly? •... - Page 48 Specifications (Continued) List of supported signals (RGB signals) This projector supports the following RGB signals. Note, however, that depending on the computer model, the screen may show flicker or streaking. Please adjust the projector if this happens. Refresh rate Resolution Mode (Hz) 720 x 400...
- Page 49 Specifications (Continued) CONTROL terminal Pin assignment Pin No. Signal Name D sub 9 pin connector Interface format 1. Communication method RS-232C, 9600bps, No Parity, Data Length: 8 bits; Stop Bit Length: 1 bit 2. Communication format STX (02h) Only 1 command valid per communication. 3.