Advertisement
Quick Links
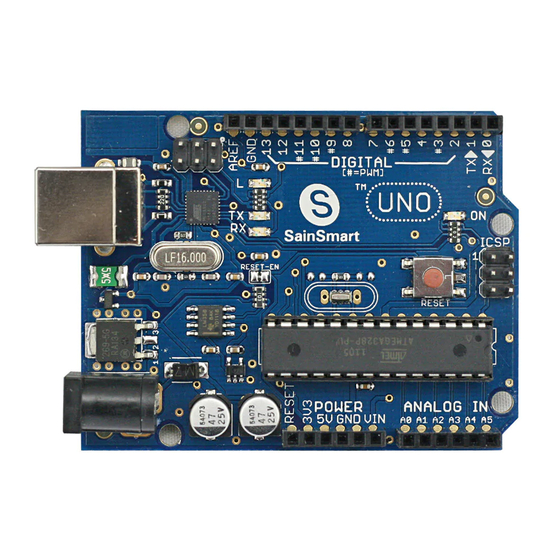
SainSmart UNO R3 Starter Kit For Arduino
Arduino Introduction
Overview
What is Arduino?
Arduino is a tool for making computers that can sense and control more of the physical world
than your desktop computer. It's an open-source physical computing platform based on a simple
microcontroller board, and a development environment for writing software for the board.
Arduino can be used to develop interactive objects, taking inputs from a variety of switches or
sensors, and controlling a variety of lights, motors, and other physical outputs. Arduino projects
can be stand-alone, or they can be communicated with software running on your computer (e.g.
Flash, Processing, MaxMSP.) The boards can be assembled by hand or purchased preassembled;
the open-source IDE can be downloaded for free.
The Arduino programming language is an implementation of Wiring, a similar physical computing
platform, which is based on the Processing multimedia programming environment.
Feature
Schematic design of the open source development interface free download, and also
according to the needs of their own changes
Download the program is simple and convenient.
Simply with the sensor, a wide range of electronic components connection (such as: LED
light, buzzer, keypad, photoresistor, etc.), make all sorts of interesting things.
Using the high-speed micro-processing controller (ATMEGA328).
The development of language and development environment is very simple, easy to
understand, very suitable for beginners to learn.
Performance
Digital I/O 0~13.
Analog I/O 0~5.( R3 is 0~7 )
Suppor
Input voltage: when connected to the USB without external power supply or external 5 v
output and external power input.
Atmel Atmega328 micro-processing controller. Because of its many supporters, the
company has developed 32-
Arduino size: width of 70 mm X high 54 mm.
Special Port
1.
VIN. The input voltage to the Arduino board when it's using an external power source (as
Advertisement

Related Manuals for SainSmart UNO R3

Summary of Contents for SainSmart UNO R3
- Page 1 SainSmart UNO R3 Starter Kit For Arduino Arduino Introduction Overview What is Arduino? Arduino is a tool for making computers that can sense and control more of the physical world than your desktop computer. It's an open-source physical computing platform based on a simple microcontroller board, and a development environment for writing software for the board.
- Page 2 The Level should be changed, like the SD card, Bluetooth module and so on. Sainsmart UNO R3 can work at 3.3V voltage by switching on the button. At this time, IO port is 3.3V and it can work with 3.3V Level module. (R3 can directly use the electronic building...
- Page 3 SainSmart UNO R3 Starter Kit For Arduino Arduino C Grammar Arduino grammar is built on the basis of C/C + +, in fact is also the basic C grammar, Arduino grammar not only put some related parameters Settings are function change, we have no need to understand his bottom, let us to know AVR micro control unit (MCU) friend can also easy to fit in.
- Page 4 SainSmart UNO R3 Starter Kit For Arduino >= && Data type boolean char byte unsigned int long unsigned long float double string array void Constant HIGH | LOW Said digital IO port level, HIGH Said high level(1), LOW Said low electric flat(0).
- Page 5 SainSmart UNO R3 Starter Kit For Arduino Analog I/O int analogRead(pin) pin 0~5. analogWrite(pin, value) pin 3, 5, 6, 9, 10, 11, value is 0 to 255 Time delay(ms)Pauses the program for the amount of time (in miliseconds) specified as parameter.
-
Page 6: Chapter 1 Hello World
SainSmart UNO R3 Starter Kit For Arduino Chapter 1 Hello World! In this chapter, we will learn use Arduino IDE serial interface tools to show the contents that we want to display in the computer. Example code: void setup() Serial.begin(9600);// opens serial port, sets data rate to 9600 bps Serial.println("Hello World!");... - Page 7 SainSmart UNO R3 Starter Kit For Arduino...
-
Page 8: Chapter 2 Blink Led
SainSmart UNO R3 Starter Kit For Arduino Chapter 2 Blink LED Small LED lamp experiment is the basis of comparison of the experimental one, this time we use the motherboard comes with 13 feet of LED lights to complete the experiment, the experimental equipment we need is the Arduino which each experiment must have and USB download cable. - Page 9 SainSmart UNO R3 Starter Kit For Arduino pinMode(ledPin, OUTPUT) ;//define interface is output } void loop() { digitalWrite(ledPin, HIGH) ; //light up led lamp delay(1000) ; //delay 1s digitalWrite(ledPin, LOW) ; //go out led lamp delay(1000) ; // delay 1s }...
-
Page 10: Chapter3 Led Blink
SainSmart UNO R3 Starter Kit For Arduino Chapter3 LED Blink light emitting diode What’s light emitting diode? The light emitting diode referred to as LED. By gallium (Ga) and arsenic (AS) and phosphorus (P) made of a compound of the diode, when the electron and hole recombination can radiate visible light, and thus can be used to prepare a light-emitting diode in the circuit and the instrument as the indicator, or the composition of the text or digital display. - Page 11 SainSmart UNO R3 Starter Kit For Arduino Example code: int ledPin=8; //set IO pin of LED in control void setup() pinMode(ledPin,OUTPUT);//set digital pin IO is OUTPUT void loop() digitalWrite(ledPin,HIGH); //set PIN8 is HIGH , about 5V delay(1000); //delay 1000ms, 1000ms = 1s digitalWrite(ledPin,LOW);...
- Page 12 SainSmart UNO R3 Starter Kit For Arduino Chapter4 PWM What’s PWM? Pulse Width Modulation, or PWM, is a technique for getting analog results with digital means. Digital control is used to create a square wave, a signal switched between on and off. This on-off pattern can simulate voltages in between full on (5 Volts) and off (0 Volts) by changing the portion of the time the signal spends on versus the time that the signal spends off.
- Page 13 SainSmart UNO R3 Starter Kit For Arduino running at Vcc = 5 volts. In that case, a value of 255 will also be 5 volts. We can then easily convert the desired voltage to the digital value needed using simple division. We first divide the voltage we want by the 5 volts maximum.
- Page 14 SainSmart UNO R3 Starter Kit For Arduino Example code: int brightness = 0; //define original value of brightness, the value is brightness of LED. int fadeAmount = 5; //define fadeAmount,the value is the amount of brightness variations’ change. void setup() { pinMode(9, OUTPUT);//...
- Page 15 SainSmart UNO R3 Starter Kit For Arduino Chapter5 Advertising LED Experiment component: LED lamp: 6 220Ω resistors: 6 Breadboard & Jumper wires Connect your circuit as the below diagram.
- Page 16 SainSmart UNO R3 Starter Kit For Arduino Example code Program code is in the advertising lights program folder. Double-click to open and you will see a led2 folder, open it, you will find out a led2.pde file. Double-click the icon to open it. Then you will see that it is the arduino programming software window with the experimental program code.
- Page 17 SainSmart UNO R3 Starter Kit For Arduino k=1;//set k is 1 for(j=3;j>=1;j--) digitalWrite(j,HIGH);//light up digitalWrite(j+k,HIGH);//light up delay(400);//delay 400ms k +=2;//k plus 2 k=5;//set k is 5 for(j=1;j<=3;j++) digitalWrite(j,LOW);//go out digitalWrite(j+k,LOW);//go out delay(400);//delay 400ms k -=2;//k sub 2 // led lamp run the example 3 program void style_3(void) unsigned char j,k;//led lamp run the example 3 program...
- Page 18 SainSmart UNO R3 Starter Kit For Arduino unsigned char i; for(i=1;i<=6;i++)//set 1~6 pin output in turn pinMode(i,OUTPUT);//set i pin output void loop() style_1();//example 1 flash();//blink style_2();//example 2 flash();//blink style_3();//example 3 flash();//blink Example code used: for(i=1;i<=6;i++)//set 1~6 pin output in turn pinMode(i,OUTPUT);//set i pin output...
-
Page 19: Chapter6 Traffic Light
SainSmart UNO R3 Starter Kit For Arduino Chapter6 Traffic light Experiment component: Red , Green , Yellow led lamp: 3 220Ω resistor: 3 Breadboard & Jumper wires Connect your circuit as the below diagram. Example code: Program code is in the traffic lights program folder. Double-click to open and you will find out a trafficLed.pde file. - Page 20 SainSmart UNO R3 Starter Kit For Arduino digitalWrite(ledyellow,HIGH);//light up yellow lamp delay(200);//delay 200 ms// digitalWrite(ledyellow,LOW);//go out digitalWrite(ledgreen,HIGH);//light up green lamp delay(1000);//delay 1000 ms digitalWrite(ledgreen,LOW);//go out...
- Page 21 SainSmart UNO R3 Starter Kit For Arduino Chapter7 Buzzer What’s buzzer? The buzzer is one integrated electronic transducers, DC voltage supply, widely used in computers, printers, copiers, alarm, electronic toys, automotive electronic equipment, telephones, timers and other electronic products for sound devices.
- Page 22 SainSmart UNO R3 Starter Kit For Arduino of 8 mm. As facing up to two buzzers’ pin County it can be seen that there are a green circuit board is passive buzzer, no circuit board using vinyl enclosed one is active buzzer. Further determine the active and passive buzzer multimeter resistance profile Rxl file test: use a black pen touch buzzer’s pin "+", red pen touch in the other pin back and forth, If you feel a click,...
- Page 23 SainSmart UNO R3 Starter Kit For Arduino Experiment component: Buzzer : 1 Breadboard & Jumper wires Connect your circuit as the below diagram. Example code int buzzer=7;//set buzzer’s digital pin IO in control void setup() pinMode(buzzer,OUTPUT);//set digital pin IO OUTPUT void loop() unsigned char i,j;//define i j...
- Page 24 SainSmart UNO R3 Starter Kit For Arduino digitalWrite(buzzer,HIGH);//sound delay(1);//delay 1ms digitalWrite(buzzer,LOW);//mute delay(1);//delay 1ms for(i=0;i<100;i++)// Output the other frequency of sound digitalWrite(buzzer,HIGH);//sound delay(2);//delay 2ms digitalWrite(buzzer,LOW);//mute delay(2);//delay 2ms while loops Description while loops will loop continuously, and infinitely, until the expression inside the parenthesis, () becomes false.
-
Page 25: Chapter8 Tilt Switch
SainSmart UNO R3 Starter Kit For Arduino Chapter8 Tilt switch What’s Tilt Sensor? The tilt sensor is a component that can detect the tilting of an object. However it is only the equivalent to a pushbutton activated through a different physical mechanism. This type of sensor is the environmental-friendly version of a mercury-switch. - Page 26 SainSmart UNO R3 Starter Kit For Arduino Example code void setup() pinMode(8,OUTPUT);//set pin8 output void loop() int i;//define i while(1)
- Page 27 SainSmart UNO R3 Starter Kit For Arduino i=analogRead(5);//read voltage values of pin5 if(i>200)//if more than 512(2.5V) digitalWrite(8,HIGH);//light up led lamp else digitalWrite(8,LOW);//go out led lamp...
- Page 28 SainSmart UNO R3 Starter Kit For Arduino Chapter9 Potentiometer What’s Analog Pins? A/D converter The Atmega168 contains an onboard 6 channel analog-to-digital (A/D) converter. The converter has 10 bit resolution, returning integers from 0 to 1023. While the main function of the analog pins for most Arduino users is to read analog sensors, the analog pins also have all the functionality of general purpose input/output (GPIO) pins (the same as digital pins 0 - 13).
- Page 29 SainSmart UNO R3 Starter Kit For Arduino It takes about 100 microseconds (0.0001 s) to read an analog input, so the maximum reading rate is about 10,000 times a second. Syntax analogRead(pin) Parameters pin: the number of the analog input pin to read from (0 to 5 on most boards, 0 to 7 on the Mini and Nano, 0 to 15 on the Mega) ...
- Page 30 SainSmart UNO R3 Starter Kit For Arduino int potpin = 0 ; //define analog pin0 int ledpin = 13 ; //define analog pin13 int val = 0 ; //set val is0. void setup() pinMode(ledpin,OUTPUT);//set analog pin13 output Serial.begin(9600);//set baud rate 9600 void loop() digitalWrite(ledpin,HIGH);//light up led in pin13...
- Page 31 SainSmart UNO R3 Starter Kit For Arduino Chapter10 Photoresistor What’s photoresistor? Photoresistor, also known as light pipes, common production materials is cadmium sulfide, There are also selenium, aluminum sulfide, lead sulfide and bismuth sulfide material. these production materials having characteristics in light of a specific wavelength, its resistance decreases rapidly.
- Page 32 SainSmart UNO R3 Starter Kit For Arduino Example code: int photocellPin = 2; //define photocellsh=2, read the value of voltage. int ledPin = 12; //define ledPin12 is the output port of led’s level. int val = 0; //define original of val.
- Page 33 SainSmart UNO R3 Starter Kit For Arduino digitalWrite(ledPin, HIGH); //when the value of val is less than 512(2.5V), light up led lamp else{ digitalWrite(ledPin, LOW);...
- Page 34 SainSmart UNO R3 Starter Kit For Arduino Chapter11 LM35 temperature sensor Temperature sensor What’s temperature sensor? The temperature sensor is that use substances of various physical properties with temperature variation of the sensor and let the temperature converted to electricity. These regularly change the physical properties of the main body temperature sensor is a core part of the temperature measuring instruments, and a wide variety.
- Page 35 SainSmart UNO R3 Starter Kit For Arduino Out can be seen from experimental cartridge of the temperature sensor, temperature sensor side is flat, and the other side is semicircular. Flat face of our own, the leftmost VCC pin (connected to +5 v), the middle of the GND pin VOUT (voltage value output pin, then the analog pins on the board), and the rightmost pin (connected board GND).
- Page 36 SainSmart UNO R3 Starter Kit For Arduino void setup() Serial.begin(9600); void loop() int val; int dat; val = analogRead(potPin); dat = (125*val)>>8 ; // Temperature calculation formula Serial.print("Tep : ") ; //print “Tep” means temperature Serial.print(dat) ; // print the value of dat Serial.println("C");...
- Page 37 SainSmart UNO R3 Starter Kit For Arduino Chapter12 Nixie tube Experiment component digital tube x1 220 Ω resistance x4 Breadboard & jumper wire Connect your circuit as the below diagram.
- Page 38 SainSmart UNO R3 Starter Kit For Arduino Example code int a=7; int b=6; int c=5; int d=11; int e=10; int f=8; int g=9; int dp=4; //display number 1 void digital_1(void) unsigned char j; digitalWrite(c,LOW);// pin5 low, light up c digitalWrite(b,LOW);//light up b for(j=7;j<=11;j++)//go out else...
- Page 39 SainSmart UNO R3 Starter Kit For Arduino // display number4 void digital_4(void) digitalWrite(c,LOW); digitalWrite(b,LOW); digitalWrite(f,LOW); digitalWrite(g,LOW); digitalWrite(dp,HIGH); digitalWrite(a,HIGH); digitalWrite(e,HIGH); digitalWrite(d,HIGH); // display number5 void digital_5(void) unsigned char j; for(j=7;j<=9;j++) digitalWrite(j,LOW); digitalWrite(c,LOW); digitalWrite(d,LOW); digitalWrite(dp,HIGH); digitalWrite(b,HIGH); digitalWrite(e,HIGH); // display number6 void digital_6(void) unsigned char j;...
- Page 40 SainSmart UNO R3 Starter Kit For Arduino // display number8 void digital_8(void) unsigned char j; for(j=5;j<=11;j++) digitalWrite(j,LOW); digitalWrite(dp,HIGH); void setup() int i;//define i for(i=4;i<=11;i++) pinMode(i,OUTPUT);//set pin4~pin11 output void loop() while(1) digital_1();//number 1 delay(2000);//delay 2s digital_2(); delay(2000); digital_3(); delay(2000); digital_4(); delay(2000);...
- Page 41 SainSmart UNO R3 Starter Kit For Arduino Chapter13 4-bit Nixie tube What’s digital tube? Digital tube is one kind semiconductor light emitting device. Their basic unit is light emitting diode. Digital tube is divided into 7 segment digital tube and 8 digital tube by the number of segments, 8 digital tube has one more light-emitting diode unit (a decimal point display) than 7 segment digital tube;...
- Page 42 SainSmart UNO R3 Starter Kit For Arduino Working principle Each segment of the digital tube is make up of the light emitting diode, and so when used with the light emitting diode, it should connect with the current-limiting resistor as well, if not the excessive current may burn light emitting diode.
- Page 43 SainSmart UNO R3 Starter Kit For Arduino Digital tube display number Experiment component 4-bit digital tube x1 220 Ω resistance x4 Breadboard & jumper wire Connection Driven digital tube current limiting resistor is certainly indispensable, there are 2 ways of limiting resistor connection.
- Page 44 SainSmart UNO R3 Starter Kit For Arduino Refer to figure below wiring for the 5643S...
- Page 45 SainSmart UNO R3 Starter Kit For Arduino Example code This is a simple stopwatch. Its accuracy is not very high. You need to fine-tune the parameters. //set anode interface int a = 1; int b = 2; int c = 3;...
- Page 46 SainSmart UNO R3 Starter Kit For Arduino pinMode(a, OUTPUT); pinMode(b, OUTPUT); pinMode(c, OUTPUT); pinMode(d, OUTPUT); pinMode(e, OUTPUT); pinMode(f, OUTPUT); pinMode(g, OUTPUT); pinMode(p, OUTPUT); void loop() clearLEDs(); pickDigit(1); pickNumber((n/x/1000)%10); delayMicroseconds(del); clearLEDs(); pickDigit(2); pickNumber((n/x/100)%10); delayMicroseconds(del); clearLEDs(); pickDigit(3); dispDec(3); pickNumber((n/x/10)%10); delayMicroseconds(del); clearLEDs(); pickDigit(4);...
- Page 47 SainSmart UNO R3 Starter Kit For Arduino digitalWrite(d2, HIGH); digitalWrite(d3, HIGH); digitalWrite(d4, HIGH); switch(x) case 1: digitalWrite(d1, LOW); break; case 2: digitalWrite(d2, LOW); break; case 3: digitalWrite(d3, LOW); break; default: digitalWrite(d4, LOW); break; void pickNumber(int x) //define pickNumber(x), Its role is to show digital x...
- Page 48 SainSmart UNO R3 Starter Kit For Arduino six(); break; case 7: seven(); break; case 8: eight(); break; case 9: nine(); break; void dispDec(int x) // Set to open the decimal point digitalWrite(p, LOW); void clearLEDs() //clear the screen digitalWrite(a, LOW);...
- Page 49 SainSmart UNO R3 Starter Kit For Arduino digitalWrite(a, LOW); digitalWrite(b, HIGH); digitalWrite(c, HIGH); digitalWrite(d, LOW); digitalWrite(e, LOW); digitalWrite(f, LOW); digitalWrite(g, LOW); void two() digitalWrite(a, HIGH); digitalWrite(b, HIGH); digitalWrite(c, LOW); digitalWrite(d, HIGH); digitalWrite(e, HIGH); digitalWrite(f, LOW); digitalWrite(g, HIGH); void three() digitalWrite(a, HIGH);...
- Page 50 SainSmart UNO R3 Starter Kit For Arduino digitalWrite(a, HIGH); digitalWrite(b, LOW); digitalWrite(c, HIGH); digitalWrite(d, HIGH); digitalWrite(e, LOW); digitalWrite(f, HIGH); digitalWrite(g, HIGH); void six() digitalWrite(a, HIGH); digitalWrite(b, LOW); digitalWrite(c, HIGH); digitalWrite(d, HIGH); digitalWrite(e, HIGH); digitalWrite(f, HIGH); digitalWrite(g, HIGH); void seven() digitalWrite(a, HIGH);...
- Page 51 SainSmart UNO R3 Starter Kit For Arduino digitalWrite(a, HIGH); digitalWrite(b, HIGH); digitalWrite(c, HIGH); digitalWrite(d, HIGH); digitalWrite(e, LOW); digitalWrite(f, HIGH); digitalWrite(g, HIGH); In front of setup () defined range of digital display routines, the definition of these subroutines can be easy to use in the loop (), just write the name of the subroutine and it will.
- Page 52 SainSmart UNO R3 Starter Kit For Arduino Chapter14 74HC595 What’s 74HC595? 74HC595 with 8-bit register and a memory, and has three-state output function. we use it to control 8 LED lights. Why do we choose 74HC595? If we control eight small lights just with Arduino, how many its I / O will be occupied? The answer is eight.
- Page 53 SainSmart UNO R3 Starter Kit For Arduino This schematic seems are complex,after analysis and combined with reference we will find it very simple.
- Page 54 SainSmart UNO R3 Starter Kit For Arduino Example code const int ON = HIGH ; const int OFF = LOW ; int latchPin = 5; //connect 595 ’ pin 12 int clockPin = 4; //connect 595 ’s pin11 int dataPin = 2;...
- Page 55 SainSmart UNO R3 Starter Kit For Arduino digitalWrite(dataPin,LOW); digitalWrite(clockPin,HIGH); delay(1); digitalWrite(clockPin,LOW); digitalWrite(latchPin,HIGH); int bits[] = {B00000001,B00000010,B00000100,B00001000,B00010000,B00100000, B01000000,B10000000}; int masks[] = {B11111110,B11111101,B11111011,B11110111,B11101111,B11011111, B10111111,B01111111}; void changeLED(int led,int state) ledState = ledState & masks[led]; if(state == ON){ ledState = ledState|bits[led]; } updateLEDs(ledState); Downloaded the program into the control panel, we can see the wonderful scene of small lights flashing.
- Page 56 SainSmart UNO R3 Starter Kit For Arduino Result We will see small red lights and green lights flashing take turns. This is the end of this chapter’s experiment, we hope that you could enjoy it and create more interactive works.
- Page 57 SainSmart UNO R3 Starter Kit For Arduino Chapter15 8x8 matrix LEDs The following figure is a matrix LED internal schematic: Wiring diagram: One LED of LED 8X8 matrix is lit as follows:...
- Page 58 SainSmart UNO R3 Starter Kit For Arduino Sample code: //the pin to control ROW const int row1 = 2; // the number of the row pin 9 const int row2 = 3; // the number of the row pin 14 const int row3 = 4;...
- Page 59 SainSmart UNO R3 Starter Kit For Arduino for(i=2;i<18;i++) { digitalWrite(i, LOW); digitalWrite(row5, LOW); digitalWrite(row6, LOW); digitalWrite(row7, LOW); digitalWrite(row8, LOW); void loop(){ int i; //the row # 1 and col # 1 of the LEDs turn on digitalWrite(row1, HIGH); digitalWrite(row2, LOW);...
- Page 60 SainSmart UNO R3 Starter Kit For Arduino The code in the folder - "8x8 the matrix LEDs experimental", can be used as a reference, made more exciting experiments.
-
Page 61: Chapter16 Infrared Remote Control
SainSmart UNO R3 Starter Kit For Arduino Chapter16 Infrared remote control Infrared receiving head What’s Infrared receiving head? Infrared remote control signals sent a series of binary pulse code. In order to make it from other infrared signal interference during wireless transmission, typically modulated it on a particular carrier frequency, and then emitted it by the infrared-emitting diode. - Page 62 SainSmart UNO R3 Starter Kit For Arduino Infrared remote control experiment Experiment component 1. IR remote control x1 Infrared receiving head x1 3. Buzzer x1 4. 220 Ω resistance x1 5. Breadboard & jumper wires Experiment principle If you want to decode remote control, you must understand the coding system of the remote controller first.
- Page 63 SainSmart UNO R3 Starter Kit For Arduino Address and command transfer twice. The second time all bits are inverted, can be used for use in the received message recognized. The total transmission time is constant, because the duplication of every point of its length negated. If you're not interested, you can ignore this...
- Page 64 SainSmart UNO R3 Starter Kit For Arduino Example code #define IR_IN 8 // infrared receive int Pulse_Width = 0;//storage pulse width int ir_code = 0x00;// user code value char adrL_code = 0x00;//Command code char adrH_code = 0x00;// Command code base minus one's complement void timer1_init(void)//timer initialization function TCCR1A = 0X00;...
- Page 65 SainSmart UNO R3 Starter Kit For Arduino Pulse_Width=TCNT1; TCNT1=0; if(Pulse_Width>=7&&Pulse_Width<=10)//high level 560us return 0; else if(Pulse_Width>=25&&Pulse_Width<=27) //high level 1.7ms return 1; return -1; void pulse_deal()//Receiving address code and command code pulse function int i; int j; ir_code=0x00;// clear adrL_code=0x00;// clear adrH_code=0x00;// clear...
- Page 66 SainSmart UNO R3 Starter Kit For Arduino ir_code=0x00ff;// user code value adrL_code=0x00;// a byte value before Key code adrH_code=0x00;// a byte value after Key code return; If high level can’t last for more than 100 ms TCNT1=0X00; while(!(digitalRead(IR_IN))); //if low wait Pulse_Width=TCNT1;...
- Page 67 SainSmart UNO R3 Starter Kit For Arduino while(1) remote_decode(); // decode remote_deal(); // Executive decoding results...
Need help?
Do you have a question about the UNO R3 and is the answer not in the manual?
Questions and answers