Table of Contents
Advertisement
Quick Links
Advertisement
Table of Contents

Summary of Contents for LEOMO TYPE-S
- Page 1 TYPE-S Operations and Safety Manual LEM-TS1 VERSION 1.0...
-
Page 2: Table Of Contents
Overview Introduction ............................4 Features ..............................4 Parts and Optional Accessories ......................5 Parts and Controls of the TYPE-S ......................8 Getting Started Charging Devices ........................... 9 Turning the TYPE-S On ........................12 Making the Initial Settings ........................13 TYPE-S Home Screen ......................... 14 Starting the LEOMO App ........................ - Page 3 Technical Information Specifications of the TYPE-S ....................... 69 Specifications of the Optional LEOMO Motion Sensors ............... 72 Specifications of the Optional Power Mount ..................73 Limitation of Liability ..........................74 Certification Information ........................75...
-
Page 4: Introduction
TYPE-S will deliver. Combining the latest in technology, biomechanics, and cycling form analysis, the TYPE-S brings training, coaching, and injury prevention to a whole new level, inside and outside the lab. -
Page 5: Parts And Optional Accessories
Parts and Optional Accessories TYPE-S TYPE-S Sensor Kit TYPE-S LEOMO Motion Sensor Kit Pro / LEOMO Motion Sensor Kit ×5 (Pro)/ ×2 ×25 ×2 Parts and Optional Accessories... - Page 6 C Sensor Charger for charging LEOMO Motion Sensors D LEOMO Motion Sensors (Set of 5 in the case of LEOMO Motion Sensor Kit Pro) / (Set of 2 in the case of LEOMO Motion Sensor Kit) for motion data collection...
- Page 7 L Arm Band (Optional) for wearing TYPE-S on arm M Waist Belt (Optional) for wearing TYPE-S around waist N USB Type-C Cable (Optional) for charging TYPE-S or for communication with devices such as personal computers O AC Adapter (Optional, Not shown)
-
Page 8: Parts And Controls Of The Type-S
D NFC Compatible with NFC type A/B E Power key Turns on/off the TYPE-S. To turn the TYPE-S off, press and hold the key for two seconds. F Pin for Power Mount Connects the TYPE-S and the Power Mount. G nano SIM card / Memory card slot Accommodates a nano SIM and a micro SD cards. -
Page 9: Charging Devices
A USB type-C cable (optional) B USB cable (optional) NOTE : An AC adapter that outputs 5 VDC, 1.5 A or higher must be used for charging the TYPE-S and LEOMO Motion Sensors. Charging Indications of the LEOMO Motion Sensors... - Page 10 Using an Optional Power Mount Charge the Power Mount using a USB type-C cable (optional). To charge the TYPE-S and Power Mount simultaneously, attach the TYPE-S to the Power Mount, and connect the USB type-C cable to the connector on the Power Mount.
- Page 11 Using the Button on the Power Mount Pressing the button on the right of the USB Type-C port shows the battery level of the Power Mount. Pressing and holding this button while charging the TYPE-S stops charging. Press the button again to resume charging.
-
Page 12: Turning The Type-S On
Turning the TYPE-S On 1 Turn on the TYPE-S by holding down the power key on the left side of the TYPE-S until it powers on. Power key 2 When you use the TYPE-S first time after purchase, follow the instructions displayed on the screen to make the initial settings. -
Page 13: Making The Initial Settings
Making the Initial Settings When the TYPE-S is first powered on after purchase, it shows a message asking if you will use a SIM. 1 Insert a SIM. To use communication functions of the TYPE-S outside Wi-Fi coverage areas, obtain a nano SIM and insert it in the TYPE-S nano SIM/memory card slot. -
Page 14: Type-S Home Screen
The back button takes you back one step or one screen, and the home button always shows the TYPE-S home screen. Swipe right on the home button and hold to view all the currently running apps. Scroll between apps by swiping slowly right or left, and release to open the center app. - Page 15 3 Proceed to Accessibility > Magnification > Magnify with triple-tap. 4 Turn it on. Now, triple-tapping the screen zooms in the displayed content. Use two-finger dragging to pan across the screen. Triple-tap the screen again to zoom out. TYPE-S Home Screen...
-
Page 16: Starting The Leomo App
2 Point the home button and swipe it left. The all currently running apps are shown. 3 Point the LEOMO App, and swipe it up. The LEOMO App stops running background and disappears from the screen. Starting the LEOMO App... -
Page 17: Installing The Type-S On A Bike
Installing the TYPE-S on a Bike Attach a standard quarter turn bike mount to your bike’s stem or handlebar. Attach the TYPE-S to the Multi-sport Adapter, and attach the Bike Plate at the back of the Multi-sport Adapter as necessary. - Page 18 WARNING In order to maintain the product’s waterproof capabilities, please follow all instructions in this manual and the LEOMO terms of use listed below. Any damage resulting from user negligence will void the product warranty. Make sure the nano SIM card/memory card tray of the TYPE-S is fully inserted.
- Page 19 Detaching the TYPE-S from the Multi-sport Adapter or Power Mount Unlock the knob at the back of the Multi-sport Adapter or Power Mount ( ), then detach the TYPE-S from it ( Multi-sport Adapter Power Mount Installing the TYPE-S on a Bike...
-
Page 20: Using Optional Accessories
Slide the upper edge of the TYPE-S under the hook of the Soft Bumper ( ), then press its bottom until it fits in the Soft Bumper. ( Detaching the TYPE-S from the Soft Bumper Push the bottom of the TYPE-S out from the Soft Bumper as shown in the figure. Using Optional Accessories... - Page 21 Using an Optional Metal Bumper Attaching the TYPE-S to a Metal Bumper Set the TYPE-S on the front frame ( ), and insert the two side keys ( ). Then, place the back frame, and secure them all with the four M2-6 screws (...
- Page 22 Multi-sport Adapter. A Lock Screw M2-4 x 1 Attaching the TYPE-S to an Optional Power Mount Fix the P Lock ( ) to the hook of the Metal Bumper using an M2-4 screw ( ), then attach it onto the Power Mount.
- Page 23 Using an Optional Arm Band or Waist Belt Attach an optional Arm Band or Waist Belt as shown in the following figures. Arm Band Waist Belt Using Optional Accessories...
-
Page 24: Turning The Leomo Motion Sensors On
Sensors are inserted into an unplugged Sensor Charger or Sensor Carrier, they will be turned off. NOTE : An AC adapter that outputs 5 VDC, 1.5 A or higher must be used for charging the LEOMO Motion Sensors. Turning the LEOMO Motion Sensors On... -
Page 25: Pairing The Leomo Motion Sensors
Manual Pairing If you have a LEOMO Motion Sensor that has not yet been paired to your TYPE-S, you can manually pair it from Quick Menu (swipe up from the bottom of the screen) > Menu > Motion Sensors. - Page 26 If manually connecting a LEOMO Motion Sensor does not work, restart the sensor by inserting and removing it from the sensor charger. If you have more than five LEOMO Motion Sensors in your surroundings, pair to the correct sensor by checking the ID printed on the bottom of the sensor.
-
Page 27: Enabling/Disabling The Leomo Motion Sensors
Enabling/Disabling the LEOMO Motion Sensors Each LEOMO Motion Sensor can be enabled/disabled from Quick Menu (swipe up from the bottom of the screen) > Menu > Motion Sensors. A Tap the switch to enable/disable all LEOMO Motion Sensors. B Tap the respective switches to enable/disable corresponding LEOMO Motion Sensors. -
Page 28: Assigning The Leomo Motion Sensor Locations
Assigning the LEOMO Motion Sensor Locations Assign LEOMO Motion Sensor locations. LEOMO Motion Sensors need to be assigned to a specific body location. When prompted, set the locations of your LEOMO Motion Sensors (you can also manually access the location assignment page from Quick Menu >... -
Page 29: Pairing Ant+ Sensors
When ANT+ sensor connections are unstable, lowering the Bluetooth signal output level may improve connection status. From the TYPE-S home screen, find and tap the Settings icon, and proceed to Connected devices > Connection preference > Bluetooth > Output Level, then select Output saver instead of Standard. -
Page 30: Wearing Your Leomo Motion Sensors
Wearing Your LEOMO Motion Sensors Match your LEOMO Motion Sensor’s color to the assigned location on your body. For example, if you have assigned the orange sensor as the RT (right thigh) sensor, place the orange sensor on your right thigh. - Page 31 NOTE : The sacrum can be found right above the tailbone. Thighs (RT and LT) minimum 4” (10 cm) Feet (RF and LF) NOTE : The following figures show the axes of the LEOMO Motion Sensors. Wearing Your LEOMO Motion Sensors...
-
Page 32: Hardware Controls For The Leomo App
Press and hold for 2 seconds to lock the screen. Press and hold again for 2 seconds to unlock the screen. C Power key Press and hold for 2 seconds to turn on the TYPE-S. Hardware Controls for the LEOMO App... -
Page 33: Recording An Activity
Recording an Activity 1 Record an activity. Starting an activity Start During an activity Pause/resume Mark lap Finishing an activity Pause Recording an Activity... - Page 34 2 Upload an activity. Upload your activities via Wi-Fi directly from the TYPE-S to the cloud from Quick Menu > Activity Log. Note that the TYPE-S does not upload activities via Bluetooth or USB. UPLOAD ACTIVITY LOG 3 Analyze data on the web app.
-
Page 35: Customizing The Leomo App
Data page layouts FTP and power zones Unit formats Account information* * You must have your LEOMO account when uploading your activities. It can be created in advance by tapping MENU > Account > Create LEOMO Account. Customizing the LEOMO App... -
Page 36: Leomo App Home Screen
Swipe left / right to change pages. B Paired sensors connection status Paired LEOMO Motion Sensors and ANT+ sensors (power meters, heart rate sensors, speed sensors, and cadence sensors) will show here. Disconnected sensors will show as a dark grey icon. - Page 37 Quick Menu Screen (Swipe up from the bottom of the screen to access Quick Menu) A ANT+ sensors B LEOMO Motion Sensors C Display brightness D ACTIVITY LOG E Close Quick Menu F MENU LEOMO App Home Screen...
-
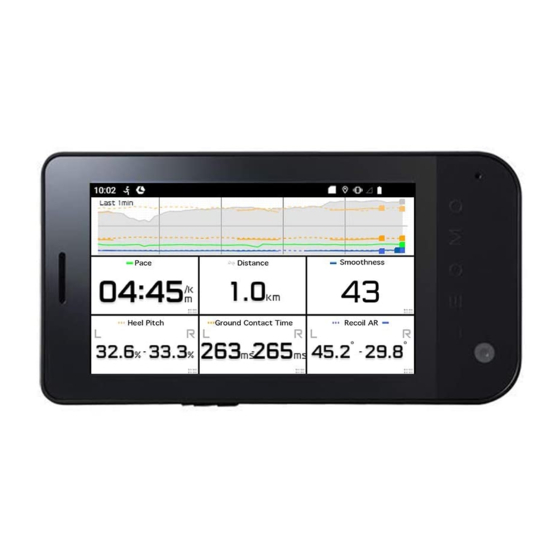
Page 38: Activity Screens
Activity Screens Data Pages Resume Finish activity Pause A Graph range Tap graph anywhere to change range. B Lap line C Elevation D Max point (scaled) E 0 for “balanced” values F 0 / min point (scaled) G Data box Short press - turn graph on/off Long press - open Detailed Data page H Graph icon... - Page 39 Data Detail Page (MPIs only) Pause A Current value B 5 min average C Close Activity Screens...
-
Page 40: Header
Header A DASHBOARD Displays summary of athlete's data. For details, see “DASHBOARD” below. B ACTIVITIES LIST Shows list of athlete's activities. For details, see “ACTIVITIES” below. C COMPARE Compares athlete's activities data. For details, see “COMPARE” below. D CALENDAR Displays athlete's activities in calendar format. For details, see “CALENDAR” below. E ATHLETE Indicates current athlete. -
Page 41: Dashboard
DASHBOARD Displays summary of athlete’s data. A Recent Activities List of your (and if you are a coach, your athlete’s) activities. B Distance Traveled Distance traveled per week for one year. C MPIs Summaries Summaries of all motion data types. DASHBOARD... -
Page 42: Activities
ACTIVITIES Shows list of athlete’s activities. Activity List List of all activities ACTIVITIES... - Page 43 A Activity Settings B Activity Summary Summary of this activity All owners can edit the “title” and “notes” section by clicking on it. Make sure to save your notes when done. You can also share / export / delete the activity data from Activity Settings. C Activity Title D Activity Notes E Map...
-
Page 44: Compare
COMPARE Compares athlete’s activities data. Compare Area Search Box This is where you actually compare data. Narrows down the Activity Range. Search Button Click this to see results. COMPARE... - Page 45 Result List When the Search button is pressed, the result will show here. Select the Activity Range to compare. A Selected Activity Range Select the Activity Range you want to compare and it will show on the main panel. B Summary data pop up when hovering mouse C Drag &...
-
Page 46: Calendar
CALENDAR Displays athlete’s activities in calendar format. Select month/year Button to jump to “today” Current Day (today) The current day, which you can go back to directly from the Today button at top left is shown in black. A Weekly Summary B Activity Distance by Overlap C Distance by Activity D Popup when hovering mouse... -
Page 47: Why Motion
Thankfully, coaches know good pedaling skills and form when they witness it. With the TYPE-S’s Motion Performance Indicators, or MPIs, coaches will now have actual values to validate their observations. MPIs give an edge to assessments by making them more precise, more communicable, and more trackable. -
Page 48: Motion Performance Indicators
Motion Performance Indicators The TYPE-S comes with five LEOMO Motion Sensors and records several types of Motion Performance Indicators (MPIs). Pelvic Torso 1. Pelvic Angle 1. Torso Angle 2. Pelvic Rotation 2. Torso Rotation 3. Pelvic Rock 3. Torso Rock Right &... -
Page 49: Dead Spot Score (Dss)
Dead Spot Score (DSS) Summary Dead Spot Scores (DSS) pinpoint the magnitude and locations where pedaling velocities lack smoothness along the left and right pedaling cycle. Lack of smoothness is a secondary symptom of sub-optimal pedaling motions. Looking at the right and left DSS values provides insight to left/right movement imbalances. Details A “dead spot”... - Page 50 Motion Rating Optimum pedaling with little to no dead spots Unsmooth pedaling Extremely unsmooth pedaling Dead Spot Score (DSS)
-
Page 51: Leg Angular Range (Leg Ar)
Leg Angular Range (LEG AR) Summary Leg Angular Range measures how much the thighs move up and down while pedaling. Looking at right and left Leg AR values provides insight to left/right movement imbalances. Details The Leg Angular Range is calculated by subtracting the angle of the thigh at its lowest point from that at its highest point. - Page 52 Rating Small range Normal range Large range Leg Angular Range (LEG AR)
-
Page 53: Foot Angular Range (Foot Ar)
Foot Angular Range (FOOT AR) Summary Foot Angular Range measures how much the heel moves up and down while pedaling. Looking at the right and left Foot AR values provides insight to left/right movement imbalances. Details The Foot Angular Range is calculated by subtracting the angle of the foot at its lowest point from that at its highest point. - Page 54 Rating Static range General range Very dynamic range Foot Angular Range (FOOT AR)
-
Page 55: Foot Angular Range (Q1) Foot Ar (Q1)
Foot Angular Range (Q1) Foot AR (Q1) Summary Foot Angular Range (Q1) shows the foot angular range of the first quadrant of the pedaling cycle (12 o’clock to 3 o’clock position). Looking at the right and left Foot AR (Q1) values provides insight to left/right movement imbalances. Details A large Foot AR (Q1) shows that the cyclist pushes down hard after the 12 o’clock position, creating thrust around the 1 and 2 o’clock positions. - Page 56 Rating Small movement in Q1 Large movement in Q1 Foot Angular Range (Q1) Foot AR (Q1)
-
Page 57: Pelvic Angle
Pelvic Angle Summary Pelvic Angle indicates the degree to which the pelvis is tilted upward. The sensor should be fixed with adhesive on the lower back in the area of the sacrum. Details Each cyclist has a different neutral pelvic alignment. Finding a natural pelvis position engages the core muscles and reduces lumbar spine strain. - Page 58 Motion Rating Parallel to ground* *Assuming that the cyclist is on flat ground. Upright Pelvic Angle...
-
Page 59: Pelvic Rock
Pelvic Rock Summary Pelvic Rock measures the average up-down angular movement of the pelvis. Details Pelvic Rock represents the average angular rotational range along the pelvis’ local sagittal axis (the axis that intersects the pelvis from front to back). When sitting up on flat ground, this front-to-back axis is parallel to the ground;... - Page 60 Rating No rotation Too much rotation Pelvic Rock...
-
Page 61: Pelvic Rotation
Pelvic Rotation Summary Pelvic Rotation measures the average angular rotational range of the pelvis. Details Pelvic Rotation is the average angular rotational range of the pelvis, measured at the sacrum once per second. This measurement is dependent on the sacrum’s local vertical axis, which will be perpendicular to the ground when sitting up and that may tilt toward the handlebars when in riding position. - Page 62 Rating No rotation Too much rotation Pelvic Rotation...
-
Page 63: Torso Angle
Torso Angle Summary Torso Angle indicates in degrees how much the chest (i.e. torso) is tilted upward relative to gravity. The sensor should be affixed along the sternum with an adhesive. Details Torso Angle indicates the angle of the sternum relative to gravity. Generally speaking, Torso Angle decreases when riding in an aero position (upper body angled toward the ground) and increases when riding in a more upright position. - Page 64 Motion Rating Parallel to gravity Upright, perpendicular to gravity Torso Angle...
-
Page 65: Torso Rock
Torso Rock Summary Torso Rock measures the average angular rotational range of the chest to the left and right. Details Torso Rock represents the average angular rotational range of the torso, measured at the sternum once per second along the local sagittal axis (the sagittal axis intersects the lower back and the abdomen area above the pelvis). - Page 66 Rating Torso Rock...
-
Page 67: Torso Rotation
Torso Rotation Summary Torso Rotation measures the average angular rotational range of the chest. Details Torso Rotation is the average angular rotational range of the chest, measured at the sternum once per second. This measurement is dependent on the torso’s rotational axis, which closely parallels the spine: when sitting up, the spine/rotational axis will be vertical (perpendicular to the ground), and when in riding position, the spine/rotational axis will tilt toward the handlebars. - Page 68 Motion Rating Torso Rotation...
-
Page 69: Specifications Of The Type-S
Specifications of the TYPE-S Android 9 Available Applications LEOMO App and other Android apps that can be downloaded from Google Play SoC: Snapdragon 439 CPU Clock Speed: Up to 2.0 GHz CPU Cores: 8x ARM Cortex A53, 4x 2.0 GHz + 4x 1.4GHz... - Page 70 Other Parts Vibrator Microphones x 2 Speaker (Receiver) Battery Built-in main unit: 1900 mAh (min) Maximum Battery Life when Using the LEOMO App When LTE mobile network is On 5 Motion Sensors Connected Built-in battery only 8 h 30 m...
- Page 71 Charging: 0 °C to 55 °C (32 °F to 131 °F) Pre-Installed Apps LEOMO App, App Updater, Google Play, Google Maps, Google, YouTube, Google Drive, Gmail, Google Calendar, Google Play Movies & TV, Google Play Music, Camera, Google Keep, Files, Google Duo, Messages, News, Phone, Google Photos Settings, Wallpapers, Calculator Google, Android, Google Play, YouTube and other marks are trademarks of Google LLC.
-
Page 72: Specifications Of The Optional Leomo Motion Sensors
Specifications of the Optional LEOMO Motion Sensors Size L 37.0 mm x W 37.0 mm x H 7.8 mm (L 1.5 in. x W 1.5 in. x H 0.3 in.) Weight 12 g IPX (Waterproof) Rating IPX7 Batteries Built-in Li-ion Polymer Rechargeable Battery... -
Page 73: Specifications Of The Optional Power Mount
3 hrs (When simultaneous charging with the TYPE-S) Power Sharing and Charging Temperature Range Power sharing to the TYPE-S: -15 °C to 55 °C (5 °F to 131 °F) Charging: 0 °C to 60 °C (32 °F to 140 °F) -
Page 74: Limitation Of Liability
Limitation of Liability THE TYPE-S PRODUCT AND ALL ACCESSORIES ARE PROVIDED ON AN ‘AS IS’ BASIS WITHOUT ANY WARRANTIES OF ANY KIND. LEOMO DISCLAIMS ALL WARRANTIES, INCLUDING WITHOUT LIMITATION, THE WARRANTY OF MERCHANTABILITY, NON-INFRINGEMENT OF PROPRIETARY OR THIRD PARTY RIGHTS, AND THE WARRANTY OF FITNESS FOR PARTICULAR PURPOSE. -
Page 75: Certification Information
Certification Information FCC DECLARATION OF CONFORMANCE This device complies with part 15 of the FCC Rules. Operation is subject to the following two conditions: (1) This device may not cause harmful interference, and (2) this device must accept any interference received, including interference that may cause undesired operation. - Page 76 INDUSTRY CANADA DECLARATION OF CONFORMANCE This device complies with Industry Canada’s licence-exempt RSSs. Operation is subject to the following two conditions: (1) This device may not cause interference; and (2) This device must accept any interference, including interference that may cause undesired operation of the device.
- Page 77 STATEMENT OF COMPLIANCE WITH EU DIRECTIVE Hereby, LEOMO, Inc. declares that this LEOMO TYPE-S Phone is in compliance with the essential requirements and other relevant provisions of Directive 2014/53/EU. The full text of the EU declaration of conformity is available at the following internet address: https:// www.leomo.io/legal...
- Page 78 5GHz band (W52, W53): Indoor use only (except communicate to high power radio) e-Label of Regulatory Information: For Regulatory Information and Compliance mark (E.labels). Please refer to your device via the following step: Settings > System > Certification More information at: HTTPS://LEOMO.ZENDESK.COM E-mail support requests to: SUPPORT@LEOMO.IO Certification Information...
- Page 79 MORE INFORMATION AT:HTTPS://LEOMO.ZENDESK.COME-MAIL SUPPORT REQUESTS TO:SUPPORT@LEOMO.IO...
Need help?
Do you have a question about the TYPE-S and is the answer not in the manual?
Questions and answers