Advertisement
Quick Links
Advertisement

Related Manuals for Canon HG-100TBR


Summary of Contents for Canon HG-100TBR
- Page 1 CANON TRIPOD GRIP HG-100TBR Advanced User Guide...
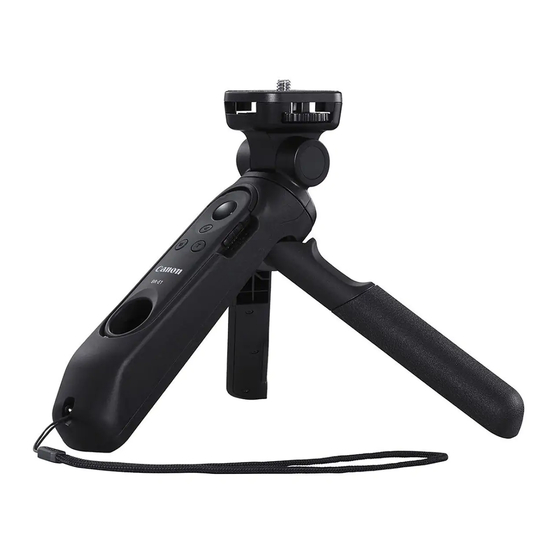
- Page 2 Introduction The Tripod Grip HG-100TBR is a handgrip that allows you to shoot while operating the camera with the attached Wireless Remote Control BR-E1. Legs can also be extended from the grip portion for use as a tripod. The included microphone brackets allow you to attach an external microphone such as a stereo microphone (sold separately) to a camera without a hot shoe.
- Page 3 Conventions Used in this Manual Icons in this Manual (p. **) : Reference page numbers for more information. : Warnings to prevent potential problems during operation. : Supplemental information. Safety Instructions Be sure to read these instructions in order to operate the product safely.
- Page 4 Nomenclature (10) Camera mount Body Wireless Remote Control BR-E1 Left/right lock release button Leg R Strap mount Front/back lock release button Tripod screw (10) Leg L Attach/detach dial Included accessories (12) (11) (11) Microphone bracket L (12) Microphone bracket S...
- Page 5 Preparation Attaching the wrist strap Attach the included wrist strap to the strap mount on the body of the tripod grip. Pairing the camera and BR-E1 See the instructions for your camera and the BR-E1. Attaching the BR-E1 With the BR-E1 at an angle, press it upward into the body of the tripod grip (rubber portion) ( ①...
- Page 6 Preparation Removing the BR-E1 With a finger where shown in the BR-E1 (strap hole) ( ① ), pull outward to remove ( ② ). Do not place your finger in the strap hole after removing the BR-E1.
- Page 7 Adjusting the Angle of the Camera Mount Adjusting the tilt of the camera mount Hold the front/back lock release button pressed. The camera mount can be locked every 15°. After adjusting the angle, release the button. 0° 45° 90° Camera mount turning Hold the left/right lock release button pressed.
- Page 8 Attaching a Camera Horizontal shooting Set the camera monitor and the BR-E1 button panel in the same orientation, and then insert the tripod screw in the tripod socket on the camera ( ① ). Turn the attach/detach dial to lock the camera ( ② ). To remove the camera, reverse the order.
- Page 9 Attaching a Camera Turn the camera mount so that the camera monitor and the BR- E1 button panel are in the same orientation. Tilt the camera mount 90°. To remove the external microphone, reverse the order. Attach a camera when the camera is turned off. Make sure to attach the camera to the camera mount securely so that it does not detach from it.
- Page 10 Holding the Tripod Grip to Shoot Put the wrist strap around your wrist as shown before holding the tripod grip. Press the buttons on the BR-E1 to start/end shooting. Attach the included wrist strap to the strap mount on the tripod grip correctly.
- Page 11 Tripodding a Camera to Shoot Bend legs R/L outward as shown. Open legs R/L all the way. Be careful not to pinch your fingers. Use the tripod legs R/L open as far as they will go. Be sure the tripod is on a level surface and does not wobble to prevent it from falling over.
- Page 12 Tripodding a Camera to Shoot For vertical shooting, set the camera mount as shown below. Do not place as a tripod to shoot if the tripod might fall over, such as in windy conditions or where there is vibration. It is recommended that you remove the BR-E1 and shoot by remote control (p.6).
- Page 13 Attaching an External Microphone If your camera does not have a hot shoe for an external microphone, you can use the microphone brackets to attach one. Even if your camera has a hot shoe, you should use the microphone brackets when you want to avoid camera or lens operation sound.
- Page 14 Attaching an External Microphone Attach the connector from the external microphone to the external microphone IN terminal on the camera. To remove the external microphone, reverse the order. Avoid mounting an item other than an external microphone on microphone bracket L. To remove the external microphone from microphone bracket L, first disconnect the external microphone connector.
- Page 15 Attaching an External Microphone When shooting vertically Attach the camera as shown (p.8). Insert microphone bracket S into microphone bracket L. Do not insert microphone bracket S backwards. Insert microphone bracket L in the camera mount. Attach the external microphone to microphone bracket S.
- Page 16 Attaching an External Microphone Attach the connector from the external microphone to the external microphone IN terminal on the camera. To remove the external microphone, reverse the order. Avoid mounting an item other than an external microphone on microphone bracket S. To remove the external microphone from microphone bracket S, first disconnect the external microphone connector.
- Page 17 Approx. 6.79 (W) × 5.85 (H) × 6.86 (D) in. Weight ... Approx. 179 g/6.33 oz. (body and BR-E1) / Approx. 163 g/5.76 oz. (body only) All the data above is based on Canon’s testing standards. Product specifications and the exterior are subject to change without notice.
- Page 18 The descriptions in this Instruction Manual are current as of August 2019. For the latest version Instruction Manual, refer to the Canon Web site. CT2-D052-A © CANON INC. 2019...