Table of Contents
Advertisement
Quick Links
Advertisement
Table of Contents

Related Manuals for ComfyBumpy BED RAIL


Summary of Contents for ComfyBumpy BED RAIL
- Page 1 For video instructions, please go to: www.ComfyBumpy.com...
- Page 2 For video instructions, please go to: www.ComfyBumpy.com ATTENTION ComfyBumpy BED RAIL INSTRUCTIONS • If there is any defective, damaged or missing components, do not use. • The bed guard should not be used unless the fixings are in place and securely attached.
- Page 3 Legend (4) Small Screws (2) Long Bolt (2) Supporting Foot (2) Main Frame Mesh Cover (4) Washer Shims (2) Nut (1) Push Pipe (2) Velcro Straps (2) Elbow Pipe (2) Supporting Straps (1) Straight Pipe Page...
- Page 4 ComfyBumpy Bed Rail Assembly Step 1: Open Main Frame and lock in with Long Bolt and Nut Fully open the Main Frame so it is in an L shape. Stick Long Bolt through outside corner hole and feed through to inside hole.
- Page 5 ComfyBumpy Bed Rail Assembly Step 2: Lock in Supporting Foot to Main Frame Grab a Supporting Foot and a Main Frame. Press in button on Supporting Foot and lock in to Main Frame end. Ensure it has clicked in. Do once again with other Locking Foot and Main Frame.
- Page 6 ComfyBumpy Bed Rail Assembly Step 3: Connect Elbow Pipe Take both Elbow Pipes. Press in button on one Elbow Pipe and lock in to other Elbow pipe. Ensure it has clicked in. Page...
- Page 7 ComfyBumpy Bed Rail Assembly Step 4: Put Elbow Pipe through Mesh Cover Ensure velcro flaps on bottom of Mesh Cover are disconnected. Weave connected Elbow Pipe up through side of Mesh Cover and all the way through the top compartment.
- Page 8 ComfyBumpy Bed Rail Assembly Step 5: Connect Elbow Pipe to Main Frame Ensure the knobs on the Main Frame are facing in. Ensure the knobs on the Main Frame are facing in. Spread Main Frame out and place Elbow Pipe on top.
- Page 9 ComfyBumpy Bed Rail Assembly Step 6: Connect Push Pipe to Straight Pipe Press in button on Straight Pipe and connect to other Straight Pipe. Ensure it has clicked in. Page...
- Page 10 ComfyBumpy Bed Rail Assembly Step 7: Feed Straight Pipe though bottom of Mesh Cover Find the smaller knob on the Main Frame (one will be thicker than the other). Push the Straight Pipe though the bottom of the Mesh Cover and fit into the smaller knob.
- Page 11 ComfyBumpy Bed Rail Assembly Step 8: Connect Push Pipe to thicker knob Press in the button on the Push Pipe and pull back mechanism. Place the Push Pipe over the thicker knob. (It may take some force to get it to pop in.) Ensure that the button on the Push Pipe clicks through.
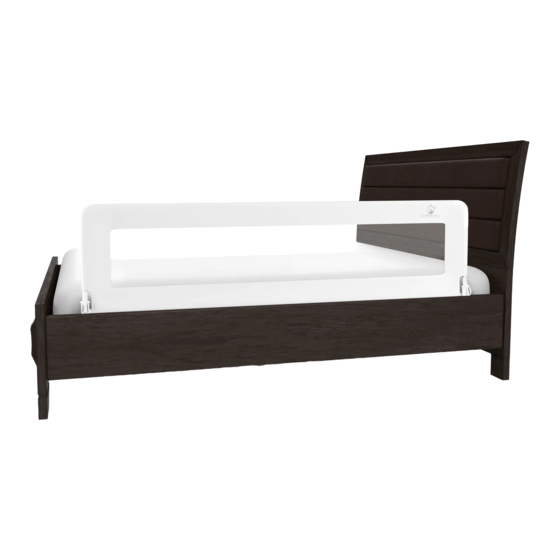
- Page 12 Pull up and connect velcro straps on Mesh Cover. Don’t attach too tight, or it will be difficult to pull down bed rail once installed. Congratulations! You’ve assembled the bed rail, now we will show you how to secure onto different types of beds. Page...
- Page 13 Securing Your Bed Rail Using Supporting Straps Step 1: Attach velcro straps on Mesh Cover Take your Supporting Strap and place the big hole on the plastic connector over the metal fastener on the bottom of the Main Frame. Pull back on the plastic connector so the small hole snaps into the metal fastener.
- Page 14 Securing Your Bed Rail Using Supporting Straps Step 2: Insert Bed Rail and pull through Supporting Straps Remove the mattress or push bed rail under mattress. Weave Supporting Straps the width of the bed. Page...
- Page 15 Tighten the Supporting Straps so blocker is flush with mattress and boxspring or bed frame. Press in button on blocker so it is secured. Test out the bed rail by pulling on it and make sure bed rail is secure as possible. Page...
- Page 16 Securing Your Bed Rail Using Velcro Straps Wrap Velcro Straps around slats and Main Frame or another part of frame if possible. Ensure they are tight and secure. Page...
- Page 17 Securing Your Bed Rail With Wood Base Find correct positioning to secure your bed rail where mattress is flush with Main Frame. Fit the Washer Shims in the Small Screws. Drill Small Screw through holes in Main Frame and into wood base.
- Page 18 Pull up on both sides of Main Frame Mechanism directly under the Mesh Cover. For video instructions, please go to: www.ComfyBumpy.com We hope you absolutely love your new ComfyBumpy bedrail! If you have any comments or concerns, please do not hesitate to contact our customer service department through Amazon or by emailing: info@comfybumpy.com...
Need help?
Do you have a question about the BED RAIL and is the answer not in the manual?
Questions and answers