CYBEX 750T Service Manual
Hide thumbs
Also See for 750T:
- Owner's manual (94 pages) ,
- Addendum (23 pages) ,
- Owner's manual (58 pages)

Related Manuals for CYBEX 750T


Summary of Contents for CYBEX 750T
- Page 1 Cybex 750T Treadmill Product Number 751T Service Manual Cardiovascular Systems Part Number LT-20407-4 D www.cybexinternational.com...
- Page 3 Cardiovascular Systems Part Number LT-20407-4 D Cybex ® and the Cybex logo are registered trademarks of Cybex International, Inc. Safety Sentry™ is a registered trademark of Cybex International, Inc. Polar ® is a registered trademark of Polar Electro Inc. DISCLAIMER: Cybex International, Inc. makes no representations or warranties regarding the contents of this manual. We reserve the right to revise this document at any time or to make changes to the product described within it without notice or obligation to notify any person of such revisions or changes.
-
Page 5: Table Of Contents
Cybex 750T Treadmill Service Manual Table of Contents Front Pages 4 Service About this Manual ....iii Warnings ..... . . 4-1 FCC Compliance Information . - Page 6 Cybex 750T Treadmill Service Manual Page ii...
-
Page 7: About This Manual
• or contact Cybex Customer Service at 508-533-4300 • To contact Cybex with comments about this manual you may send email to techhelp@cybexintl.com. FCC Compliance Information WARNING: Changes or modifi cations to this unit not expressly approved by the party responsible for compliance could void the user’s authority to operate... - Page 8 Cybex 750T Treadmill Service Manual Page iv...
-
Page 9: Safety
Before plugging the power cord into an electrical outlet, verify that the voltage requirements for the site match the voltage of the treadmill that has been received. The power requirements for the Cybex 750T Treadmill include a grounded, dedicated circuit, rated for one of the following: 100 VAC, 50/60 Hz, 20A •... -
Page 10: Important Safety Instructions
Cybex 750T Treadmill Service Manual Important Safety Instructions (Save These Instructions) DANGER: To reduce the risk of electric shock, always unplug this treadmill from the electrical outlet immediately after using it and before cleaning it. WARNING: Serious injury could occur if these precautions are not observed. To reduce the risk of burns, fi... - Page 11 Seek qualifi ed repair personnel when servicing. If • DO NOT you live in the USA, contact Cybex Customer Service at 888-462-9239. If you live outside the USA, contact Cybex Customer Service at 508-533-4300. Use Cybex factory parts when replacing parts on the treadmill.
-
Page 12: Warning Decals
To replace any worn or damaged decals do one of the following: Visit www.cybexinternational.com to shop for parts online, fax orders to 508-533-5183 or contact Cybex Customer Service at 888-462-9239. If you are located outside of the USA, call 508-533-4300. For location or part number of labels, see the parts list and exploded-view diagram. - Page 13 Cybex 750T Treadmill Service Manual DE-20427 Warning Motor Cover Safety Page 1-5...
-
Page 14: Caution Decals
Cybex 750T Treadmill Service Manual Caution Decals Caution decals indicate a potentially hazardous situation, which if not avoided, may result in minor or moderate injury. There are no caution decals used on this unit. However, there are caution statements listed in Chapters 5 and 6 of this manual. See Chapters 5 and 6. -
Page 15: Csafe Ports
Figure 3 CSAFE Ports The 750T Treadmill has two CSAFE ports, one in the console for CSAFE devices that need access there, and one under the base of the unit for running a network connection. NOTE: The CSAFE standard defines a communication protocol and low-voltage DC power source specific to the Fitness Equipment Industry. - Page 16 Cybex 750T Treadmill Service Manual Base CSAFE Port Location CSAFE Port Bottom View Figure 5 Safety Page 1-8...
-
Page 17: Preventive Maintenance
NOTE: Worn or damaged components shall be replaced immediately or the treadmill removed from service until the repair is made. NOTE: Cybex is not responsible for performing regular inspection and maintenance actions for your treadmill. Instruct all personnel in equipment inspection and maintenance actions and also in accident reporting/recording. - Page 18 Cybex 750T Treadmill Service Manual as this might create an electrical hazard or cause failure of the electronics. As Needed — Vacuum any dust or dirt that might accumulate under or around the treadmill. Motors are especially susceptible to dust and dirt, and restricted airfl ow can prevent adequate cooling that could shorten motor life.
-
Page 19: Running Belt Maintenance
Walk on the belt to see if it still slips. If it does restart this procedure at step 1 A. If you have to do this procedure three times and it still slips call Cybex Customer Service. Follow the next step to be sure the belt is centered. - Page 20 Cybex 750T Treadmill Service Manual 2. Center the belt. NOTE: While centering the belt choose one bolt to adjust. Do not adjust both bolts. With the treadmill running at 5 mph (8 kph) observe the running belt. If the belt tracks off center to the right or left, the deck will become exposed.
-
Page 21: Other Preventive Maintenance
Cybex 750T Treadmill Service Manual Other Preventive Maintenance Other preventive maintenance activities must be completed by a qualifi ed service technician at the recommended intervals listed in the Service Schedule at the end of this chapter. These activities include: Replace the running deck •... -
Page 22: Service Schedule
Cybex 750T Treadmill Service Manual Service Schedule All maintenance activities shall be performed by qualifi ed personnel. Failure to do so could result in serious injury. NOTE: This is the minimum recommended service. 1. Determine mileage. While in Dormant Mode enter Statistics Mode by pressing the sequence CLEAR 999 and ENTER. -
Page 23: Statistics
WARNING: All maintenance activities shall be performed by qualified personnel. Failure to do so could result in serious injury. NOTE: Cybex is not responsible for performing regular inspection and maintenance actions for your treadmill. Instruct all personnel in equipment inspection and maintenance actions and also in accident reporting/recording. - Page 24 Cybex 750T Treadmill Service Manual This page intentionally left blank Preventive Maintenance Page 2-8...
-
Page 25: Customer Service
Your serial number and voltage can be found on the rear of your treadmill. See Figure 1. For your convenience, record your serial number and voltage below so that you will have it ready if you call Cybex Customer Service. -
Page 26: Return Material Authorization (Rma)
The serial number begins with a letter, for example: R09-101331100. 4. At Cybex’s discretion, the technician may request that you return the problem part(s) to Cybex for evaluation and repair or replacement. The technician will assign you an RMA number and will send you an ARS label. -
Page 27: Ordering Parts
Cybex 750T Treadmill Service Manual Concealed Damage — Damage not seen with a visual check upon receipt of a shipment but noticed later must be reported to the carrier as soon as possible. Upon discovery of the damage, a written or phone request to the carrier asking them to perform an inspection of the materials must be made within ten days of the date of delivery. - Page 28 Cybex 750T Treadmill Service Manual This page intentionally left blank Customer Service Page 3-4...
-
Page 29: Service
Motor brush removal and replacement should be performed by a qualified service technician. Cautions CAUTION: Use only Cybex replacement parts when servicing. Failure to do so could result in personal injury. CAUTION: During this procedure STAY OFF THE RUNNING BELT! Stand with your feet on the two steps. -
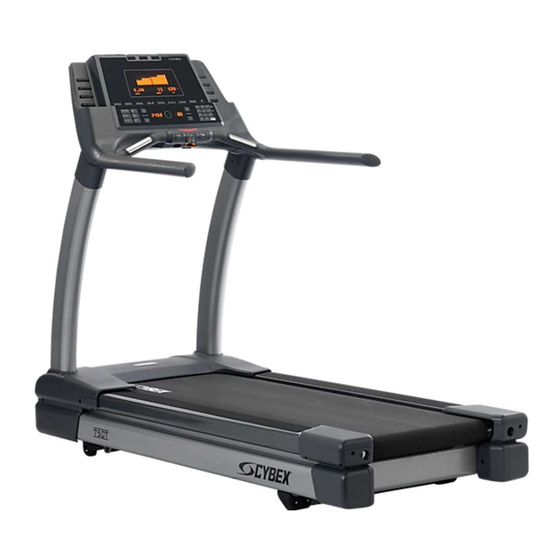
Page 30: Display Console
Cybex 750T Treadmill Service Manual Display Console Heart Rate Indicator Bar Graph Text Area Data Readouts QUICK START Programs Key Pad Time / Incline Speed / PrX Figure 1 Audio Visual (AV) Key Pad – Optional Figure 2 Service Page 4-2... -
Page 31: Service Diagnostics
Cybex 750T Treadmill Service Manual Service Diagnostics Service diagnostics allows testing, monitoring or altering of unit controls and performance. Open service diagnostics from Dormant mode or opening screen. Press PAUSE/END key to exit. Press CLEAR, press 8-8-8 and press ENTER. - Page 32 Cybex 750T Treadmill Service Manual Display test Press and hold the Programs key to light up the Bar Graph Matrix LED’s. Press and hold the Manual key to light up the 5 x 7 Dot Matrix LED’s and Data Readout LED’s. Press and hold the Fit Test key to light up the 7-Segment Displays.
- Page 33 Cybex 750T Treadmill Service Manual DRIVE DIAGNOSTICS Enter Drive Diagnostics by holding the ENTER key for 5 seconds while in Static I/0 test. This creates a diagnostics screen for controlling and viewing lower controller values. Text Area shows “DRIVE DIAGNOSTICS”.
-
Page 34: Error Codes
Cybex 750T Treadmill Service Manual Error Codes Error codes notify user of a problem condition and are displayed on the console. Error codes can also help to indicate the part of the unit most likely to be causing the problem. Errors are tracked in a rolling log of 20 entries, each stamped with time and date. -
Page 35: End Caps And Top Platforms
Cybex 750T Treadmill Service Manual End Caps and Top Platforms NOTE: During this procedure you will have the option to remove the end caps, top platforms, rear roller, front roller, running deck, running belt, rubber mounts, drive belt and drive motor. Follow this procedure from step 1 even though the heading for some of these procedures will appear before the step where you remove that part. - Page 36 Cybex 750T Treadmill Service Manual D. Using a Phillips screwdriver, remove the screw securing each of the lower inner caps to the lower outer caps See Figure 6. Motor Cover Tabs Screws (7) Lower Lower Screw (1) Inner Cap Outer...
-
Page 37: Rear Roller
Cybex 750T Treadmill Service Manual Remove the top platforms. Button Head Bolt A. Using a 7/16” Socket wrench, remove Lock Washer the hex head bolt, lock washer and flat Flat Washer washer at the rear of the top platform. See Figure 10. -
Page 38: Front Roller
Cybex 750T Treadmill Service Manual Front Roller Drive Belt Front Roller Remove the front roller. WARNING: Drive belt is under tension. Do not pinch fingers while releasing tension. Tools Required Whiz Lock Bolt Tensioning • 3/4” Socket wrench Slot A. Using a 9/16” Socket wrench loosen the right Figure 12 front roller bolt. -
Page 39: Deck Pivot
Cybex 750T Treadmill Service Manual Deck Pivot Deck Pivot Deck Bracket (2) Wave Pivot Washer (2) Tools Required Shaft (1) Retaining • 9/16” Socket wrench Ring (2) Mounting 11. Remove the deck pivot assembly. Bolt (2) A. Using a 9/16” Socket wrench, remove... - Page 40 Cybex 750T Treadmill Service Manual WARNING: Drive Motor is heavy, use care when lifting. B. Remove the drive motor mounting brackets and lift the drive motor up and out of the treadmill. See Figure 16. 15. Secure the drive motor.
- Page 41 Cybex 750T Treadmill Service Manual 21. Secure the rear roller. A. Slide the rear roller into the running belt. See Figure 9. B. Install the bolt, washer, bushing and rear roller nut for each side of the roller into position. See Figure 11.
-
Page 42: Motor Controller
Cybex 750T Treadmill Service Manual 25. Adjust the running belt tension and tracking. A. Follow the Tension and Center the Belt procedure located in the Preventive Maintenance chapter of this manual. Motor Controller NOTE: This procedure will cover the motor controller, power cord, on/off switch and line fi lter. Follow this procedure from step 1 even though the heading for some of these procedures will appear before the step where you remove that part. -
Page 43: Power Cord
Drive Motor See Figure 19. Cable (OUTPUT) B. Remove the motor controller. NOTE: Cybex may want this part back for Resistor evaluation. Contact Cybex Customer (DB) Service at 888-462-9239. Replace the motor controller. -
Page 44: On/Off Switch
Cybex 750T Treadmill Service Manual B. Remove the power cord from the power cord inlet. See Figure 19. 10. Install the power cord. A. Insert the new power cord into the power cord inlet in the base plate. See Figure 20. -
Page 45: Line Filter
Cybex 750T Treadmill Service Manual Line Filter Tools Required • Phillips screwdriver 13. Replace the line filter. NOTE: Take notice of which cables are connected to the line fi lter. A. Disconnect the two fast-ons connectors that go from the line filter to the motor controller. -
Page 46: Elevation Motor
Cybex 750T Treadmill Service Manual D. Using a Phillips screwdriver, fully tighten the seven screws on the front motor cover and each motor cover side (left and right). See Figure 7. 16. Test the unit for proper operation. A. Connect the treadmill to the power outlet. - Page 47 Cybex 750T Treadmill Service Manual Remove the elevation motor. A. Using a 9/16” open end wrench and a 9/16” Socket wrench, remove the two bolts, nuts and sleeves on the elevation motor (one at the top and one at the bottom). NOTE: Hold the motor while you remove the second bolt so that it doesn’t fall.
-
Page 48: Upper And Lower Display Boards
Cybex 750T Treadmill Service Manual Upper and Lower Display Boards NOTE: This procedure will cover the upper display board, lower display board, display overlay, contact heart rate grips, e-stop switch and display cable. Tools Required • Phillips screwdriver • 11/16” Socket wrench •... -
Page 49: Display Overlay
Cybex 750T Treadmill Service Manual Handset Upper to Lower Display Console Board Display Cable Cable Cable Self Front Cable Threading Nuts RJ-45 Cable (top) Figure 26 Figure 25 C. Using an 11/16” Socket wrench, remove the four self threading nuts front the console front. See Figure 26. -
Page 50: Contact Heart Rate Grips
Cybex 750T Treadmill Service Manual Attach the display overlay. A. Remove the paper backing from the new display overlay. B. Slide the ribbon cable through the slot. C. Carefully place the display overlay in position within the indentation on the console front and firmly rub the display overlay so that it adheres to the console. -
Page 51: Stop Switch
Cybex 750T Treadmill Service Manual Stop switch Tools Required • Phillips screwdriver E-stop Lower Cover Storage Lanyard 10. Remove the e-stop switch. Clip Pull the e-stop out of console and unclip the lanyard clip from storage Figure 29 tab on lower cover. See Figure 29. - Page 52 Cybex 750T Treadmill Service Manual D. Rotate the upper handset cover up and Upper off handrail. Handset Cover 12. Install upper handset cover. Place the upper handset cover in position on handrail. See Figure 32. NOTE: Do not pinch the contact heart rate cables when installing the handset assembly top and screws.
-
Page 53: Display Cable
Cybex 750T Treadmill Service Manual Display Cable Tools Required • Wire cutters 16. Remove the display cable. A. Disconnect the display cable from the hub board Display connector J3 in the base. See Figure 34. Cable Hub Board B. Disconnect the display cable from the display Connector J3 board. - Page 54 Cybex 750T Treadmill Service Manual B. Using a Phillips screwdriver, fully tighten the seven screws on the front motor cover and each motor cover side (left and right). See Figure 7. 22. Connect the external power source. A. Plug the treadmill into the power outlet.
-
Page 55: Appendix A - Parts List
Cybex 750T Treadmill Service Manual Parts List ITEM QTY. PART NO. DESCRIPTION ITEM QTY. PART NO. DESCRIPTION HW-20089 WASHER, WAVE, .650 ID X .855” AF-19988 NUT, ROLLER, REAR HW-53017 WASHER FLAT, 5/16”, SS AF-20052 BRACKET, MOTOR,MOUNTING HX-13771 RING, RETAINING, 5/8” 0.579 ID... - Page 56 Cybex 750T Treadmill Service Manual ITEM QTY. PART NO. DESCRIPTION ITEM QTY. PART NO. DESCRIPTION AW-20289 WIRE, INLET TO SWITCH FILTER HS-41006 SCREW, SLFTP, 10-24 X .5, JUMPER PNHD, PHIL HS-41187 SCREW, SLFTP, 8-16 X .3125”, AW-20290 WIRE, SWITCH TO FILTER...
- Page 57 Cybex 750T Treadmill Service Manual ITEM QTY. PART NO. DESCRIPTION HS-11894 SCREW SEMS, 6/32 X .25”, PNHD PHIL AW-20892 CABLE, COMP AV JACK BOARD, GREEN AW-20841 CABLE,IPOD DE-22190 LABEL,NIKE+ IPOD HS-00293 BOLT, 5/16 - 18 X 2.0”, HXHD HS-41050 BOLT, 5/16-18 x 2.25”, HXHD, G5 HW-00189 WASHER, FLAT, 5/16”...
- Page 58 Cybex 750T Treadmill Service Manual This page intentionally left blank Parts List Page A-4...
-
Page 59: Appendix B - Exploded Views
Cybex 750T Treadmill Service Manual Appendix B – Exploded Views ITEM QTY. PART NO. DESCRIPTION ITEM QTY. PART NO. DESCRIPTION AF-19988 NUT, ROLLER, REAR HS-17937 BOLT, 3/8 - 24 X 2.75”, AF-20206 CLAMP, LOWER, TOP STEP HXHD CAP AL-19740 ROLLER ASSY, FRONT HS-18358 BOLT, 5/16 - 18 X .1.25”,... - Page 60 Cybex 750T Treadmill Service Manual ITEM QTY. PART NO. DESCRIPTION ITEM QTY. PART NO. DESCRIPTION HS-15706 SCREW, 8-16 X .50”, PNHD, STL, PL-20218 DUCT, FAN, RIGHT BLK ZN PL-20274 ISOLATOR, WATER, BOTTLE, LEFT HS-19108 SCREW 5/16 - 18 X 3/4”, HXHD...
- Page 61 Cybex 750T Treadmill Service Manual ITEM QTY. PART NO. DESCRIPTION ITEM QTY. PART NO. DESCRIPTION HS-15706 SCREW, 8-16 X .50”, PNHD, STL, HS-11347 BOLT,1-4-20X0.75,SCHD BTN,BLK BLK ZN HS-12083 BOLT LCK,1-4-20X.625 EC-19974 SENSOR, IR MOTION HS-13739 BOLT LCK,1-4-20X1.25,G5 HS-10716 SCREW, 4-40 X 0.38”, PNHD,...
- Page 62 Cybex 750T Treadmill Service Manual ITEM QTY. PART NO. DESCRIPTION ITEM QTY. PART NO. DESCRIPTION EH-10291 TY WRAP BASE AW-20444 WIRE, OUTLET, GROUND JUMPER, HS-11977 SCREW SEMS, 8-32 X .38, PNHD GREEN PHIL AW-20446 WIRE, INLET TO SWITCH JUMPER, EH-20244...
- Page 63 Cybex 750T Treadmill Service Manual ITEM QTY. PART NO. DESCRIPTION ITEM QTY. PART NO. DESCRIPTION AX-20383 ASSY, MOTOR COVER PL-20266 COVER, REAR, FRAME INNER, AX-20452 ASSY, END CAP, LEFT LEFT AX-20453 ASSY, END CAP, RIGHT PL-20269 COVER, REAR, FRAME OUTER,...
- Page 64 Cybex 750T Treadmill Service Manual ITEM QTY. PART NO. DESCRIPTION AF-20052 BRACKET, MOTOR,MOUNTING AX-20094 ASSY, ELEVATION FM-20096 PIN, ELEVATION PIVOT FT-16825 SLEEVE, ELEVATION MOUNTING, TOP FT-16826 SLEEVE, ELEVATION MOUNTING, BOTTOM HB-20097 BEARING, FLANGE, BRONZE HB-20098 BEARING, THRUST, BRONZE HN-11136 KEPS 5/16” HEX STL ZINC...
- Page 65 Cybex 750T Treadmill Service Manual ITEM QTY. PART NO. DESCRIPTION * Language Key 1-German HS-16929 BOLT WHIZ LOCK, 3/8 - 16 X 2-French .625”, HXHD 3-Spanish AF-19921 WELDMENT, UPRIGHT, LEFT AF-19922 WELDMENT, UPRIGHT, RIGHT 4-English AC-21401-X* ASSY, CONSOLE, 751T, AMBER...
- Page 66 Cybex 750T Treadmill Service Manual This page intentionally left blank Exploded Views Page B-8...
- Page 67 KAD-22221 KAD-22431 KAD-22223 AX-21798-X KAX-22895-X SCHEMATIC 751T Cybex 750T Treadmill Service Manual Schematic Page C-1...
- Page 68 KAD-22221 KAD-22431 KAD-22223 AX-21798-X KAX-22895-X SCHEMATIC 751T With A/V Option Schematic Page C-2 Cybex 750T Treadmill Service Manual...
Need help?
Do you have a question about the 750T and is the answer not in the manual?
Questions and answers