Table of Contents
Advertisement
Advertisement
Table of Contents

Related Manuals for Philips CDR785/01C


Summary of Contents for Philips CDR785/01C
-
Page 4: Limited Warranty
TO GET WARRANTY SERVICE IN U.S.A., PUERTO RICO OR U.S. VIRGIN ISLANDS... Take the product to a Philips factory service center (see enclosed list) or authorized service center for repair. When the product has been repaired, you must pick up the unit at the center. Centers may keep defective parts. -
Page 6: Table Of Contents
TABLE OF CONTENTS Table of contents IMPORTANT SAFETY INSTRUCTIONS ...2 GENERAL INFORMATION...3 LIMITED WARRANTY ...4 GENERAL INFORMATION Welcome...7 About this manual ...7 Environmental information ...7 Supplied accessories ...7 Technical data...7 Discs for recording...8 Discs for playback...8 Maintenance...8 CDR(W) handling ...8 CONTROLS AND CONNECTIONS Controls on the front...9 Connections at the back ...10... -
Page 7: General Information
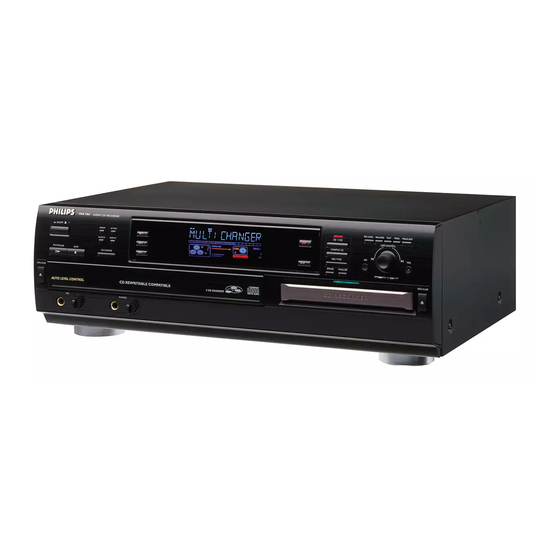
Thank you for buying this Philips Compact Disc Recorder / CD Changer. In the eighties Philips invented a new audio system - the CD. The CD (compact disc) revealed to you the new dimensions of digital sounds and added to the pleasures of audio. -
Page 8: Discs For Recording
CDRW compatible CD players and CD recorders, when they are finalized. – All Philips CD players and CD recorders with the sticker shown here are CDRW compatible. To ensure proper working of the set we recommend the use of Philips audio CDR and audio CDRW discs only. -
Page 9: Controls And Connections
CDR 785 AUDIO CD RECOR DER ON/OFF REPEAT CD TEXT CD 1 SHUFFLE DISPLAY CD 2 STOP PLAY/PAU SE CD-CHAN GE CD 3 OPEN/CLO SE AUTO LEVE L CONT PHONES ¡ ™ Controls on the front General 1 ON/OFF ...turns the CD recorder/changer ON and ON/OFF indicator...lights up when the set is switched on 2 PLAY/PAUSE ;... -
Page 10: Connections At The Back
CONTROLS AND CONNECTIONS AC MAINS Connections at the back 1 Connection to power 2 ANALOG IN...connects to the line output of a tape deck, amplifier or other analogue source 3 ANALOG OUT CDR & CD ...connects to the line input of an amplifier. -
Page 11: Display
DISPLAY indications CD changer section 1 2 3 STEP TEXT TOTAL TRACK TIME TOTAL REM 9 10 11 12 13 14 15 16 17 18 19 20 + COMPILE CD TRACK PROG CD RW CD RW SHUFFLE REPEAT ALL EDIT RECORD IN PROGRESS 1 STEP...indicates the number of tracks in a program... -
Page 12: Display Messages
DISPLAY DISPLAY indications Messages, as listed and explained here, may appear on the display for your guidance. General PHILIPS CD RECORDER ...when set is switched on READING ...reading disc information OPEN CDC / CDR .during tray opening of changer/recorder PROGRAM FULL ...program full INSERT DISC ...insert disc or insert disc in correct... -
Page 13: Installation
Others AUTO FINAL...when activating/disactivating the auto finalize function NO AUDIO TR ...when the recorder enters a data track during recording FINALIZE CD ...laser power calibration performed 96 ...times, please finalize disc INITIALIZING ...during laser power calibration for unfinalized discs DISC RECOVER ...during disc recovering after power failure OPC ERROR ...failure during OPC procedure (OPC = Optimum Power Calibration) -
Page 14: Connections General
We have described the most common ways of connecting the CD recorder. If you still have difficulties with the connections you can always contact the Philips Consumer Service desk in your country. Analog connections This connection must be made for playback on the CD recorder deck as well as the CD changer deck (cord 2). -
Page 15: Digital Coaxial Connections
Note: Your set is equipped with a digital coaxial output (common output for CD recorder & CD changer deck). This output can be used for digital playback. (e.g. Philips receiver FR960 or FR970.) Digital optical connections This connection is required if you want to make recordings from an external CD player with a digital optical output. -
Page 16: Power Supply/Mains
This switches on the AC power supply. 4 Press ON/OFF to switch on the set. PHILIPS CD RECORDER will be displayed. • Press ON/OFF again to switch off the set. • Press y on the remote control to switch the set to Standby mode. -
Page 17: Remote Control
REMOTE CONTROL Remote control commands BRIGHTNESS TRACK INCR. CD TEXT TEXT EDIT SPACE PROGRAM SHUFFLE REPEAT CD 1 CD 2 CD 3 STANDBY y ...switches to Standby BRIGHTNESS ...sets the brightness of the display TRACK INCR(ement) ...selects automatic or manual increase of track numbers during recording CD TEXT ...activates CD text mode Number/alphabet keys 0 - 9... -
Page 18: Cd Changer
LOADING DISCS CD changer Note: Only Audio CDs will be accepted in the CD changer deck If a non-audio disc is inserted, the display shows WRONG DISC. 1 Press OPEN/CLOSE to open the disc compartment. OPEN CDC lights up. 2 Insert CDs in the two outer disc trays, label side up. •... -
Page 19: Cd Text
CD text ON/O FF REPE AT SHUF FLE PLAY /PAUS E CD-C HANG E OPEN /CLOS E This feature allows the display of information such as album title or track title contained on a specially encoded CD. • Make sure to insert a CD with CD text. is shown and the album title is scrolled once. -
Page 20: Search
PLAYING Search COMP ILE CD REC TYPE ERASE FINALIZ E CD RE CO RD ER 1 Hold down Q or R. The player first searches backwards or forwards at 10 times normal speed with sound at low volume, then goes to 50 times normal speed with sound muted. -
Page 21: Program
Programming track numbers ON/O FF REPE AT CD TEXT SHUF FLE DISP LAY STOP PLAY /PAU SE CD-C HANG E OPEN /CLOS E CD TEX T EDIT ING RECOR D CD CD COMP ILE CD REC TYPE ERASE FINALIZ E You can select tracks and store them either in the CD changer, or CD recorder memory. -
Page 22: Recording General
RECORDING GENERAL Basic information We will describe: – Digital recording from internal CDC (fast or normal recording). – Recording from external CD player: – Digital – Digital (synchronized start with external CD player) – Analog – Finalizing discs: Finalizing a CDR(W) disc is a simple procedure, necessary to: –... -
Page 23: Rec Level Key
RECORDING GENERAL REC LEVEL key RECOR D CD CD COMP ILE CD REC TYPE ERASE FINALIZ E You can adjust the reference record level for both digital and analog recordings. This is also possible when ALC is active. This feature can be used for fading your recordings in or out. 1 Select the required recording mode (see Recording modes). -
Page 24: High Speed Recording And Automatic Finalizing
INTERNAL RECORDING High speed recording and automatic finalizing High speed recording and automatic finalizing of the current disc CD TEX T EDIT ING RECOR D CD CD COMP ILE CD REC TYPE ERASE FINALIZ E Notes: – During High Speed recording, the Pause function is not operative. -
Page 25: High Speed Recording
High speed recording High speed recording of an entire disc, a track, a program or a track edit RECOR D CD CD COMP ILE CD REC TYPE ERASE FINALIZ E 1 Make sure that the CDR(W) is absolutely free of scratches and dust particles. -
Page 26: Microphone Recording
INTERNAL RECORDING Microphone recording CD TEX T EDIT ING RECOR D CD CD COMP ILE CD REC TYPE ERASE FINALIZ E 1 Make sure that the CDR(W) is absolutely free of scratches and dust particles. 2 Set MIC LEVEL to the minimum level to prevent acoustic feedback (e.g. -
Page 27: External Recording
Analog or digital recording RECOR D CD CD COMP ILE CD REC TYPE ERASE FINALIZ E When making recordings from an external source, we recommend to do analog recording only if digital recording is not possible. Digital recording will usually result in better sound quality. -
Page 28: Recording With Automatic Synchronized Start
EXTERNAL RECORDING Recording with automatic synchronized start Recording of an entire disc or a track with automatic start Important: – Recording from CD-changers should always be started in the Auto-Start mode. – For recording from external CD changers do not use AUX MANUAL , but AUX TRACK or AUX CD. -
Page 29: Manual Recording
Manual recording Manual recording from an external source 1 Make sure that the CDR(W) is absolutely free of scratches and dust particles. 2 Press repeatedly AUX to select the input for the external source you want to record from. AUX DIGITAL is displayed if the digital coaxial input is selected. -
Page 30: (Un)Finalizing, Erasing
EXTERNAL RECORDING Note: The set is standard adjusted for a mono microphone. If you wish to use a stereo microphone, press AUX for more than 5 seconds. The set will display MONO ?. Press NO to select STEREO or YES to select MONO. STEREO MIC or MONO MIC will be displayed. -
Page 31: Unfinalising Cdrw Discs
Unfinalising CDRW discs If you want to record (or erase) on (from) an finalized CDRW, you have to unfinalize it first. Notes: – Unfinalizing will take approximately 2 minutes. – After unfinalizing of the CDRW, changes to display. – When unfinalizing a CDRW with CD text on it available, this text will be transferred to the CD recorder memory. -
Page 32: Special Features
SPECIAL FEATURES Text edit (on CD recorder only) RECOR D CD CD COMP ILE CD REC TYPE ERASE FINALIZ E After you have recorded your CDR(W), the TEXT EDIT feature allows you to give names to to discs and tracks. Disc and track names will be displayed during playback. - Page 33 Erasing text 1 Press TEXT/store to enter into the text edit menu. lights up and TEXT EDIT is displayed. TEXT 2 Rotate ¡ JOG CONTROL ™ to select the text erase menu. TEXT ERASE is displayed. STEP TEXT TOTAL TRACK TIME TOTAL REM 9 10 11 12 13 14 15 16 17 18 19 20 + COMPILE CD TRACK PROG CD RW...
-
Page 34: Track Editing (On Cd Changer Only)
SPECIAL FEATURES Track editing (on CD changer only) CD TEX T EDIT ING RECOR D CD CD COMP ILE CD REC TYPE ERASE FINALIZ E You can create a “track” by marking a passage of music within one track on the current disc. This new “track” can be used for recording or playing. -
Page 35: Troubleshooting
WARNING Under no circumstances should you try to repair the set yourself as this will invalidate the warranty. Do not open the set as there is a risk of electric shock. If a fault occurs, first check the points listed, before taking the set for repair.