
Related Manuals for Tuscany BROOKSVILLE 6736045


Summary of Contents for Tuscany BROOKSVILLE 6736045
- Page 1 6736048 Have a question? DON’T GO BACK TO THE STORE, WE CAN HELP, just call 1-800-626-3525 ,8 a.m. to 5 p.m. EST Monday-Friday.
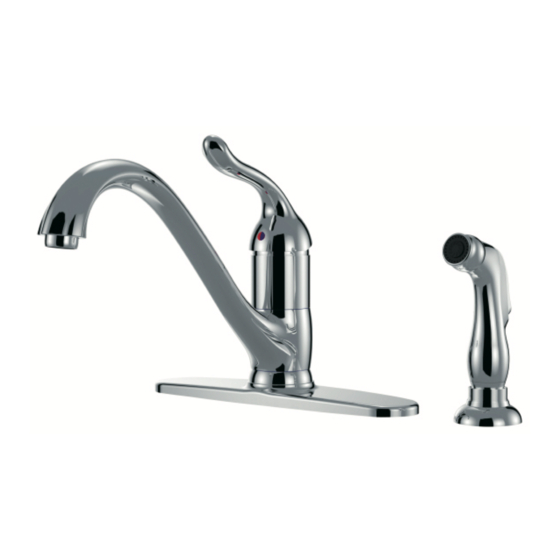
- Page 2 Mounting Post Aerator Washer Aerator Core Aerator Collar Metal Washer Wrench Hex Wrench Spray Hose Washer Aerator Assembly Have a question? DON’T GO BACK TO THE STORE, WE CAN HELP, just call 1-800-626-3525 ,8 a.m. to 5 p.m. EST Monday-Friday.
- Page 3 supplies Please Note: Do not remove the customer service tag with the model number and phone number as this will be helpful if you need assistance in the future. wrench (#28) to unscrew nuts (#21) and washers (#31) from underneath to remove the deck plate (#20). Place silicone sealant beneath the faucet base (#15) and install the faucet through the single faucet hole.
- Page 4 Using supplied wrench (#28), attach metal washer (#23) and nuts (#24) on mounting post (#13), side spray (#25) (#30) (#14) assembly spray popping . See diagram for visual. Have a question? DON’T GO BACK TO THE STORE, WE CAN HELP, Step 5-8 just call 1-800-626-3525 ,8 a.m.
- Page 5 (Hint - This is easier to apply Teflon tape before installation) After installing the faucet, remove the aerator assembly (#32). Please Note: Do not use pliers to remove the aerator as they might damage it. Remove by hand. Check for leaks Turn on the hot and cold water shut offs.
- Page 6 Lock nut (#5) lock nut (#5). Remove handle (#1) and cartridge (#6) to check if ceramic disk is damaged permanently or dirty. Re-install the cartridge (#6) or replace the cartridge (#6). Check (#6). the rubber o-ring to make sure it is seated properly in the cartridge (#6).
Need help?
Do you have a question about the BROOKSVILLE 6736045 and is the answer not in the manual?
Questions and answers