Advertisement
Quick Links
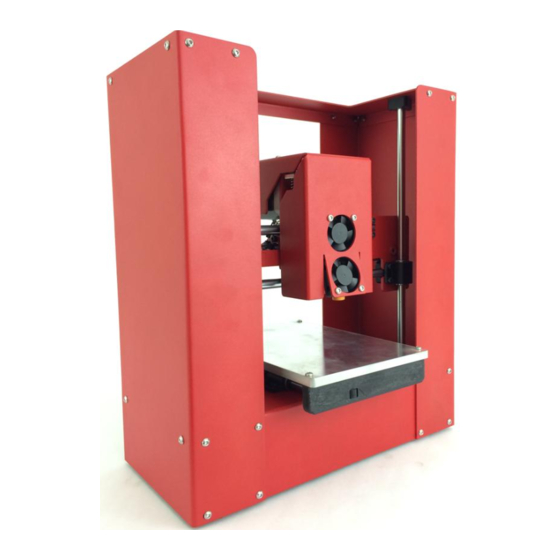
Assembling the Printrbot Play Kit (Model 1505)
Assembling the Printrbot Play Kit (Model
TOOLS:
#1 Phillips Head Screwdriver
Zip tie gun
(1)
Blue Threadlocker
Micro Cutters
(1)
Needle nosed pliers
Rubber Mallet
(1)
© 2015
Written By: Printrbot Support
(1)
(1)
(1)
1505)
help.printrbot.com
Page 1 of 29
Advertisement

Related Manuals for Printrbot Play 1505


Summary of Contents for Printrbot Play 1505
- Page 1 Assembling the Printrbot Play Kit (Model 1505) Assembling the Printrbot Play Kit (Model 1505) Written By: Printrbot Support TOOLS: #1 Phillips Head Screwdriver Zip tie gun Blue Threadlocker Micro Cutters Needle nosed pliers Rubber Mallet © 2015 help.printrbot.com Page 1 of 29...
- Page 2 Assembling the Printrbot Play Kit (Model 1505) Step 1 — What's in the box Congratulations on receiving your new Printrbot Play kit! Before beginning the build, look over the checklist of materials and tools to make the experience as hassle free as possible.
- Page 3 Assembling the Printrbot Play Kit (Model 1505) Step 2 — Installing Y Axis Bearings Place the 8mm linear bearings (x3) into the bearing slot cutouts on top of base. Insert Delrin bearing clamps (x3). Insert the two pointed ends of the clamps through the ...
- Page 4 Assembling the Printrbot Play Kit (Model 1505) Step 4 — Installing Y Axis Idler Pulley Screw your assembled M4 22mm/bearing/pulley stack into the base with a 3mm Allen hex key. Use your 1.5mm Allen hex key to attach the end stop with the short wires to the base with ...
- Page 5 Assembling the Printrbot Play Kit (Model 1505) Step 5 — Installing Y Axis Motor / Pulley Pick any motor and attach a GT2 pulley to the motor shaft with M3 set screws (x2). Be sure that one of the set screws threads down on to the flat side of the motor shaft. Note that the GT2 pulley is oriented with the flanges away from the body of the motor.
- Page 6 Assembling the Printrbot Play Kit (Model 1505) Step 6 — Installing Z Axis Bar End Supports Find two of the Delrin Z rod supports and #4-20 3/8” plastite screws (x6). TIP: To identify the "plastite screws", ignore the screw head type and focus on the thread type.
- Page 7 Assembling the Printrbot Play Kit (Model 1505) Step 8 — Attach Leadscrew to Z Motor Secure your 1/4" acme coupler to the Z axis stepper shaft approximately 7mm up from base plate with an M3 set screw. TIP: You can use a couple of belt tensioner clips as a spacer for the coupler height.
- Page 8 Assembling the Printrbot Play Kit (Model 1505) Step 10 — Installing X Motor / Pulley Attach a GT2 pulley onto the shaft of an unused motor with M3 set screws (x2). Again, the GT2 pulley should be oriented with the set screws closer to the body of the motor. Leave approximately 3mm of space between the pulley and the body of the motor on the motor shaft.
- Page 9 Assembling the Printrbot Play Kit (Model 1505) Step 12 — Installing X Carriage Bearings Install 8mm bearings (x2) with bearing clamps onto the motor end of the XZ plate using M3 8mm screws (x2 each). Install one more 8mm bearing with a bearing clamp onto the opposite end with M3 8mm ...
- Page 10 Assembling the Printrbot Play Kit (Model 1505) Step 14 — XZ Carriage Smooth Rod Installation Place an 8mm linear bearing onto a 250mm smooth rod. Repeat this step. Seat 250mm the smooth rods w/ bearings (x2) into matching slots of the XZ plate. Rods ...
- Page 11 Assembling the Printrbot Play Kit (Model 1505) Step 16 — Installing XZ 4th Bearing A fourth 8mm bearing can now be installed and secured into the remaining bearing hole on the XZ carriage. Use plastite screws (x2) to secure the bearing clamp to the bar end on.
- Page 12 Assembling the Printrbot Play Kit (Model 1505) Step 18 — Attaching X Axis Bearing Brace Place the flat portion of X axis bearing clamp away from the arm of the the X cart. Notice the orientation of clamp to the extruder cart. The clamp should mimic the shape of the carriage, stair-stepping to the right.
- Page 13 Assembling the Printrbot Play Kit (Model 1505) Step 20 — X Axis Belt Part 1 Wrap the belt around X axis idler pulley. Next, route the belt around the GT2 pulley, aligning the teeth of the belt with the grooves of ...
- Page 14 Assembling the Printrbot Play Kit (Model 1505) Step 21 — X Axis Belt Part 2 Using needle nose pliers, feed belt back towards extruder cart and through belt slots in extruder cart. Pull tight by hand to remove slack for now.
- Page 15 Assembling the Printrbot Play Kit (Model 1505) Step 22 — Install Extruder Gear Attach a motor to the extruder carriage with an M3 6mm screw. Only attach the left side of the base for now leaving the right hole empty.
- Page 16 Assembling the Printrbot Play Kit (Model 1505) Step 24 — Install Extruder Arm Attach the drive gear to the extruder motor by tightening an M3 set screw down on to the flat side of the shaft. Make sure the serrated portion of the extruder gear lines up with the ridge of the extruder base.
- Page 17 Assembling the Printrbot Play Kit (Model 1505) Step 25 — Installing Hot end Loosen the M3 25mm screw to allow room to feed thermistor and power cables through the cable retention notch on extruder carriage. Secure extruder base again making sure no wires are pinched.
- Page 18 Assembling the Printrbot Play Kit (Model 1505) Step 26 — Attaching Sensor Probe Remove all extra nuts and washers from the Auto-Leveling Probe. Use an M3 6mm screw to attach the delrin sensor clamp to the XZ carriage plate.
- Page 19 Assembling the Printrbot Play Kit (Model 1505) Step 28 — Secure Extruder Wire Braiding Secure the extruder assembly wiring against the wire relief with a zip tie. Use another zip tie to manage the wiring for the X axis motor wiring.
- Page 20 Assembling the Printrbot Play Kit (Model 1505) Step 30 — Attach Fans to Extruder Cover Attach two fans to the extruder fan shroud with plastite screws (x2 each). NOTE: Be sure to place the fan with the black 3-pin connector in the top position. This fan ...
- Page 21 Assembling the Printrbot Play Kit (Model 1505) Step 32 — Y Axis Assembly Insert 6 1/2" smooth rods into the 8mm bearings on the Y axis (2x). Attach the bar end pieces to the end of the smooth rods. Note that the front bar end has ...
- Page 22 Assembling the Printrbot Play Kit (Model 1505) Step 34 — Attach X Axis Add the XZ carriage assembly to the bot, inserting the two Z axis smooth rods into the 8mm bearings in the carriage. Thread the acme rod into the delrin acme nut.
- Page 23 Assembling the Printrbot Play Kit (Model 1505) Step 35 — Install Base Grommit Add the rubber grommit to the wire wrap. Thread the Extruder / X motor wire bundle through it. Feed the wire bundle through the matching hole in base. Press the grommit into the the ...
- Page 24 Assembling the Printrbot Play Kit (Model 1505) Step 37 — Printrboard Wiring Motor connectors are not keyed so note the direction they are installed in the photos. Other connectors are keyed and only plug in one way. The Extruder motor wire will be shorter than the X motor wire.
- Page 25 Assembling the Printrbot Play Kit (Model 1505) Step 38 Printrboard wiring cont'd Hot End Thermistor ext - "T-EXT" Fan ext - "FAN" Red/Black Power Adapter - "PWR" X End Stop - "X-STOP" Y End Stop - "Y-STOP"...
- Page 26 Assembling the Printrbot Play Kit (Model 1505) Step 40 — Modify Hotend Fan Extension Remove the red wire from the white molex connector end. Use a micro slotted screw driver to pry up the retaining latch so that you can slide out the ...
- Page 27 Assembling the Printrbot Play Kit (Model 1505) Step 42 — Install Hotend Fan Extension Verify that your modified connector looks like the connector pictured. Plug the extruder hot end heater connector into the Printrboard as pictured. Step 43 — Install Fan Extension Part 2 Take the (3) pin fan extension connector and insert into the (3) pin ICSP pin closest to the ...
- Page 28 Assembling the Printrbot Play Kit (Model 1505) Step 44 — Connect Hotend and Bed Fans Connect the 2 pin fan extension to the 2 pin fan connector (white). Connect the 3 pin fan extension to the 3 pin fan connector (black).
- Page 29 Getting Started With Cura on Your Printrbot Play IMPORTANT: FAILURE TO FOLLOW THE STEPS IN THE GETTING STARTED AND CALIBRATION GUIDES WILL RESULT IN DAMAGE TO YOUR PRINTRBOT Go to http://printrbot.com/project/play for more on drivers, software and getting started ...
Need help?
Do you have a question about the Play 1505 and is the answer not in the manual?
Questions and answers